In the world of DIY home renovations, tile is a popular choice for its durability and aesthetic appeal. But what happens when you want to install tile on a wooden surface? Will the tile mortar stick to wood? This is a common concern for many homeowners and DIY enthusiasts.
In this blog post, we will dive deep into the topic and explore whether tile mortar can effectively adhere to wood. We’ll address questions such as “Can you glue tiles onto MDF?” and “Can I install backsplash tile on plywood?” By the end, you’ll have a better understanding of whether it’s possible to tile directly onto wood and what precautions you need to take to ensure a successful installation.
So, if you’ve been pondering how to make a tiled DIY table or wondering if liquid nails can hold wood to tile, you’ve come to the right place. Let’s find out the answers and get ready to transform your wooden surfaces into stunning tiled masterpieces!

Will Tile Mortar Stick To Wood
Tile installation is a popular DIY project that can transform your bathroom or kitchen into a stylish oasis. But before you dive into tiling, you might be wondering, “Will tile mortar stick to wood?” It’s a valid question, considering that wood is a different material than the typical concrete or cement backer boards used for tile installation. Well, fear not my fellow DIYers, for I am here to shed some light on this sticky situation!
Understanding the Basics
To answer the question, let’s start with the basics. Traditional tile installation relies on a strong, adhesive material called mortar. This mortar acts as a bond between the tile and the substrate, holding everything securely in place. But when it comes to wood, things can get a bit tricky. Wood is a porous material that expands and contracts with changes in humidity and temperature. This movement can cause the mortar to crack or detach, leading to an unstable tile installation.
The Importance of a Stable Substrate
When it comes to tiling onto wood, the key is to create a stable substrate that can support the tile and withstand the natural movements of the wood. To achieve this, there are a few steps you can take:
1. Use the Right Backer Board
One option is to install a cement backer board over the wood surface. Cement backer boards are specially designed to provide a stable and moisture-resistant base for tile installations. They can be attached to the wood using screws or nails, creating a solid surface that won’t flex or warp.
2. Consider Uncoupling Membranes
Another option is to use uncoupling membranes, such as those made from crack isolation or uncoupling systems. These membranes are placed on top of the wood and provide a protective layer between the wood and the tile. They allow for some movement of the wood without compromising the bond between the tile and the substrate.
3. Choose a Flexible Mortar
When tiling onto wood, it’s crucial to use a flexible mortar that can accommodate the movement of the wood. Flexibility is key to preventing cracks or delamination of the tile. Look for mortars labeled as suitable for wood or flexible substrates.
Tips and Tricks
Now that you know the basics, here are a few tips and tricks to ensure a successful tile installation on wood:
1. Prepping the Wood
Properly preparing the wood surface is essential for a strong bond. Make sure the wood is clean, dry, and free from any coatings or sealants. Sanding the surface can also help improve adhesion.
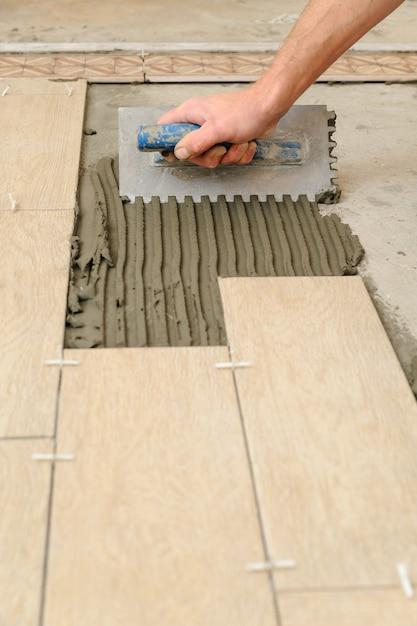
2. Using the Correct Trowel
Choosing the right trowel size is important. A larger trowel with deep grooves will ensure proper mortar coverage and adhesion to the wood. Follow the manufacturer’s recommendations for trowel size.
3. Allowing for Movement
Remember that wood expands and contracts, so it’s important to accommodate this movement. Leave expansion gaps between the tiles and any fixed objects, such as walls or cabinets. These gaps can then be filled with a flexible caulk that matches the grout color.
So, to answer the burning question, “Will tile mortar stick to wood?” The short answer is yes, it can, but with the right preparation and precautions. By using the correct backer board, uncoupling membranes, and flexible mortar, you can successfully tile over wood and create a stunning, durable floor or wall. Just remember to prep the wood surface, choose the right trowel, and allow for movement. With these tips in hand, you’ll be well-equipped to tackle your next tile installation project like a pro!
FAQ: Will Tile Mortar Stick to Wood
Welcome to our comprehensive FAQ section, where we answer all your burning questions about whether tile mortar will stick to wood. We’ve gathered the most common inquiries surrounding this topic and created this informative and entertaining guide just for you. So, let’s dive in!
How do you make a tiled DIY table
Creating a tiled DIY table can be a fun and rewarding project. Here’s a step-by-step guide to help you along the way:
- Start by selecting the wood for your tabletop. Whether it’s sturdy oak or elegant walnut, choose a wood that suits your taste.
- Measure and cut the wood to your desired table size, ensuring it’s smooth and even.
- Prepare your wooden tabletop by sanding it down to remove any imperfections or rough edges.
- Apply a coat of primer to seal the wood and create a smooth surface for the tile adhesive.
- Lay out your tiles in a pleasing design. You can opt for ceramic, porcelain, or any type you fancy.
- Apply tile adhesive to the back of each tile and press them firmly onto the primed wood.
- Once the adhesive has dried, apply tile grout to fill in the gaps between the tiles.
- Use a grout float to spread the grout evenly and remove any excess.
- Allow the grout to dry, then wipe away any haze with a clean, damp cloth.
- Finally, give your tiled tabletop a good cleaning and polishing, and voila – you’ve made a beautiful DIY tiled table!
Will Liquid Nails hold wood to tile
Ah, the age-old question of whether Liquid Nails can work its magic to hold wood to tile. The short answer is, yes! Liquid Nails is a strong adhesive that bonds various materials together, including wood and tile. However, proper surface preparation is crucial for optimal results. Make sure to clean and dry both the wood and tile surfaces before applying Liquid Nails. Additionally, follow the manufacturer’s instructions for the best application practices, and you’ll have your wood securely attached to the tile in no time.
Can you glue tiles onto MDF
While MDF (Medium-Density Fiberboard) is a versatile material, gluing tiles directly onto it is not recommended. MDF is more prone to moisture damage and can warp when exposed to excessive humidity. Since tiles require a stable and moisture-resistant surface, it’s better to opt for a different substrate, such as plywood or cement board, for better tile adhesion and longevity. Remember, a solid foundation makes for a lasting tile installation!
Can I install backsplash tile on plywood
Yes, you can install a stunning backsplash tile on plywood! Plywood provides a stable and reliable substrate for your tile installation. However, some precautions are necessary. Firstly, ensure the plywood is properly prepared by sanding any rough areas and filling in any gaps or cracks. Additionally, it’s essential to apply a suitable waterproofing or primer to seal the plywood and prevent moisture from compromising your installation. With proper preparation and the right adhesive, your backsplash tile will bond flawlessly to the plywood, adding a touch of elegance to your kitchen or bathroom.
Can you apply tile directly to wood
While it might seem tempting to skip a step and apply tile directly to wood, it’s not the most recommended approach. Wood is susceptible to expansion and contraction due to changes in moisture and temperature. This movement can cause the tiles to crack and the adhesive to fail over time. To ensure a long-lasting and secure tile installation, we recommend using a stable and moisture-resistant substrate, such as plywood or cement board, as the base for your tiles. Remember, a solid foundation is the key to tile success!
Do you need to seal plywood before tiling
Absolutely! Sealing plywood before tiling is crucial to protect it from moisture and prevent damage. Plywood is a porous material that can absorb water, leading to warping and compromising the tile installation. Apply a suitable waterproofing product or primer to seal the plywood and create a moisture barrier. By taking this extra step, you ensure the longevity of your tile installation and keep water-related issues at bay.
Can I use cement board instead of plywood
Yes, you can use cement board instead of plywood as a substrate for your tile installation. Cement board, also known as backer board, is specifically designed to provide a stable and moisture-resistant surface for tile. Its composition makes it an excellent choice in high-moisture areas such as bathrooms and kitchens. When properly installed, cement board offers superior tile adhesion and ensures a durable and long-lasting tile surface. So, whether you’re tiling a shower or a kitchen floor, cement board has got you covered!
What kind of subfloor is needed for ceramic tile
When it comes to ceramic tile, a sturdy and level subfloor is paramount. The recommended subfloor materials for ceramic tile include plywood, cement board, or an uncoupling membrane system. Plywood should be at least 3/4-inch thick, exterior grade, and properly installed and secured. Cement board provides an excellent alternative, offering stability and resistance to moisture. Uncoupling membrane systems, such as Schluter DITRA, provide added flexibility and protection against subfloor cracks. Remember, a solid and properly prepared subfloor ensures a successful ceramic tile installation that will stand the test of time.
Does thinset bond to wood
Yes, thinset can bond to wood when used in combination with the right substrate. As mentioned earlier, using a stable and moisture-resistant material such as plywood or cement board is essential when installing tile on wood surfaces. By providing a suitable base for the thinset, it ensures a strong and long-lasting bond between the tile and wood. So, with the proper preparation and the right materials, you can make thinset work its magic on wood!
Can I tile directly on plywood
While tiling directly on plywood is not recommended, it can be done under certain circumstances. Remember that plywood is susceptible to moisture and the movements caused by temperature and humidity changes. To ensure a successful tile installation on plywood, follow these steps:
- Use exterior-grade plywood with a minimum thickness of 3/4-inch.
- Seal the plywood with a suitable waterproofing or primer to create a moisture barrier.
- Reinforce the plywood with an additional layer of cement board, ensuring proper installation and secure fastening.
- Apply a high-quality tile adhesive specifically designed for plywood.
- Install your tiles following the manufacturer’s instructions.
By taking these precautions, you can minimize the risk of tile failure and enjoy a beautiful and durable tiled surface.
What tile adhesive should I use for wood
For wood substrates, it’s important to choose a tile adhesive specifically formulated for this material. Flexible polymer-modified thinset mortars are commonly recommended for bonding tiles to wood surfaces. These adhesives offer flexibility and strength, accommodating the natural movements of the wood while maintaining a secure bond between the tile and substrate. Always check the manufacturer’s instructions and select an adhesive suitable for your tile type and wood substrate. With the right adhesive, your tiles will stick to wood like glue, ensuring a lasting and stunning installation.
Does tile adhesive stick to wood
Yes, tile adhesive can stick to wood when you use the appropriate type formulated for this purpose. As mentioned earlier, flexible polymer-modified thinset mortars are excellent choices for bonding tiles to wood surfaces. These adhesives possess the required bonding properties to provide a strong and long-lasting attachment between the tile and wood substrate. Just make sure to follow the adhesive manufacturer’s instructions and properly prepare the wood surface for optimal adhesion. With the right adhesive and preparation, your tile adhesive will stick to wood like a champ!
Can you install tile on a wood subfloor
While it’s possible to install tile on a wood subfloor, ensuring the proper conditions and precautions are in place is crucial. Here are a few key steps to follow:
- Evaluate the integrity of the wood subfloor. Make sure it’s stable, free from rot, and in good condition.
- Check if the subfloor has the necessary thickness and meets the deflection requirements for tile installation. Typically, a minimum of 3/4-inch plywood is recommended.
- Ensure the subfloor is securely fastened to prevent any movement or flexing.
- Apply an appropriate moisture barrier or primer to seal the subfloor, preventing moisture-related issues.
- Add an additional layer of cement board for added stability and improved tile adhesion.
- Select a tile adhesive that is suitable for wood subfloors and follow the manufacturer’s instructions for proper application.
By carefully following these steps, you can successfully install tile on a wood subfloor, creating a beautiful and durable tiled surface.
How do you prepare a wooden floor for tile
Properly preparing a wooden floor before tiling is essential to ensure a successful and long-lasting installation. Here’s a step-by-step guide to help you get it right:
- Evaluate the condition of the wooden floor. Ensure it’s free from rot, damage, or any structural issues.
- Repair or replace any damaged or weakened areas of the floor.
- Securely fasten any loose floorboards.
- Sand the wooden floor to create a smooth and even surface, removing any imperfections.
- Clean the floor thoroughly, removing any dust, dirt, or debris.
- Apply a suitable primer or waterproofing product to seal the wood and create a moisture barrier.
- Install an additional layer of cement board for added stability and improved tile adhesion.
- Finally, select a high-quality tile adhesive suitable for wooden floors and follow the manufacturer’s instructions for proper application.
By meticulously preparing your wooden floor, you pave the way for a successful tile installation that will withstand the test of time.
Does grout stick to wood
Grout, unfortunately, does not adhere well to wood surfaces. Wood is prone to movement and expansion, which can cause grout to crack and become loose. To avoid unsightly cracking and potential maintenance issues, it’s best to use a flexible caulk or sealant instead of grout when transitioning between tiles and wood surfaces. This flexible material accommodates the movement of the wood and ensures a durable and aesthetically pleasing finish. So, when it comes to grout and wood, it’s better to part ways and opt for an alternative solution!
Does tile mortar stick to plywood
Yes, tile mortar can stick to plywood when the proper preparation is done. To ensure a successful tile installation on plywood, follow these steps:
- Use exterior-grade plywood with a minimum thickness of 3/4-inch.
- Seal the plywood with a suitable waterproofing or primer to create a moisture barrier.
- Apply a layer of cement board for added stability and improved tile adhesion.
- Select a high-quality tile mortar suitable for plywood and follow the manufacturer’s instructions for proper application.
By following these steps, you can enjoy a robust bond between the tile mortar and plywood, allowing your tile installation to thrive.
Does concrete stick to wood
While concrete is undoubtedly strong and durable, it struggles to adhere well to wood. The movement and flexibility of wood can cause the concrete to crack and separate over time. Therefore, it’s not recommended to directly apply concrete to wood surfaces. Instead, for a reliable and secure bond, consider alternative options such as using a suitable adhesive or incorporating a stable substrate like plywood or cement board before applying the concrete. By doing so, you can ensure a solid integration between the two materials and achieve a long-lasting and exceptional result.
What do you put down before tile
Before you embark on your tiling journey, it’s crucial to lay down the groundwork for a successful installation. Here are a few essential steps to follow before tiling:
- Prepare the substrate: Ensure the surface is clean, dry, and free from dust, grease, or any other contaminants.
- Apply a suitable primer or waterproofing product: This helps create a moisture barrier and enhances tile adhesion.
- Level the substrate: If necessary, use a self-leveling compound to create a smooth and even surface for tiling.
- Install an appropriate underlayment: Depending on your project’s requirements, this may include cement backer board, uncoupling membrane, or plywood.
- Allow the substrate and underlayment to cure completely before proceeding with tile installation.
By meticulously preparing your surface, you establish a solid foundation for your tiles, ensuring a stunning and long-lasting result.
Can I use mortar on wood
Using mortar directly on wood surfaces can be a questionable decision. As we mentioned earlier, wood is susceptible to movement due to changes in moisture and temperature, which can compromise the integrity of the mortar. However, by incorporating a stable substrate like plywood or cement board, you can create a suitable surface for mortar application. The mortar adheres well to these materials, ensuring a secure connection between the tiles and substrate. So, while using mortar on wood alone is not advised, teaming it up with the right substrate brings harmony and strength to your tile installation.
How do you edge a tiled tabletop
Edging a tiled tabletop adds a finishing touch and enhances the overall appearance of your DIY masterpiece. Here’s a step-by-step guide to help you achieve polished and professional-looking edges:
- Measure and cut your trim: Select a trim material that complements your tabletop design, such as wood or metal. Cut the trim pieces to match the length of each edge of your tabletop.
- Sand and paint the trim (if desired): Smooth any rough edges of the trim and apply a suitable paint or finish to match your aesthetic preferences.
- Apply adhesive: Use a strong adhesive, such as construction adhesive or tile adhesive, to attach the trim to the edge of the tabletop. Follow the manufacturer’s instructions for proper application.
- Secure the trim: Hold the trim firmly against the edge of the tabletop and use finishing nails or screws (if applicable) to secure it in place.
- Fill any gaps: Use wood putty or caulk to fill any gaps between the trim and tiles, creating a seamless transition.
- Allow the adhesive and putty/caulk to dry completely.
- Clean and polish: Give your tiled tabletop and newly edged edges a thorough cleaning and a final polish.
By following these steps, you’ll have an exquisitely edged tiled tabletop that will impress all who gather around it!
Can you put mortar directly on plywood
While it’s not recommended to put mortar directly on plywood, there are alternative methods to achieve a successful tile installation:
- Seal the plywood: Use a suitable waterproofing