If you’ve ever experienced the frustration of seeing your second coat of paint cracking, don’t worry, you’re not alone. It’s a common issue that many DIY enthusiasts and professionals encounter during the painting process. Cracks can be unsightly and diminish the overall appeal of your freshly painted surface. But what causes this phenomenon, and more importantly, how can you prevent it?
In this blog post, we’ll dive into the various reasons why your second coat of paint may be cracking and explore effective solutions to rectify the problem. From understanding the importance of proper surface preparation to identifying the role of drying time between coats, we’ll cover it all. So, whether you’re wondering about fixing cracked peeling paint, dealing with alligatoring paint cracks, or simply seeking tips to achieve a smooth finish with spray paint, we’ve got you covered. Let’s delve into the world of cracking paint!
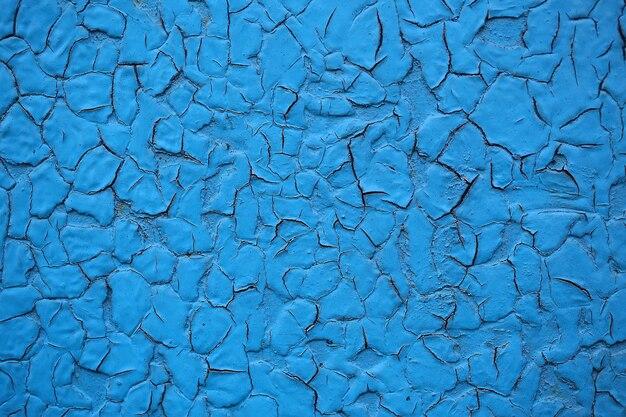
Why Is My Second Coat Of Paint Cracking
We were all excited about giving our walls a fresh new look with a second coat of paint. But hold on a minute, what’s this? Cracks on the surface? How did this happen? Don’t worry, you’re not alone in this predicament. In this article, we’ll delve into the possible reasons why your second coat of paint may be cracking, and what you can do to fix it.
Dry Climate? More Like Dry Paint!
One possible culprit behind your cracking paint is a dry climate. When the air is too dry, it sucks the moisture out of your paint before it has a chance to properly cure. As a result, the paint becomes brittle and prone to cracking. So, before you start blaming your painting skills, take a look at the humidity levels in your home. If you live in an arid climate, consider using a humidifier to add moisture to the air. Your paint will thank you!
Rushing It? Time to Slow Down!
We understand, sometimes we get a bit too eager to finish a painting project. But hurrying through your second coat of paint can actually cause it to crack. Applying a second coat before the first coat has fully dried can lead to poor adhesion and eventual cracking. So, be patient, my friend. Give the first coat enough time to dry completely, usually around 24 hours, before applying the second coat. Your walls will reward you with a smooth and crack-free finish.
The Wrong Tools? Say Goodbye to Cracks!
Using the wrong tools can make a big difference in the outcome of your paint job. If you’re applying a second coat with a brush that’s seen better days, it could be the reason behind those pesky cracks. A worn-out or low-quality brush may not apply the paint evenly, leading to weak spots and eventual cracking. Invest in a good-quality brush or roller and see the difference it makes in the smoothness of your paint job. Remember, a happy brush equals a happy wall!
Shaky Foundations? Prepare Your Surface!
Before applying any paint, it’s crucial to prepare the surface properly. If you’re painting over flaking or peeling paint, your new coat won’t adhere properly, leading to cracks down the line. Take the time to sand, scrape, and clean the surface thoroughly before applying the second coat. This will create a smooth and solid foundation for your paint, ensuring a crack-free finish that will stand the test of time.
Temperature Extremes? Room for Improvement!
Extreme temperatures can wreak havoc on your paint job. If you’re applying the second coat in freezing cold or scorching heat, your paint may not have a chance to bond properly, resulting in cracks. The optimal temperature range for painting is usually between 50°F (10°C) and 85°F (29°C). So, save the painting for a day when the weather is just right, and your walls will thank you by staying crack-free.
Poor-Quality Paint? Time for an Upgrade!
Last but not least, the quality of your paint can play a significant role in its propensity to crack. Using a poor-quality paint, especially for that crucial second coat, can lead to disappointing results. So, invest in a high-quality paint that’s specifically designed for the surface you’re painting. Not only will it enhance the durability of your paint job, but it will also minimize the chances of cracking. Remember, a little extra investment now can save you time and frustration in the long run.
There you have it, the possible reasons why your second coat of paint is cracking. By addressing these issues, you’ll be well on your way to achieving a flawless and crack-free paint job. So, take a step back, assess the situation, and apply these solutions. Happy painting, and may your walls be ever smooth and crack-free!
Disclaimer: The information provided in this article is for general informational purposes only. It is not intended as professional advice. Always consult a qualified professional for specific guidance related to your painting project.
FAQ: Why Is My Second Coat of Paint Cracking
So, you’ve just finished applying the second coat of paint onto your wall and, lo and behold, cracks start to appear. Frustrating, huh? Don’t worry, you’re not alone in this predicament. Cracking paint is a common issue faced by many DIY enthusiasts and professionals alike. In this FAQ-style subsection, we address some of the most frequently asked questions about why your second coat of paint may be cracking and offer solutions to fix the problem.
How do you fix cracked peeling paint
If you notice cracked and peeling paint on your walls, here’s what you can do:
- Scrape and sand: Start by scraping off the loose paint with a scraper or putty knife. Then, smooth the area by gently sanding it using fine-grit sandpaper.
- Prime it: Apply a coat of primer to the affected area to promote adhesion and provide a fresh surface for the new paint.
- Repaint: Once the primer is dry, repaint the area with a high-quality paint specifically designed for your surface. Apply thin coats and allow proper drying time between each coat.
Why does my second coat of spray paint wrinkle
Spray paint wrinkling typically occurs due to a few reasons:
- Improper drying time: If you apply a second coat of spray paint too soon without allowing sufficient drying time between coats, it can lead to wrinkling.
- Incompatibility: Mixing different types or brands of spray paint that are not compatible with each other can cause wrinkling.
- Incorrect temperature and humidity: Painting in extremely hot, cold, or humid conditions can cause the spray paint to dry too quickly or not adhere properly, resulting in wrinkling.
- Spraying too close or too far away: Holding the spray can too close to the surface, or spraying from too far away, can result in uneven coverage and wrinkling.
To avoid wrinkling, make sure to follow the instructions on the spray paint can, allow proper drying time between coats, and ensure the environmental conditions are suitable for painting.
How do you fix cracked wall paint
When dealing with cracked wall paint, follow these steps to fix the issue:
- Inspect and prep the wall: Identify the extent of the cracking and determine whether there are any underlying issues causing the problem, such as moisture or structural damage. Address these concerns before proceeding.
- Remove loose paint: Scrape off any loose or flaking paint using a scraper or putty knife. Sand the area lightly to smoothen the surface.
- Patch and fill: Apply a suitable wall patching compound to the cracked areas to fill them in. Allow it to dry completely.
- Sand and smooth: Once the patching compound is dry, sand the area lightly to create a smooth surface.
- Prime and paint: Apply a coat of primer to the patched area, allowing it to dry. Then, repaint the wall with a high-quality paint, using thin coats and allowing adequate drying time between each coat.
By following these steps, you’ll be able to fix those unsightly cracks on your wall and enjoy a beautifully painted surface.
Can I paint over chipping paint
It’s generally not recommended to paint over chipping paint, as the new paint will likely not adhere well to the unstable surface. Instead, follow these steps:
- Determine the cause: Identify and address the underlying cause of the chipping paint, such as moisture issues or improper surface preparation.
- Scrape and sand: Remove the chipping paint by scraping it off with a scraper or putty knife. Sand the area lightly to create a smooth surface.
- Repair and patch: Fix any damaged areas by filling them in with a suitable patching compound. Allow it to dry completely and sand it smooth.
- Prime and paint: Apply a coat of primer to the repaired and patched areas, allowing it to dry. Finally, paint the surface with a high-quality paint, using thin coats and ensuring adequate drying time between each coat.
By taking these steps, you can achieve a long-lasting and visually appealing paint job without the chipping paint causing any further issues.
Does paint flatten as it cures
Yes, paint typically levels out and flattens as it cures. During the drying process, the solvents in the paint evaporate, allowing it to level out and create a smooth, even finish. However, it’s important to note that the leveling process may vary depending on the type of paint and environmental conditions. Applying thin coats, following the instructions on the paint can, and providing proper ventilation can help ensure optimal leveling and a flawless finish.
How do you keep paint from cracking
To prevent paint from cracking, follow these tips:
- Prepare the surface: Properly clean and prep the surface before painting. Remove any loose paint, smoothen rough areas, and ensure the surface is dry and free of contaminants.
- Use high-quality paint: Invest in a high-quality paint that is suitable for your specific surface. Cheaper paints can be prone to cracking and other issues.
- Apply thin coats: Apply thin and even coats of paint rather than thick layers. Thick coats take longer to dry and are more prone to cracking.
- Allow drying time: Ensure you provide ample drying time between coats and before subjecting the painted surface to any stress or heavy use.
- Avoid extreme environmental conditions: Try to paint in moderate temperature and humidity levels. Extreme heat, cold, or humidity can affect the drying and curing process, leading to cracks.
- Consider priming: Apply a primer before painting, especially if you’re painting on a particularly porous or challenging surface. The primer promotes adhesion and reduces the chances of cracking.
By following these preventive measures, you can minimize the risk of paint cracking and enjoy a durable, beautiful finish.
How do you paint over cracked paint
If you want to paint over cracked paint, take the following steps:
- Inspect and prepare the surface: Assess the extent of the cracking and ensure there are no underlying issues causing the problem. Prepare the surface by cleaning and removing loose or flaking paint.
- Sand and smoothen: Lightly sand the cracked areas to create a smooth surface. Ensure any raised edges are leveled.
- Fill in the cracks: Use a suitable patching compound to fill in the cracks. Allow it to dry completely, and sand it smooth.
- Prime the surface: Apply a coat of primer to the patched and prepared surface. This promotes better adhesion and ensures a uniform finish.
- Paint the surface: Finally, paint the surface with a high-quality paint, using thin coats and allowing proper drying time between each coat.
With these steps, you can effectively paint over cracked paint, transforming your surface into a visually appealing and crack-free masterpiece.
How do you fix alligator paint cracks
When faced with alligator paint cracks, here’s how to tackle the issue:
- Evaluate the extent of damage: Assess the severity of the alligatoring and determine whether it is limited to the paint layer or extends to the underlying substrate.
- Remove the old paint: If the alligatoring is extensive or affects the substrate, consider removing all the old paint using a paint stripper or heat gun. Follow the manufacturer’s instructions and take appropriate safety precautions.
- Repair the substrate: If there is damage to the underlying surface, fix it accordingly. Patch, sand, and smooth the substrate as necessary.
- Prime the surface: Apply a high-quality primer to the prepared surface, allowing it to dry completely. This promotes adhesion and helps prevent further cracking.
- Apply new paint: Once the primer is dry, paint the surface with a suitable paint for your specific application. Use thin coats, allowing each coat to dry before applying the next.
By addressing the root causes and taking these corrective measures, you can banish those alligator cracks and restore your surface to its former glory.
What happens if you paint a second coat too soon
Painting a second coat too soon can lead to several issues, including:
- Poor adhesion: The second coat may not adhere properly to the first coat, leading to uneven coverage and potential peeling or flaking in the future.
- Wrinkling: If the first coat hasn’t had enough time to dry and cure, applying a second coat can cause wrinkling and an uneven appearance.
- Longer drying time: By applying multiple coats too quickly, you extend the overall drying time of the paint, risking damage or marring the finish while it cures.
To avoid these problems, always check the drying instructions on the paint can and allow sufficient drying time between coats. This ensures optimal adhesion, a smooth finish, and a durable paint job.
What happens if you paint over cracked paint
Painting over cracked paint without properly preparing the surface can cause the cracks to reappear and affect the new paint job. Consequently, the issues you faced with the initial coat are likely to resurface, leading to more frustration.
To avoid these problems, follow these steps:
- Inspect and prepare the surface: Identify the cause of the cracking and fix any underlying issues. Remove loose or flaking paint, sand the area, and ensure the surface is clean and dry.
- Repair and patch: Fill in the cracks with a suitable patching compound and allow it to dry completely. Sand the area to create a smooth surface.
- Prime the surface: Apply a coat of primer to the repaired areas and any surrounding areas, allowing it to dry thoroughly. Primer promotes better adhesion and covers up any patched areas.
- Paint the surface: Finally, apply the paint in thin, even coats, allowing proper drying time between each coat. This will give you a fresh and crack-free paint job.
By following these steps, you can ensure a long-lasting and visually pleasing final result.
Why is my paint flaking
There are a few reasons why your paint may be flaking, including:
- Poor surface preparation: Insufficient cleaning, sanding, or priming before painting can cause the paint to peel or flake.
- Moisture or humidity issues: Excess moisture or high humidity levels can affect adhesion, causing the paint to separate from the surface over time.
- Incompatible or low-quality paint: Using paint that is not suitable for your specific surface or opting for low-quality paints can result in poor adhesion and eventual flaking.
- Applying too thick a coat: Thick layers of paint take longer to dry and cure, making them more prone to flaking. It’s better to apply thin coats and allow proper drying time.
To prevent paint flaking, ensure your surface is properly prepared and compatible with the chosen paint. Use high-quality products and apply thin coats, giving each layer enough time to dry.
What causes paint to look like alligator skin
Alligator skin-like patterns on paint arise due to a few causes:
- Inadequate surface preparation: Insufficient cleaning, smoothing, or priming of the surface before painting can cause the paint to develop an alligator-like appearance.
- Excessive paint buildup: Applying multiple thick coats of paint without allowing proper drying time between each layer can result in an alligator skin effect.
- Exposure to extreme temperatures: Drastic fluctuations in temperature can cause the paint to expand and contract rapidly, leading to the formation of alligator skin-like patterns.
- Use of incompatible products: Mixing incompatible or low-quality paint products can cause chemical reactions, resulting in an undesirable finish resembling alligator skin.
To prevent this issue, thoroughly prepare the surface, apply thin coats of paint, allow ample drying time, and use compatible, high-quality products.
Do I really need to wait 4 hours between coats of paint
The recommended drying time between coats of paint can vary depending on factors such as temperature, humidity, and the type of paint used. While some paints may be touch-dry within hours, it’s generally advisable to wait at least four hours between coats. Waiting allows the paint to dry and cure properly, ensuring better adhesion, minimizing the risk of issues like wrinkling or cracking, and promoting a more durable finish.
However, always refer to the manufacturer’s instructions on the paint can for specific drying time recommendations, as they may vary depending on the paint brand and type.
Why is my paint cracking when it dries
There are a few reasons why your paint may be cracking as it dries:
- Poor surface preparation: Insufficient cleaning, sanding, or priming before painting can cause the paint to crack as it dries.
- Excessive thickness: Applying paint too thickly can lead to uneven drying and cracking.
- Drying conditions: Extremely hot, cold, or humid conditions can affect the drying process, causing the paint to crack.
- Old or low-quality paint: Using old or low-quality paint can result in a weaker and less flexible paint film, increasing the likelihood of cracking.
To prevent cracking, ensure the surface is properly prepared, apply paint in thin coats, avoid extreme drying conditions, and opt for high-quality paint.
Why is my acrylic paint cracking
Acrylic paint can crack during the drying process for a few reasons:
- Thick application: Applying acrylic paint in thick layers can cause shrinkage during drying, leading to cracking.
- Inadequate drying time: If subsequent layers of acrylic paint are applied before the previous layer has fully dried, the trapped moisture can cause cracking.
- Temperature and humidity: Applying acrylic paint in extremely hot, cold, or humid conditions can alter drying times and contribute to cracking.
- Low-quality paint or mediums: Using low-quality acrylic paint or inappropriate mediums can affect the paint’s drying properties, making it more prone to cracking.
To avoid cracking, apply acrylic paint in thin, even layers, ensuring each layer is completely dry before applying the next. Paint in suitable environmental conditions and use high-quality paint and mediums.
How do you fix alligatoring paint
To address alligatoring paint, the following steps can help:
- Inspect the surface: Determine the extent of the alligatoring and evaluate the underlying causes such as incompatible paint layers, excessive build-up, or improper surface preparation.
- Remove loose paint: Scrape off any loose or peeling paint using a scraper or put