By [Your Name]
Published Date: Month Day, Year
When it comes to baking bread or other yeast-based goodies, one crucial step that can’t be overlooked is allowing the dough to rise. This process allows the yeast to ferment, creating those fluffy, airy textures we all love. But have you ever wondered if the type of bowl you use for rising your dough can make a difference? In this blog post, we will explore the question of what type of bowl is best for dough to rise.
From metal bowls to plastic containers, each choice has its pros and cons. We will cover the various factors to consider, such as heat retention, airflow, and the potential effects on the yeast’s activity. Whether you’re a novice home baker or an experienced bread master, understanding the impacts of different bowl materials on your dough’s rising process can help you achieve the perfect loaf every time. So, let’s dive in and find out which bowl will give your dough the ideal environment to rise to its fullest potential.
1. Choosing the Perfect Bowl for Dough to Rise
If you’re an aspiring baker or an established dough enthusiast, you know that the secret to making delicious bread lies in the rising process. But have you ever wondered what type of bowl is best for dough to rise? Fear not, my fellow dough devotees, for I am here to unravel this mystery for you!
1.1 The Stainless Steel Splendor
Ah, stainless steel, the trusty knight of the kitchen. Not only is it durable and resistant to odors, but it also offers a cool environment for your dough to rise. Plus, you can pretend you’re conducting a scientific experiment every time you peek into the bowl to check on your dough’s progress. Science meets baking – the ultimate combination!
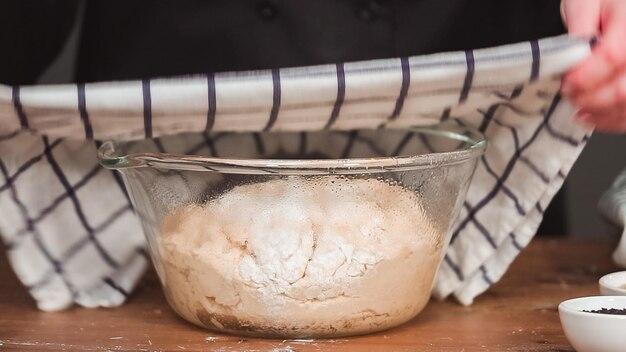
1.2 The Glass Glamour
If you’re a visual fanatic who finds joy in watching your dough transform, a glass bowl is your go-to choice. Its transparent walls allow you to witness the magic as your dough puffs up and doubles in size. Just make sure you don’t get too distracted by the mesmerizing process and accidentally overproof your dough. We’ve all been there!
1.3 The Ceramic Charmer
For those who like to keep things traditional, a ceramic bowl is a timeless classic. Its porous nature allows for better airflow, creating a cozy environment for your dough to rise. The rustic charm of a ceramic bowl will transport you back to simpler times when breadmaking was an art passed down through generations. Nostalgia never tasted so good!
1.4 The Plastic Paradox
Although plastic may not seem like an obvious choice, it actually has its perks. Lightweight and affordable, plastic bowls are easy to maneuver, making the dough transfer a breeze. Just ensure you find a BPA-free option to avoid any unwanted plastic flavors sneaking into your dough. No one wants a touch of Tupperware in their bread!
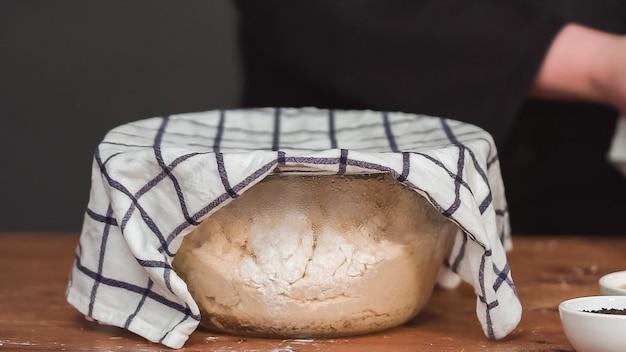
1.5 The Etiquette of Covering
Remember, my dough disciples, regardless of the bowl you choose, always cover your dough with a clean towel or plastic wrap during the rising process. This prevents any unwanted crust formation and keeps your dough happily snug as it doubles in size. Let’s keep our dough feeling like the rock stars they are!
1.6 Bowl Summary
Now that we’ve explored the various types of bowls, it’s time for you to pick the perfect vessel for your dough to rise. Whether you opt for the stainless steel splendor, the glass glamour, the ceramic charmer, or even the plastic paradox, just remember to treat your dough with love and care. With the right bowl, patience, and a pinch of humor, you’ll be rewarded with irresistibly fluffy bread that will make your taste buds sing. May your dough rise to great heights and your baking adventures be filled with joy!
FAQ: What Type of Bowl is Best for Dough to Rise
So you’ve decided to become a “dough whisperer” and embrace the wonderful world of bread making. Congratulations! But before you dive headfirst into the doughy abyss, there’s one key question you need to answer: What type of bowl is best for dough to rise? Fear not, my fellow bread enthusiasts, for I have compiled an FAQ-style guide to help you find the perfect vessel for your rising dough. Let’s get started!
How Do You Tell If Dough Has Risen Enough
Ah, the age-old question that tempts even the most seasoned bakers. No worries, my friend, I’ve got you covered! To check if your dough has risen to perfection, simply poke it gently with your finger. If the indentation bounces back slowly, like a sleepy sloth emerging from its afternoon nap, congratulations! Your dough is ready for the next step. If it springs back quickly, give it a bit more time to rise. And remember, practice makes perfect!
How Do You Make Dough Rise in the Oven
Ah, the magical art of oven-rise! To achieve this, preheat your oven to a cozy warm temperature, around 100°F (38°C). Once it reaches this delightful temperature, turn it off and place your covered dough inside. The residual heat will create a cozy haven for the yeast to work its magic. Just be sure not to forget your dough in there, unless you’re aiming for a loaf that resembles a piece of charcoal art!
Will Dough Rise in a Metal Bowl
Ah, the eternal debate: metal or not to metal? While we might like to imagine dough having a love-hate relationship with metallic bowls, the truth is that metal can actually hinder the rising process. You see, metal tends to conduct heat more efficiently than other materials. As a result, it can sabotage the delicate balance of temperature needed for optimal dough rising. So it’s best to steer clear of metal bowls and opt for a more dough-friendly alternative.
Where Do You Leave Dough to Rise Overnight
If you have the patience (and inclination) to let your dough work its magic overnight, kudos to you! To grant your dough a cozy overnight spa retreat, simply cover it with a clean kitchen towel and let it rest in a warm, draft-free place. Some bakers swear by leaving it in the microwave or oven, but please, for the love of all things delicious, remember to remove it before preheating the oven the following morning. No one likes a doughy surprise!
Can Sourdough Starter Go in a Metal Bowl
Ah, the mysterious world of sourdough! While some bakers may argue that sourdough starter and metal bowls are sworn enemies, the truth is not so black and white. Sourdough starter can indeed be kept in a metal bowl, but it’s best to avoid prolonged contact. Acidic elements in the starter can react with certain metals, resulting in some unwanted flavors. So, if you’re not up for a game of metal and sourdough chemistry, it’s safer to opt for a glass or ceramic bowl.
What Can Cause Dough Not to Rise
Ah, the cruel realities of dough. Sometimes, despite our best efforts, our little balls of potential refuse to rise. But fear not, brave baker, for there are a few culprits that might be behind this doughy rebellion. Yeast past its prime, improper temperature, excessive salt, or the lack of a nurturing environment can all contribute to the refusal of dough to rise. So keep your ingredients fresh, watch that temperature, and create a environment so cozy that even dough can’t resist its charms!
Can I Let My Dough Rise in the Sun
Ah, the great outdoors beckon! While it may seem tempting to let your dough bask in the glorious rays of the sun, it’s generally not the best idea. Sunlight can cause the dough’s surface to dry out, leading to a crusty layer that hinders rising. Additionally, the temperature fluctuations outside can be too inconsistent, resulting in unpredictable rising times. So, unless you wish to engage in a risky game of dough tanning, it’s best to find a cozy indoor spot for your rising adventures.
What Can I Proof My Sourdough in
Ah, the sacred process of sourdough proofing! To provide your sourdough with the perfect nurturing environment, opt for a proofing basket or a banneton. These lovely creations help maintain the dough’s shape as it rises while allowing air circulation for that much-desired crust formation. If you’re feeling fancy, sprinkle the basket with a bit of flour or line it with a tea towel to prevent any sticky situations. Your sourdough will rise to stardom in no time!
Will Dough Rise in a Plastic Bowl
Ah, the humble plastic bowl! While it may not be the most romantic option, plastic is actually a friend to dough rising. Plastic bowls provide a warm and cozy environment for yeast to work its bubbly magic. Just ensure that your plastic bowl is food-safe and sturdy enough to handle the dough’s magnificent rise. It may not have the charm of a ceramic or glass bowl, but it gets the job done!
Will Dough Rise in the Fridge
Ah, the chilly abode of the fridge! If you’re in no rush and wish to extend the rising process, the fridge can be your trusted ally. Simply cover your dough tightly and let it rest in the fridge overnight (or longer, if you’re feeling patient). The cold temperatures slow down the yeast’s activity, resulting in a slower rise and enhanced flavor development. Just remember, time marches on, so don’t forget about your dough like a forgotten science experiment!
Should I Cover Dough While It Rises
Ah, the age-old question of dough exposure! To prevent your rising dough from drying out or forming a crusty exterior, covering it is essential. A clean kitchen towel or a plastic wrap snugly laid over the top will do the trick. But beware, my friend, choosing a towel with a flamboyant pattern might give your dough an inadvertent fashion makeover. So keep it simple and stylish, just like your dough dreams!
What Is the Best Way to Rise Bread Dough
Ah, the art of bread dough rising! There are several methods you can employ to create the perfect rising environment for your dough. One popular option is to place your covered dough in a slightly warm oven (preheated to a low temperature and then turned off). Another approach is to find a cozy spot in your kitchen, away from drafts and temperature extremes. Remember, the key to successful rising is consistency, warmth, and a sprinkle of patience.
Do I Need to Cover Dough When Proofing in the Oven
Ah, the cozy proofing haven of the oven! When proofing your dough in the oven, covering it is of utmost importance. You wouldn’t want your poor dough to experience a drying journey akin to a trek through the Sahara desert, would you? So, cover it with a clean kitchen towel or plastic wrap to ensure it stays moist and protected. Your dough will thank you with a glorious rise!
Can You Let Dough Rise in a Stainless Steel Bowl
Ah, the sleek and shiny world of stainless steel! While stainless steel bowls may not be the dough’s true love, they can serve as a temporary rising abode. However, it’s important to note that stainless steel tends to conduct and retain heat, potentially interfering with the dough’s rising process. So, if you find yourself without a suitable alternative, go ahead and give your stainless steel bowl a doughy vacation. But remember, it’s just a fling, not a long-term commitment!
Can Dough Rise in an Airtight Container
Ah, the battle between dough and air! While airtight containers are perfect for storing leftovers or keeping those pesky pantry bugs at bay, they might not be the best choice for dough rising. Oxygen is a close ally to the yeast’s rising prowess, and an airtight environment can limit its potential. So, opt for a bowl covered with a kitchen towel or a lightly sealed container to provide your dough with the essential spark it needs to rise to the occasion.
How Long Does It Take for Dough to Rise
Ah, the elusive concept of time in the world of bread-making! The rising time for dough can vary depending on various factors such as room temperature, yeast activity, and recipe specifics. On average, dough takes about 1 to 2 hours to rise. However, it’s crucial to remember that dough rises at its own pace, like a leaf dancing to its own rhythm in the wind. So, embrace the element of unpredictability and be patient. Good things come to those who wait!
Why Does Bread Need to Rise Twice
Ah, the mystical wonders of the double rise! Bread benefits from a two-step rising process for several reasons. First, the initial rise allows the yeast to feed on sugars and create those delightful air bubbles that contribute to a light and fluffy texture. The second rise, also known as the “proofing” stage, gives the dough the chance to develop even more flavor and structure. It’s like sending your dough on a transformative journey, allowing it to rise to new heights of deliciousness!
Congratulations, my dough-wrangling friend! You have now unlocked the secrets of finding the perfect bowl for your dough to rise. Whether you opt for a cozy ceramic nest or embrace the simplicity of plastic, remember that the magic lies not only in the chosen vessel but also in the love and care you invest in your dough. So gather your ingredients, unleash your creativity, and let your dough rise to new heights of bread-making mastery. Happy baking, and may your loaves be forever fluffy!