If you’re facing a termite infestation, it’s crucial to take swift action to protect your home from these destructive pests. One common method of termite treatment involves drilling holes in the infested areas to deliver the treatment solution deep into the wood. But what size drill bit should you use for effective termite control? In this blog post, we’ll explore the different factors to consider when choosing the right drill bit size and provide helpful insights on drilling techniques for termite treatment. So, let’s dive in and learn how to tackle those pesky termites!
What Size Drill Bit for Termite Treatment
So, you’ve got a termite problem? Oh boy, you’re in for a ride! But fear not, my friend, because I’m here to help you navigate the world of termite treatment drill bits. Now, let’s talk about finding the perfect size bit for those pesky little critters.
Figuring Out the Right Size
When it comes to termite treatment, one size does not fit all. You’re going to need a drill bit that’s just right – kind of like Goldilocks and her porridge, but with power tools. So how do you determine the right size bit to use?
Digging into the Details
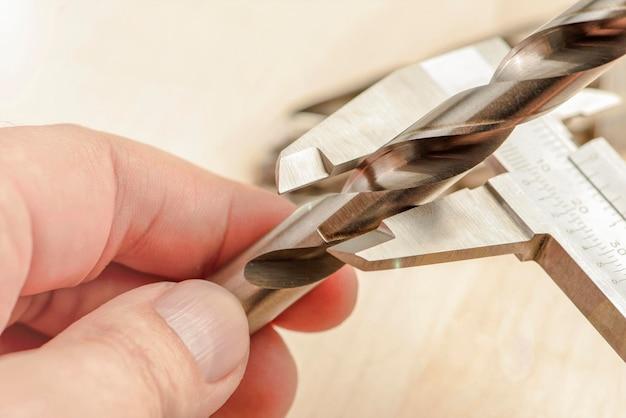
First things first, you’ll want to know the size of the termite treatment rods you’re working with. These rods are typically around 5/16-inch in diameter, but hey, don’t take my word for it. Whip out your measuring tape and check those rods out for yourself!
Size Matters, Baby!

Now that you know the diameter of the termite treatment rods, you can choose a drill bit that will create the perfect-sized hole. You’re looking for a bit that’s just a smidge larger, maybe around 3/8-inch, to give you a little wiggle room. After all, you don’t want those termites escaping through the cracks!
Better Safe Than Sorry
Remember, it’s always better to err on the side of caution. When in doubt, go for a slightly larger drill bit. That way, you can ensure those termites won’t be able to sneak their way out while you’re busy fighting the good fight. Leave no termite unturned!
Wrapping It Up
Well, my friend, now you’re armed with the knowledge of what size drill bit to use for termite treatment. Just remember, take measurements, choose a bit that’s a tad bigger, and don’t forget to make those termites quake in their little wooden boots! Good luck, and may the drill be with you!
Termite Tools
A Funny Guide to Equip Yourself for the Battle Against Termites!
Are you ready to take on the mighty termites? Well, you’ll need more than just determination. In this section, we’ll discuss the essential termite tools that will help you fight these tiny terrors. Buckle up and let’s get cracking!
1. Termite Detector
First things first, you need a trusty termite detector. It’s like a superhero’s spidey senses, but for detecting termite presence. This tool will save you from drilling unnecessary holes in your beautiful walls. Grab your termite detector and track those sneaky pests like a pro!
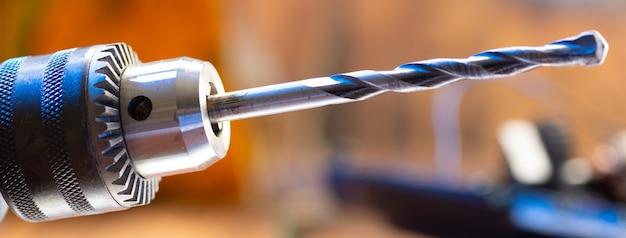
2. The Mighty Drill

Ah, the mighty drill! Your trusty sidekick in the war against termites. But remember, not all drills are created equal. You need the perfect size drill bit to penetrate the termite’s fortress. So put on that tool belt, find the right size bit, and get ready to unleash your drilling prowess!
3. Disturbance Device
Termites love peace and quiet, but we’re here to disrupt their tranquility! Meet the disturbance device. Whether it’s the tapping of a hammer or the rumbling of your footsteps, this tool ensures termites can’t relax for even a second. So get out there, make some noise, and let those termites know who’s boss!
4. Vacuum of Doom
Termites don’t stand a chance against the Vacuum of Doom! This tool sucks them up faster than a tornado. Just imagine, termites screaming as they’re whisked away to their doom. It’s a termite’s worst nightmare, and your secret weapon to keep your home termite-free!
5. Sticky Trap Surprise
Time to lure those termites into a trap they can’t escape! Enter the sticky trap surprise. Covered in irresistibly delicious termite treats, these traps will make the termites come running. And once they’re stuck, it’s game over for them. So sit back, relax, and let the traps do all the work!
6. Termite Repellant Spray
Last but not least, we have the termite repellant spray. Not only does it keep termites at bay, but it also leaves a refreshing scent behind. It’s like going to war with a fancy perfume! So spray away and protect your home with style.
Now that you’re armed with the top-notch termite tools, those pesky termites don’t stand a chance! Remember, a little humor and a lot of determination go a long way in the battle against these tiny terrors. Take the fight to them with your trusty tools and reclaim your home!
Subsection: The Art of Termite Injection
How to Make Termites Scream for Mercy
It’s time to delve into the fascinating world of termite injection. If you’re wondering what size drill bit you need for termite treatment, fear not! We’ve got you covered, and we’re going to make it entertaining too.
Sizing Up the Situation
When it comes to termite injection, size does matter. Choosing the right drill bit is crucial for an effective attack on these tiny terrors. To start off, you’ll need a drill bit with a diameter around the same size as your termite superstars. We’re talking about a bit with a diameter of 1/8th of an inch. We don’t want those stubborn critters slipping away, do we?
Boomy Bitty Bits
Next up, let’s talk about the boom factor. You’re going to need a drill bit that’s long enough to penetrate deep into the wood where these pesky punks like to hang out. We suggest going for a bit that’s at least 18 inches in length. Remember, we want to give the termites a real taste of a “surprise” injection!
Aim for the Gold, Not the Cold
Now that we have the size covered, let’s talk about technique. When drilling into the infested wood, make sure you aim for the termite hub, not just any hole. We’re talking about drilling into the goldmine of termite activity—their little secret hideout where they hatch their wicked plans. Aim true, my friend!
It’s The Pressure That Counts
Finally, let’s discuss the pressure. You want to inject some termite Terminator juice, right? Well, ensure you are using a drill bit that allows you to apply a good amount of pressure while injecting the treatment. We’re looking for enough force to make even the bravest of termites tremble in fear.
Conclusion: Drill, Inject, and Laugh!
So, there you have it! The art of termite injection is a precise blend of size, boom, aim, and pressure. With the right drill bit and techniques, you’ll be showing those termites who’s boss in no time. Just remember to wear your imaginary superhero cape while you do it!
Now that you’re armed with the knowledge of what size drill bit to use and some tips and tricks, go forth and inject with confidence. Happy drilling and even happier termite-slaying!
Termite Rodding Tool: A Powerful Weapon in the Fight Against Termites
Introduction
When it comes to termite treatment, having the right tools can make all the difference. One such tool that should be in every pest control expert’s arsenal is the termite rodding tool. This mighty device is designed to penetrate even the toughest termite-infested areas, ensuring thorough treatment and effective elimination of these pesky critters. In this subsection, we’ll take a closer look at this essential tool and explore its benefits in the battle against termites.
The Versatile Termite Rodding Tool: Your Secret Weapon
The termite rodding tool is like a warrior’s sword in the war against termites. With its slender and sturdy design, it allows pest control professionals to access hard-to-reach areas with ease. This tool is incredibly versatile, making it suitable for both preventive treatments and active infestations. It’s like having a handy sidekick that you can always rely on to get the job done.
Why Choose a Termite Rodding Tool
-
Enhanced Precision: The termite rodding tool offers pinpoint accuracy, allowing pest control experts to target specific areas where termites may be lurking. Say goodbye to random guesswork and hello to surgical-level precision!
-
Deep Penetration: Termites are notorious for hiding in the tightest of spaces. But fear not! The rodding tool’s slim design enables it to reach deep into termite galleries, ensuring that every nook and cranny is treated effectively.
-
Time Efficiency: With this tool in hand, pest control professionals can get the job done faster than ever before. Say goodbye to lengthy treatment processes and hello to quicker results!
How to Properly Use a Termite Rodding Tool
Using a termite rodding tool is fairly straightforward but requires some finesse. Here are a few tips to help you master the art of termite rodding:
-
Choose the Right Drill Bit Size: To ensure optimal performance, it’s crucial to select the correct drill bit size for your rodding tool. Consider the size of the termite galleries and how deep you need to penetrate. It’s all about finding the perfect fit!
-
Preparation Is Key: Before using the rodding tool, it’s essential to clean the drill bit thoroughly and inspect it for any signs of damage. You’ll want your tool to be in top-notch condition for maximum effectiveness.
-
Strike with Precision: As you plunge the termite rodding tool into the infested area, channel your inner ninja and aim for the heart of the termite colony. Make each strike count, and watch those termites scatter!
The termite rodding tool is one of the most valuable weapons in the fight against termites. Its precision, versatility, and time efficiency make it an essential tool for pest control professionals. By investing in this mighty device, you can ensure thorough treatment and effective elimination of termites. So go forth, my friend, and conquer those termites with the power of the termite rodding tool!
Termite Control Spray: Taking down termites one spray at a time
The Battle Begins: Termites vs. Humans
So you’ve discovered termites wreaking havoc in your home. It’s time to put on your warrior hat and fight back against these tiny intruders. One powerful weapon in your arsenal is the mighty termite control spray. Let’s dive into the world of termite control sprays and find out how they can help you combat these pesky creatures.
What’s the Buzz about Termite Control Sprays
1. Arm Yourself: Choosing the Right Spray
When it comes to choosing the right termite control spray, it’s important to use one specifically formulated for these wood-munching critters. Look for sprays that contain active ingredients like pyrethroids or borates. These ingredients effectively target and eliminate termites, leaving your home termite-free.
2. Take Aim: Direct Application
Now that you’ve got your trusty termite control spray, it’s time to take aim. Locate the termite infested area and spray directly on the affected surfaces. Remember to read the label instructions on how to apply the spray effectively.
3. The Power of Persistence
One shot of spray won’t always do the trick. Termites can be persistent little creatures! To ensure their complete elimination, be prepared to apply the termite control spray multiple times. Persistence will pay off in the end, leaving those termites running for cover.
Five Pranks Termites Absolutely Hate
1. The Lemon Zest Trick
Termites may love feasting on wood, but they can’t stand the smell of lemons. Mix some lemon zest with water and spray it around your home’s wooden structures. Watch as the termites scuttle away, unable to stand the citrusy aroma.
2. Minty Fresh Termites
Did you know that termites have an aversion to mint? Crush some mint leaves and sprinkle them around potential entry points. Those termites won’t be able to handle the freshness and will retreat in no time.
3. Sour Grapes
Termites might have a sophisticated palate for wood, but they won’t be able to appreciate the sourness of grapes. Slice up some sour grapes and place them near termite infested areas. The termite party will be over in a flash.
4. The Vinegar Vengeance
Termites loathe the pungent odor of vinegar. Fill a spray bottle with vinegar and generously spritz it in areas where termites are causing trouble. They’ll quickly find a new spot to gorge on, far away from the tangy scent.
5. The Onion Bulwark
Few things are as effective against termites as onions. Just peel and slice some onions, then place them near termite entry points. The termites will soon be waving the white flag and looking for a more onion-free environment.
Don’t Let Termites Rain on Your Parade!
With the power of termite control sprays and a touch of pranking creativity, you now have the upper hand in the battle against these tiny terrors. Armed with lemon zest, mint, sour grapes, vinegar, and even onions, your home will become an impenetrable fortress against termites. So go forth, spray, and have some fun while evicting those uninvited guests from your household.
Liquid Termite Treatment
How to Get Rid of Termites the Liquid Way
Termites, those pesky little creatures that can wreak havoc on our homes. Don’t worry though, because we’ve got the solution for you – liquid termite treatment. It may sound like something out of a sci-fi movie, but trust us, it’s the real deal. In this section, we’ll dive into the ins and outs of liquid termite treatment and how you can effectively use it to get rid of those unwanted house guests.
The Liquid Terminator: A Non-Hollywood Experience
What is Liquid Termite Treatment?
Liquid termite treatment is a method used to protect your home from termite infestation. It involves applying a liquid termiticide to the soil around your property or directly into termite-infested areas. The termiticide then forms a protective barrier, preventing termites from entering your home and causing any further damage.
How Does it Work?
When termites come into contact with the termiticide-treated soil, it acts as a deadly poison for them. The termites unknowingly pick up the termiticide on their bodies and transfer it to other termites through social interaction and grooming. This nasty chain reaction eventually wipes out the entire termite colony, giving you peace of mind and a termite-free home.
The DIY Liquid Termite Treatment Guide
1. Gather Your Supplies
Before embarking on your liquid termite treatment journey, make sure you have all the necessary supplies. You’ll need a backpack sprayer, safety goggles, gloves, and of course, the liquid termiticide itself. Remember, safety first!
2. Locate the Affected Areas
Identifying the areas where termites are present is crucial for effective treatment. Look for mud tubes, damaged wood, or tiny holes in and around your home. Termites can be pretty sneaky, so keep your eyes peeled!
3. Mix and Spray
Follow the instructions provided with your termiticide to mix the appropriate solution. Once ready, use your trusty backpack sprayer to apply the liquid termiticide to the soil surrounding your home or directly onto the infested areas. Don’t be afraid to get your spraying on – this is war, after all!
4. Repeat as Needed
For long-lasting protection, it’s important to reapply the liquid termiticide periodically. Monitor the treated areas for any signs of termites and, if necessary, give them another spray. Show those termites who’s boss!
Liquid termite treatment is a powerful tool in the fight against termites. With its ability to eliminate entire termite colonies, it’s no wonder homeowners are turning to this method for protection. So, suit up, gather your supplies, and get ready to say “hasta la vista, termites!”
Do My Own Termite Control
So, you’ve discovered a termite infestation in your home. Termites may be small, but they can cause some serious damage if left unchecked. Calling in the professionals is always an option, but if you’re feeling a bit adventurous, you might be thinking, “Can I do my own termite control?” Well, my friend, the answer is yes, you absolutely can give it a shot! Just make sure you bring your A-game and a sense of humor because this DIY project might just be the ultimate test of your handyman skills.
Drill Like a Pro
One of the most effective methods for termite control is treating the affected areas with chemical solutions. But before you can unleash your inner termite warrior, you’ll need to know the right drill bit size to get the job done. Cue the sound of trumpets! Dum-dum-dum-dum! For those pesky termite holes in your walls, we recommend using a tiny superhero of a drill bit – say hello to the magical 1/4-inch drill bit. It’s small, but mighty!
The Great Termite Hunt
Before you can start drilling away, it’s important to locate those sneaky termites. Don your detective hat and grab a flashlight. Begin your search near areas that are prone to moisture, such as bathroom and kitchen plumbing, as termites love a damp environment. Look for mud tubes, which are like termite highways, and tiny piles of sawdust near the entrance points. Once you’ve found these little troublemakers, it’s time to put your plan into action.
Get Your Drill On
Now that you’ve gathered your intelligence, it’s time to gear up and get drilling. Attach your trusty 1/4-inch drill bit to your drill (cue the superhero music again) and carefully make holes near and around the termite-infested areas. Remember, slow and steady wins the race. Once you’ve drilled the holes, you can inject the termite pesticide into the holes, effectively eliminating those unwanted guests. Just be sure to follow the instructions on the pesticide label and wear any necessary protective gear.
Preventive Measures
After you’ve saved your home from the wrath of termites, it’s time to fortify your defenses. Prevention is key! Start by fixing any leaks or sources of moisture, as termites thrive in damp environments. Keep your home clean and tidy, as clutter can create cozy hiding spots for these pests. Consider using termite-resistant materials when repairing or renovating your home, and keep an eye out for any signs of termite activity in the future.
Taking on termite control yourself can be an adventure, to say the least. Armed with your trusty drill bit and a sense of humor, you can tackle these little terrors head-on. Remember to locate the termites, drill with finesse, and take preventive measures to avoid future infestations. While the professionals are always there to lend a hand, doing it yourself can be a rewarding and empowering experience. Good luck, brave termite fighter!
How to Drill for Termites Like a Pro
Did you know that drilling is a crucial step when it comes to termite treatment? Don’t worry, you don’t need to be a professional woodpecker to do it right! In this guide, we’ll show you how to drill for termites using the perfect size drill bit and some nifty tips and tricks. Let’s dive in!
Choosing the Right Drill Bit Size
First things first, let’s talk about the drill bit size. Think of it as finding the perfect fit for your favorite pair of jeans – you want it to be just right. For termite treatment, you’ll want to grab a 1/2 inch drill bit. It’s like the Goldilocks of drill bits – not too big, not too small, but just perfect for the job!
Locating the Termite Party
Now that you have your trusty drill bit, it’s time to find those pesky termites and give them a surprise they won’t forget. Look for signs of termite activity around the infested area, like mud tubes or termite droppings (yep, those critters leave little presents behind). Once you have found the hotspot, grab your drill and let’s get drilling!
Marking the Spot, Not the Dance Floor
Before you start drilling like a madman, take a moment to mark the spot. You don’t want to end up with more holes than Swiss cheese! Grab a pencil and make a small mark where you’ll be drilling. It’s like drawing a target for your drill – aim, drill, repeat!
Safety First, Drilling Second
Now, hold your horses! Before you drill into the wood, make sure to put on your safety gear. A pair of goggles will protect your precious peepers from flying wood chips, and a dust mask will save your lungs from getting a not-so-delightful termite dust facial. Safety may not be the most glamorous part, but it’s definitely the smartest!
Drilling Technique: Steady and Smooth
Alright, it’s showtime! Place the drill bit on your marked spot and hold the drill firmly. Start drilling using a slow and steady motion, like you’re painting a masterpiece. Apply just enough pressure to make progress without going too hard. Remember, patience is key here!
Drilling Depth: Go Deeper!
Now, you may be wondering, how deep should you go? Well, termites are sneaky little devils, so it’s important to drill deep enough to reach their hideouts. Aim for a depth of about 18 inches – it’s like a termite spa treatment, but without the relaxing music!
Termite Treatment: The Grand Finale
Once you’ve drilled your way into termite territory, it’s time to deliver the knockout punch. Apply your chosen termite treatment product directly into the holes. Make sure to follow the instructions on the label for the best results. Those termites won’t know what hit them!
Wrapping it Up, Drillbit Style
Congratulations, you’ve mastered the art of drilling for termites! Remember, using the right drill bit size and following proper drilling techniques are essential for effective termite treatment. So go out there, grab your drill, and show those termites who’s boss. Happy drilling!
How to Deal with Those Pesky Termites in Your Walls
Introduction
Termites are like the ninjas of the insect world. They quietly invade your home without warning, wreaking havoc on your precious walls. But fear not, dear reader, for I am here to guide you through the treacherous battle against these tiny invaders. In this subsection, we will delve into the art of treating termites in walls. So grab your toolkit and let’s get started!
Locate the Termite Hideout
Before you whip out your trusty drill bit, you’ll need to play detective and find where these sneaky critters have made their home. Grab a stethoscope (or a glass cup if you’re feeling MacGyver-ish) and press it against the wall. Listen closely, and if you hear any faint munching sounds, you’ve hit the jackpot – or rather, the termites have hit the jackpot. Congrats, you’re on the right track!
Choose the Right Weapon: Drill Bits
Now that you know where those rascally termites are, it’s time to bring out the big guns. But wait, before you start drilling like there’s no tomorrow, make sure you have the correct drill bit size. You don’t want to go too big and cause unnecessary damage, like creating a termite-sized sinkhole in your wall. Aim for a bit size between 1/2 inch and 1 inch. Just remember, size does matter when it comes to drilling into termite territory.
Drill, Baby, Drill!
Armed with your properly sized drill bit, it’s time to channel your inner handyman (or handywoman) and start drilling into those termite-infested walls. Make sure to wear goggles and a tool belt for that extra DIY flair. Create holes about 12 to 18 inches apart along the affected area. But hey, don’t go all “Dracula” on your walls – they’ve suffered enough. Just a quick, gentle drilling session will do the trick.
Call in the Cavalry: Time for Treatment
Now that the drilling is complete, it’s time to unleash the termite eradication squad. We’re talking about termiticide here – the enemy of all wood-munching pests. Fill up a spray bottle with your trusty termite-killing potion (also known as termiticide) and apply it generously into the freshly drilled holes. This superhero-like solution will seep into the walls, taking down those pesky termites one sip at a time.
The Final Countdown: Monitor and Maintenance
Congratulations, dear warrior, you have successfully treated your termite-infested walls! But the battle is not over just yet. Keep a close eye on the treated area and monitor for any signs of resurgence. Remember, those termites may be small, but they’re sneaky. So vigilance is key. If you notice any suspicious termite activity, grab that drill bit once again and repeat the process to defend your beloved walls.
Treating termites in walls may seem like a daunting task, but armed with the right knowledge and a sprinkle of humor, you can conquer those creepy crawlies like a champ. So grab your stethoscope, find their hideout, choose the perfect drill bit, drill away with finesse, and let the termiticide do its magic. With proper monitoring, you’ll bid adieu to those unwanted house guests. Good luck, brave termite warrior!
Drilling Holes to Treat Termites
Why Holes and Termites Go Hand-in-Hand
So, you’ve got yourself a pesky termite problem? Don’t worry, we’ve all been there. But before you start envisioning yourself armed with a flamethrower or a herd of hungry anteaters, hold your horses! There’s a much simpler (and legal) solution: drilling holes. Yes, you heard me right. Because when it comes to dealing with these tiny wood-munching monsters, drilling holes can be your secret weapon.
The Art of Drilling
Now, you might be wondering, “Why on earth do I need to start playing Bob the Builder with termites?” Well, my friend, drilling holes is like opening a back door invitation into their cozy munching lair. It allows you to access those hard-to-reach crevices where termites like to throw their never-ending wood-chomping parties.
The Right Drill Bit Size: Oh, Size Does Matter!
When it comes to drilling holes for termite treatment, the size of your drill bit matters more than you might think. Think of it as choosing the right sized straw for your bubble tea – too small, and you’ll struggle to get those precious tapioca balls through; too large, and you risk losing half your drink in one mighty slurp. In the termite world, it’s the same story. You don’t want a drill bit that’s too large or too small. It needs to be just right.
Finding the Perfect Fit
To ensure a successful termite treatment, opt for a drill bit size that matches the width of your chosen termite-killing concoction. You see, it’s all about creating that perfect balance. Too small, and the solution won’t fully penetrate the wood, leaving some termites unscathed. Too large, and you might end up wasting your precious termite-slaying liquid, which let’s face it, doesn’t come cheap.
Sweat the Small Stuff: Drill Bit Maintenance
Now, before you go all Van Gogh on your home, drilling holes left, right, and center, make sure your drill bit is in tip-top shape. Dull or damaged drill bits won’t perform their best, leaving you frustrated and the termites with the last laugh. So, my friend, keep that drill bit sharp, clean, and well-lubricated for smooth sailing through even the toughest of timbers.
While drilling holes for termite treatment might not be your usual weekend activity, it is a necessary step in bidding farewell to those pesky creatures. Remember, choose your drill bit size wisely, maintain it like a seasoned pro, and give those termites a taste of their own medicine. Happy drilling!
What Size Drill Bit Should I Get
So, you’ve got a termite problem, huh? Well, don’t worry, my friend. With the right tools and a sprinkle of know-how, you’ll be saying “goodbye” to those pesky critters in no time. One essential tool in the battle against termites is a trusty drill. But before you go drilling holes willy-nilly, let’s talk about the most important question: what size drill bit should you get?
The Magic Number: 5/16 Inch
When it comes to termite treatment, the magic number is 5/16 inch. That’s right, my friend, a 5/16 inch drill bit is the perfect size for the job. Why, you ask? Well, let me explain. Termite treatment involves injecting termiticide into the infested areas of your home, and a 5/16 inch hole is just the right size to do that effectively. It’s not too big, not too small – it’s just right, like Goldilocks’ porridge.
Why Not Go Bigger
You might be thinking, “Why not go big or go home? Shouldn’t a larger hole mean better termite control?” Ah, my friend, that’s where you’d be wrong. You see, drilling a larger hole may seem like a good idea, but it can actually do more harm than good. A large hole can weaken the structural integrity of your home and make it easier for those determined termites to do their damage. Trust me, you don’t want to give them any help.
Don’t Go Smaller Either
On the other hand, going smaller isn’t the answer either. A smaller drill bit won’t allow you to inject the proper amount of termiticide into the affected areas. You want to get that sweet poison right where the termites are partying, and a smaller hole just won’t cut it. Plus, a smaller hole might not even fit the nozzle of your termiticide applicator. It’s like trying to fit into your favorite jeans after Thanksgiving dinner – it’s just not gonna happen.
The Do-It-Yourself Champion
Now that you know the magic number, you can confidently face those termite invaders head-on. Armed with your 5/16 inch drill bit and a can-do attitude, you’ll be the do-it-yourself champion of termite treatment. Just remember to follow all safety guidelines, wear protective gear, and consult with a professional if you’re unsure. With a little bit of drilling and a whole lot of determination, you’ll be saying “good riddance” to those pesky termites in no time.
So, my friend, go forth and conquer. Armed with your trusty drill and your newfound knowledge of drill bit sizes, you’re ready to kick some termite butt! Good luck, and may your home be termite-free forever.
How Deep to Drill for Termite Treatment
If you’re ready to take on those pesky termites and show them who’s boss, then you’re going to need to know just how deep to drill for termite treatment. It’s not as simple as just grabbing a drill and going to town – there’s actually a science to it. But fear not, my friend, because I’m here to break it down for you in a way that’s both informative and amusing.
Do termites have secret underground lairs
Well, not exactly. Termites do build their nests underground, but they won’t be throwing any secret lair parties down there. So, the first step in figuring out how deep to drill is to locate the termite galleries. These are the tunnels that the termites use to travel to and from their nests.
Finding the termite highway
To find these sneaky little tunnels, you’ll need to do a bit of detective work. Look for signs of termite activity such as mud tubes, damaged wood, or discarded wings. Once you’ve found these telltale signs, you’ll have a pretty good idea of where those termites are hiding.
Targeting the termite headquarters
Now that you’ve located the termite galleries, it’s time to figure out just how deep to drill. Typically, you’ll want to drill no more than 12-18 inches deep. This will allow you to reach the main termite population and ensure that your treatment is effective.
Keep it precise, like a surgeon with a drill
When drilling, be sure to use a drill bit that matches the size of the treatment hole you need. You don’t want to go too big or too small – precision is key here. And remember, you’re not trying to strike oil, so don’t go drilling too deep. Keep it shallow and focused on the galleries.
Measure twice, drill once
Before you start drilling, measure twice to make sure you’re hitting the mark. And don’t rush it – take your time and be gentle with that drill. No need to go all jackhammer on those termites; they’re small but mighty creatures.
A word of caution
While it’s important to reach the termite galleries with your treatment, be careful not to damage any vital structures in the process. We don’t want your house to collapse just to get rid of some bugs. So, proceed with caution and use common sense.
So, there you have it – a comprehensive guide on how deep to drill for termite treatment. Armed with this knowledge, you’re ready to take on those unwanted guests and show them who’s boss. Happy drilling, my friend!
Why Do They Drill Holes for Termite Treatment
When it comes to termite treatment, you might be wondering why those pesky professionals insist on drilling holes in your precious wooden walls. Well, fear not, my curious friend, for I am here to unveil the mysterious reasons behind this seemingly destructive act.
The Sneaky Termites
First, let’s delve into the mischievous nature of termites themselves. These tiny terrors love to set up camp in cozy, dark, and hidden corners of your home. They feast on delicious wood, causing structural damage that can leave you running for the hills (or at least reaching for your wallet).
Sneaky Solutions
So, why do they drill holes for termite treatment? It turns out that drilling holes is actually a clever strategy to combat these home-wrecking critters. By drilling strategically placed holes, pest control experts gain access to the inner workings of termite colonies and can deliver their secret weapons directly to the heart of the problem.
The Termidor Tango
One effective weapon in the battle against termites is a liquid treatment known as Termidor. This powerful potion is injected into the drilled holes, spreading like wildfire through the termite tunnels. Think of it as a tango: Termidor leads, and the termites follow. They unwittingly carry the deadly toxin back to their nest, spreading it among their unsuspecting comrades.
Taking a Stand
But wait, there’s more! Another reason for drilling holes during termite treatment is to create a barrier of defense around your home. This involves injecting a termite-repellent solution into your soil, disrupting the pests’ path to your humble abode. It’s like laying down an invisible forcefield to keep those pesky critters at bay.
The Hole Enigma
Now that we’ve uncovered the secrets of termite treatment, you might be wondering about the aftermath—what happens to those holes? Don’t worry; they won’t be left open like a gaping wound. Once the treatment is complete, those skilled professionals will plug the holes up, ensuring your home is not only termite-free but visually pleasing as well.
So, the next time your home is under attack by those wood-munching menaces, remember the drill holes are not a cause for alarm. Instead, they are the key to evicting these unwelcome guests and keeping your home safe and secure. Let those professionals work their magic, and bid those termites farewell!
Now that we’ve uncovered the secrets of termite treatment, it’s time to explore the fascinating world of drill bit sizes and their role in eradicating these destructive pests. Stay tuned for our next captivating subsection: “What Size Drill Bit for Termite Treatment?”
What is the Best Treatment for Subterranean Termites
Introduction
When it comes to subterranean termites, you want the best treatment to get rid of those pesky pests. After all, your home is not their private playground! In this subsection, we’ll explore some of the most effective and entertaining ways to deal with these underground intruders.
Options for Termite Treatments
Liquid Termite Treatments: Battling Termites with Science
Liquid termite treatments are like the genius scientists of termite elimination. They work by creating a chemical barrier around your home, essentially putting up a “no entry” sign for these tiny terrors. It’s like setting up a force field around your home but without the need for any flashy explosions (sorry, no superheroes here).
Baiting Systems: Alluring Termites to Their Demise
Think of baiting systems as a buffet for termites. These clever devices use tasty treats to attract termites, enticing them to feast on the poison-laced bait. It’s like setting up a gourmet restaurant for termites, complete with a deadly surprise hidden in every dish. Bon appétit, little termite!
Fumigation: Evicting Termites Circus-Style
If you want to go all-in on evicting termites, fumigation is the grand circus act of termite treatments. This involves sealing your home in an airtight tent and filling it with a lethal gas. It’s like giving those termites an all-expenses-paid vacation to the underworld. They won’t be coming back, that’s for sure!
Choosing the Right Treatment
Don’t DIY: Pest Control Professionals to the Rescue
While it might be tempting to take on those tenacious termites yourself, calling in the experts is always the smart move. Pest control professionals have the knowledge, experience, and arsenal of treatments to handle any invasion. Leave it to the pros, they’ll get right to the root of the problem. Bye-bye, termites!
Consider Your Home’s Unique Situation
Every home is different, so it’s important to consider your specific situation when choosing a treatment. Factors like the extent of infestation, location, and construction type can all influence the best course of action. So, don’t be afraid to consult with a professional and let them tailor the treatment to your home’s needs.
Subterranean termites may be formidable opponents, but with the right treatment, you can win the battle for your home. Whether you opt for liquid treatments, baiting systems, or the grand spectacle of fumigation, remember to call in the professionals and consider your unique situation. It’s time to give those termites the boot and reclaim your castle!