As 3D printing continues to gain popularity, it’s important to understand the fundamental concepts behind this fascinating technology. One of the key elements in 3D printing is the axis system, specifically the X, Y, and Z axes. These axes determine the direction in which the printer moves and ultimately creates the desired object.
In this blog post, we will delve into the world of 3D printing and explore the significance of the X, Y, and Z axes. We will answer questions such as how to set the home position in popular printers like Ender 3, how to interpret XYZ coordinates, and how to overcome common issues like Z wobble and banding. By the end of this post, you’ll have a solid understanding of the axis system in 3D printing and be able to navigate this exciting field with confidence.
So let’s dive in and demystify the XYZ axis system in 3D printing.
What Direction Is Axis X Y Z on a 3D Printer
When it comes to 3D printers, understanding the different axes and their directions is crucial. So, let’s dive into the fascinating world of XYZ axes and explore what makes them tick!
The X-Axis: Where the Magic Begins
First up, we have the X-axis. Think of it as the superstar that steals the show every time you hit that print button. This bad boy is responsible for horizontal movement, back and forth, left and right, like a graceful dancer on a stage. The X-axis brings your creations to life in the width dimension, ensuring precise movements and intricate details.
The Y-Axis: Taking Things to New Heights
Next, we have the Y-axis, the less flashy but equally important sidekick to the X-axis. The Y-axis enables vertical movements, lifting your masterpiece from the build plate to a whole new level of awesomeness. Think of it as the superhero who can fly, elevating your design to new heights, quite literally. Together with the X-axis, the Y-axis ensures your creation takes shape in the length dimension.
The Z-Axis: Building the Third Dimension
Last but certainly not least, we have the Z-axis, the unsung hero of the 3D printer world. The Z-axis is all about depth, adding that crucial third dimension to your creations. This axis allows the print head to move up and down, layer by layer, building your design from the ground up. It’s like a skilled construction worker, meticulously assembling each piece to create a stunning final product.
The XYZ Trio: A Perfect Synchronization
Now that we’ve met our three musketeers – X, Y, and Z – it’s essential to understand how they work together in perfect harmony. Picture them as a synchronized team, each playing their role to bring your imagination into the real world. The X-axis handles the width, the Y-axis takes care of the length, and the Z-axis adds that mesmerizing depth, creating a complete 3D experience.
Putting It All Together: Let the 3D Printing Journey Begin!
When you hit that “Print” button, these three axes come together in a beautifully orchestrated dance, carrying out the commands from your design software. They move simultaneously with precision, ensuring every layer is precisely placed, resulting in a tangible marvel that you can hold in your hands.
So, next time you marvel at a 3D printed creation, take a moment to appreciate the workings of the X, Y, and Z axes. They may not be the flashiest of stars, but their synchronized movements are what make 3D printing possible.
Now that you’re familiar with the directional prowess of the X, Y, and Z axes, it’s time to unleash your creativity and let the 3D printing journey begin! Get ready to bring your wildest ideas to life, one layer at a time!
FAQ: What Direction Is Axis X Y Z in 3D Printing
Table of Contents
– How do you set home position in Ender 3?
– How do you plot XYZ coordinates?
– Is the Z axis vertical in 3D printing?
– What does XYZ mean in position?
– Is the Y axis vertical in 3D printing?
– How do you read XYZ coordinates?
– What is the height in XYZ for 3D printing?
– What is the Z axis in 3D printing?
– How do you remember the XYZ axis?
– What causes Z wobble in 3D printing?
– What are the steps to 3D printing?
– In what direction does the Z axis move?
– How do you check XYZ on Windows 10?
– How do 3D printers achieve sharp corners?
– How do you fix the Z Band on an Ender 3?
– Which way does the XYZ axis point?
– Where is the home position on a 3D printer?
– What does Z banding look like?
– What are Z steps in 3D printing?
– What causes banding in 3D printing?
– How do I calibrate the XY axes on my 3D printer?
– What does a calibration cube tell you?
– How do XYZ coordinates work?
– How do you write XYZ coordinates?
How do you set home position in Ender 3
To set the home position in Ender 3, you’ll need to navigate through the printer’s menu. Go to the Control section and look for the Home option. Select it, and the printer will move its print head to the predefined home location. It’s like sending your printer to its cozy little nest. Just make sure nothing obstructs its path, such as curious pets or misplaced LEGO blocks.
How do you plot XYZ coordinates
Plotting XYZ coordinates is like guiding your printer through its three-dimensional dance routine. You can use specialized software like CAD (Computer-Aided Design) software to create a model and define the XYZ coordinates for each point. Once the model is ready, your printer’s software will follow these coordinates to bring your creation to life. It’s like choreographing the perfect ballet, but with plastic instead of tutus.
Is the Z axis vertical in 3D printing
Yes, the Z axis is indeed vertical in 3D printing. In the wondrous world of Cartesian coordinate systems, the Z axis points upwards. So, when your printer’s Z axis moves, it’s gracefully ascending or descending, depending on the heavenly commands you bestow upon it. Remember, it’s vertical, not diagonal, because we want our 3D prints to defy gravity, not geometry!
What does XYZ mean in position
XYZ in position refers to the three spatial dimensions in a Cartesian coordinate system. The X axis represents the horizontal movement, the Y axis denotes the vertical movement, and the Z axis symbolizes the depth or forward-backward movement. Together, they form your printer’s navigation system, allowing you to travel through the magical realm of 3D printing. Just like playing a game, but with fewer dragons and more filament.
Is the Y axis vertical in 3D printing
No, the Y axis is not vertical in 3D printing. The Y axis corresponds to the vertical movement, allowing your printer to reach new heights. Imagine the Y axis as a ladder that your printer confidently climbs to build your creations layer by layer. So, the Y axis is definitely vertical, just like a unicorn’s leap or your ambitions towards 3D printing greatness.
How do you read XYZ coordinates
Reading XYZ coordinates might seem like deciphering an alien language at first, but fear not! It’s simpler than it looks. Each coordinate represents a position value along the X, Y, or Z axis. A positive value indicates an upward, rightward, or forward position, while a negative value suggests a downward, leftward, or backward location. Think of it as your printer’s secret code for locating precisely where to lay down its molten plastic. It’s like reading the stars, but with fewer celestial bodies and more filament.
What is the height in XYZ for 3D printing
Height in XYZ for 3D printing refers to the Z axis, representing the vertical dimension. It determines the height or depth of your prints. From soaring towers to delicate figurines, the Z axis allows you to visualize your designs in the third dimension. So, the next time you’re looking to print something tall, remember that height lies in the realm of XYZ, waiting to be brought to life layer by layer.
What is the Z axis in 3D printing
In the magnificent realm of 3D printing, the Z axis reigns supreme! The Z axis represents the vertical movement, guiding your printer as it reaches new heights of creativity. Picture it as the backbone of your printer, allowing objects to rise or descend from the build plate. With the Z axis, your imagination can take flight, much like a superhero soaring above the city skyline. So, embrace the power of the Z axis and let your prints soar into the third dimension!
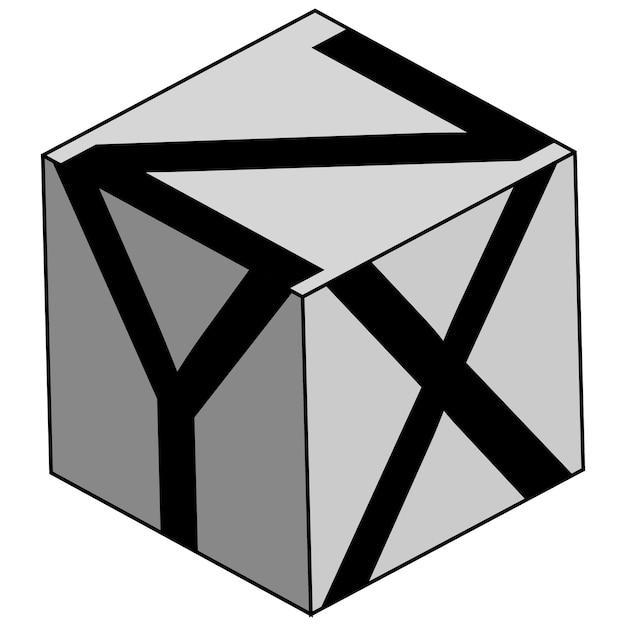
How do you remember the XYZ axis
Remembering the XYZ axis can be a daunting task, but fear not! We have a little trick to help you. Just think of the XYZ axis as the coordinates of a treasure chest. X marks the horizontal spot, Y indicates the vertical height, and Z delves into the depth. So, imagine hunting for that elusive treasure—your future 3D prints—with X, Y, and Z as your trusty guide, leading you to the pot of filament gold.
What causes Z wobble in 3D printing
Z wobble in 3D printing can occur due to various factors. It’s like your printer suddenly decided to do the tango when it was supposed to be printing straight lines. Loose or worn-out components, such as the Z-axis leadscrew or couplers, can cause this wobbly behavior. Luckily, tightening screws and ensuring proper alignment often helps smooth out the dance routine. Remember, a wobble might be charming on the dance floor, but not on your 3D prints!
What are the steps to 3D printing
Embarking on a 3D printing adventure involves several steps, much like unraveling a captivating mystery. Here’s a quick rundown of the key steps:
1. Design or find a 3D model: Unleash your creativity or explore online repositories filled with amazing designs.
2. Slice your model: Use slicing software to divide your model into printable layers and generate the necessary instructions for your printer.
3. Prepare the printer: Ensure your printer is clean, level, and ready for action.
4. Load the filament: Feed your printer’s hungry extruder with the chosen filament.
5. Start the print: Send the instructions to your printer and watch as it brings your creation to life, layer by layer.
6. Fine-tune settings: Adjust settings like print speed, temperature, and support structures to achieve the best results.
7. Remove the print: Once your print is complete, carefully detach it from the print bed, admiring your masterpiece like a proud artist. Voila!
In what direction does the Z axis move
The Z axis moves in the vertical direction, allowing your printer to create mesmerizing 3D prints layer by layer. Picture it as an elevator escorting your print head up or down the building of possibilities. So, next time you see your printer’s Z axis in action, envision it as an architectural miracle, constructing your dreams with each graceful ascent or descent.
How do you check XYZ on Windows 10
To check XYZ coordinates on Windows 10, you’ll need to rely on specialized software or tools. There are various programs available for 3D printers that provide features like position monitoring. With these tools, you can visualize and track the X, Y, and Z coordinates while your printer is in motion. It’s like having a GPS for your printer, ensuring it never loses its way during the magical journey of creation.
How do 3D printers achieve sharp corners
Ah, sharp corners, the epitome of design perfection! The secret behind 3D printers achieving sharp corners lies in the layer height and proper calibration. By fine-tuning these settings, you can ensure that each layer perfectly aligns, creating crisp edges that would make a surgeon jealous. So, if sharp corners are what you seek, dive deep into the sea of calibration and adjust those settings until your prints boast corners so sharp, they could rival a samurai’s blade.
How do you fix the Z Band on an Ender 3
Fixing the Z band on an Ender 3 is like giving your printer a chiropractic adjustment. To tackle this, start by checking the tension on the Z-axis belt. It should be tight enough to eliminate slack but not so tight that your printer is gasping for breath. Additionally, ensure that the Z leadscrew is properly aligned and lubricated. Remember, a happy Z band means smoother prints and a healthier printer—no chiropractor visit needed!
Which way does the XYZ axis point
The XYZ axis points towards the vast expanse of the printer’s build volume, guiding your printer’s movements as it carves your dreams into reality. The X axis stretches left and right, the Y axis reaches high and low, and the Z axis plunges into the depth of imagination. Together, they form an intrepid trio, ready to navigate the uncharted territory of creativity. So, embrace the direction of XYZ and embark on a journey where dreams take shape layer by layer.
Where is the home position on a 3D printer
Just like you crave the comfort of your home after a long day, a 3D printer has its own “home” position. This position, also known as the origin point, typically rests at one corner of the build plate. It’s the starting point for every print, where everything feels safe and familiar. So, when your printer homes, it’s seeking that cozy beginning, ensuring it’s ready to embark on its next grand creation from a place of comfort and stability.
What does Z banding look like
Z banding is like the erratic brushstrokes of a crazy artist on your 3D prints. It appears as visible lines or patterns that run parallel to the Z axis on the sides of your prints. These imperfections can be caused by various factors such as loose belts, misaligned components, or even mechanical issues in your printer. Fear not, though, for with some troubleshooting and adjustments, you can banish the banding and restore the smooth, flawless finish to your prints.
What are Z steps in 3D printing
Z steps in 3D printing refer to the precision with which your printer can move the Z axis. It determines how small or large each movement of the Z axis is. The correct Z steps value ensures accurate layer heights and avoids potential issues like uneven layer thicknesses. So, finding the ideal Z steps value is crucial for achieving the perfect balance between detail and speed in your 3D prints. Fine-tuning Z steps is like finding the tempo that your printer can dance to flawlessly.
What causes banding in 3D printing
Banding in 3D printing can be caused by a variety of factors. It’s like that annoying mosquito buzzing around your masterpiece. Loose belts, improper printer calibration, inadequate infill settings, or even outdated firmware can contribute to this undesirable banding effect. By checking and addressing these potential culprits, you can bid farewell to the banding and say hello to smooth and flawless prints that will make even the toughest critic smile with awe.
How do I calibrate the XY axes on my 3D printer
Calibrating the XY axes on your 3D printer is like conducting a symphony. Follow these steps to achieve harmonious movements:
1. Level the print bed: Use the printer’s built-in bed leveling system or follow manual instructions to ensure the bed is perfectly level.
2. Check belt tension: The belts driving the X and Y axes should be taut enough to eliminate slack but not so tight that they resemble guitar strings.
3. Verify pulley alignment: Ensure that the pulleys guiding the belts are aligned properly. Misaligned pulleys can cause irregular movements and compromised print quality.
4. Monitor motor current: Adjusting the motor current settings can help prevent skipped steps and ensure smooth movements.
By calibrating these elements, you’ll be the conductor of your printer’s flawless performance, weaving beautiful prints with every mesmerizing motion.
What does a calibration cube tell you
A calibration cube is like a wizard’s crystal ball, providing insights into your printer’s performance. By printing a calibration cube, you can evaluate various aspects of your printer’s accuracy and make necessary adjustments. It allows you to