If you’re a PC enthusiast or a newbie building your own computer, you’ve probably come across the mysterious DRAM light on your motherboard. This blinking light can be a source of frustration and confusion, but fear not, we’re here to help. In this blog post, we’ll dive into what the DRAM light on your motherboard means, why it might be flashing, and how you can fix it. So buckle up, folks, and let’s shed some light on this issue.
Dram Light on Motherboard
Have you ever gazed into the depths of your computer tower, only to be greeted by a rhythmic blink from an enigmatic little light labeled “DRAM”? Fear not, my curious friend, for I am here to shed some light on the matter (pun intended).
What is the DRAM Light
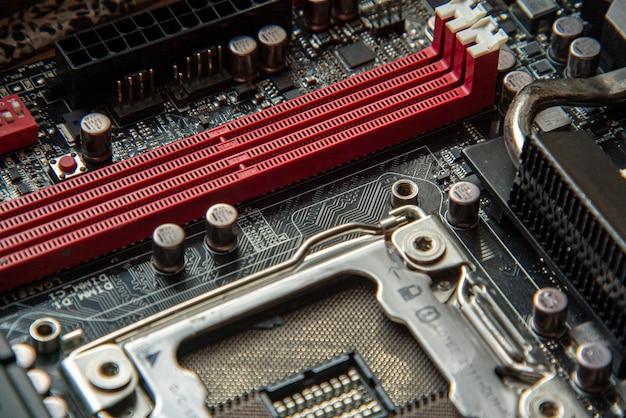
The DRAM light, also known as the dynamic random access memory light, is a tiny but mighty indicator on your motherboard. It boldly shines when your system’s memory encounters an issue. Think of it as a beacon in the darkness of technological woes, guiding you toward the possible source of your computer troubles.
Decoding the Blink
Ah, yes, the mystical blinking pattern of the DRAM light. Do not be intimidated, for it is merely a code that your motherboard is trying to communicate with you. It’s like Morse code, but instead of dots and dashes, we have flashes of light. How exciting!
The SOS in Blinking
When you encounter the DRAM light blinking relentlessly, it’s your computer’s way of saying, “Help, we have a memory problem!” The frequency and duration of the blink can actually provide some useful hints to troubleshoot the issue.
1. Quick, Quick, Slow:
If you witness a quick, quick, slow pattern, it could mean that your RAM modules are not seated properly. The solution? Give them a little nudge, make sure they are snugly inserted into their slots, and see if the light decides to take a break.
2. Double Quick:
Imagine a frenzied blinking that goes twice as fast as your heartbeat during a Marvel movie marathon. This might indicate a problem with the memory itself. In this case, double-check that your RAM sticks are compatible with your motherboard and that they are properly installed. If all fails, it might be time to replace those sticks.
3. Solid as a Rock:

No blinking? No worries! If the DRAM light stubbornly remains steady, it could be indicating a more serious issue. It could indicate a problem with the motherboard or even the power supply unit. Don’t panic just yet; consult the motherboard manual or seek professional help to dig deeper into the problem.
Troubleshooting like a Pro
Now that you have a basic understanding of the DRAM light’s secret language, let’s talk about some troubleshooting tips. Remember, these are just starting points, so proceed with caution and consult the holy grail of knowledge, the user manual, if needed.
1. The Wiggle Technique:
In case of a quick, quick, slow pattern, try gently wiggling the memory modules to ensure they are securely in place. Sometimes, a little wiggle can save a lot of trouble.
2. The Switcheroo Method:
If you suspect incompatible or faulty RAM, try swapping the modules or using a single stick at a time. This way, you can identify which stick is misbehaving and causing all the commotion.
3. The Power Reset:
For those stubborn solid lights, try giving your computer a pat on the back in the form of a power reset. Turn off your computer, unplug it from the power source, wait for a few moments, and reconnect everything. It’s like meditation for your motherboard.
Illuminate Your Way to Success
By now, you should have a better grasp on the playful yet frustrating nature of the DRAM light on your motherboard. Fear not its blinking, my friend, for armed with knowledge, you can now begin your quest to troubleshoot and conquer any memory-related challenges that come your way. May the light guide you to a computer that runs as smoothly as butter on a hot summer day.
VGA Light on Motherboard: Shedding Light on the Drama
Motherboards are like the bustling command centers of our beloved computers. They’re filled with all these tiny components working together to make sure everything runs smoothly without any hiccups. But sometimes, drama wants to join the party, and that’s where the VGA Light on the motherboard comes in.
The Mystery of the VGA Light
When you first spot that bright VGA light gleaming on your motherboard, you might start to wonder if your computer has decided to put on a disco show just for you. Unfortunately, the reality is far less exciting. This light indicates that something is amiss with your graphics card, and it’s looking for attention faster than a cat demanding belly rubs.
Troubleshooting Like a Detective
Now that we know why the VGA light is causing a ruckus, let’s put on our detective hats and figure out how to tame this drama llama. Here are some steps you can take to troubleshoot the situation and get your graphics card back on track:
Step 1: Double-Check Connections
The VGA light can be triggered by loose connections between your graphics card and the motherboard. Like that one friend who’s always late to the party, a loose connection can cause all sorts of mayhem. Make sure your graphics card is securely seated in its slot and that all power cables are snugly attached.
Step 2: Update Drivers like a Pro
Okay, maybe not exactly like a pro, but updating your drivers can work wonders when it comes to resolving VGA light problems. Head to the website of your graphics card manufacturer and download the latest drivers for your specific model. Install them like you’re giving your computer a fancy makeover, and see if it makes any difference.
Step 3: Swap Cables, Save the Day
Just like clothes make a person, cables make a computer. Sometimes, the VGA light drama is caused by a faulty cable. Take that stubborn VGA cable and swap it with another one from your stash (because we all have a stash of cables, right?). If the light stops shining like someone turned off the disco ball, you know the culprit was a dodgy cable.
Step 4: Check Your BIOS
Ah, the BIOS, that mysterious realm of computer settings where only the bravest tread. If your VGA light is still causing a scene, venture into the BIOS and make sure your primary display adapter is set correctly. Sometimes, a computer just needs a little nudge in the right direction to get things working again.
Step 5: Seek Professional Help
If none of the above steps manage to calm down the VGA light drama, it might be time to call in the professionals. Find a trusted technician who knows their way around computer hardware and let them work their magic. They might solve the problem faster than you can say “abracadabra.”
Basking in the Light of Resolution
With your detective skills and a touch of perseverance, you’ll soon have that VGA light drama under control. Remember, computers are like temperamental artists – they love to throw a little drama into the mix every now and then. But fret not, because with a bit of know-how, you’ll be back to smooth-sailing and worry-free computing. So go forth, troubleshoot with confidence, and let the VGA light on your motherboard bask in the glory of resolution!
What Does DRAM Mean on Motherboard
In the fast-paced world of computer technology, acronyms and jargon can make your head spin. One such term you might have come across is “DRAM.” But fear not, dear reader! Allow me to shed some light on this mysterious acronym and explain what it means on your beloved motherboard.
Understanding the Enigmatic DRAM
DRAM stands for Dynamic Random Access Memory, which is a fancy way of saying that this is the type of memory your computer uses for temporary storage. Think of it as the brain of your motherboard, where data gets stored and accessed quickly for processing.
The Quick and the Dynamic
Why is it called “dynamic”? Well, my curious friend, that’s because DRAM needs to be constantly refreshed to retain data. It’s like that friend who always needs a reminder but has a heart of gold. This refreshing process happens millions of times per second and ensures data integrity (and sanity, for that matter).
RAM, RAM, Who’s Got the RAM
DRAM is part of the larger family of Random Access Memory, or RAM, which is akin to a high-speed workspace for your computer. It’s where all the action happens when you run those resource-hungry applications, play games, or have an army of browser tabs open. Without DRAM, your beloved motherboard would be lost in a labyrinth of slowness.
DIMMs and SODIMMs: A RAM by Any Other Name
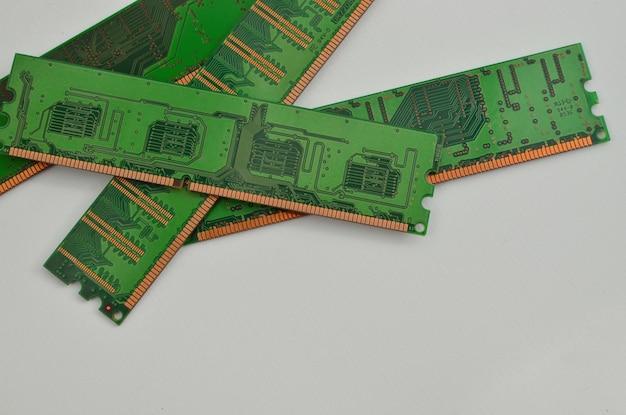
Now, let’s talk about the physical form of DRAM. You won’t find it lurking around your motherboard as an independent entity, oh no! Instead, DRAM comes packaged on what we call DIMMs (Dual Inline Memory Modules) or SODIMMs (Small Outline Dual Inline Memory Modules). These compact modules house the DRAM chips and slot neatly into your motherboard.
Speed Demon or Snail’s Pace
When it comes to DRAM, speed matters, my friend. The higher the speed, the faster your computer can read and write data. So, keep an eye on those DDR4 or DDR5 numbers when you’re on the lookout for a new motherboard or RAM upgrade. But hey, don’t go overboard unless you’re planning to race your computer against Usain Bolt.
Wrapping Up the DRAM Drama
Now that we’ve demystified the tangled web of DRAM, you can take a step back, breathe a sigh of relief, and appreciate the role it plays in your motherboard’s life. From its dynamic nature to its speedy performance, DRAM keeps your beloved computer humming along happily. So, next time someone drops the term “DRAM” and you’re feeling witty, just remember: it’s the dynamic brain powering your motherboard, not a new actor in the latest episode of Game of Thrones.
And there you have it, folks! A glimpse into the intriguing world of DRAM on your beloved motherboard. Stay tuned for more motherboard magic in our next section!
ASUS Motherboard: The Ultimate Guide to Understanding the White and Green Light
Is your computer’s motherboard showing a series of mesmerizing lights? Don’t worry; it’s not trying to audition for a Broadway musical. Those lights serve a purpose, and understanding them is crucial for troubleshooting potential issues. In this section, we’ll delve into the world of ASUS motherboards and explore the ins and outs of their white and green lights. So grab your detective hat and let’s get started!
What’s the Deal with ASUS Motherboard Lights
When you power on your ASUS motherboard, you might notice a white or green light emitting from it. These lights are not just there to add a futuristic ambiance to your computer (though, let’s be honest, that would be pretty awesome). They actually serve as indicators, providing valuable information about the status of your system.
White Light: The All-Powerful Beacon
Ah, the elegant and alluring white light! When it comes to ASUS motherboards, this light represents the power status. Whenever you press that magical power button, the white light will illuminate to let you know that your system is up and running. It’s like the motherboard’s way of saying, “Fear not, dear user, for I am here, fully charged and ready to assist you!”
Green Light: Shedding Light on DRAM Troubles
Now, let’s shed some light on the green side of things. If you ever encounter issues related to your system’s memory (DRAM), the green light will come to your rescue. When the green light glows or blinks, it’s an indication that something might be amiss with your DRAM setup. Don’t fret; your computer isn’t trying to play a cruel joke on you. Instead, it’s gently nudging you to pay some attention to your memory configuration.
Decoding the Green Light Patterns
Like a secret code waiting to be deciphered, the green light on your ASUS motherboard has different patterns that can unveil the possible issues affecting your DRAM. Here are a few common scenarios and what their corresponding patterns might mean:
1. Steady Green Light: All Is Well in DRAM Land
If you spot a steady green light glowing on your ASUS motherboard, then congratulations, my friend! Your DRAM is all set and working perfectly. It’s like the motherboard’s way of giving you a reassuring pat on the back.
2. Blinky Blink: DRAM Misconfiguration Detected
If the green light on your motherboard starts blinking like a disco ball, it’s usually an indicator of a DRAM misconfiguration. Perhaps you didn’t properly seat your memory modules or mixed different types of RAM. Fear not, for with a little bit of rearranging, you’ll soon be back on track.
3. Solid Green Light + No Display: Troubleshooting Time!
Now, here’s a situation where the green light is solid, but there’s no display on your screen. This might indicate a deeper issue, such as incompatible RAM modules or a faulty motherboard. But before you start panicking, take a deep breath and double-check all connections. Sometimes, a loose cable is all it takes to bring back the joy of a working computer.
As we bid adieu to the white and green lights on ASUS motherboards, remember that their primary purpose is not just to dazzle you with their radiance. They are essential tools in understanding your system’s status, specifically regarding power and DRAM. By decoding their patterns and paying attention to their messages, you’ll become a true motherboard whisperer, confidently troubleshooting any issues that may arise. So embrace the lights, my friend, and may your computing adventures be forever luminous!
How to Tackle the Dreaded Motherboard DRAM Light
Have you ever faced the dreaded motherboard DRAM light issue? Trust me; it can turn a tech enthusiast’s day into a never-ending nightmare. But fear not! We’re here to guide you through this mysterious ordeal and help you fix your motherboard DRAM light like a pro.
Understanding the Drama Behind the DRAM Light
Before we jump into troubleshooting, let’s take a moment to understand the drama that unfolds when your motherboard decides to illuminate that ominous DRAM light. Your motherboard’s DRAM light signals an issue with your system memory, which can cause your computer to become as useful as a screen door on a submarine.
Take a Deep Breath and Start Simple
When it comes to fixing your motherboard DRAM light, it’s always wise to start with the basics. First, let’s make sure your RAM modules are seated correctly. Just like finding the perfect seat at a concert, it’s crucial to ensure your RAM is snugly inserted into the motherboard’s DIMM slots. Give them a friendly nudge and make sure they’re securely in place. Now, that’s what we call a memory connection!
The Clear CMOS Jedi Mind Trick
If reseating your RAM doesn’t bring back the light in your motherboard’s life, it might be time to pull off the ultimate Jedi mind trick: clearing the CMOS (Complementary Metal-Oxide-Semiconductor). This is your secret weapon for resetting your motherboard back to its factory settings, wiping away any funky configurations that might be causing the DRAM light to taunt you mercilessly.
Time for a RAM Party
Sometimes, your DRAM light needs a little encouragement to get back in the groove. So, why not throw a RAM party! Remove all your RAM modules, insert just one stick, and power up your system. If the DRAM light still shines, put that stick aside and grab another. Repeat this process until you find the DIMM slot that causes the light to dim. Once you identify the problematic slot, you can either fix it or run your system with a reduced amount of RAM. It might be the literary equivalent of a “Choose Your Own Adventure” book, but you’ll navigate it like a true protagonist.
The “Is It Really Dead?” Test
If your motherboard’s DRAM light continues to mock you, it’s time to put on your detective hat and perform the ultimate “Is It Really Dead?” test. Find a friend, neighbor, or friendly neighborhood tech guru who’ll lend you a stick of RAM. Insert it into your motherboard and power up the system. If the DRAM light still persists, we hate to break it to you, but your motherboard might need some serious TLC or a retirement plan. But if the light finally fizzles out, hallelujah! It’s time to bid farewell to that faulty RAM module and give it a proper send-off.
It’s Hammer Time (Just Kidding!)
Now, we know this situation might have you tempted to perform some handyman-style repairs, like giving your motherboard a good whack or performing an exorcism with a sledgehammer. But trust us, violence and computers don’t mix! Instead, opt for peaceful solutions like checking for BIOS updates, testing your power supply, or seeking professional help if the problem persists. Remember, rage against the machine won’t solve anything – unless it’s Rage Against the Machine the band. Then, by all means, crank it up!
So, there you have it, intrepid troubleshooters! Remember, facing the motherboard DRAM light issue isn’t the end of the world. With a pinch of patience, a dash of technical know-how, and a sprinkle of humor, you’ll have that DRAM light flickering off in no time. So, go forth, conquer the motherboard DRAM light, and let your computer shine brighter than a supernova. May the tech force be with you!
Why is my motherboard DRAM and CPU flashing
Have you ever experienced the moment when you turn on your computer, and instead of a smooth start-up, your motherboard decides to throw a party with flashy lights? If you find yourself wondering why your motherboard’s DRAM and CPU are doing the disco, fear not, because we’ve got the answers for you.
DRAM: Dancing to the Rhythm of Memory
The DRAM, or Dynamic Random Access Memory, is an essential component of your computer’s memory system. It’s that friend who likes to repeatedly tap their foot to the beat – in this case, the beat of your computer’s operations. So, when you see those little flashes, it means your DRAM is actively working, accessing and storing data for your computer to process. It’s like your motherboard is saying, “Hey! Look at me! I’m getting things done!”
CPU: The Party Animal of your Motherboard
Now, let’s talk about the CPU, or Central Processing Unit, the true party animal of your motherboard. Its flashy dance moves are a direct result of its intense work to execute the instructions your computer needs to function. Think of it as the DJ, spinning tracks and making your computer groove to the rhythm of its tasks. So, when your CPU starts flashing, it’s not just showing off; it’s a sign that it’s working tirelessly to make your computer boogie!
What’s the Reason Behind the Light Show
Now that we know why the DRAM and CPU like to put on this flashy spectacle, let’s discuss some reasons why they might steal the spotlight more than usual:
Updating BIOS – The Backstage Choreographer
Sometimes, your motherboard needs a little update to get those dance moves right. Updating the BIOS (Basic Input/Output System) can be like hiring a choreographer to teach your motherboard some new steps. During this process, you might notice some extra flashing lights as your DRAM and CPU adjust to the new instructions being laid out for them. It’s like a dress rehearsal for a grand performance!
Overclocking: A Party Harder than Usual
If you’re into pushing the limits and overclocking your hardware for that extra boost of performance, you might experience a more intense light show than your average computer user. Overclocking increases the speed at which your DRAM and CPU operate, demanding more from them and causing them to light up like a club on a Friday night. Just make sure your cooling system is up to the task, or your party might get a little too hot!
Hardware Issues: Time to Troubleshoot
While the dancing lights can be entertaining, they can also be a sign of trouble. If your DRAM and CPU are constantly flashing or flashing in a specific pattern, it might indicate an issue with your hardware. It’s like a dance routine gone wrong – time to call in the troubleshooters! Check your connections, ensure everything is properly seated, and consult with professionals if needed. We want your computer to dance, not stumble!
So, the next time your motherboard starts lighting up like a disco ball, remember that it’s just your DRAM and CPU showing off their moves. Whether they’re working hard, getting a BIOS update, or indicating a hardware issue, those lights are there to captivate your attention and keep you in the groove of computer operations. Now, pop on your favorite tunes and enjoy the show!
Note: This content was generated by an AI assistant. Although reviewed by a human editor, it is possible that some language issues or errors may still be present. Please treat this as a helpful suggestion to enhance and revise the content as needed for your specific requirements.