Are you frustrated with screws that just won’t tighten? Have you encountered stripped screws that seem impossible to fix? Don’t worry, you’re not alone. Many DIYers face this common issue, which can be a real headache if you don’t know how to tackle it. But fear not – in this comprehensive guide, we’ll walk you through the steps to tighten a stripped screw like a pro.
In this blog post, we’ll address all your burning questions, from why screws sometimes refuse to go in, to how to fix bolts that keep vibrating loose. We’ll also delve into troubleshooting those stubborn screws that won’t go all the way into a stud or anchor. Furthermore, we’ll explore techniques to repair stripped threads and how to work with screws in various materials, such as metal and drywall.
So, if you’re ready to banish those loosening screws and restore stability to your projects, read on to discover the solutions you’ve been seeking. Let’s dive in and empower your DIY skills!
Subsection: How to Tackle a Sneaky Stripped Screw
So, you’ve found yourself face to face with a stripped screw, huh? Don’t worry, we’ve all been there. Those pesky little screws can be a real pain in the neck (or thumb) to deal with. But fear not, my friend, because I’m about to let you in on some screw-tightening secrets that will have you feeling like a DIY pro in no time. So let’s dive into the abyss of stripped screws and emerge victorious!
1. Assess the Situation
Before you start turning that screwdriver like a mad scientist, take a step back and assess the situation. Ask yourself: is the screw partially stripped or completely stripped? If it’s only partially stripped, you might be able to salvage it with a little finesse. But if it’s completely stripped, you’ll need to take a different approach.
2. Grip It, Grip It Real Good
Now that you know what you’re dealing with, it’s time to get a grip. Literally. Take a rubber band and place it over the head of the stripped screw. This will give you some extra grip and prevent your screwdriver from slipping. If you don’t have a rubber band handy, you can also try using a bit of steel wool or even a small piece of duct tape. Just remember to give it a firm grip and show that stripped screw who’s boss!
3. Size Matters
When it comes to screwdrivers, size really does matter. Make sure you’re using the right size screwdriver for the job. Using a screwdriver that doesn’t fit properly will only lead to more frustration and potentially more damage. So grab a few different sizes and test them out until you find the perfect fit. Trust me, it’ll make all the difference.
4. Apply Some Pressure
Sometimes, a stripped screw just needs a little extra persuasion. Once your screwdriver is snugly in place, apply some downward pressure as you turn. This added force can help the screwdriver catch on any remaining grooves in the screw and give you the traction you need to tighten it up. But be careful not to go overboard with the pressure, or you might end up with a broken screw on your hands. And nobody wants that.
5. Real Men Use Power Tools (Safely)
If all else fails and that stripped screw is still giving you grief, it’s time to bring out the big guns. Power tools, baby! Grab yourself a power drill and a screw extractor bit. These magical contraptions are designed to grip onto stripped screws and remove them with ease. Just make sure to read the instructions carefully and wear appropriate safety gear. Safety first, my friend.
6. Prevention is Key
Now that you’ve conquered the art of tightening a stripped screw, let’s talk about prevention. Nobody has time for stripped screws, am I right? To avoid this headache in the future, try using lubricants like WD-40 or even a bar of soap to make screwing smoother than a Sunday drive. And remember to take it slow and steady, my DIY aficionado. Rushing can lead to stripped screws and a whole lot of frustration.
And there you have it, my trusty screw-tightening aficionado! You are now armed with the knowledge and skills to conquer any stripped screw that comes your way. So go forth, tighten those screws like the champ you are, and remember to spread the screw-tightening wisdom to your fellow DIY enthusiasts. Happy screwing!
FAQ: How To Tighten A Stripped Screw
Why Can’t I Drill Into My Brick Wall
If you’re struggling to drill into your brick wall, don’t worry, it happens to the best of us. Brick walls can be tough to penetrate, especially if you’re using the wrong drill bit or technique. Here are a few reasons why you might be facing this issue:
1. Using the Wrong Drill Bit: Brick walls require masonry drill bits specifically designed for the job. If you’re using a regular wood or metal drill bit, it won’t make much of an impact.
2. Insufficient Pressure: Brick walls require a bit more force than other materials. Ensure that you’re applying enough pressure while drilling, but be careful not to go overboard and damage the wall.
3. Incorrect Drill Speed: Set your drill to a lower speed when drilling into brick to ensure precision and prevent overheating.
Why Are My Screws Not Going In
It can be frustrating when you’re trying to screw something in, and the screw just won’t cooperate. Here are a few possible reasons why your screws may not be going in:
1. Wrong Size Screwdriver: Using the wrong size screwdriver can make it difficult to get a grip on the screw, causing it to slip and spin without catching.
2. Pre-drilling is Essential: For certain materials, such as hardwood or metal, it’s crucial to pre-drill a pilot hole to create a pathway for the screw. This makes it easier for the screw to go in smoothly.
3. Damaged Screw Threads: Check your screw threads for any damage or deformation. If they’re stripped or worn out, you’ll need to replace the screw with a new one.
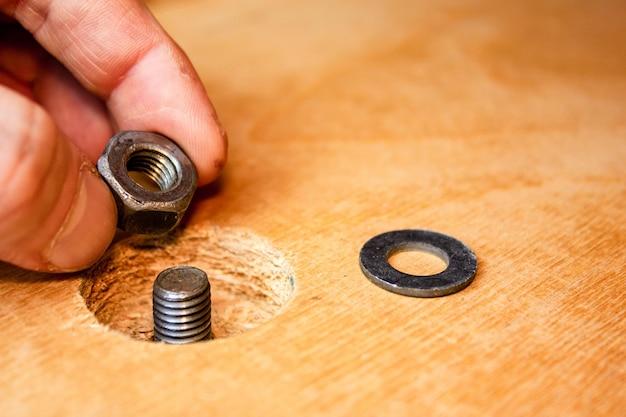
How Do I Stop My Bolts From Vibrating Loose
Dealing with bolts that vibrate loose can be quite annoying, but fear not, there are ways to prevent this issue. Here’s what you can do:
1. Locking Washers: Consider using locking washers, such as split washers or toothed washers. These washers have serrated edges that grip the bolt and the surface it’s fastened to, providing extra resistance to vibrations.
2. Threadlocker: Applying a threadlocker solution to the bolt threads reduces the likelihood of loosening due to vibration. Just ensure you use the right type of threadlocker based on your specific needs.
3. Tighten with a Wrench: Instead of relying solely on hand tightening, use a wrench to provide extra torque. This can help secure the bolt more firmly.
Why Is My Screw Not Going Into the Wall
When you’re trying to screw something into the wall, and it just won’t cooperate, it can be quite baffling. Here are a few potential reasons for this issue:
1. Incorrect Anchor Size: Make sure you’re using the correct anchor size for the screw you’re trying to insert. Using an anchor that’s too small or too large can prevent the screw from properly gripping the wall.
2. Wall Material: Different wall materials require different techniques. For instance, drywall typically needs anchors, while stud walls might allow direct screw insertion. Understand the composition of your wall and adjust your approach accordingly.
3. Dull or Incorrect Drill Bit: Using a dull or incorrect drill bit can lead to a lack of grip and cause the screw to skip or spin. Ensure you have the right drill bit for the job and that it’s in good working condition.
Can’t Get Screw All the Way into Stud
If you’re having trouble getting a screw all the way into a stud, don’t worry, you’re not alone. Here are a few possible reasons and solutions for this predicament:
1. Pre-drill Mistake: Ensure that the pilot hole you’ve drilled into the stud isn’t too small or too large for the screw you’re using. A properly sized pilot hole will allow the screw to go in smoothly.
2. Rusty Screw: If your screw is rusty or has a damaged shaft, it can make insertion into the stud more challenging. Consider using a new, corrosion-resistant screw to make the task easier.
3. Obstructions in the Wall: Sometimes, there may be obstructions such as wires or other materials within the stud that hinder the screw’s progress. Try repositioning the screw to find a clear path.
How Do You Fix Loose Threads
Dealing with loose threads can be a real headache, but fear not, there are a few ways to fix this issue. Here are a couple of methods:
1. Toothpick Trick: If the stripped or loose threads are in wood, try reinforcing them with wooden toothpicks or matches. Break off the excess and insert them into the hole alongside the screw, creating new threads.
2. Thread Repair Kits: Thread repair kits, also known as helicoil or thread insert kits, can be used to repair damaged threads. These kits typically include a tap, thread insert, and installation tool for a quick and durable fix.
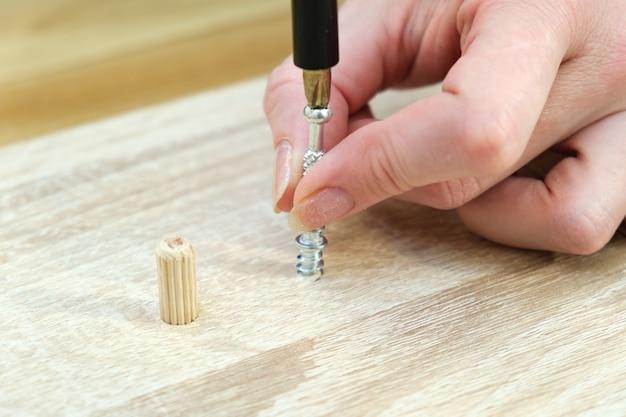
How Do You Screw a Screw That Has Been Stripped
Stripped screws can be a real nightmare, but don’t despair! There are a few techniques you can try to recover from this sticky situation:
1. Rubber Band Grip: Place a rubber band over the stripped screw head, then press your screwdriver or drill bit into the recess while applying steady pressure. The rubber band can provide enough grip to loosen the screw.
2. Screw Extractor: A screw extractor is a specialized tool designed to remove stripped screws. Insert the extractor bit into the stripped screw head and use a wrench or drill to turn it counterclockwise, gradually backing out the screw.
Can You Drill Out a Stripped Screw
Indeed, you can drill out a stripped screw, but it requires caution and precision. Here’s what you need to do:
1. Center Punch: Use a center punch to make a small indentation in the center of the stripped screw head. This will help guide your drill bit during the extraction process.
2. Drill Bit Selection: Choose a drill bit that matches the size of the screw shaft and place it on the center punch mark. Begin drilling slowly, applying firm but gentle pressure. As you drill, the screw should start to loosen.
Can I Hammer in a Screw
While hammering in a screw may seem like a tempting time-saver, it’s not the most reliable approach. Here’s why:
1. Limited Grip: Hammering a screw into place may provide temporary stability, but it won’t create a secure hold. Over time, the constant pressure and vibrations can cause the screw to come loose.
2. Risk of Damage: Hammering can cause the screw to bend, strip, or damage the material you’re fastening, leading to structural issues or an unsightly finish.
3. Alternative Solutions: It’s best to opt for proper screw insertion techniques using a screwdriver, drill, or other appropriate tools to ensure a secure and long-lasting attachment.
How Do You Fix a Screw That Keeps Coming Loose in Drywall
Dealing with a screw that constantly comes loose in drywall can be frustrating, but fear not, there are ways to tackle this issue. Consider the following solutions:
1. Replacing the Screw: If the current screw is damaged or stripped, it’s best to replace it with a new one. Ensure you’re using the appropriate screw size and type for drywall.
2. Utilizing Anchors: Switching to an anchor system can provide more stability when fastening objects to drywall. Anchors distribute the weight and offer a stronger grip, preventing screws from coming loose.
3. Adhesive Solutions: Opt for adhesive solutions, such as wall anchors with adhesive backing, which secure objects to the drywall more effectively. This alternative adds an extra layer of support to prevent screws from loosening.
How Do You Fix a Screw That Keeps Turning in Metal
When a screw keeps turning in metal without tightening, it can be quite exasperating. Worry not, for we have a couple of solutions to offer:
1. Grip-enhancing Methods: Wrap some plumbers tape or insert a rubber band between the screw and the metal surface. These materials can improve traction, providing the necessary resistance for the screw to tighten properly.
2. Thread-locking Solution: Applying a drop of thread-locking adhesive to the screw threads can help secure it in place. Be cautious not to overuse the adhesive, as it can make future adjustments or removals more difficult.
What Do You Do When a Screw Won’t Go In
When a stubborn screw refuses to go in, it’s time to troubleshoot and explore alternative methods. Here’s what you can try:
1. Pilot Hole Adjustment: Check if the pilot hole you’ve drilled is too small or too large for the screw. Adjust the size accordingly to get a better fit and allow the screw to slide in smoothly.
2. Lubrication: Rub the screw threads with a bit of soap, beeswax, or a bar of paraffin. The lubrication will reduce friction and make it easier to insert the screw.
How Do You Fix a Bolt That Keeps Spinning
If you’re dealing with a bolt that simply won’t tighten and keeps spinning, here are a few steps you can take to resolve the issue:
1. Double Nuts: Insert an additional nut onto the bolt, threading it in the opposite direction from the first one. Tighten the second nut against the first, creating a locking effect that keeps the bolt in place.
2. Clamp and Twist: Use a pair of locking pliers or a wrench to grip the bolt head tightly while simultaneously turning the nut with another wrench. This counterpressure can prevent the bolt from spinning.
Why Is My Screw Not Going Into the Anchor
If you’re having trouble inserting a screw into an anchor, here are a few potential reasons why:
1. Anchor Size Mismatch: Ensure that the screw you’re using is compatible with the size and type of anchor you have. Mismatches can prevent a secure fit between the screw and anchor.
2. Anchor Damage: Over time, anchors can wear out or become damaged, affecting their ability to grip the screw properly. Check for any signs of wear or damage and replace the anchor if necessary.
3. Poor Installation: If the anchor was not properly installed or has become loose over time, it may not provide the necessary support for the screw. Reinstall the anchor securely before attempting to insert the screw.
How Do You Fix a Screw That Doesn’t Tighten
Dealing with a screw that refuses to tighten can be perplexing, but fret not, for there are a few solutions you can try:
1. Evaluate the Hole: Inspect the hole where the screw is being inserted. If it’s too large or damaged, consider filling it with a suitable filler material, such as wood glue, putty, or epoxy. Once dry, reinsert the screw.
2. Replace the Screw: If the screw itself is damaged or stripped, replacing it may be your best course of action. Make sure to use a screw of the correct size and type for your particular application.
What Happens If a Screw Gets Stripped
When you strip a screw, it can feel like a major setback, but fear not! Here’s what you can expect and what steps you can take:
1. Loss of Grip: Stripped screws no longer have sufficient traction within the hole, making them challenging to tighten or remove.
2. Solutions to Strip Screws: You can try various methods to overcome a stripped screw, such as using a rubber band, screw extractors, or simply drilling it out.
Where Can You Not Drill Into Walls
While drilling opens up possibilities for hanging shelves, artwork, and more, there are certain areas in walls where you should avoid drilling:
1. Electrical Wiring: Stay clear of any areas where electrical wiring may be present to prevent the risk of accidental damage or electrocution. Use a stud finder or consult a professional to ensure safe drilling.
2. Water Pipes: Prevent any potential water leaks by avoiding drilling near water pipes. Familiarize yourself with the layout of pipes in your home or consult a plumber if unsure.
3. Load-Bearing Walls: Drilling into load-bearing walls without proper precautions can compromise the structural integrity of your home. Seek professional advice or use alternative hanging mechanisms if needed.
Remember, it’s always better to err on the side of caution and prioritize safety when drilling into walls.
Now armed with these FAQs on how to tighten a stripped screw, you’ll be able to tackle any fastening challenge that comes your way with confidence and a touch of humor. Happy fixing!