Are you dealing with a cracked sewer pipe or a faulty floor drain in your basement? If so, you’re not alone. Many homeowners face the challenge of replacing drain pipes in their basements, and it can be a daunting task. In this comprehensive guide, we’ll walk you through everything you need to know about replacing drain pipes in your basement, from understanding different types of floor drains to the step-by-step process of replacing a pipe under concrete. So grab your tools and let’s get started!
Replacing Drain Pipe in Basement: A DIY Adventure
Is Your Basement Feeling “Drained”? Time to Roll Up Those Sleeves!
Hey there, basement dwellers! If you’re anything like me, the thought of replacing a drain pipe in your basement might make you want to hide in a hole. But fear not, because I’m here to guide you through this DIY adventure with a few laughs along the way.
Why Fixing Your Drain Pipe is No Laughing Matter
Before we dive in (pun intended), let’s understand why replacing a drain pipe in your basement is not something you should put off. Picture this: you’re chilling in your cozy basement den, watching the latest episode of your favorite show, when suddenly, a mysterious odor starts wafting through the air. Cue dramatic horror movie music.
The Unfortunate Consequences of an Inefficient Drain Pipe
A faulty drain pipe can turn your basement into a stinky swamp, filled with mysterious leaks and unwanted water. Not only does this put a damper on your Netflix and chill time, but it can also lead to more serious issues like mold growth and damage to your precious belongings. Nobody wants their comic book collection turning into a soggy mess!
Gather Your Tools and Channel Your Inner Plumber
Alright, enough with the scary stories. It’s time to put on your DIY hat (or helmet, if you’re feeling extra cautious) and get to work! Here’s a list of the things you’ll need:
1. The Usual Suspects – Tools
- A sturdy wrench
- A pipe cutter or hacksaw
- Thread seal tape
- A bucket (for any unexpected waterworks)
2. Safety First – Gear Up
- Goggles (let’s keep those eyes safe, folks)
- Rubber gloves (no need to get your hands dirty)
Step-by-Step: Drain Pipe Replacement Extravaganza
Now that we’re suited up and armed with the right tools, let’s get this show on the road! Follow these steps to tackle that pesky drain pipe like a pro:
1. Drain the Drama
Turn off the water supply and empty the basement of any H2O surprises. Note: If you’re living in a particularly rainy area, you might want to wait for a dry spell before diving in.
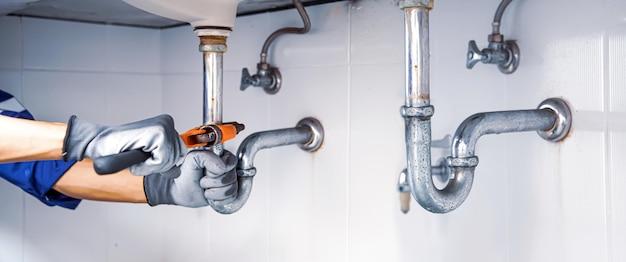
2. Hulk Smash, I Mean, Remove the Old Pipe
Get your wrench and unleash your inner superhero! Remove the old pipe by loosening the connections and carefully detaching it from the surrounding fixtures. Flex those muscles!
3. Measure Twice, Cut Once
Using your pipe cutter or hacksaw, measure and cut the new pipe to fit snugly into place. Don’t worry, precision is the name of the game here!
4. Get Tightly Sealed
Wrap the threads of your new pipe with the thread seal tape. This will ensure a watertight connection, preventing any sneaky leaks from crashing your basement party.
5. Time for a Reunion: Installing the New Pipe
Connect the new pipe to the existing fixtures, making sure everything is tightly secured. If it feels a bit like playing with Legos, you’re on the right track.
Breathe Easy, Basement Heroes!
Congratulations, you’ve successfully conquered the realm of basement plumbing! Give yourself a pat on the back and revel in the sweet smell of victory (and a fresh basement). Remember, even if you stumble along the way, a little DIY humor and determination can turn a daunting task into a triumphant adventure.
So, go forth, my fellow DIY enthusiasts, and let’s keep those basement drain pipes flowing like a river (minus the flood, of course). Happy fixing!
Basement Sewer Trap Cover
What is a Basement Sewer Trap Cover
If you’re a homeowner with a basement, you’re probably familiar with the basement sewer trap cover. This inconspicuous, yet crucial component helps ensure that no unwanted visitors find their way into your basement through the drainpipe. Think of it as the ultimate bouncer for your home’s plumbing system.
Why is it Important
The basement sewer trap cover plays a vital role in preventing any unwanted surprises from entering your basement. Imagine waking up one day to find a family of raccoons having a pool party in your basement. Not exactly the kind of party you want to host, right?
By securely covering the basement sewer trap, you’re ensuring that critters, pests, and even sewer gases stay out of your basement. It also prevents any accidental items (or worse, one of your precious belongings) from finding their way down the drain and causing a clog in your plumbing system.
Types of Basement Sewer Trap Covers
-
Metal Grid Covers: These sturdy covers are like a genius combination of a trampoline and a filter. They let water flow through while keeping unwanted debris, small animals, and errant Lego pieces out of your basement.
-
Plastic Caps: If you want a lightweight, yet effective option, plastic caps are the way to go. They cover the trap snugly to prevent any unwanted intrusions.
-
Customizable Covers: For those with a flair for personalization, there are customizable basement sewer trap covers available. You can have your cover engraved with your family name, a witty quote, or even a customized image. Talk about making a statement!
How to Maintain Your Basement Sewer Trap Cover
To keep your basement sewer trap cover working efficiently, it’s important to conduct regular maintenance checks. Here are a few simple steps you can take:
- Clean the cover: Remove any debris, leaves, or dirt that may have accumulated on the cover. This can be done with a brush or a gentle spray of water.
- Inspect for damage: Make sure there are no cracks or holes in the cover that could allow unwanted guests to squeeze through. If you notice any damage, it’s best to replace the cover promptly.
- Check for proper fit: Ensure that the cover fits securely in place and that there are no gaps for critters to sneak through.
So, the basement sewer trap cover may not be the most glamorous topic, but it’s an essential part of keeping your basement critter-free and your plumbing system functioning smoothly. With the right cover in place, you can rest easy knowing that your basement is protected from unexpected visitors and potential plumbing mishaps.
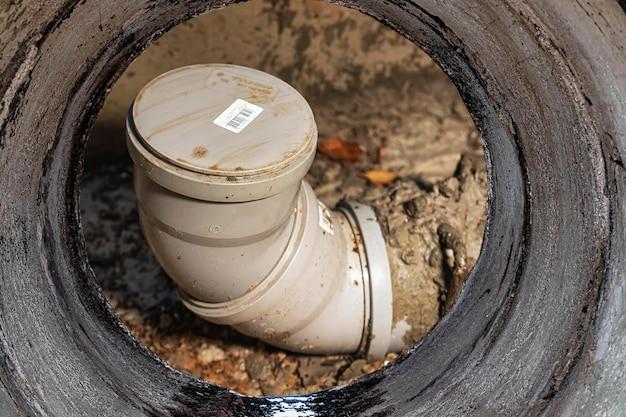
Cracked Sewer Pipe in Basement
If you’ve discovered a cracked sewer pipe in your basement, don’t panic. It may seem like a stinky situation, but fear not! With a little knowledge and a dash of humor, you’ll be able to tackle this problem head-on (or pipe-on). Let’s dive into the world of cracked sewer pipes and find out what you can do to fix the crrrrr-appy situation.
The Cracked Conundrum: What Causes Those Pesky Cracks
Sewer pipes cracking in basements is a common woe for many homeowners. These pipes are subject to all sorts of stresses and strains, and sometimes they just can’t handle the load. So, what causes these cracked conundrums? Well, let me break it down for you (no pun intended).
-
Time Takes its Toll: Over time, sewer pipes can become brittle and weakened due to age. Just like us, they start to show signs of wear and tear. So, don’t be too hard on your pipes – they’re doing their best!
-
Tree Troubles: Sometimes, trees can be a pain in the basement. Tree roots are notorious for infiltrating sewer pipes and causing cracks. It’s like they’re playing “hide and seek” but with your plumbing. Sneaky little devils!
The Smelly Truth: Signs and Symptoms of a Cracked Pipe
So, how can you tell if you have a cracked sewer pipe? Your nose may give you a clue! If you detect any funky odors wafting up from your basement, it’s a good indicator that something is amiss. But wait, there’s more!
-
Water Woes: Is water pooling around your basement floor? Are your drains slow or clogged? These can be signs of a cracked sewer pipe, too. It’s like your basement is throwing a little plumbing parade – and nobody wants to be invited to that!
-
Uninvited Guests: Have you noticed an increase in pests around the house? Cracked sewer pipes can attract all sorts of critters, from rats to roaches. It’s like a party for pests, and you definitely didn’t send them an invitation!
The Fixer Upper: How to Repair a Cracked Sewer Pipe
Now that we’ve uncovered the problem, it’s time to roll up our sleeves (and hold our nose) to fix it. There are a few options available, depending on the severity of the crack.
-
Pipe Patching: For smaller cracks, pipe patching can be a quick and easy fix. Think of it as a Band-Aid for your pipes – a temporary solution until you can tackle the root of the problem. But hey, sometimes a Band-Aid is all you need, right?
-
Pipe Replacement: If the crack is extensive or recurring, you may need to consider pipe replacement. This is a more involved process but can provide a long-lasting solution. It’s like getting a brand new pipe – your basement will thank you!
Remember, I’m just a word wizard providing DIY advice; it’s always best to consult a professional plumber to assess the situation and provide the best crack-eliminating strategy.
So, there you have it – a cracked sewer pipe in your basement doesn’t have to be a complete disaster. With a little humor and the right know-how, you’ll be able to get your plumbing system back on track (pun intended). Now, go forth and conquer those cracks!
Types of Basement Floor Drains
Traditional Floor Drain
The traditional floor drain, or as we like to call it, the “classic,” is a simple yet effective drain that has been a staple in basements for years. Its design is straightforward—a circular drain surrounded by a grate. This drain is perfect for capturing any water or liquid that may find its way into your basement, whether it’s from a leaky pipe or an intense game of basement water polo. The grate prevents any debris or foreign objects from clogging up the drain, ensuring smooth water flow.
Decorative Floor Drain
For those who want to add a touch of elegance to their basement, the decorative floor drain is the way to go. With intricate designs and stylish finishes, these drains are sure to catch the eye of anyone entering your basement. Think of them as the jewelry of basement drains. They not only serve their purpose of draining water but also add a touch of sophistication to your space. Who said basement drains can’t be fancy?
Flush-Mounted Floor Drain
If you’re looking for a drain that seamlessly blends into your basement floor, the flush-mounted floor drain is your best bet. This drain sits flush with the floor, creating a sleek and seamless appearance. It’s perfect for those who don’t want a drain that sticks out like a sore thumb. The flush-mounted drain is like a ninja—it does its job without drawing attention to itself. Plus, it’s easier to clean since there are no grates to remove or scrub.
Multi-Functional Floor Drain
Why settle for just a drain when you can have a multi-functional one? The multi-functional floor drain is like the Swiss Army knife of basement drains. Not only does it drain water, but it also comes with additional features such as a built-in odor trap or a backup valve to prevent sewer water from flooding your basement. It’s like having a drain that can do magic tricks—keeping your basement dry and smelling fresh at the same time.
Eco-Friendly Floor Drain
If you’re environmentally conscious and want to reduce your carbon footprint even in your basement, an eco-friendly floor drain is the way to go. These drains are designed to be water-efficient, ensuring that only the necessary amount of water is drained away while conserving water whenever possible. It’s like having a little eco-warrior in your basement, working tirelessly to save the planet, one drop of water at a time.
In conclusion, when it comes to basement floor drains, you have a wide variety of options to choose from. Whether you prefer the classic, the fancy, the discreet, the versatile, or the eco-friendly, there’s a drain out there that will suit your basement and your personal style. So, next time you’re in the market for a basement drain, remember to consider not only its functionality but also the flair it can add to your space. Happy drain shopping!
Cast Iron Floor Drain Replacement
If you’re dealing with a drain issue in your basement, specifically the need to replace a cast iron floor drain, don’t panic! We’ve got you covered. In this section, we’ll walk you through the process of replacing that old, rusty drain with a shiny new one.
The Age-Old Battle: Cast Iron vs. Modern Materials
First things first, let’s take a moment to appreciate the longevity of cast iron drains. Those things could survive a zombie apocalypse! But let’s face it, even the toughest cast iron drain eventually succumbs to the wear and tear of time. So, why not take this opportunity to upgrade to a more modern material?
Tools of the Trade
Before you dive headfirst into the DIY abyss, make sure you have the right tools in your arsenal. You’ll need a pipe wrench, a hacksaw, channel-lock pliers, a screwdriver, and a healthy dose of determination. Oh, and don’t forget your superhero cape!
Step 1: Prepare for Battle
Time to don your superhero cape and get ready for action! Start by shutting off the water supply and clearing out the area around the drain. You don’t want any obstacles when you’re swinging that pipe wrench like a champ.
Step 2: Time to Wrench and Roll
Now it’s the moment we’ve all been waiting for – the actual removal of the old drain. Grab your trusty pipe wrench and give that bad boy a good twist. If it’s being stubborn, don’t be afraid to show it who’s boss by applying a little more force. You got this!
Step 3: Out with the Old, In with the New
With the old drain defeated, it’s time to introduce its successor. Gently place the new drain into position and make sure it’s a snug fit. Secure it in place with the channel-lock pliers, giving it a twist for good measure. It’s like you’re performing drain surgery – you know, if doctors wore capes.
Step 4: The Finishing Touches
Once the new drain is securely in place, it’s time to test your handiwork. Turn the water supply back on and watch as your basement is saved from the impending flood. Victory is yours!
Congratulations! You’ve successfully replaced that ancient cast iron drain in your basement with a new, modern version. Give yourself a pat on the back and bask in the glory of your DIY skills. Remember, with the right tools and a little cape-wearing confidence, you can conquer any drain-related challenge. Stay tuned for more fearless plumbing adventures!
Cost to Replace Drain Pipes in House
What’s the Damage
So, your basement drain pipes are acting up, huh? Well, before you start imagining dollar signs flying out of your wallet, let’s take a moment to break down the cost of replacing those pesky pipes.
The Good News
Alright, let’s start with the good news (because we could all use a little positivity, right?). The cost of replacing drain pipes in your house is not set in stone. Phew! It can vary depending on a few factors, such as the size of your home, the length of the pipes, and the material of the pipes themselves.
Size Matters
Now, we’re not talking about pipe envy here (we’ll leave that for another blog post), but the size of your house does play a role in determining the cost. Larger homes generally have more extensive piping systems, which means the replacement might be a little pricier. Hey, at least you can say your pipes are big and impressive!
Material Girl (or Guy)
The material of your pipes will also impact the cost. If you’re rocking some fancy copper pipes, you might need to dig deeper into your pockets (pun intended) because copper is a bit more expensive than other materials. On the other hand, if you have good ol’ PVC pipes, you’re in luck because they tend to be more budget-friendly. Who knew plumbing could be so fashion-forward?
The Price Tag
Alright, let’s cut to the chase. How much will this drain pipe replacement extravaganza actually cost you? Well, on average, homeowners can expect to shell out anywhere from $1,500 to $15,000. That’s quite a range, huh? But remember, this includes not only the cost of materials but also the labor involved. So, it’s important to get a professional assessment to get a more accurate estimate for your specific situation.
DIY Danger Zone
Now, you may be tempted to put on that tool belt and tackle this project yourself, but hold your wrenches for a moment. While DIY-ing can save you some cash, it’s important to consider the potential pitfalls. One wrong move, and you could end up with a flooded basement or an impromptu water feature. So, unless you’re a certified plumbing wiz, it’s best to leave this job to the pros. Trust us; your sanity and dry basement will thank you!
Wrapping it Up
So, there you have it, folks! The cost to replace drain pipes in your house can range from a few thousand dollars to the price of a small car. But remember, it’s essential to get an accurate assessment from a professional plumber. And if you’re thinking of going the DIY route, proceed with caution. Now go forth, armed with this knowledge, and conquer those plumbing challenges like the hero you are!
How to Replace a Floor Drain in Concrete
Preparing for the Task
Before you dive headfirst into the exciting world of drain replacement, gather your supplies. You’ll need some trusty tools that include a wrench, screwdriver, and maybe even a pair of gloves for that added superhero touch. And don’t forget a bucket to catch any surprises that may come gushing your way!
Step 1: Investigation Time
First things first, put your detective hat on and locate your floor drain. You might need to dust off those old Nancy Drew or Hardy Boys skills here. Once found, gently remove the drain cover, giving it a pep talk if necessary. Ah, the joys of hands-on plumbing.
Step 2: Shut Off the Waterworks
Now it’s time to play the boss and shut off the water supply. Locate the valves controlling the water flow to the area, twisting them clockwise till they surrender. This step prevents unexpected indoor swimming sessions and water damage that would make Aquaman proud.
Step 3: Get Your Dancing Shoes On
Get those dancing shoes on as we shimmy and shake the drain loose. Twist that wrench counter-clockwise, channeling your inner rockstar until the drain surrenders itself to your superior brute strength. Don’t forget to flex those muscles!
Step 4: Out with the Old
Bid farewell to the old drain, wiping away any tears of nostalgia as you remove it from its concrete embrace. Give the area a good clean, removing any debris or funny smells that might dampen the mood. Now, prepare yourself mentally for the arrival of the shiny new drain.
Step 5: The Grand Finale
Place your sparkling new drain into the concrete hole, ensuring it fits like a glove (a water-resistant one, of course). Now it’s time to tighten it up, securing the drain cover with a satisfying twist of the wrench. Stand back and admire your handiwork – you’ve successfully set the stage for a drama-free drain life.
So there you have it – a step-by-step guide on how to replace a floor drain in concrete. Remember, while it may have felt like a workout, you’ve earned your DIY superhero cape. Show off your plumbing prowess to family, friends, and unsuspecting neighbors. Happy draining!
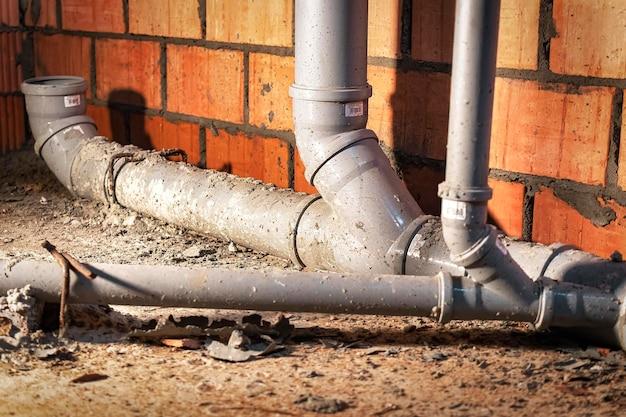
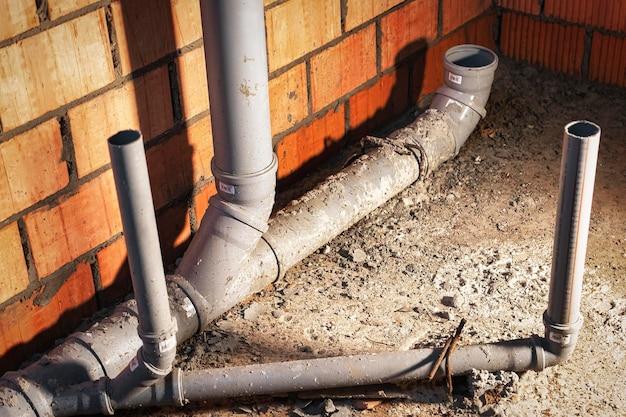
How to Replace a Pipe Under Concrete
So you’ve discovered a pesky, leaky pipe under your concrete floor. Don’t worry, replacing it doesn’t have to feel like you’re on a never-ending episode of “Extreme DIY Plumbing.” With a little bit of know-how and some basic tools, you can tackle this task and emerge victorious. Here’s a step-by-step guide to help you replace that pipe like a pro (or at least pretend to).
Dig Like a Doge
Now, before you can replace that pipe, you’ll need to do some good ol’ excavation. And no, we’re not talking about archaeological digs here. Grab your trusty shovel and start digging like a doge digging for buried treasure. Just make sure you don’t end up unearthing a secret basement bunker from the Cold War era. After all, a new pipe is great, but unintentional espionage is a little less desirable.
Say Goodbye to Old Pipe, Hello to New
Once you’ve successfully unearthed the old pipe, it’s time to bid it adieu. This is where your inner handywoman or handyman comes into play. Grab your pipe wrench and channel your inner superhero strength as you loosen those fittings. Just be prepared for a symphony of grunts and a few precarious balancing acts in the process. But hey, who needs a workout when you have plumbing adventures, right?
Measure Twice (or Thrice), Cut Once
Now, for the fun part – cutting the pipe! Take a deep breath, grab that shiny hacksaw, and make sure you’re measuring twice (or maybe even thrice) before making any cuts. Measure twice, cut once – oh, how those words have haunted many a DIY enthusiast. But fear not! You’ve got this! Just make sure you’re cutting the right pipe and not a random water line. Let’s avoid any unintentional indoor water parks, shall we?
A Little Wiggle and a Lot of Grunt
Removing the old pipe is like ending a toxic relationship – it takes a little bit of wiggling and a whole lot of grunt. Fear not, for with determination and perseverance, you’ll successfully detach that stubborn pipe from its concrete embrace. Just remember to watch the flailing pipe arms and expect a final burst of water to bid you farewell. It’s like a surprise send-off party, plumbing style!
Say Hello to the New Pipe
With the old pipe gone, it’s time to welcome the new one with open arms (or at least open wrenches). Slide that shiny new pipe into place, tightening the fittings with finesse. Admire your handiwork and pat yourself on the back – you’ve just replaced a pipe under concrete like a true DIY hero!
So there you have it, a humorous guide to replacing a pipe under concrete. Remember, this is just a starting point, and if you encounter any major snags along the way, don’t hesitate to call in the professionals. Sometimes it’s best to let the experts handle the nitty-gritty (and potentially messy) details. But if you’re feeling adventurous and have the DIY bug, grab your tools and dive into this plumbing adventure headfirst. Good luck, and may your pipes forever remain leak-free!
What is the Best Pipe for Basement Drain
The Search for the Perfect Pipe
When it comes to finding the best pipe for your basement drain, it can feel like embarking on a quest for the holy grail. With so many options out there, how do you choose the right one? Fear not, for I am here to guide you through the labyrinth of drain pipes and recommend the crème de la crème.
PVC – The Champion of Drainage
Our first contender is PVC (Polyvinyl Chloride), and boy, does it pack a punch! Known for its durability and affordability, PVC pipes are like the superhero of drain pipes. They can withstand high pressures, resist corrosion, and drain water like nobody’s business. Don’t be fooled by its plain, plastic exterior – these pipes mean business!
ABS – The Sleek and Stylish Choice
Next up, we have ABS (Acrylonitrile Butadiene Styrene). This pipe is all about the sleek and stylish vibes. If you’re looking to impress your friends with your dazzling drain pipe, ABS is the way to go. Its smooth finish not only looks good but also helps prevent clogs and blockages. Who knew a drain pipe could be such a fashion statement?
Cast Iron – The Vintage Rockstar
If you’re a fan of all things retro, cast iron pipes might just be your jam. These vintage rockstars have been around for ages and have stood the test of time. Cast iron pipes are as sturdy as they come and have excellent sound insulation properties – perfect for keeping those basement karaoke sessions under wraps. Plus, they add a touch of old-world charm to your drainage system.
HDPE – The Eco-Friendly Warrior
Last but certainly not least, we have HDPE (High-Density Polyethylene). If you’re an eco-warrior at heart, this is the pipe for you. Made from recycled materials, HDPE pipes reduce your carbon footprint while still delivering top-notch drainage performance. It’s a win-win for both you and Mother Earth.
Conclusion: The Pipe-tastic Decision
Now that you’ve met our top contenders, it’s time to make a pipe-tastic decision. Consider factors like durability, aesthetics, and environmental impact. Think about your basement’s specific needs and budget. And remember, no matter which pipe you choose, the real victory lies in having a basement drain that works like a charm. Happy pipe hunting!
So there you have it – a rundown of the best pipes for basement drains. Whether you opt for PVC, ABS, cast iron, or HDPE, your basement will thank you. Who knew drain pipes could be so fascinating? Now go forth, dear reader, and make a plumbing choice that will leave your basement singing with joy!
Replacing Drain Pipe Under Basement Floor: A Humorous Endeavor
The Struggles of Plumbing
Ah, the joys of homeownership! The never-ending list of tasks and repairs can make even the most level-headed individuals want to run for the hills. One particular challenge that can leave you feeling like you’re in over your head is dealing with a drain pipe that needs replacing under your basement floor. But fear not, my friends, for I am here to guide you through this seemingly treacherous journey!
Unearthing the Problem
First things first, you’ll need to locate the source of the issue. Now, I don’t recommend wearing a detective hat or busting out a magnifying glass, but being a bit of a Sherlock Holmes can help. Look for any telltale signs like damp spots, funky odors, or even suspicious puddles. Remember, the nose knows!
Preparation: Gathering Your Weaponry
Before diving headfirst into this murky endeavor, arm yourself with the necessary tools. We’re not talking about swords and shields here—leave those for the medieval reenactments. No, my friend, you’ll need some heavy-duty gear like a reliable wrench, a bucket for capturing any unwanted surprises, and, of course, a can-do attitude.
Don’t Fear the Dirty Work
Prepare yourself emotionally and mentally to get down and dirty. Yes, you read that right. Replacing a drain pipe under your basement floor is not for the faint of heart or those who value a spotless appearance. Embrace the grit, the grime, and the unexpected shower from a burst pipe. Oh, the joys!
Let The Games Begin
Underneath your basement floor lies a miniature labyrinth of pipes, waiting to test your patience. Fear not, for you have the power of determination on your side! Begin by carefully excavating the area around the drain pipe, channeling your inner Indiana Jones. Just remember, there won’t be any ancient artifacts here—unless you count that decades-old sock you lost in the laundry once.
The Great Exchange
With the old pipe exposed, it’s time for a trade-in! Carefully remove the old pipe, bidding it farewell with a heartfelt goodbye. Embrace your new pipe like a long-lost friend, connecting it snugly with the rest of the plumbing system. It’s all about that perfect fit, just like Cinderella and her glass slipper.
Celebratory Laughs
Take a moment to revel in the satisfaction of conquering this plumbing challenge. Raise your wrench in triumph and laugh in the face of adversity—because, my friend, you are a DIY superhero! With the drain pipe replaced, you can now bask in the glory of a fresh, leak-free basement. Ah, the sweet smell of victory!
Repairing or replacing a drain pipe under your basement floor can be a daunting task, but armed with the right tools, a can-do attitude, and a dash of humor, you can conquer any plumbing obstacle. So gear up, embrace the mess, and show that drain pipe who’s boss. And remember, the next time you’re faced with such a predicament, laugh in the face of plumbing troubles!