Are you tired of relying on window units to cool your home during the hot summer months? It may be time to consider installing a central air conditioning system. And when it comes to reliable and efficient air conditioners, Goodman stands out as a trusted name in the industry.
In this blog post, we’ll guide you through the process of installing a Goodman air conditioner from start to finish. Whether you’re a DIY enthusiast or prefer to leave the job to the professionals, we’ll provide you with everything you need to know about installing a Goodman AC unit in your home.
We’ll cover topics like the central AC installation process, step-by-step HVAC installation, and the installation of a Goodman air handler. Plus, we’ll explore the differences between Goodman and Payne air conditioners and help you determine which one is right for you.
But installation is only the beginning. We’ll also share tips on maintaining your Goodman air conditioner, how long it can be expected to last, and how much you can expect to pay for installation.
Don’t let the summer heat take over your home. Keep reading to learn how to install a Goodman air conditioner and stay cool all season long.
Installing Your Goodman Air Conditioner
When it comes to keeping your home cool and comfortable, a quality air conditioner is a must-have during the summer months. If you’re in the market for a new air conditioner, Goodman air conditioners are an excellent choice. They are known for their reliability and efficiency, and they won’t break the bank. In this section, we’ll walk you through the steps needed to install a Goodman air conditioner.
Step 1: Choose the Right Location
The first step in installing your Goodman air conditioner is to choose a suitable location. Ideally, you want to install it in a shaded area, away from direct sunlight. You also want to avoid installing your unit near any bushes, trees, or other obstacles that can obstruct airflow. Additionally, make sure the location you pick can handle the weight of the air conditioner.
Step 2: Install the Mounting Bracket
The next step is to install the mounting bracket. The bracket is what holds the air conditioner in place. Attach the bracket to the wall using the appropriate screws and make sure it’s level.
Step 3: Install the Air Conditioner
The next step is to install the air conditioner on the mounting bracket. Carefully lift the unit and place it on the bracket. Make sure it’s level and secure.
Step 4: Connect the Wires
Once the air conditioner is in place, it’s time to connect the wires. Follow the manufacturer’s instructions carefully. Make sure everything is properly connected, and there are no loose wires.
Step 5: Test the Air Conditioner
The final step is to test the air conditioner. Turn on the power and give it a test run. Make sure it’s working properly and that there are no leaks or other issues.
Installing a Goodman air conditioner is a straightforward process. With the right tools and some basic DIY skills, you can have your air conditioner up and running in just a few hours. If you’re not confident in your abilities, it’s always best to call in a professional. They’ll ensure everything is installed correctly and that your air conditioner is working at peak performance.
Goodman AC Not Working
One of the frustrating issues you may encounter with your Goodman air conditioner is when it suddenly stops working. While it could be due to various factors, some common reasons include:
Thermostat Issues
The thermostat is the central control unit of an AC system, and if it fails, it could cause the system to stop working. For instance, if the thermostat is set to “off” or “heat,” the AC won’t turn on. Likewise, a malfunctioning thermostat may not send the signal to the AC system to commence cooling.
Dirty Air Filters
Dirty air filters could also result in your Goodman AC system not working. When the air filters are clogged with dirt, dust, and debris, they don’t allow for proper airflow, causing the system to overheat and shut down. A good practice is to clean or replace your air filters at least once every three months.
Electrical Issues
If there’s an electrical issue with the AC system, it could also result in the unit not working. The electrical components of an air conditioner could get damaged due to power surges, lightning strikes, or worn-out wiring. If you suspect an electrical issue, it’s best to have a professional HVAC technician diagnose and repair the problem.
Low Refrigerant Level
The refrigerant is the substance that cools the air and circulates within a closed loop between the inside and outside unit of the AC system. A low refrigerant level could result in the AC not cooling, as the unit will be unable to absorb warmth from the indoor air. This could be caused by refrigerant leaks or improper installation.
In conclusion, if your Goodman AC system suddenly stops working, there could be a variety of reasons causing the issue. It is best to refer to your user manual and check for simple faults such as the thermostat being set to the wrong mode or dirty air filters before calling a technician. Regular maintenance checks and tune-ups can also help prevent such issues from happening in the first place, ensuring your AC system functions optimally.
How to Install an AC in Your Home
Summer is coming, and with it, the unbearable heat. If you don’t have an air conditioner yet, it’s high time you get one installed before the temperatures start rising. But, if you’ve never installed an AC before, the process can be overwhelming.
In this guide, we will walk you through the installation process and give you some useful tips on how to do it efficiently, safely, and in a stress-free manner.
1. Choose the Right Location
The first step in installing an AC is to identify the right location for it. You want to choose a spot in your home that is both central and accessible. Ideally, your AC should be placed on the window or in a location where it can direct airflow towards the center of your room. It’s important to choose a location that is not obstructed by trees, buildings, or any other objects that may affect the airflow.
2. Prepare the Installation Site
Before you install your AC, you need to prepare the installation site. This involves checking if the window or wall opening is wide and tall enough to accommodate the air conditioner. You also want to ensure that the installation site is stable, secure, and able to support the weight of the air conditioning unit.
3. Install the Mounting Bracket
Next, you need to install the mounting bracket that comes with the AC unit. The mounting bracket is a vital component that ensures the air conditioner is well secured and stable. You want to make sure that you attach the bracket to the wall or window sill securely using screws.
4. Install the AC Unit
Now it’s time to install the air conditioning unit. You want to make sure that you follow the manufacturer’s instructions carefully. Most AC units come with a detailed installation manual that provides step-by-step instructions. Make sure to follow these instructions closely to avoid any potential pitfalls.
5. Seal the Gaps
After installing the air conditioning unit, you want to seal any gaps to prevent air leaks. You can use either caulk or foam insulation to seal the gaps.
6. Test the AC Unit
Once the installation is complete, it’s time to test the air conditioner to ensure it’s working correctly and blowing cold air. You can test your AC by turning it on and adjusting the thermostat. Make sure to read the manual and follow the instructions on how to operate the AC properly.
Installing an AC unit in your home can be a daunting task, but with this guide, you should be able to do it confidently, efficiently, and safely. Remember to choose the right location, prepare the installation site, install the mounting bracket, install the AC unit, seal the gaps, and test the unit. With these steps, you’ll be able to beat the summer heat in no time!
Step-by-Step HVAC Installation
Installing a Goodman air conditioner might seem complicated for those who have never done it before. However, with proper preparation and organization, the installation can be smooth sailing. Below are the simple steps to follow.
Choose the Right Location
Before installing the unit, you should first decide on the perfect location. Consider a place that provides sufficient airflow, free from any obstructions, and is within reach of a power source and refrigerant lines. It is also essential to measure the dimensions of the unit and ensure there is enough space for it to fit.
Gather the Tools and Materials
You will need essential tools such as a drill, screwdriver, pliers, and wire strippers. Besides, you should also have materials such as refrigerant lines, electrical wires, mounting brackets, and ductwork, among others. Ensure that you have all the necessary items before you start the installation process.
Mount the Air Conditioner
Once you have chosen the location and gathered the necessary tools and materials, you can proceed to mount the unit. Start by attaching the mounting brackets to the base of the air conditioner and then secure it to the wall or window frame. It’s essential to ensure that the unit is level and secure.
Connect the Electrical Wiring
Connecting the electrical wiring is the next step after mounting the air conditioner. Ensure that the power source is turned off before you start the electrical work. Bear in mind that improper wiring can be hazardous and lead to damage to the unit or even fire.
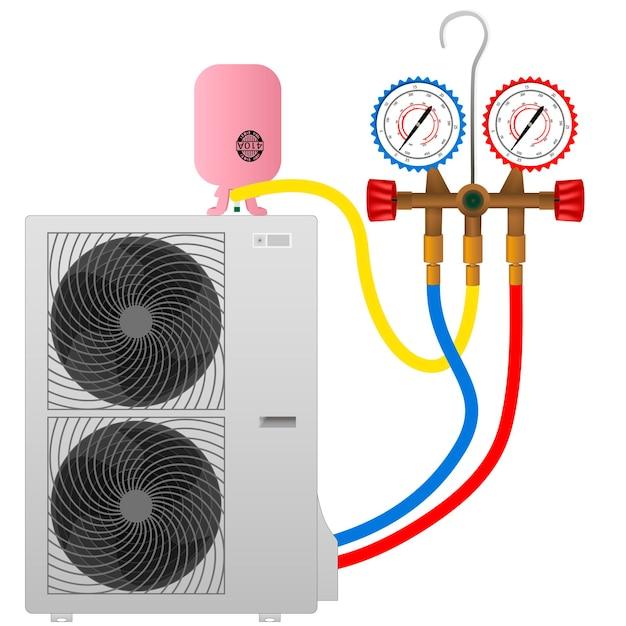
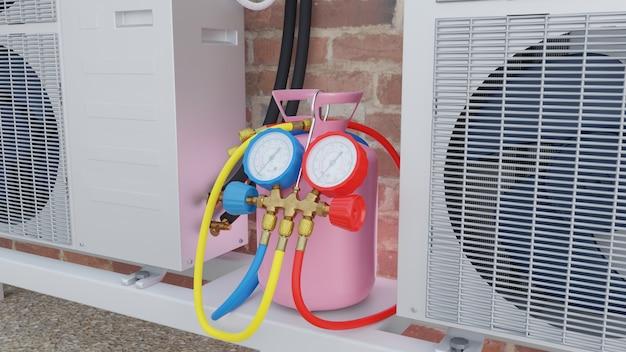
Install the Refrigerant Lines
Refrigerant lines are responsible for carrying refrigerant between the air conditioner and the condenser unit. Installing them requires precision and careful attention to detail. Ensure that you follow the manufacturer’s instructions when handling refrigerant lines.
Test the System
Once the installation process is complete, it’s time to put the system to test. Turn on the power source and set the thermostat to a comfortable temperature. Check that the air conditioner is working correctly, and cool air is coming through the vents.
In conclusion, installing a Goodman air conditioner isn’t as complicated as one might anticipate. Following these simple steps will help you install your system with ease. Remember to follow the manufacturer’s guidelines and take safety precautions when installing the unit.
Installing Goodman Air Handler
When it comes to HVAC installations, the air handler unit is one of the most vital components of any cooling or heating system. It’s the powerhouse that circulates air within the ducts throughout your home. In this subsection, we will take a detailed look at the steps you’ll need to follow for installing Goodman air handler.
Check Your Tools
Before beginning any installation, make sure you have the necessary tools. For this installation, you’ll need a channel lock plier, a level, a screwdriver, a measuring tape, and a utility knife. If you don’t have these tools, it’s advisable to acquire them first before starting any work.
Prepare the Air Handler Location
For optimal operation, Goodman air handlers should be installed in a central location that is easy to access, preferably near the main return duct. The location should be at least two feet away from any obstruction. Once you’ve identified the ideal location, you’ll need to prepare a platform or bracket that is strong enough to support the weight of the air handler.
Mounting the Air Handler
To install the air handler, you’ll need to mount it on the platform. The installation manual will guide you on the various steps you need to follow when mounting the unit. It’s critical to ensure the unit is level to avoid issues of vibration or other types of unnecessary noise.
Duct Work
Once you’ve mounted the unit, you will need to carry out the ductwork. This step involves connecting the air handler to the ducts via the supply and return plenum. Ensure you seal all joints correctly to avoid air leaks.
Wiring
The final phase of installing Goodman air handler entails wiring the unit to the thermostat, air conditioning unit, and any other relevant electrical component. Before the power is restored, double-check all the connections to avoid any loose wiring.
Conclusion
Installing Goodman air handler is a task that requires careful planning and execution to ensure that the system operates optimally. We hope that this subsection has provided you with useful tips for installing Goodman air handler. By following the steps provided, you’ll successfully install an efficient air handling unit for your HVAC system.
Central AC Installation Process
Installing a central air conditioner might seem like a daunting task, but it’s actually pretty straightforward. Here’s a step-by-step guide to help you through the process.
Step 1: Choose the Right Location
The first step is to choose the right location for your air conditioner. The unit needs to be placed in an area that has good airflow and is away from any obstructions. It should also be positioned in a spot that is easy to access for maintenance and repairs.
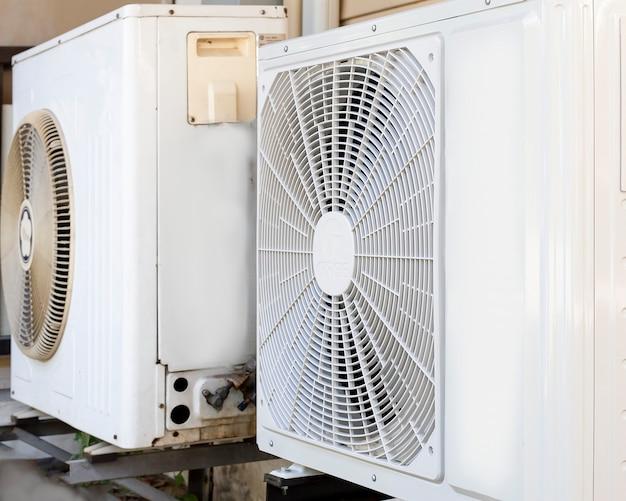
Step 2: Install the Condenser Unit
The condenser unit is the part of the air conditioner that goes outside. It should be installed on a flat, level surface, and secured with bolts or screws. The unit should also be positioned close to the house so that the refrigerant lines can reach inside.
Step 3: Install the Evaporator Coil
The evaporator coil is the part of the air conditioner that goes inside the house. It should be installed in the ductwork near the furnace. The coil connects to the condenser unit outside with refrigerant lines.
Step 4: Install the Refrigerant Lines
The refrigerant lines connect the condenser unit to the evaporator coil. They need to be installed carefully to prevent leaks and ensure proper airflow. The lines should also be insulated to prevent any heat loss or gain.
Step 5: Install the Air Handler
The air handler is the part of the air conditioner that circulates the cooled air throughout the house. It should be installed in a closet or attic and connected to the evaporator coil. The air handler also needs to be connected to the thermostat.
Step 6: Connect to Electrical
The final step is to connect the air conditioner to the electrical system. This should be done by a certified electrician. The air conditioner will need its own circuit breaker and wiring.
By following these steps, you can install a central air conditioner and enjoy a comfortable home all summer long. Don’t forget to have a professional HVAC technician inspect and maintain your unit regularly to ensure it operates at peak performance.
Goodman vs Payne Air Conditioners
When it comes to choosing the right air conditioner for your home, there are several factors you need to consider, including the brand and model. In this section, we’ll be comparing Goodman and Payne air conditioners to help you make an informed decision.
Goodman Air Conditioner:
Goodman air conditioners are known for their affordability and energy efficiency. They are also easy to install and maintain, with most contractors and homeowners praising their reliability and ease of use.
One of the standout features of Goodman air conditioners is their excellent warranty. With some models, you can get up to 10 years of warranty coverage, which gives you peace of mind knowing that your investment is protected. Also, Goodman air conditioners are compatible with most smart home systems, making it easy to control and monitor your HVAC system using your smartphone or tablet.
Payne Air Conditioner:
Payne air conditioners are another popular brand, known for their durability and long lifespan. They are designed to withstand harsh weather conditions and provide optimal cooling performance, making them a great choice for homeowners in hotter climates.
One of the significant advantages of Payne air conditioners is their eco-friendly features. Most Payne models are designed to use eco-friendly refrigerants that are free of ozone-depleting chemicals, making them an environmentally responsible choice for homeowners.
Goodman vs. Payne:
Both Goodman and Payne air conditioners have a lot to offer, making it challenging to choose between the two. In terms of affordability, Goodman air conditioners are generally more budget-friendly than Payne models. However, Payne air conditioners are known for their durability and are designed to last longer than most Goodman models.
When it comes to energy efficiency, both brands perform well, with Goodman air conditioners known for their SEER ratings and Payne air conditioners for their eco-friendliness.
In conclusion, the choice between Goodman and Payne air conditioners ultimately comes down to the specific needs of your home and your budget. Both brands have their unique advantages, so it’s crucial to do your research and consult with a professional HVAC contractor before making a final decision.
Goodman GSX14 Installation Manual PDF
If you’re planning to install a Goodman air conditioner, it’s essential to have the installation manual with you. With this guide, you won’t have to guess the installation process of your brand new AC. You can download the installation manual for Goodman GSX14 in PDF format from the official Goodman website. Here’s how:
Step 1: Go to the Goodman Manufacturing website
First things first, head straight to the official website of Goodman Manufacturing. Once you’re there, navigate to the Technical Information section.
Step 2: Search for your model
Once you’re on the Technical Information page, you’ll find a search bar where you can look for any manual you want. Type in “Goodman GSX14 installation manual” and hit enter.
Step 3: Download the manual
After you’ve searched for the model number, it will direct you to a page with available manuals. Look for the installation manual PDF and download it. It’s that simple!
The GSX14 installation manual has all the necessary information you need to install your unit. From wiring diagrams to installation instructions, everything is included. The manual is easy to understand, and it’s illustrated for better comprehension.
Pre-Installation Checklist
Before you start the installation process, we suggest you go through the pre-installation checklist provided in the installation manual. This will help you prepare everything in advance and make the installation process a lot easier. Ensure you have all the necessary tools and equipment for a smooth installation.
Professional Installation
While the installation manual can be helpful, it’s always best to have a professional install your Goodman air conditioner. They have the experience and expertise to guarantee proper installation without any issues. Plus, hiring a licensed professional gives you peace of mind knowing that everything has been done correctly.
In conclusion, installing a Goodman air conditioner is not as difficult as it sounds, especially if you have the right tools and the installation manual. By following the instructions provided in the manual, you’ll have your unit up and running in no time.
How to Install a Goodman 3 Ton AC Unit
Installing a Goodman 3 ton AC unit can seem like a daunting task, but with the right tools and a bit of patience, it’s a job that you can tackle on your own. Here’s a step-by-step guide on how to install your new Goodman AC unit.
Step 1: Pick the Right Location
Before you get started, you need to choose the right location for your new AC unit. Look for an area that is flat, shaded, and has easy access to electricity and the ductwork.
Step 2: Unpack the Unit
Once you’ve chosen the right location, it’s time to unpack your new Goodman AC unit. Make sure you have everything you need to complete the installation, including the installation manual, mounting hardware, and all the required tools.
Step 3: Install the Mounting Brackets
Next, install the mounting brackets according to the instructions provided in the installation manual. Make sure that the brackets are securely attached to the wall or mounting surface.
Step 4: Install the Condenser Unit
Now it’s time to install the condenser unit. Make sure that the unit is level and securely attached to the mounting brackets. Connect the refrigerant lines and electrical wires according to the instructions provided.
Step 5: Connect the Ductwork
Once the condenser unit is in place, it’s time to connect the ductwork. Attach the supply and return ducts to the unit, making sure that all connections are tight and secure.
Step 6: Install the Thermostat
Finally, install the thermostat according to the instructions provided in the installation manual. Make sure that the thermostat is located in a place that is easily accessible and away from any heat sources.
Congratulations, you’ve just installed your new Goodman 3 ton AC unit! With proper installation, your new unit will provide you with years of reliable and efficient cooling.
Goodman AC Unit Installation Instructions
If you’re looking to install a Goodman air conditioner, you’ll want to make sure you do it right the first time. Here are some installation instructions that will help you get your Goodman AC unit up and running in no time.
Gather Your Tools
Before you start the installation process, you’ll want to make sure you have all the tools you need. You’ll need a drill with drill bits, a screwdriver, wire cutters, pliers, and a level.
Prepare the Installation Area
Make sure you have a flat surface to install your Goodman AC unit on. You’ll also want to make sure there is enough clearance around the unit for proper airflow.
Install the Mounting Plate
Take the mounting plate that came with your Goodman AC unit and screw it into place on the wall. Make sure the plate is level before you start.
Connect the Wires
Take the wires that came with your Goodman AC unit and connect them to the appropriate terminals. This process may vary depending on the specific model of air conditioner you are installing, so be sure to read the manufacturer’s instructions carefully.

Install the Air Conditioner
With the mounting plate in place and the wires connected, it’s time to install the air conditioner unit. Lift the unit onto the mounting plate and secure it in place with the provided screws.
Test the AC Unit
Once you’ve completed the installation, it’s important to test the AC unit to make sure it’s working properly. Turn the unit on and let it run for a few minutes to ensure that it’s producing cold air.
Installing a Goodman AC unit can be a challenging process, but with these installation instructions, you should be able to get the job done with ease. Remember to read the manufacturer’s instructions carefully and to take all necessary safety precautions when working with electrical equipment. Good luck!
How Long Do Goodman Air Conditioners Last
Goodman air conditioners are known for their durability and long life. However, the lifespan of any air conditioner depends on various factors such as the quality of installation, maintenance, and usage.
Factors Affecting the Lifespan of Goodman Air Conditioners
Quality Installation:
The lifespan of your Goodman air conditioner heavily depends on the quality of installation. Poor installation could affect its performance and lead to a shorter life span. It is essential to select a professional and experienced technician to install the unit to ensure correct installation and optimal performance.
Maintenance:
Regular maintenance is crucial to ensure the longevity of your Goodman air conditioner. Neglecting cleaning and maintenance of the unit could lead to damage and a decrease in its efficiency. You should follow the manufacturer’s recommended maintenance schedule or consult a professional technician for routine maintenance.
Usage:
Excessive usage of your Goodman air conditioner could lead to a shorter life span. It is essential to use it efficiently and maintain a moderate temperature to avoid overworking the unit. Installing a programmable thermostat will help regulate the temperature and ensure effective usage of your air conditioner.
Expected Lifespan of Goodman Air Conditioners
On average, a properly installed and well-maintained Goodman air conditioner can last between 10-15 years. However, factors such as usage, maintenance, and installation might lead to a shorter or longer lifespan.
Signs That Your Goodman Air Conditioner is Failing
Here are some signs that your Goodman air conditioner might be failing and requires repair or replacement:
- The unit is making strange noises
- The air coming from the vents is weak
- The air conditioner takes longer to cool the room
- The unit frequently turns on and off
Goodman air conditioners are built to last, but their lifespan depends on various factors such as quality installation, maintenance, and usage. Regular maintenance by a professional technician could prolong the life of your unit, ensuring optimal performance and efficiency. If your Goodman air conditioner is showing signs of failure, it is essential to seek professional repair or replacement.
Can You Install a New Air Conditioner Yourself
If you’re wondering whether it’s a good idea to install a new air conditioner yourself, the answer is “it depends.” In some cases, installing an air conditioner can be a straightforward process that you can handle on your own without any issues. In other cases, however, it may be best to leave the installation to a professional.
Factors to Consider
Before you decide whether or not to install an air conditioner yourself, there are several factors to consider. First, you’ll need to make sure that you have all the necessary tools and equipment to complete the installation. Some of the tools you’ll need include a drill, a wrench, a level, and a screwdriver.
You’ll also need to consider the complexity of the installation process. If the installation requires complex electrical work or the installation of ductwork, you’ll need to hire a professional to do the work for you.
Pros and Cons
There are pros and cons to installing an air conditioner yourself. The main advantage is that you can save money on the installation costs. However, if you make a mistake during the installation process, you could end up causing damage to your home or the air conditioner. Additionally, if you don’t install the unit correctly, it could void the manufacturer’s warranty.
When to Hire a Professional
If you’re not comfortable working with electricity or if you don’t have the necessary skills and experience to install an air conditioner yourself, it’s best to hire a professional. A professional HVAC contractor has the knowledge and experience to install the unit correctly, which will ensure that it operates efficiently and effectively.
In conclusion, whether or not you should install a new air conditioner yourself depends on your skills, experience, and the complexity of the installation process. With proper planning and preparation, you may be able to handle the installation on your own. However, if you don’t feel confident in your abilities, it’s best to hire a professional to do the job for you.
Install Goodman Air Conditioner: Who Installs Goodman Air Conditioners Near Me
When you have decided to upgrade to a Goodman air conditioner, the next step is finding the right installer. Installing an air conditioner is not a typical DIY project, so you need to find someone with the right expertise to get the job done correctly. Here are some tips on how to find a trustworthy installer for your Goodman air conditioner.
Ask for Referrals
When it comes to finding the right installer, word of mouth is one of the most effective ways to get recommendations. Ask your friends, family, or neighbors who have installed air conditioners in their homes to recommend an installer they trust. They may also advise you on how to choose the right installer and what to expect during the installation process.
Check Online Reviews
In today’s digital world, online reviews are a valuable source of information. Check online reviews of local installers who offer Goodman air conditioners. Reading reviews from other clients can help you shortlist potential installers and identify the ones worth considering.
Look for Licensed and Insured Installers
When searching for an installer, always make sure they are licensed and insured to perform the installation. Being licensed means they have the proper training and knowledge to install your Goodman air conditioner correctly. Being insured means that you are covered in case of accidents or damage during the installation.
Work With Professionals
When installing a Goodman air conditioner, it’s essential to work with professionals who are experienced in the installation of these specific units. Look for an installer who specializes in air conditioning installation and maintenance. They should also be familiar with your Goodman air conditioning unit’s unique features and know how to troubleshoot any issues.
Manufacturer Referrals
Goodman air conditioner manufacturers often refer licensed and authorized installers who have undergone proper training and are well-versed in installing the brand’s air conditioning units.
Installing a Goodman air conditioner requires careful consideration and research to ensure the job is done correctly. By following these tips and working with licensed and experienced installers, you can have peace of mind knowing that your new air conditioner will function efficiently and last for years to come.
How to Install Central Air Conditioning Yourself
Are you tired of sweating through the summer months? Maybe it’s time to install central air conditioning in your home, but you don’t want to break the bank by hiring a professional. Good news! You can install central air conditioning on your own with the right tools and a bit of know-how. Here’s how:
Choose the Right System
Before you begin installation, you need to select the right central air conditioning system for your home. This means figuring out the size of your home, the type of cooling system you want, and your budget. Keep in mind that a bigger unit doesn’t always mean better; in fact, an oversized unit can cause excess moisture and humidity. Look for a unit that matches your home’s square footage and energy needs.
Gather the Necessary Tools and Materials
Once you have your central air conditioning system picked out, it’s time to gather the necessary tools and materials. You’ll need a hammer, screwdriver, drill, metal snips, wire cutters, and a level. In terms of materials, you’ll need copper tubing, electrical wire, PVC pipe, insulation, and an air handler or furnace.
Prep the Area
Before you start installing, you need to prepare the area where the unit will be placed. This means clearing away any debris, leveling the ground, and installing a pad for the unit to sit on. Make sure the pad is level and secure.
Install the Indoor Unit
Once the area is prepped, it’s time to install the indoor unit. This involves mounting the air handler or furnace, running the refrigerant lines, and connecting the electrical wiring. It’s important to consult the unit’s manual for proper installation instructions.
Install the Outdoor Unit
With the indoor unit in place, it’s time to install the outdoor unit. This involves mounting the unit on a concrete pad, installing the refrigerant lines and electrical wiring, and testing the unit to make sure it’s working properly.
Final Steps
After the installation is complete, make sure to test the unit and adjust any settings as necessary. You’ll also want to insulate any exposed refrigerant lines and electrical wires to prevent damage or injury. Finally, sit back and enjoy the cool air!
Installing central air conditioning on your own may seem daunting, but with the right tools and a bit of patience, it’s definitely doable. Just be sure to follow proper safety procedures and consult the unit’s manual for proper installation instructions.
What is the lifespan of a Goodman air conditioner
If you’re planning to install a Goodman air conditioner, you may be wondering how long it will last. The lifespan of a Goodman air conditioner can vary depending on several factors, including how often you use it, how well it’s maintained, and the model you choose.
Factors Affecting the Lifespan of a Goodman Air Conditioner
Average Lifespan
Generally, Goodman air conditioners are built to last for 10-15 years. This is the industry average, but with proper maintenance and timely repairs, most units can last longer than that.
Maintenance
Your air conditioner’s lifespan depends on how well you maintain it. Routine maintenance, such as cleaning or replacing air filters, checking the refrigerant levels, and cleaning the coils can help increase its lifespan.
Usage
The frequency of use and the duration of usage also depend on the lifespan of a Goodman air conditioner. If you use it excessively or use it for extended periods, it can shorten its lifespan.
Model
The type or model of air conditioner you buy also determines its lifespan. A high-end Goodman air conditioner that is designed with durable materials, advanced technology and guarantees a more extended warranty will outlast a cheaper, basic model.
Tips to Increase the Lifespan of a Goodman Air Conditioner
Maintenance
As mentioned earlier, routine maintenance of your Goodman air conditioner is one of the most effective ways to ensure it lasts longer. Regular maintenance and professional cleaning prevent dirt buildup or rust, enabling the smooth functioning of the air conditioner and preventing costly damages.
Professional Installation
Ensure that a professional installer installs your Goodman air conditioner. A poorly installed unit can result in system flaws, causing premature wear and tear of the unit.
Repairs
Timely repairs are critical in maintaining the lifespan of your Goodman air conditioner. A small fault may escalate and cause significant system failures affecting the air conditioner’s durability.
In conclusion, the lifespan of a Goodman air conditioner can range anywhere from 10-15 years or more, depending on how well it’s maintained and other factors. Repairing it when necessary, professional installation, and enlisting the help of technicians to solve any problems are essential maintenance practices to increase its longevity.
How Much Does It Cost to Install a Goodman AC Unit
If you’re planning to install a Goodman air conditioner in your home, you’re probably wondering how much it would cost you. The cost of installing a Goodman AC unit varies depending on several factors, including the size of the unit, the complexity of the installation, the location of your home, and the contractor that you hire.
Factors That Affect the Cost of Installation
The size of your AC unit is one of the most significant factors that determine the cost of installation. A smaller unit will cost less to install than a bigger unit. But, if you have a large home or live in a hot climate, a smaller unit may not be sufficient to keep your home cool, and hence you may need a bigger unit.
Another factor that affects the cost of installation is the complexity of the installation. If you already have an existing AC unit, the installation cost may be lower since the contractor doesn’t need to do any additional work. However, if you need to install a new AC unit from scratch, the cost may be higher since the contractor needs to do additional work.
Your location also affects the cost of installation. For example, if you live in a remote area, the installation may cost more since the contractor needs to travel a longer distance to reach your location.
Finally, the contractor that you hire also affects the cost of installation. Some contractors charge a higher fee than others, depending on their experience, expertise, and reputation.
Estimate of Installation Cost
On average, the cost of installing a Goodman AC unit may range from $3,000 to $7,000, including labor and materials. However, this estimate is just a rough estimate, and the actual cost may vary depending on the factors mentioned earlier.
To get an accurate estimate, it’s recommended that you contact a professional contractor who can evaluate your home and provide you with a detailed quote. This way, you can get an accurate estimate of the total cost involved before making any decisions.
Installing a Goodman AC unit in your home can be a significant investment, but it’s worth it in the long run. Make sure to choose the right size to match your needs and to hire a professional contractor who can ensure that the installation process goes smoothly and efficiently. With the proper installation, you can enjoy cool and comfortable indoor temperatures throughout the year.