Do you ever wish you could capture the essence of your hands in a unique and personalized way? Hand casts are a popular trend that allows you to create beautiful sculptures of your hands, preserving their shape and memories for years to come. While there are several methods to make hand casts, one particularly fascinating and cost-effective approach involves using flour. Yes, you read that right – ordinary flour can be transformed into an impressive mold that beautifully captures the contours of your hand.
In this blog post, we’ll explore the art of making hand casts with flour, including how to create the perfect mixture, the step-by-step process, and some creative ideas to enhance your hand cast. We’ll also answer common questions, such as how to make plaster with flour, what materials can be used for molds, and even explore the exciting world of 3D printed casts and their potential benefits. So, let’s dive in and unlock the secrets to mastering the art of hand casting using simple pantry staples!

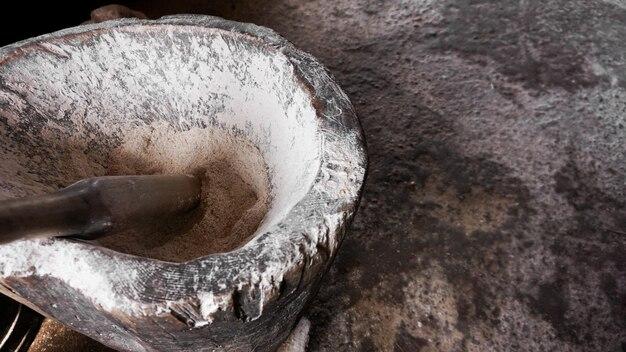
How to Create a Hand Cast Using Flour
Gather Your Ingredients
First things first, let’s assemble the cast-making dream team. Here’s what you’ll need:
- 2 cups of all-purpose flour
- 1 cup of salt
- 1 cup of water
- A sprinkle of creativity (optional)
Mix It Up
Now that you have your ingredients, it’s time to put your mixing skills to the test. In a bowl, combine the flour and salt. Mix them together like a dynamic duo from a baking movie until they are thoroughly blended.
Add a Splash of Water
Next, slowly pour in the water and stir the mixture until it reaches a dough-like consistency. Think of yourself as the master chef of hand casts, creating a delightful concoction that will soon immortalize your precious limb.
Knead, Knead, Knead
Like a bread baker shaping their dough, knead the mixture for a few minutes until it becomes smooth and pliable. This step is not only essential for achieving the perfect texture but also a great way to release any built-up tension. Who knew hand casts could be so therapeutic?
Shape Your Legacy
Now comes the fun part! Take your dough and mold it into the desired shape of your hand cast. You can mold it flat or create a three-dimensional masterpiece that captures every crevice and ridge. Get creative with it—after all, this is your chance to leave a lasting impression!
Let It Set
Once your hand cast is shaped to perfection, it’s time to let it set and dry. Place it on a flat surface and leave it for about 24 hours to ensure it hardens completely. Patience is a virtue, dear cast maker, and your patience will soon be rewarded.
Unveil Your Work of Art
The moment you’ve been waiting for has arrived! Gently remove the hardened hand cast from its resting place. Admire the intricate details and marvel at your artistic prowess. You now possess a tangible symbol of your hand’s magnificence.
The Finishing Touch
To preserve your hand cast and ensure it stands the test of time, consider applying a clear coat of varnish or paint. This protective layer will not only add a glossy finish but also help safeguard your creation against potential mishaps or accidents. Safety first, my crafty comrades!
Now that you have mastered the art of creating a hand cast with flour, let your imagination roam free. Create casts of your family’s hands, your best friend’s paw, or even a mythical creature straight out of your wildest dreams. Remember, the possibilities are as endless as the cast-making adventures you embark upon. So go forth, cast maker extraordinaire, and let your floury creations leave an indelible mark in the annals of artistry.
FAQ: How Do You Make A Hand Cast With Flour
Welcome to our comprehensive guide on how to make a hand cast with flour! Whether you’re looking to create a unique keepsake or add a personal touch to your home decor, making a hand cast using flour is a fun and budget-friendly option. In this FAQ-style guide, we’ll answer all your burning questions about making hand casts with flour. So, let’s dive in!
How Do You Make Plaster with Flour
Making plaster with flour is a simple and cost-effective alternative to traditional plaster. Follow these easy steps:
- In a mixing bowl, combine 1 part flour with 2 parts water.
- Stir the mixture until it becomes smooth and free of lumps.
- Place the bowl in the microwave and heat it on high for 2 minutes. This will thicken the mixture.
- Remove the bowl from the microwave and let it cool for a few minutes.
- Your homemade plaster is now ready to use!
How Do You Make Flour Molds
Creating molds with flour is a straightforward process. Here’s how you can do it:
- In a mixing bowl, combine 2 cups of flour, 1 cup of salt, and 1 cup of water.
- Knead the mixture until it forms a smooth, pliable dough.
- Roll out the dough into a flat sheet, approximately 1/4 inch thick.
- Press your hand or object firmly into the dough to create an impression.
- Carefully remove the hand or object, leaving behind a perfect flour mold.
- Let the mold air dry for 24-48 hours or bake it in the oven at a low temperature for a quicker drying process.
Do 3D Printed Casts Heal Bones Faster
While 3D printed casts offer many benefits, such as enhanced flexibility and breathability, they do not directly affect the healing speed of bones. The healing process primarily depends on the nature and severity of the injury, as well as a person’s overall health. However, 3D printed casts can provide greater comfort and convenience during the healing period.
What Is 3D Casting
3D casting is a technique that involves capturing a three-dimensional replica of an object or body part. It can be done using various materials, including plaster, resin, or even food-grade substances like flour. The resulting cast provides a lifelike representation and can be used for decorative purposes, mementos, or even for medical applications.
How Do You Make Hand Molds with Flour
To make hand molds with a flour mixture, follow these steps:
- In a bowl, mix together 2 cups of flour, 1 cup of salt, and 1 cup of water.
- Knead the mixture until it forms a smooth and moldable dough.
- Roll out the dough into a flat layer, around 1/4 inch thick.
- Gently place your hand onto the dough and press it firmly to create a clear impression.
- Carefully remove your hand, ensuring the mold retains its shape.
- Leave the mold to air dry for 24-48 hours or use a low-temperature oven for quicker drying.
Can Flour and Water Make Plaster
Yes, a mixture of flour and water can be used to create a homemade plaster. However, keep in mind that this plaster alternative may not have the same strength and durability as traditional plaster. It’s best suited for decorative purposes or temporary creations.
How Do You Make Plaster with Flour and Salt
Creating plaster with flour and salt is a simple process. Here’s how:
- In a bowl, combine 1 cup of flour, 1/2 cup of salt, and enough water to create a smooth paste.
- Mix the ingredients until they form a creamy consistency similar to traditional plaster.
- Use the mixture to cast your desired shape or mold.
- Allow the plaster to air dry completely before painting or decorating.
How Do You Make a Homemade Hand Cast
Making a homemade hand cast is an enjoyable and creative project. Here’s a step-by-step guide:
- Prepare a mixture of 2 cups of flour, 1 cup of salt, and 1 cup of water in a bowl.
- Knead the ingredients together until they form a smooth and pliable dough.
- Roll out the dough into a flat sheet, approximately 1/4 inch thick.
- Carefully place your hand onto the dough and press it down gently to make an impression.
- Remove your hand from the dough, leaving behind a detailed cast.
- Allow the hand cast to air dry for 24-48 hours or speed up the process by baking it in the oven at a low temperature.
- Once dry, you can paint or decorate the cast to your liking.
What Is the Best Material for Making a Mold
The choice of material for making a mold depends on the specific project and desired outcome. Some popular options include silicone, plaster, alginate, and even food-grade substances like flour or gelatin. Consider factors such as durability, ease of use, and the level of detail required before selecting the best material for your mold.
What Material Can I Use to Make a Mold for Resin
When making a mold for resin, silicone rubber is often the preferred choice due to its flexibility, durability, and ability to capture fine details. Silicone molds allow for easy removal of the resin cast without damaging the mold. However, depending on the size and complexity of the object, other materials like plaster or even 3D-printed molds can also be used.
How Do You Do Baby Hand Casting
Creating a beautiful baby hand cast is a cherished way to capture those tiny fingers and toes. Here’s how you can do it at home:
- Prepare a mixture of 2 cups of flour, 1 cup of salt, and 1 cup of water in a bowl.
- Knead the ingredients until they form a smooth and pliable dough.
- Roll out the dough into a thin layer, allowing it to be flexible enough to capture delicate details.
- Gently press your baby’s hand into the dough, making sure to support it to prevent any discomfort.
- Carefully remove your baby’s hand, leaving behind a precious hand cast.
- Allow the cast to air dry for 24-48 hours or speed up the drying process by using a low-temperature oven.
- Once dry, you can paint or personalize the cast as a treasured keepsake.
How Do You Make Hand Sculptures at Home
Creating hand sculptures at home is an enjoyable and artistic endeavor. Here’s a simple guide to get you started:
- Gather your preferred sculpting material, such as clay, plaster, or even air-dry modeling compounds.
- Prepare the material according to its specific instructions or recipe.
- Start by shaping a base or armature to support the hand sculpture.
- Gradually build up the clay or plaster around the armature, carefully sculpting the shape of the hand.
- Pay close attention to details, such as fingers, wrinkles, or palm lines, to add realism to your sculpture.
- Once satisfied, allow the sculpture to dry or cure completely, following the material’s guidelines.
- Finally, you can apply paints, finishes, or sealants to enhance the appearance and preserve the sculpture.
How Do You Make a Cast with Flour
Making a cast with flour is a simple and cost-effective method. Follow these steps:
- Mix together 2 cups of flour, 1 cup of salt, and 1 cup of water in a bowl.
- Knead the mixture until it forms a smooth and pliable dough.
- Roll out the dough into a flat layer, approximately 1/4 inch thick.
- Lay the dough over the desired object or body part, gently pressing it to create an impression.
- Allow the cast to air dry for 24-48 hours or use a low-temperature oven for faster drying.
- Once dry, carefully remove the cast from the object or body part, revealing the intricate details.
What Household Items Can You Use to Make Plaster
If you don’t have traditional plaster on hand, don’t worry! You can still create plaster-like mixtures using common household items. Some alternative options include using flour, salt, cornstarch, or even baking soda in combination with water. Experimentation and adjusting the ratios may be necessary to achieve the desired consistency and strength.
What Can I Use to Make Molds
When it comes to making molds, various materials commonly found in households can be used. Here are a few options:
- Silicone: Ideal for capturing fine details and reusable for multiple casts.
- Plaster: Provides a solid and durable mold, especially for larger objects.
- Alginate: Perfect for quick and highly detailed molds, often used in dental and lifecasting applications.
- Gelatin: Food-grade mold material suitable for simple projects or temporary casts.
- Flour and Salt: A budget-friendly option for creating molds with minimal detail requirements.
What Material Is Used for Epoxy Molds
Epoxy molds are typically made using silicone, which is known for its excellent release properties and ability to withstand the high temperatures associated with curing epoxy resin. Silicone molds allow for easy removal of the cured epoxy without requiring additional mold release agents. However, ensure you choose a silicone specifically formulated for epoxy resin to achieve the best results.
What Materials Can Be Used in Silicone Molds
Silicone molds are versatile and compatible with various casting materials. Some common materials that work well with silicone molds include:
- Epoxy resin: Creates vibrant and durable castings suitable for various crafts and art projects.
- Concrete or cement: Ideal for creating decorative items, such as planters or statuettes.
- Wax: Allows for intricately detailed candles or wax figures.
- Soap: Perfect for producing unique and customized soap bars.
- Plaster: Great for reproducing detailed sculptures or architectural elements.
What Household Items Can You Use to Make a Mold of Your Hands
Creating a mold of your hands can be a delightful and personal project. Here are a few household items you can use for this purpose:
- Alginate: A skin-safe material commonly used for lifecasting, readily available in craft stores or online.
- Silicone putty: Easy-to-use silicone-based compounds that can be molded directly onto the skin.
- Gelatin: A food-grade option for temporary molds that can be poured directly onto the hand.
- Plaster bandages: These create a quick and easy mold, but they may not capture fine details as well as other materials.
Now that you have all the answers to your burning questions, you’re ready to embark on your hand casting adventures using flour! Enjoy the process and let your creativity shine as you create unique and meaningful keepsakes that will stand the test of time. Happy casting!
Note: This blog is for entertainment and informational purposes only. Always ensure the safety and suitability of materials and techniques before attempting any DIY project.