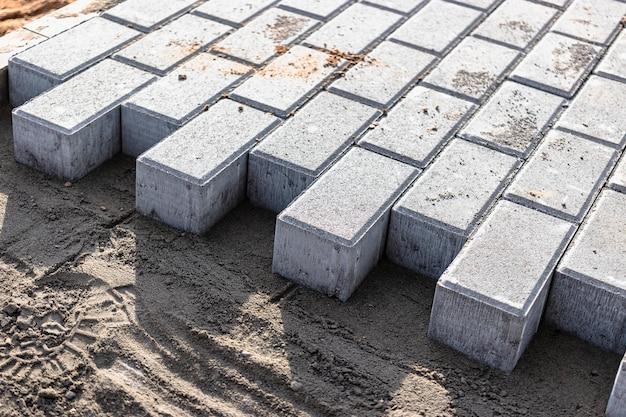
Garage floors are typically constructed using concrete slabs. While concrete is a durable material, over time, it may sink or become uneven due to shifting soil or other factors. If your garage floor has started to sink or exhibits signs of unevenness, slab jacking may be a suitable solution. Slab jacking involves lifting and leveling the concrete slab using a specialized tool and equipment, such as a concrete lifting foam kit or mud jacking garage floor gear.
This blog post will provide you with all the information you need to know about slab jacking garage floors. We will cover everything from the equipment and tools needed for slab jacking to the benefits of using polyjacking instead of traditional mudjacking. By the end of this post, you’ll have a good understanding of how to lift and level your garage floor and keep it looking level for years to come.
Understanding Slab Jacking for Your Garage Floor
So, you’ve got a garage floor that looks like you’ve been playing go-kart indoors. Every time you step inside, it feels like you’re swimming in a sea of uneven concrete slabs. Well, you’re not alone. Many homeowners face the same struggle when it comes to their garage floors. But there’s a solution that can help you salvage your garage floor without breaking the bank.
What is Slab Jacking
Slab jacking – also known as mud jacking or concrete lifting – is a process that involves pumping a mixture of sand, water, and cement at high-pressure levels beneath a concrete slab. The mixture seeps into the underlying soil, causing it to expand and push the slab upwards. This helps to level the surface, filling any voids and gaps that might have caused the floor to sink in the first place.
Why Slab Jacking is Ideal for Your Garage Floor
Not only is slab jacking cheaper than ripping out and replacing your garage floor entirely, but it is also a quicker process with minimum downtime. Since you’re not getting rid of the already existing floor, slab jacking is eco-friendly and sustainable. Plus, there’s no need to worry about color compatibility or any other aesthetic aspects. With slab jacking, your garage floor will look as good as new, without costing a fortune.
Who Should You Contact
Slab jacking might look like a DIY project, but it is always best to leave it to the experts. While a simple Google search can reveal multiple contractors who can do the job, it is important to opt for a slab jacking specialist with experience and expertise. You don’t want to end up with your garage floor worse off than before due to shoddy workmanship.
Don’t let an unsightly garage floor bring down the aesthetics of your home. With slab jacking, you can save your bank account and recycle your concrete while achieving a leveled and smooth surface. Trust the hands of a professional, and you’ll end up with a garage floor that’s sure to turn heads.
Slab Jacking Equipment: The Tools You Need
So, you’ve decided to tackle your garage floor’s slab jacking all by yourself. Good for you, you brave soul! Now, let’s talk about the equipment you’ll need to get this job done. Here are a few essential tools you should consider:
1. Grout Mixer
The first thing you’ll need is a grout mixer. You could use a regular drill with a mixing attachment, but let’s be honest here – that’s going to take a while. Invest in a good quality grout mixer and save yourself the hassle.
2. Slab Jacking Pump
Next up is the slab jacking pump. This pump is what you’ll use to inject the grout mixture into the holes you’ve drilled in your garage floor. There are different types of pumps available, so choose one that suits your needs and budget.
3. Drill
You can’t inject anything without drilling holes first. Invest in a good quality drill that can handle the job. Don’t skimp out here, or you’ll end up with a lot of headaches later.
4. Concrete Leveling Compound
After you’ve injected the grout mixture, you’ll need to level out your garage floor’s surface. For this, you’ll need a concrete leveling compound. There are different types available, so choose one that’s suitable for your specific garage floor.
5. Safety Gear
Last but not least, don’t forget to wear safety gear. The equipment mentioned here can be dangerous if mishandled, and you don’t want to end up hurting yourself or others. Invest in safety glasses, gloves, and a respirator mask to keep yourself safe.
So there you have it – the essential equipment you need for slab jacking your garage floor. Go forth, DIY warrior, and tackle that concrete slab with confidence!
Using the Concrete Slab Jack Tool
If you’re a handy DIYer, you might find yourself in need of a trusty concrete slab jack tool. This tool is used to lift portions of a concrete slab that have sunk or settled over time. Don’t worry; even if you’re not a DIYer, this tool is straightforward to use and saves you both time and money.
What is a Concrete Slab Jack Tool
A concrete slab jack tool is an essential tool used in the slab jacking process. It’s a hydraulic pump that forces concrete slurry (a mixture of water, cement, and sand) beneath the slab, lifting it back to its original position. This tool is beneficial because it doesn’t require the entire slab’s replacement, which can be incredibly expensive and time-consuming.
How to Use the Concrete Slab Jack Tool
To use this tool, first, drill small holes through the sunken or settled area of the concrete slab. Typically, these holes are around 1 5/8 inches in diameter, spaced 6-8 feet apart. Then, connect the pumps with a hydraulic hose. After that, pump the concrete slurry through the holes you drilled until the slab raises to the required height.
Benefits of Using a Concrete Slab Jack Tool
One of the key benefits of using a concrete slab jack tool is that It’s an inexpensive alternative to fixing a sunken or settled concrete slab since you only need to fix the areas that need to be fixed, compared to a total replacement. Additionally, it’s a DIY-friendly tool, allowing you to save expensive remodeling costs.
If you own a sunken or settled concrete slab – say, a garage floor, pathway, or patio surface – don’t panic. Get your hands on a reliable concrete slab jack tool and fix it yourself. Always opt for a high-quality tool to get the best result. With the right tools and a bit of elbow grease, you can easily perform the slab jacking process and get your concrete slab back to its original condition.
Mud Jacking Garage Floor: An Alternative to Slab Jacking
If you’ve done some research on garage floor leveling, you must have come across the popular method of slab jacking. However, did you know that there’s another way you can achieve the same results with even better benefits? And nope, it’s not “flap jacking” or “tab jocking,” whatever those weird techniques are. It’s called “mud jacking!”
What is Mud Jacking Garage Floor
Mud jacking, also known as slab jacking or pressure grouting, involves pumping a slurry mixture of water, soil, and cement underneath a sunken concrete slab to raise it back to its original position. It’s less invasive and quicker than replacing the entire concrete slab and can take a few hours to complete, leaving your garage floor smooth and level.
Why Choose Mud Jacking over Slab Jacking
While slab jacking is an excellent technique, mud jacking has some benefits that make it a better option for some homeowners. Here’s why:
- Mud jacking can lift heavier loads than slab jacking.
- The material used in mud jacking is more durable than the fillers used in slab jacking.
- Mud jacking fills all voids, not just the ones that caused the sinking, making future sinking less likely.
- Mud jacking is a greener option since the material used is a mixture of water, soil, and cement.
What is the Cost of Mud Jacking
The cost of mud jacking varies depending on the size and location of the concrete slab. On average, mud jacking costs between $500 and $1500 for a two-car garage, while slab jacking ranges between $1000 and $3000. While mud jacking is relatively cheaper, we advise that you get a quote from a professional before making a final decision.
How to Choose the Right Mud Jacking Contractor
Choosing the right contractor for your mud jacking project is critical to achieving the desired results. Here are some factors to consider:
- Experience: Find a contractor who has been in the business for several years and has experience dealing with mud jacking projects similar to yours.
- Reputation: Check reviews on review sites and ask for references to know if the contractor is reliable and trustworthy.
- Insurance and licensing: Ensure that the contractor has liability insurance and is licensed to operate in your state.
- Cost: Compare quotes from different contractors to get the best deal without compromising quality.
If you’re looking for an alternative to slab jacking or want to go green with your garage floor leveling project, mud jacking is an excellent option. It’s quicker, less invasive, and more durable than slab jacking, making it a cost-effective solution that can leave your garage floor smooth and level again. Just ensure that you get a professional and experienced contractor to handle the project.
Concrete Lifting Foam Kit
If you’re considering slab jacking your garage floor, you’ve likely come across the option of using a concrete lifting foam kit. While it may seem like an unusual method, it’s actually becoming more and more popular amongst DIY enthusiasts.
What is a Concrete Lifting Foam Kit
In simple terms, a concrete lifting foam kit is a set of materials that you can use to lift and repair concrete slabs. The kit typically includes a chemical mixture that, when combined, creates a foam-like substance. You can then inject this foam into gaps and voids under the concrete, which lifts the slab and restores it to its original position.
Advantages of Using a Concrete Lifting Foam Kit
There are several advantages to using a concrete lifting foam kit over other methods of slab jacking. First and foremost, the kit is easy to use and requires minimal preparation. With just a few simple tools, you can mix and inject the foam into the gaps under your garage floor.
Another advantage is that the foam is lightweight and won’t add any extra weight to the slab. This is especially important in areas with weak soil or where heavy equipment can’t be used.
Finally, the foam cures quickly and won’t shrink like other materials, which means your garage floor will be ready to use in no time.
How to Use a Concrete Lifting Foam Kit
Using a concrete lifting foam kit is a relatively straightforward process. First, you’ll need to identify the gaps or voids under your garage floor where the foam needs to be injected. Next, mix the chemicals in the kit according to the instructions and pour the mixture into the injection gun.
Insert the injection gun into the gap or void and slowly inject the foam. As the foam expands, it will lift the concrete slab back to its original position.
If you’re looking for a quick and easy way to lift and repair your garage floor, consider using a concrete lifting foam kit. With its lightweight materials and fast curing time, it’s a great solution for DIY enthusiasts who want to tackle a project on their own.
How to Lift a Garage Slab
Garage slab jacking repairs can be a hassle, but the hardest part is the actual lifting process. So, how do you lift that mammoth of a garage slab? Don’t worry; we’ve got you covered with some tried and tested tips.
Equipment You’ll Need
First things first, you need the right equipment to lift the garage slab. Here are some essentials:
- A jack
- Shims
- Pry bars
- Rope or chain
- Protective gear (gloves, eyewear, and steel-toed boots)
Preparing the Slab
Before you start lifting, make sure you prepare the slab:
- Clear the area around the garage floor and remove any debris or obstacles.
- Identify the low points on the slab that need lifting.
- Use shims to create a gap between the slab and the ground. This will make it easier to lift.
Lifting the Slab
Now comes the fun part. Here’s how to lift the garage slab:
- Insert the jack under the slab and slowly pump it until it touches the underside of the garage floor.
- Place the pry bar between the jack and the garage floor and use it to lift the slab.
- Repeat the process with another jack and pry bar until the slab is level.
Safety Measures
Garage slab jacking can be dangerous, so take the necessary safety measures:
- Wear protective gear to protect yourself from debris or any hazards.
- Don’t lift more than one side of the slab at a time.
- Keep your hands and feet out of the way of the moving slab.
Lifting a garage slab is a tricky process, but it’s not impossible! With the right equipment, preparation, and safety measures, you can lift the slab and achieve a level garage floor. Remember to take your time and be patient with the process. Happy slab lifting!
Can a garage floor be mudjacked
Have you ever wondered if your sunken garage floor could be lifted with mudjacking? The answer is a resounding YES! Mudjacking or slab jacking is an affordable and effective way to repair concrete surfaces such as your garage floor. This method involves drilling small holes into the affected area and injecting a mixture of water, cement, and other materials. This mixture will fill the voids, lift the slab, and stabilize the ground underneath to prevent further sinking.
The mudjacking process
Mudjacking is an easy and straightforward process that usually takes a few hours to complete. First, the contractor drills small holes in the sunken area. These holes allow access for the mudjacking pump to insert the grout mixture. Second, the contractor injects the grout mixture into these holes. As the grout expands, it lifts the sunken area and matches it to the surrounding surface. Finally, the contractor seals the holes.
Benefits of mudjacking your garage floor
Mudjacking your garage floor has many benefits. Firstly, mudjacking is cheaper than replacing your garage floor entirely. Secondly, the process is less disruptive because it doesn’t involve tearing out and replacing the entire slab. Thirdly, mudjacking leaves smaller holes than concrete replacement; thereby causing lesser disruption to your daily routine. Finally, mudjacking is eco-friendly since it eliminates the need for concrete disposal.
Is mudjacking the right choice for you
Mudjacking is suitable for houses built on clay soils, on hills, and any soil type that can cause sinking and settling in concrete slabs. However, mudjacking may not be appropriate for severe structural problems with your garage floor. In such a case, reconstruction, or total replacement may be the only solution.
Mudjacking is an affordable and effective method to fix your sunken garage floor. It’s a process that will make your floor level again, more stable, and prevent further settling. Choose a qualified concrete repair specialist to carry out the process for you and enjoy the benefits of having a properly leveled garage floor.
How Long Does Slab Jacking Last
If you’re considering slab jacking as a solution to your garage floor problems, one of the questions you’re probably asking yourself is, “How long will this last?” We here at [company name] have a lot of experience with slab jacking, and we’re happy to help answer that question. The short answer? It depends.
Factors That Affect How Long Slab Jacking Lasts
There are several factors that can affect how long your slab jacking repair will last. Here are a few:
The Type of Soil Beneath Your Garage Floor
If your garage floor is built on top of very loose or sandy soil, your slab jacking repair may not last as long as it would if it was built on top of more solid or rocky soil. This is because loose soil can shift and settle more easily than denser soil, which can lead to cracking and other damage in your garage floor.
The Quality of the Slab Jacking Materials
The quality of the materials used in your slab jacking repair can also affect how long it lasts. Cheaper materials may not hold up as well over time, which could lead to additional repairs being needed sooner than if you had used higher-quality materials.
The Amount of Weight Your Garage Floor Needs to Support
If you use your garage to store heavy items like cars or machinery, this can put additional strain on your garage floor. Over time, this extra weight can cause the floor to settle or crack, which could require another round of slab jacking repairs.
How Long Can You Expect Slab Jacking to Last
While there are several factors that can affect how long a slab jacking repair will last, in general, you can expect it to last anywhere from 5 to 10 years. With proper care and maintenance, you may be able to extend the life of your slab jacking repairs for even longer.
Wrapping Up
Now you know how long you can expect your slab jacking repair to last, although the answer can vary depending on the factors mentioned. If you’re considering slab jacking for your garage floor, be sure to choose a reputable contractor who uses high-quality materials to help ensure that your repair lasts as long as possible.
How to Level a Concrete Garage Floor
If you’re tired of the bumps and dips in your garage floor, you might be considering slab jacking as a solution. But before you get to that stage, you need to know how to level your concrete garage floor. Here are some simple steps to follow:
Step 1: Gather Your Tools
You’ll need a few basic tools to level your garage floor, including a long, straight 2×4 board, a carpenter’s level, a shovel, a hoe, a trowel, and some safety gear.
Step 2: Prepare the Surface
Before you start leveling, you need to prep the surface. This means thoroughly cleaning the garage floor and removing any debris or loose material. You should also fill any large cracks or holes with a concrete patching compound.
Step 3: Mark Your High and Low Spots
Using your 2×4 board and level, mark the high and low spots on your garage floor. This will give you a clear idea of where you need to focus your leveling efforts.
Step 4: Add and Spread the Self-Leveling Compound
Self-leveling compound is a mixture designed to flow into low spots and create a flat, even surface. Pour the mixture onto your garage floor in small sections and use a trowel to spread it out evenly. Repeat this process until you’ve covered your entire garage floor.
Step 5: Wait for the Compound to Dry
Once you’ve applied the self-leveling compound, you need to wait for it to dry completely. The drying process typically takes 24-48 hours. Once it’s fully dry, you can walk on it and start using your garage as normal.
In conclusion, leveling your concrete garage floor doesn’t have to be a difficult or time-consuming task. With these simple steps, you can create a flat, even surface in no time. And if you do end up needing slab jacking services, at least you’ll have a level surface to work with!
Is Polyjacking Better Than Mudjacking
When it comes to leveling your uneven garage floors, there are two popular methods: mudjacking and polyjacking. In this section, we’ll compare the two methods and determine which one is better.
Mudjacking Method
Mudjacking, also known as slab jacking, is the traditional method of leveling concrete slabs. In this method, a mixture of water, cement, and sand, known as slurry, is pumped into holes drilled in the concrete surface. The slurry fills the voids beneath the slab and lifts it back to its original position.
Pros of Mudjacking
- Cost-effective
- Well-established method
- Long-lasting solution
- Can handle heavier loads

Cons of Mudjacking
- Requires more drilling
- Slurry can wash out quickly
- May crack unevenly
- Not suitable for colder climates
Polyjacking Method
Polyjacking is a relatively new method of lifting concrete slabs. In this method, a high-density polyurethane foam is injected into small holes drilled in the concrete surface. The foam expands and lifts the slab back to its original position.
Pros of Polyjacking
- Requires fewer and smaller holes
- Foam sets quickly
- Environmentally friendly
- Resistant to water erosion
- Works in extreme temperatures
Cons of Polyjacking
- More expensive than mudjacking
- May not be suitable for heavier loads
- Not a well-established method
- Foam can shrink over time
So, Which Method is Better
As you can see, both mudjacking and polyjacking have their respective pros and cons. Choosing the right method for your situation depends on various factors such as your budget, location, and the use of your garage. Mudjacking is more affordable and has been around for a long time, making it a reliable method. On the other hand, polyjacking requires fewer holes and is more environmentally friendly. Ultimately, the decision comes down to personal preference and the recommendations of a professional contractor.
In conclusion, both mudjacking and polyjacking are effective solutions for leveling uneven garage floors. It’s crucial to work with a professional contractor to assess your situation and determine the best method for your needs.
How Much Does Polyurethane Concrete Lifting Cost
If you’re looking for a cost-effective way to repair your garage floor, polyurethane concrete lifting is your best bet. This method is ideal for fixing sunken slabs without the need for excavation. But, before you get too excited, it’s important to know how much it costs.
Factors that Affect the Cost
Several factors influence the cost of polyurethane concrete lifting. They include:
Location
The cost of polyurethane concrete lifting varies from one location to another. If you live in an area where the cost of living is high, expect to pay more.
Level of Damage
The extent of the damage to your garage floor determines how much you’ll have to pay for polyurethane concrete lifting. The more extensive the damage, the more you’ll pay.
Size of the Area
The size of the area that needs repair affects the cost of polyurethane concrete lifting. The larger the area, the more expensive it will be.
Labor Costs
The amount you’ll pay for labor also affects the cost of polyurethane concrete lifting. If you hire a professional, you’ll pay more than if you do it yourself.
The Average Cost of Polyurethane Concrete Lifting
Now that you know the factors that influence the cost of polyurethane concrete lifting, let’s talk about the average cost. On average, you can expect to pay between $5 and $10 per square foot of concrete for polyurethane concrete lifting.
Polyurethane concrete lifting is an excellent way to repair sunken slabs in your garage floor. It’s a cost-effective and convenient method that doesn’t require excavation. However, the cost varies depending on your location, level of damage, size of the area, and labor costs. On average, you can expect to pay between $5 and $10 per square foot of concrete.