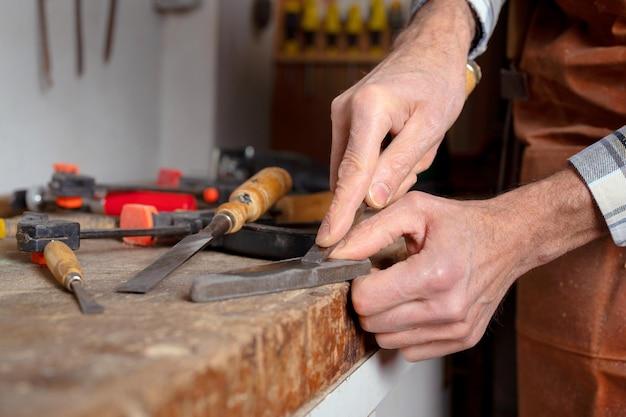
Are you a passionate hand engraver looking to enhance your craft? One essential aspect of mastering the art of hand engraving is keeping your tools sharp. Whether you’re a beginner or an experienced engraver, knowing how to effectively sharpen your hand engraving tools is crucial for achieving clean and precise designs. In this comprehensive guide, we’ll explore various techniques, including using a graver sharpening tool like the Crocker graver sharpener, and provide step-by-step instructions to ensure your tools are always razor sharp. So let’s delve into the world of hand engraving tool sharpening and elevate your engraving game to new heights!
How to Keep Your Hand Engraving Tools Razor Sharp
Hand engraving is a delicate art form that requires precision, skill, and tools that are razor sharp. But what do you do when those tools start to lose their edge? Fear not, my fellow engravers! In this guide, I’ll show you some tried and true methods for sharpening your hand engraving tools. Say goodbye to blunt tools and hello to crisp lines!
Getting Started: The Essentials
Before we dive into the nitty-gritty of tool sharpening, let’s go over what you’ll need. Grab your favorite cup of coffee, put on some tunes, and gather these essentials:
1. Whetstones – Your Trusty Allies
Whetstones are the backbone of any engraver’s sharpening arsenal. These humble stones come in a variety of grits, from coarse to fine. Think of them as the secret sauce that will transform your dull tools into sharp beauties. A whetstone with two different grits, such as 1000/6000, is a great place to start.
2. Honing Oil – The Lubricant for Success
To ensure a smooth sharpening process, it’s crucial to have some honing oil on hand. This magical elixir keeps the metal shavings from clogging up the stone and helps create a fine edge. Consider it the WD-40 for your engraving tools.
3. Strop it Like it’s Hot
No, I’m not talking about a dance move. A strop is a strip of leather or canvas that serves as the final step in the sharpening process. It helps refine the edge of your tools to a razor-sharp finish. Just think of it as giving your tools a spa day!
Step-by-Step: Sharpening like a Pro
Now that we have our essentials sorted, let’s dive into the sharpening process. Follow these steps, and your hand engraving tools will be sharper than a cat’s claws in no time:
1. Prepare Your Whetstone
Grab your whetstone and give it a good soak in water. We want it nice and moist, just like a slice of chocolate cake. Keep in mind that different stones may require different soaking times, so check the manufacturer’s recommendations.
2. Oil Up Your Tools
Before you start sharpening, give your hand engraving tools a good coating of honing oil. Think of it as a pre-sharpening massage for your tools. It helps lubricate the process and prevents unnecessary friction.
3. Finding the Right Angle
Now it’s time to find your groove and master the right sharpening angle. For most hand engraving tools, a 20 to 30-degree angle will do the trick. Remember, practice makes perfect, so don’t be discouraged if it takes a few tries to find your sweet spot.
4. Let the Sharpening Begin!
Place your engraving tool on the whetstone and slide it back and forth in a sweeping motion. Repeat this process on both sides of the tool, making sure to maintain the same angle throughout. Remember, slow and steady wins the race, so take your time and enjoy the sharpening process.
5. The Finishing Touch: Stropping
Time to bring out the strop! Gently drag your newly sharpened tools across the strop, again maintaining the same angle. This will refine the edge of your tools and give them that extra oomph. Think of it as the final flourish before stepping into the spotlight.
Polish Those Tools and Unleash Your Creativity
Congratulations, dear engraver! You’ve successfully sharpened your hand engraving tools to perfection. Now it’s time to test them out and unleash your creative genius. Remember, a sharp tool is a happy tool, so make sure to keep up with regular maintenance and sharpening. Happy engraving!
Sharpening Your Graver: A Tool Worth Its Weight in Gold
If you’re serious about hand engraving, then a well-sharpened graver is your secret weapon. This little tool holds the key to creating stunning designs and intricate details that will leave people in awe. But as with any tool, regular maintenance is vital to keep it performing at its best. In this section, we’ll delve into the art of graver sharpening and equip you with the knowledge to keep your engraving game razor-sharp.
Getting to the Point: Why Sharpness Matters
Before we plunge into the depths of graver sharpening, let’s take a moment to appreciate why it’s so important. Picture this: you’re delicately engraving a breathtaking design when suddenly, your graver slips, leaving an unwanted scratch. Ouch! A sharp graver dramatically reduces the chances of such accidents, giving you more control and precision over each stroke. So, let’s roll up our sleeves and sharpen our way to hand engraving nirvana!
The Three Musketeers: Tools for Graver Sharpening
-
Sharpening Stone: The trusty companion for all your graver sharpening needs. Choose a fine-grit stone for honing the cutting edge of your graver. Remember, a smooth, consistent stroke is key to achieving that much-needed sharpness. Imagine your graver is a luxury car being buffed to a shine, and you’re holding the polishing cloth. Slow and steady wins the race!
-
Oil or Water: These aren’t just any liquids; they’re the sidekick to your sharpening stone. Depending on the type of stone you use, grab either oil or water to lubricate and cool the graver as you sharpen. Think of them as the refreshing drink on a hot summer day – they keep things running smoothly and prevent overheating. Plus, they add a touch of hydration to your graver’s life.
-
Loupe: Meet the magnifying glass of the engraving world. Insert dramatic reveal music here. A loupe helps you inspect your handy work up close, making it easier to spot any flaws or inconsistencies in your sharpening technique. It’s like having your own detective on the case, ensuring your graver is top-notch and ready for action.
The Sharpening Showdown: Step-by-Step Guide
-
Prepping the Stone: Before you begin your epic journey to sharpen-city, soak your sharpening stone in water or cover it with oil. This ensures a smooth and seamless sharpening experience. Just think of it as giving your stone a little TLC before the heavy lifting begins.
-
Finding the Sweet Spot: Hold the graver firmly but gently against the stone, with the beveled edge facing down. No need to press down with the strength of Hercules; a light touch will do. You want to find that sweet spot where the graver meets the stone at the perfect angle, around 25 to 30 degrees. It’s like a dance move – a delicate balance of precision and finesse.
-
Rock, Roll, Repeat: Time to sharpen! Using a rocking motion, gently slide the graver back and forth on the stone. Imagine you’re at a rocking chair marathon, gliding back and forth, back and forth. Keep the strokes smooth, steady, and consistent, covering the entire length of the cutting edge. This helps maintain an even sharpness and avoids any flat spots.
-
Inspect and Adjust: Pause the sharpening dance, grab your trusty loupe, and inspect your handiwork. Are the scratches on your graver’s beveled edge consistently forming? If not, adjust the angle and try again. Keep sharpening and checking until you achieve that perfect, shining cutting edge. With a little practice, you’ll become a master of the graver sharpening dance!
So there you have it – a crash course in graver sharpening that doesn’t require a black belt in engraving. Take the time to get to know your graver and the finesse it takes to keep it at its sharpest. Remember, a sharp graver is a happy graver, and a happy graver leads to breathtaking engravings that will leave your audience speechless. Now go forth, fellow engravers, and sharpen with gusto!
Crocker Graver Sharpener
Having sharp engraving tools is essential for creating precise and beautiful designs. But let’s be honest, sharpening those delicate tools can be a real pain in the you-know-where. Fear not, my fellow engravers, because the Crocker Graver Sharpener is here to save the day!
What is the Crocker Graver Sharpener
The Crocker Graver Sharpener is a nifty little tool that’s designed specifically for sharpening hand engraving tools. It’s like having your own personal sharpening guru in the palm of your hand, ready to breathe new life into your dull and worn-out tools.
Say Goodbye to Frustration
No more struggling to find the right angle or spending hours trying to sharpen your tools with traditional methods. With the Crocker Graver Sharpener, you’ll be able to sharpen your engraving tools with ease and precision, leaving you more time to actually do what you love – engraving!
How Does It Work
The beauty of the Crocker Graver Sharpener lies in its simplicity. It’s basically a small, handheld device with a diamond wheel that allows you to sharpen the cutting edge of your engraving tools. Just insert your dull tool into the sharpener and let the diamond wheel work its magic. It’s quick, it’s easy, and it’s oh-so-satisfying to see your tools regain their sharpness!
Benefits of Using the Crocker Graver Sharpener
-
Precision: With the Crocker Graver Sharpener, you can ensure that your tools are consistently sharpened to the perfect angle, resulting in cleaner and more precise cuts. Say goodbye to wobbly lines and uneven designs!
-
Efficiency: No more wasting time trying to sharpen your tools using outdated methods. The Crocker Graver Sharpener allows you to quickly and efficiently sharpen your engraving tools, so you can spend more time doing what you love.
-
Versatility: The Crocker Graver Sharpener is compatible with various types of engraving tools, including flat gravers, onglettes, and knife points. Whether you’re a professional engraver or just starting out, this sharpener has got you covered.
-
Durability: Made with high-quality materials, the Crocker Graver Sharpener is built to last. It can withstand the test of time, ensuring that you’ll be able to sharpen your tools for years to come.
Get Your Hands on the Crocker Graver Sharpener Today
If you’re tired of struggling to sharpen your hand engraving tools or simply want to make your sharpening process more efficient, then the Crocker Graver Sharpener is definitely worth considering. It’s the tool that will take your engraving game to the next level, all while saving you time and frustration.
So, fellow engravers, say goodbye to dull tools and hello to the Crocker Graver Sharpener! Your tools will thank you, and your designs will never be the same again. Happy engraving!
Subtopic: Hand Engraving – YouTube
If you’re looking to sharpen your hand engraving tools and add a little extra flair to your craft, YouTube is the place to be. Thanks to the wonderful world of online video tutorials, you can now learn the art of hand engraving from the comfort of your own workshop. So grab your tools and get ready to be entertained and educated in equal measure!
Learning the Ropes with Hand Engraving Masters
You’ll discover a treasure trove of knowledge by exploring YouTube channels created by experienced hand engravers. These masters of the craft generously share their expertise, tips, and techniques with aspiring engravers like yourself. From basic tool handling to advanced decorative designs, these channels cover it all.
The Entertaining Side of Hand Engraving
As you navigate through the enchanting realm of hand engraving on YouTube, be prepared to encounter a delightful mix of informative and entertaining content. Some engravers inject their videos with a healthy dose of humor, making the learning process all the more enjoyable. Who knew that learning a centuries-old artistic tradition could be so entertaining?
Recommendations from the Best in the Biz
With a myriad of YouTube channels dedicated to hand engraving, it can be overwhelming to choose where to start. That’s where recommendations from trusted professionals come in handy (pun intended!). Take the time to explore different channels and see which ones resonate with your learning style and artistic sensibilities.
Dive into In-Depth Tutorials
Once you’ve found your favorite hand engraving YouTube channels, dive into their in-depth tutorials. These videos not only provide step-by-step instructions but also offer valuable insights into the techniques employed by the masters. As you watch and learn, always remember: patience and practice are keys to honing your hand engraving skills.
Connect with the Engraving Community
Besides learning the tricks of the trade, YouTube can also help you connect with fellow hand engraving enthusiasts. Engage with the community by leaving comments, asking questions, and sharing your own progress. The support, advice, and encouragement you’ll receive will undoubtedly fuel your passion for this mesmerizing craft.
Taking Inspiration to the Next Level
One of the greatest benefits of YouTube is the ability to tap into a boundless source of inspiration. As you watch videos, draw inspiration from different engravers and their unique styles. Adapt and combine techniques to develop your own artistic approach. Remember, hand engraving is an art form, and with practice, your creativity will soar.
YouTube is not just a platform for funny cat videos and epic fails; it’s a haven for hand engravers seeking to sharpen their skills. Whether you’re a beginner or a seasoned engraver looking to add new techniques to your repertoire, YouTube offers a wealth of resources to help you on your artistic journey. So grab your popcorn, sit back, and let the enchanting world of hand engraving unfold before your eyes.
And there you have it! A comprehensive guide to using YouTube as your go-to resource for all things hand engraving. Happy engraving, and may your artistic endeavors be etched with beauty and precision!
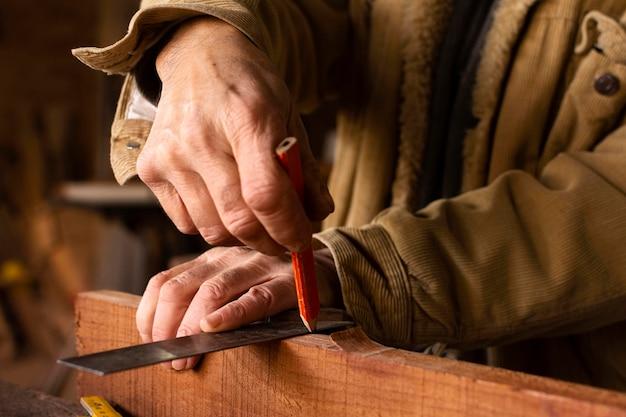
How to Hand Engrave Metal
Hand engraving metal can seem daunting at first, but with a little practice and the right tools, you’ll be etching like a pro in no time. Before you begin, make sure you have a steady hand and a sense of humor—because engraving metal is as much about patience as it is about precision. So, let’s dive into the fascinating world of hand engraving metal!
Choosing the Right Tools
First things first: you need to equip yourself with the right tools. Find a comfortable engraving handle that feels right in your hand, like a trusty old wrench. It should be an extension of your personality and your creative genius. Next, grab some high-quality engraving gravers. These little metal warriors come in various shapes and sizes, so experiment and find the ones that speak to you. Remember, there’s no rule that says your engraving tools can’t have a little personality!
Mastering the Art of Hand Engraving
Now that you have your tools, it’s time to channel your inner artist and dive into the art of hand engraving. Start by securing your metal piece in a vice grip—it’s like giving your masterpiece a big bear hug. Position yourself comfortably and assume the engraver’s stance, with a slight bend in your knees and a glint of determination in your eyes.
Hold Your Breath and Start Engraving
As you hover the engraving tool over the metal’s surface, remember to hold your breath like you’re vacuuming the most stubborn crumbs. This steadies your hand and lets you focus on creating those intricate designs. Start with light, delicate strokes, like a hummingbird’s wings fluttering in the wind. Feel the metal yield beneath your touch, as if it’s whispering secrets only you can hear.
Embrace the Art of Patience
Mastering hand engraving takes time, so embrace the art of patience like a koala clings to a eucalyptus tree. Don’t rush the process—it’s not a race; it’s a dance between your tools and the metal canvas. Appreciate the journey and the imperfections that make each piece unique. Remember, if at first, you don’t succeed, keep trying until you’ve engraved more metal than a superhero has saved the world!
Celebrate Your Creations
Once you’ve engraved your metal piece with love and dedication, take a moment to appreciate your creation. Admire the fine details, the bumps, and the grooves that tell the story of your artistic journey. Share your masterpiece with friends, family, and maybe even the Queen of England—after all, she deserves a hand-engraved metal portrait, doesn’t she?
Hand engraving metal is a fascinating art form that requires equal parts skill, patience, and a dash of humor. So, grab your trusty engraving handle, unleash your creative genius, and let your tools dance across the metal canvas. Remember, every stroke brings your vision to life, making you the metal maestro of your own destiny. Happy engraving!
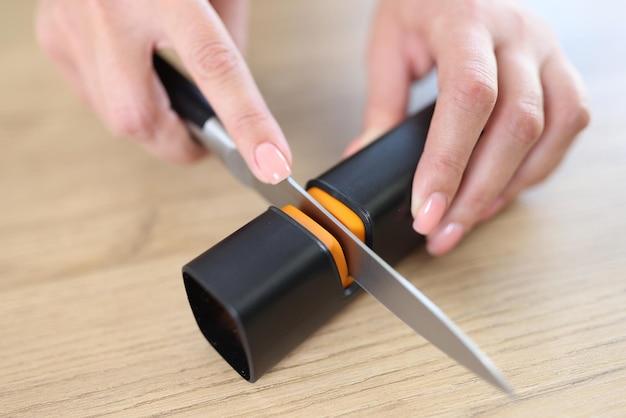
How to Sharpen Onglette Graver
If you’re a hand engraver seeking to improve your craft, sharpening your tools is an essential skill to master. One of the tools you’ll be sharpening is the onglette graver, a versatile tool that allows for creating fine lines and decorative cuts. In this section, I’ll walk you through the process of sharpening an onglette graver, ensuring it glides through metal like a hot knife through butter.
Gather Your Sharpening Supplies
Before we dive into the nitty-gritty of sharpening, let’s gather the necessary supplies:
- Diamond stone: Look for a fine-grit diamond stone to sharpen your graver effectively.
- Sharpening oil: Mineral oil or sharpening oil will do the trick, providing lubrication for a smooth sharpening experience.
- Safety equipment: Don’t forget to gear up with safety goggles and finger protection. We don’t want your digits ending up as accidental engravings!
The Dance of the Graver and the Stone
-
Positioning is Key
Secure your diamond stone on a flat surface and make sure it won’t go sliding around like a greased pig at a rodeo. Place it somewhere stable, like a workbench or table. Imagine the stone as your dance floor – you’re about to lead the graver in a graceful tango.
-
The Right Angle is Everything
Now hold the onglette graver firmly between your fingertips, ensuring a stable grip. Position it at approximately a 30-degree angle against the stone. Remember, we want a sharp edge, not a dull one like a butter knife at brunch.
-
A Motion Refined
With a gentle but assertive motion, slide the graver across the stone, as if you’re polishing its metallic dance shoes. Move it in a forward-and-backward motion, ensuring the entire length of the graver runs across the stone consistently. Think of it as a rhythmic exercise for your hands. Sharpening is your masterclass, and the stone is your trusted instructor.
-
Don’t Overstay Your Graver’s Welcome
Avoid grinding the graver on the stone for too long, or else it might acquire a stubborn edge like a teenager refusing to do their chores. A few strokes on each side will do the trick. Remember, we’re aiming for sharpness, not world records on the number of strokes.
-
Flipping the Graver – Like a Pancake Maestro
Once you’re done sharpening one side of the graver, it’s time to flip it and sharpen the other side. This step is akin to flipping a pancake – a swift yet graceful maneuver. Adjust your angle to ensure both sides receive equal sharpening love.
A Sharp Tip for the Road
Congrats, my friend! You’ve successfully sharpened your onglette graver. Now you’re ready to dive into intricate engravings with the precision of a hawk spotting its prey. Just remember, practice makes perfect, so don’t be disheartened if you don’t become a hand engraving maestro overnight. Keep honing your skills, and soon enough, your engravings will shine brighter than a diamond on a sunny day. Happy engraving!
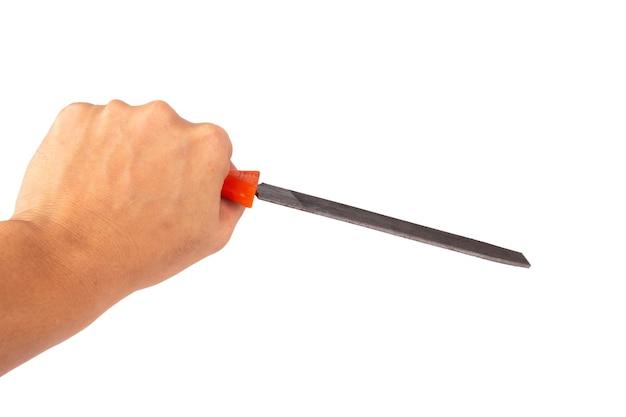
How to Sharpen an Etching Tool
If you’re an aspiring hand engraver, you know the importance of keeping your etching tools sharp. Dull tools can leave messy, unclear lines, and let’s face it, no one wants a sloppy engraving. So, in this section, we will dive into the art of sharpening your etching tool, which is essential for creating crisp and clean engravings that will impress even the most discerning eyes.
The Nitty Gritty of Sharpening
To sharpen an etching tool, you’ll need a few key items: a sharpening stone or diamond file, honing oil, and a steady hand. Start by setting up your work area with good lighting and a comfortable seating arrangement, so you won’t be squirming around as you sharpen those blades. Remember, precision is key, so grab your tool and let’s get started!
Step 1: Prepare Your Tool
Before we dive into the actual sharpening process, it’s essential to properly prepare your etching tool. Clean off any dirt or debris that may have accumulated, ensuring you have a smooth and clear surface to work with. This will prevent any imperfections from interfering with the sharpening process. Plus, a clean tool is just more aesthetically pleasing, right?
Step 2: Choose Your Weapon
Now, it’s time to select the right weapon for the job – your sharpening stone or diamond file. These trusty tools will help you remove any dull edges and bring forth the sheer sharpness your etching tool deserves. Just like choosing a wand in the wizarding world, you must find the one that feels right in your hands. Experiment with different options until you find your perfect match.
Step 3: Master the Angle
Ah, the angle of attack – a concept not just for martial arts aficionados, but for engraving as well. When sharpening your etching tool, it’s essential to hold your blade at the proper angle. This angle may vary depending on the specific tool you’re sharpening, so be sure to do some research or consult a master engraver if you’re unsure. Remember, finding the right angle is the key to unlocking the full potential of your etching prowess!
Step 4: Find Your Rhythm
Sharpening an etching tool is a delicate dance between patience and practice. Once you’ve set the angle, it’s time to find your rhythm. Using gentle strokes, carefully slide your tool along the sharpening stone or file in a consistent and controlled manner. Like a seasoned salsa dancer, let your body flow with the movements, displaying finesse and precision. Sooner than you think, those dull edges will transform into razor-sharp perfection.
Step 5: Oil it Up
After the sharpening dance is complete, it’s time to give your etching tool a little pampering. Apply a few drops of honing oil to a clean cloth or directly onto the blade, and give it a good rubdown. This oil helps to prevent corrosion and keeps your tool in tip-top shape, ready for future engraving endeavors. Plus, it adds a lovely sheen, making your tool feel like the star of the show.
So there you have it, the secret to sharpening your etching tool like a true artisan. With a little practice and a touch of finesse, you’ll be wielding a perfectly sharp tool that will elevate your engravings to new heights. So, grab your tools, embrace your inner engraving maestro, and let the sharpening process begin!
What are the Sharp Tools Used in Engraving Called
Engraving is an art form that requires precision, skill, and the right set of tools. If you’re new to the world of engraving, you might be wondering what these sharp gizmos are called. Fear not, my curious friend, I’m here to enlighten you on the subject!
Graspers of Gorgeousness: Burins
Let’s start with the crème de la crème of engraving tools – burins. These beauties are the main stars of the show, the Leonardo DiCaprios of the engraving world, if you will. With their sharp and angled blades, burins are designed to carve exquisite lines into various materials like metal, wood, or even bone. Burins come in different shapes and sizes, each serving its own unique purpose. So, be sure to have a few of these in your arsenal if you want to create masterpieces that make people go “oooh” and “aaah.”
The Incredible Etching Ensemble: Etching Needles
Picture this: a tiny, needle-like instrument that’s capable of creating intricate designs with delicate ease. That, my friend, is an etching needle. These slender wonders use a technique called etching to cut fine lines into materials like copper or zinc plates. With their sharp tips and a touch of artistic finesse, etching needles allow you to bring your creative visions to life. So, if you’re looking to create stunning prints or etchings that deserve a standing ovation, don’t forget to have some of these gracious needles in your tool collection.
Whirrs and Wonders: Engraving Machines
Now, let’s venture into the realm of modern engraving wizardry – meet the engraving machines. These nifty devices are like the magical wands of engraving. They make the process faster, smoother, and more efficient, allowing you to engrave with the precision of a surgeon. These powerful machines come equipped with motorized bits and bobs that zip and zoom through materials with precision and finesse. So, if you want to ditch the manual labor and let technology take the reins, an engraving machine might just be the time-saving tool you’re looking for.
Tiny Titans: Gravers
Last but certainly not least on our list are the mighty gravers. These little champs are like the pocket knives of engraving – versatile and mighty despite their small size. Gravers are pointed tools that can carve, shape, and sculpt with surgical precision. Whether you’re working on metals, glass, or even gems, gravers will be your trusty sidekicks. With various types like flat, point, or square, gravers allow you to create intricate details and textures that will leave others marveling at your craftsmanship.
In conclusion, the sharp tools used in engraving have names as vivid as their capabilities. From the masterful burins, the delicate etching needles, the magical engraving machines, to the versatile gravers, these tools bring art and craftsmanship together in a harmonious symphony. So, fellow artisans, whether you’re a traditionalist or a tech enthusiast, make sure to equip yourself with these sharp wonders and unleash your creative potential!