Welcome to our comprehensive blog post all about shabby fabrics tutorials! Whether you’re a seasoned sewer or just starting out, this guide is packed with valuable information and inspiration to help you create beautiful projects using shabby fabrics. From fabric free patterns and shabby fabrics video tutorials to the significance of color in textiles, we’ll cover a range of topics that are sure to pique your interest. So grab your sewing machine and let’s dive into the wonderful world of shabby fabrics!
Shabby Fabrics Tutorials: Adding a Dose of Vintage Charm to Your Crafting
Shabby chic is all about embracing imperfections and adding a touch of vintage charm to your crafting projects. By using shabby fabrics, you can easily achieve that effortlessly stylish look. Whether you’re a beginner or a seasoned crafter, these shabby fabrics tutorials will guide you through the process with a sprinkle of humor and a whole lot of fun.
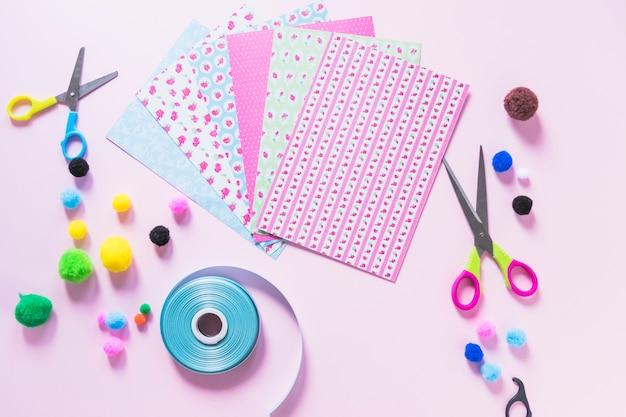
The Hunt for Shabby Fabrics
Before diving into the tutorials, you need to gather the perfect shabby fabrics. Hit up thrift stores, flea markets, and vintage shops in search of worn-out yet beautiful materials. Look for floral prints, faded pastels, and cozy textures that scream shabby chic. Remember, the more unique and weathered, the better!
Shabby Coasters: A Delightfully Worn-Out Addition to Your Living Room
Bring a touch of rustic charm to your coffee table with these shabby coasters. Cut your chosen shabby fabrics into small squares or circles, stitch them together, and voila! You’ve got yourself a set of delightfully worn-out coasters that will make your guests green with envy.
Vintage-Inspired Throw Pillows: A Nostalgic Accent for Any Room
Add a pop of shabby chic to your living space with vintage-inspired throw pillows. Cut two square pieces of your shabby fabrics and stitch them together, leaving a small opening. Fill it with stuffing, hand-stitch the opening closed, and you’ve created a cozy and nostalgic accent piece that will take your décor to the next level.
Shabby Chic Headbands: For Days When Your Hair Needs a Little Extra Oomph
Turn heads with a shabby chic headband that showcases your unique style. Cut a strip of shabby fabric, wide enough to fit comfortably around your head, and long enough to tie at the back. Fold it in half lengthwise, with the pattern facing inward, and stitch along the open edge. Flip it inside out, tie it around your head, and let your inner boho queen shine!
Worn-In Pouches: The Perfect Accessory for Storing Your Shabby Chic Treasures
Complete your shabby chic ensemble with a worn-in pouch for holding your essentials. Cut two rectangles of your chosen shabby fabric, place them together with the pattern facing inward, and stitch along three sides. Turn it right side out and fold the open edge inward before stitching it closed. Now you have a shabby chic pouch that’s perfect for stashing your handmade jewelry or other treasures.
Final Thoughts: Unleash Your Creativity with Shabby Fabrics
With these shabby fabrics tutorials, you can inject a dose of vintage charm into your crafting projects. From shabby coasters to worn-in pouches, the possibilities are endless. Embrace the beauty of imperfection and let your creativity run wild. So grab your shabby fabrics and get ready to embark on a crafting adventure that will transport you to a bygone era of timeless style. Happy crafting!
Shabby Fabrics Video Tutorials
If you’re tired of the same old boring tutorials, get ready for shabby fabrics video tutorials that are not only educational but also entertaining. We believe that learning should be fun, so we’ve curated a collection of videos that will have you giggling as you master the art of shabby chic with fabrics.
Let’s Get This Party Started
In this section, we’ll explore some video tutorials that cover a wide range of shabby fabric techniques. From distressed denim to frayed edges, these videos will guide you through the process step by step. So grab your popcorn, sit back, and let’s dive into the world of shabby chic!
Distressed Denim Delight
Do you have a pair of old jeans that you don’t wear anymore? Don’t toss them away just yet! Our first video tutorial will show you how to transform those drab denim pants into a shabby chic masterpiece. Learn how to distress your denim with scissors, sandpaper, and a little bit of elbow grease. By the end of the tutorial, you’ll have a pair of jeans that will make heads turn.
Frayed Edge Fiesta
Frayed edges are a staple of shabby fabric designs. In this video tutorial, we’ll teach you how to achieve those perfect frayed edges that scream shabby chic. Grab your fabric scraps, a needle, and thread, and let’s get fraying! You’ll be amazed at how a simple technique can turn your plain fabric into a textured beauty.
Lovely Lace Lovin’
Lace is an essential element of shabby chic decor, and in this video tutorial, you’ll learn how to add a touch of lace to your fabric projects. From sewing techniques to creative applications, this tutorial will have you falling in love with lace. Whether you’re adding lace trim to a pillowcase or creating a delicate lace overlay, this tutorial will guide you every step of the way.
Buttons and Bows Bonanza
No shabby fabric creation is complete without the perfect finishing touches. In this video tutorial, we’ll show you how to add buttons and bows to elevate your projects to the next level. From fabric-covered buttons to silk ribbons, this tutorial will teach you the art of embellishment. Get ready to add a touch of whimsy and charm to your fabric creations!
Now that you’ve discovered these shabby fabrics video tutorials, you’re armed with the knowledge and inspiration to create your own shabby chic masterpieces. Whether you want to distress denim, fray edges, incorporate lace, or embellish with buttons and bows, these videos will guide you every step of the way. So grab your sewing kit and let the shabby fabric fun begin!
What State is Shabby Fabrics In
When it comes to the state of shabby fabrics, it’s a bit like stepping into a time machine and winding up in your grandma’s attic. The charmingly worn and faded fabrics have certainly seen better days, but that’s part of their appeal. Shabby fabrics are like the vintage jeans of the fabric world: distressed, worn, and full of character.
The Evolution of Shabby Fabrics
Shabby fabrics didn’t always have their time to shine. Back in the day, they were simply known as well-loved and well-worn textiles that had seen their fair share of use. But as the world turned towards a more rustic and nostalgic aesthetic, these fabrics started gaining attention for their unique charm.
The Shabby Chic Revolution
The shabby fabrics movement truly took off with the rise of the shabby chic style. This interior design trend celebrated all things vintage, worn, and cozy. Suddenly, those faded floral prints and frayed edges became highly sought after. People began to realize that shabby fabrics have a certain warmth and authenticity that is hard to find in brand new, pristine textiles.
Find Beauty in Imperfections
What makes shabby fabrics so beloved is their imperfections. Those small stains and frayed edges tell a story of a fabric that has been loved and cherished. It’s like having a piece of history in your hands. And let’s face it, life is too short for perfectly pressed fabrics! There’s something liberating about embracing the shabby and letting go of the need for everything to be flawlessly pristine.
DIY and Shabby Fabrics Tutorials
The beauty of shabby fabrics is that you don’t have to wait for them to naturally age and distress. You can take matters into your own hands and create your own shabby chic masterpieces. There are plenty of tutorials out there that will guide you through the process of distressing fabrics, giving them that perfectly imperfect look.
So, what state is shabby fabrics in? They are in a league of their own, defying conventional notions of perfection and embracing the beauty of imperfections. From their humble beginnings as well-loved textiles to their rise as the darlings of the shabby chic movement, shabby fabrics have truly made their mark on the world of design. So go ahead, embrace the shabby and let your creativity run wild with these charmingly worn and faded fabrics.
Shabby Fabrics Block of the Month: A Stitch in Time
Do you find yourself daydreaming about fabric? Do you get lost in a world of color, texture, and patterns every time you step into a fabric store? Well, my fellow fabric aficionados, you’re in luck! Today, we’re going to dive into the wonderful world of shabby fabrics block of the month.
What is a Block of the Month
If you’re new to the sewing scene, you might be wondering, “What on earth is a block of the month?” Don’t worry, I’ve got your back! A block of the month is like a sewing subscription box, but better. Each month, you receive a carefully curated package, packed with everything you need to create a quilt block. It’s like Christmas morning, every month!
The Beauty of Shabby Fabrics
Now, let’s talk about what makes shabby fabrics so special. Imagine handmade vintage quilts with a modern twist. The soft, muted colors and delicate floral designs transport you to a cozy English garden. It’s like wrapping yourself in a warm hug from your favorite grandma, but without the mothballs!
Why Choose a Shabby Fabrics Block of the Month
Well, my friend, let me tell you why a shabby fabrics block of the month is the bee’s knees. First off, these quilts are hand-selected by experts in the field. You’ll be using only the finest fabrics, ensuring your quilt looks like a million bucks.
Secondly, there’s a certain charm in creating something with your own two hands. Each block is like a mini masterpiece, and as you stitch them together, you’re building a story. Plus, when you proudly show off your finished quilt, you can gracefully say, “Oh, this old thing? I made it myself!”
The Joy of Unboxing
Let’s talk about that moment when your shabby fabrics block of the month package arrives at your doorstep. It’s like receiving a secret package filled with unlimited possibilities. You carefully open the box, and while you might not squeal with delight (or maybe you do, no judgment here!), you can’t help but marvel at the treasures inside.
You’ll find high-quality fabrics, carefully pre-cut and labeled, along with detailed instructions and diagrams. It’s like having a sewing fairy godmother guiding you through the process. And trust me, even if you’re a beginner, you’ll be amazed at what you can create!
Join the Shabby Fabrics Community
Now, here’s the icing on the block (pun intended). When you sign up for a shabby fabrics block of the month, you become part of a vibrant and supportive community. There are online forums, social media groups, and even quilt retreats where you can connect with fellow fabric enthusiasts and share your triumphs and tribulations.
So, what are you waiting for? Grab your scissors, thread, and a cup of tea (or coffee, no judgment here!), and let’s embark on a shabby chic sewing adventure together. With a shabby fabrics block of the month, you’ll create something truly special, one stitch at a time.
How to Add Color to Your Fabrics with Textile Paint
When it comes to adding a splash of color to your fabrics, textile paint is the superhero you need. Say goodbye to boring, monotonous fabrics and hello to vibrant, eye-catching designs! Textile paint is like a magic wand that can transform any plain fabric into a masterpiece. So let’s dive into the marvelous world of textile paint and explore all the creative possibilities it holds.
Gather Your Painting Arsenal
Before we embark on this colorful journey, let’s make sure you have everything you need. Here’s a checklist of items to gather:
- Textile paint (various shades of your choice)
- Paintbrushes (different sizes for varied strokes)
- Fabric (prewashed and ready for a makeover)
- Palette (to mix and blend your colors)
- Masking tape (to create sharp edges)
- Stencils (to add extra flair)
- An apron (to protect your stylish outfit)

Let the Painting Party Begin!
Now that you have all your tools ready, it’s time to roll up your sleeves and dive into the artistic process. Get your creative juices flowing with the following steps:
Step 1: Prewash and Prepare
Make sure your fabric is clean and free from any dirt or residue. This will ensure that the paint adheres smoothly and lasts longer. Iron out any wrinkles to create a smooth painting surface. Let’s get those fabrics squeaky clean and ready for their colorful transformation!
Step 2: Test Your Colors
Before you unleash your inner Picasso on your fabric, it’s always a good idea to test the colors on a small patch first. This will help you see how the paint looks on the fabric and make any necessary adjustments. Think of it as a sneak preview before the main event!
Step 3: Plan Your Design
Whether you want to create a dazzling abstract pattern or a whimsical landscape, planning your design beforehand will save you from any unwanted surprises. You can sketch your ideas on paper or use stencils for a more precise design. Remember, this is your chance to unleash your creativity, so let your imagination run wild!
Step 4: Paint Away!
Now it’s time to grab that paintbrush and bring your design to life! Start by applying the base color and let it dry before adding more details. Use different brushes for different effects, like wide strokes for backgrounds or fine lines for intricate details. Don’t be afraid to experiment and layer colors for a stunning visual impact.
Step 5: Let it Dry and Set
Once your masterpiece is complete, let it dry according to the instructions on the textile paint bottle. Some paints require heat-setting with an iron, so make sure you follow the recommended steps. This will ensure the longevity of your design, so you can rock your vibrant fabrics with confidence!
Show Off Your Painted Perfection
Congratulations, you have now entered the elite club of textile paint artists! Whether you’ve customized a plain t-shirt or transformed an old pair of jeans into a work of art, your fabrics will now turn heads wherever you go. So go ahead, show off your painted perfection and inspire others to embrace their inner artist!
With textile paint, the possibilities are endless. From subtle accents to bold statements, you can now breathe new life into your shabby fabrics. So grab your brushes, don your apron, and let your creativity run wild as you splash your world with color!
Shabby Fabrics Free Table Runner Patterns
Looking to elevate your dining table game without breaking the bank? Look no further! We’ve gathered the most adorable, shabby chic table runner patterns that will have your guests saying, “Where did you get that?!”
Romantic Ruffles: The Elegant Mess
Transform your table into a charming haven with this free table runner pattern. The Romantic Ruffles design is all about embracing the beauty of imperfection. Who needs perfectly pressed lines when you can have a delightful mess of ruffles? If you’re looking to create an enchanting ambiance, this pattern is a must-try.
Patchwork Pandemonium: Embrace the Chaos
For those who love embracing the chaos of life, the Patchwork Pandemonium table runner pattern will be your new best friend. Mix and match various shabby fabrics to create a whimsical patchwork runner that’s as unique as you are. It’s a vibrant addition to any table and is sure to spark conversation at your next dinner party.
Delightful Denim: Upcycling at its Finest
Got some old jeans lying around? Don’t toss them out just yet! With the Delightful Denim table runner pattern, you can transform those worn-out blues into a fabulous piece of decor. Simply cut the jeans into strips, sew them together, and voila! Your table will now be adorned with a trendy, upcycled masterpiece. Who knew denim could be so chic?
Flowery Frenzy: Nature’s Touch
Bring the beauty of a garden to your dining table with the Flowery Frenzy pattern. This free table runner design is all about embracing nature’s touch. Incorporate floral fabrics in different shapes and colors to create a visually stunning centerpiece for your table. It’s like having a mini garden right at your fingertips!
Whimsical Wonderland: Let Your Imagination Run Wild
If you’re a fan of fairy tales and whimsy, the Whimsical Wonderland table runner pattern is perfect for you. Create a magical atmosphere with pastel-colored fabrics and floral embroidery. Let your imagination run wild as you design a one-of-a-kind fairy tale-inspired table runner. Who says your dining table can’t be a portal to another world?
Boho Bliss: Effortlessly Stylish
For those who want a touch of bohemian flair, the Boho Bliss table runner pattern is a must-try. It’s all about embracing the beauty of imperfections and unconventional designs. Incorporate shabby fabrics with earthy tones and bold patterns for a effortlessly stylish look. This table runner is sure to add a touch of free-spirited charm to your dining table.
So, why settle for a plain table runner when you can unleash your creativity and make your own shabby chic masterpiece? With these free table runner patterns, you’ll have an unforgettable table setting that will leave your guests in awe. Get ready to impress with your sewing skills and take your dining experience to a whole new level!
How to Quilt with Just One Piece of Fabric
Have you ever looked at a single piece of fabric and wondered, “Can I make a quilt out of this?” Well, wonder no more my friend, because I’m here to tell you that YES, you absolutely can! Quilting with one piece of fabric may sound unconventional, but it’s a fun and unique way to create a shabby-chic masterpiece. So, let’s dive into the world of one-piece fabric quilts and discover how to make your very own!
Gather Your Supplies
Before we get stitching, you’ll need to gather a few supplies. Of course, the most important one is your chosen piece of fabric. Look for a design that speaks to you, whether it’s a vibrant floral pattern or a whimsical polka dot print. Next, round up your trusty sewing machine, some matching thread, and a pair of good fabric scissors. And don’t forget the all-important measuring tape or ruler – precision is key!
Measure Twice, Cut Once
Once you’ve assembled your supplies, it’s time to measure and cut your fabric. Lay it out flat on a clean, spacious work surface – your quilting dreams are about to take shape! Measure the desired size for your quilt, keeping in mind that larger dimensions will allow for a more pronounced shabby effect. With your measuring tape or ruler, carefully mark the dimensions on the fabric. Take a deep breath, channel your inner quilting warrior, and make that first cut!
Sewing Time
Now that you have a perfectly sized piece of fabric, it’s time for the sewing magic to happen. Set up your sewing machine, thread it with a color that complements your fabric, and give it a good ol’ test run. Once you’re satisfied with the tension and stitch length, guide your fabric under the needle, and start sewing around the edges. Leave a small opening for turning the quilt right side out and inserting batting.
Batting Matters
Speaking of batting, let’s talk about what to use to give your quilt that lovely, puffy feel. Since you’re working with just one piece of fabric, batting is what will give your quilt some dimension and coziness. Opt for a lightweight batting if you’re after a fluffier finish, or choose a denser one if you prefer a sturdier quilt. Place the batting inside your sewn fabric, making sure to distribute it evenly. Firmly stitch the opening closed. Almost there!
Quilting the Quilt
To add some extra pizazz to your one-piece fabric quilt, it’s time to embrace your inner artist and quilt it. Choose a design – it can be as simple or intricate as you like – and start stitching along the fabric. You can go with classic straight lines or get wild with some fancy free-motion quilting. The choice is yours, my friend! Just remember to keep your stitches consistent and quilting lines evenly spaced throughout.
Final Flourishes
Now that you’ve sewn and quilted your one-piece fabric quilt, it’s time for the grand finale – the finishing touches! Trim any excess batting or fabric edges to achieve a clean, polished look. If you’re feeling particularly fancy, you can even add some decorative binding around the edges for that extra touch of shabby-chic goodness. And there you have it, folks – your very own one-piece fabric quilt masterpiece!
So, the next time you stumble upon a gorgeous fabric that speaks to your crafty soul, don’t be afraid to turn it into a quilt. With a little creativity, a touch of sewing prowess, and a whole lot of personality, you can create a shabby-chic quilt that will be the envy of all your friends. Happy quilting!
The Importance of Color in Fabrics and Textiles
When it comes to fabrics and textiles, color plays a significant role in their overall appeal and success. Think about it – would you be as drawn to that shabby chic pillow if it were a dull shade of gray? Probably not. Color has the power to capture attention, evoke emotions, and create a lasting impression.
Setting the Mood with Color
Color has the ability to set the mood and create a specific atmosphere. For example, vibrant and bold colors like red or yellow can energize a space, making it feel lively and exciting. On the other hand, calming hues like blue or pastels can create a serene and relaxing ambiance. So, the next time you’re picking out fabrics for your shabby chic project, consider the mood you want to convey and choose your colors accordingly.
Creating Visual Interest and Contrast
Color can also be used to create visual interest and contrast in fabrics and textiles. By incorporating different shades and tones, you can add depth and dimension to your design. Whether it’s using complementary colors to make certain elements pop or opting for a monochromatic scheme for a sleek and sophisticated look, playing with color can elevate your shabby chic creations.
Expressing Personality and Style
Your choice of color in fabrics and textiles is a reflection of your personality and style. Whether you’re drawn to vibrant and eclectic patterns or prefer a more muted and understated palette, the colors you choose can speak volumes about who you are. So, don’t be afraid to showcase your unique style through the colors you incorporate into your shabby chic projects.
Making a Statement with Color
Lastly, color in fabrics and textiles has the power to make a statement. It can be used to draw attention to certain elements, highlight specific details, or simply make a bold and memorable impression. A pop of unexpected color in a shabby chic design can turn an ordinary piece into something extraordinary and eye-catching.
So, the next time you’re working on a shabby chic project, remember the importance of color in fabrics and textiles. It can make all the difference between a lackluster result and a show-stopping masterpiece. Embrace the power of color and let your creativity shine!