The Samsung dryer belt diagram is a crucial element when it comes to understanding how your dryer functions and troubleshooting any issues. If you’ve ever wondered about the intricate workings of your Samsung dryer or felt stuck when trying to replace the dryer belt, then this blog post is for you. In this comprehensive guide, we’ll cover everything from the Samsung dryer belt pulley to determining the right dryer belt for your appliance. So let’s dive in and unravel the mysteries of the Samsung dryer belt diagram!
Samsung Dryer Belt Diagram: A Guide to Fixing Your Dryer Belt
Has your trusty Samsung dryer suddenly gone silent? Is it no longer tumbling those clothes into fluffy perfection? Don’t fret! The culprit might just be a worn-out dryer belt. In this handy guide, we’ll explore the ins and outs of the Samsung dryer belt diagram, demystifying the process so you can get that laundry train back on track. So gather your tools and let’s dive right in!
Understanding the Inner Workings
To fix your Samsung dryer belt, it’s important to have a clear understanding of its diagram. This nifty diagram illustrates the components and tension configurations of the dryer belt, making it easier for even the most dryer-dunce among us to follow along.
The Heroic Belt: Saving Clothes One Tumble at a Time
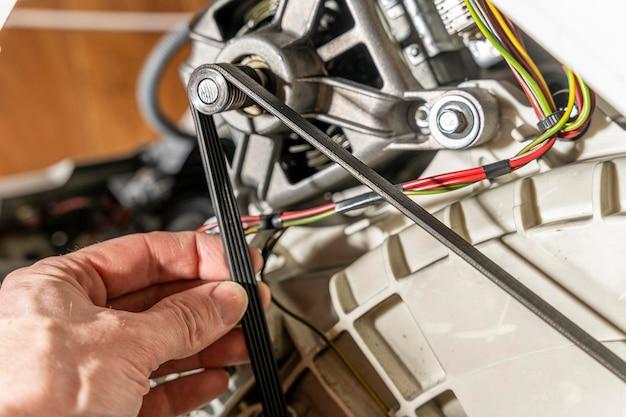
Ah, the dryer belt—the unsung hero of laundry day. This humble, rubbery wonder is the driving force behind your dryer’s motion. But, alas, over time it can stretch, fray, or even snap, leaving your clothes feeling neglected. Fear not, for with a little know-how and a nudge from this diagram, you’ll soon have your dryer belt swapped out and your clothes dancing in dryer-delight once again.
Tools of the Trade
Before embarking on your dryer belt replacement quest, gather your trusty tools. This includes a screwdriver, a willingness to get your hands dirty, and of course, a replacement belt that matches Samsung’s specifications. Don’t worry—we won’t judge if you let out a little cheer for your tool collection. Tools save the day!
Let’s Get Down to Business
First things first—unplug your dryer. We don’t want any shocking surprises, do we? Once that’s taken care of, locate the access panel, usually found at the rear of the appliance. Flex your DIY muscles and remove the panel using your screwdriver. Voila! You’re one step closer to dryer perfection.
A World of Tension
Next up, locate the tensioner pulley. This little guy is responsible for holding the belt taut and ensuring proper tumbling action. Give it a gentle push to release the tension on the old belt and free it from its confinement. Let that old belt rest—its days of glory are behind it.
Follow the Diagram, Young Padawan
Now it’s time to consult that trusty diagram. This visual guide will help you navigate the belt replacement process like a seasoned pro. Place the new belt around the drum, following the diagram for guidance on the exact positioning and threading. It’s as if the diagram is your dryer’s personal GPS, guiding you with joyful ‘tumble-turn left’ and ‘tumble-turn right’ instructions.
Taming the Tensioner
With the belt securely looped around the drum, it’s time to tame the tensioner once more. Easier said than done? Not with the diagram on your side! Follow the diagram’s instructions to ensure the tensioner is in its proper position, gently pulling the belt tight as you go. Don’t be shy, give it a little tug—your dryer will appreciate the pep talk.
Putting It All Back Together
With the dryer belt properly installed and the tensioner in place, it’s time to put that access panel back on like a champ. Secure it with your screwdriver, ensuring a snug fit. Feel that sense of accomplishment wash over you as you take a moment to bask in your newfound appliance-savviness.
The Final Curtain Call
Plug your dryer back in, stand back, and admire your handiwork. Give it a whirl—literally—and listen to the sweet hum of a successfully resurrected dryer. Your clothes will thank you, and you can bask in the glory of saving the laundry day.
There you have it—an epic journey through the Samsung dryer belt diagram. Armed with this knowledge, you can now confidently conquer any dryer belt mishap that comes your way. So go forth, intrepid laundry warrior, and let the tumbling continue!
Samsung Dryer Belt Pulley
If you’ve ever found yourself wondering why your Samsung dryer is making a squeaky noise or not spinning as it should, then you might just have a faulty dryer belt pulley. Don’t worry, though – we’ve got you covered! In this section, we’ll delve into the nitty-gritty details of the Samsung dryer belt pulley, how it works, and what you can do to fix it.
Understanding the Mechanism
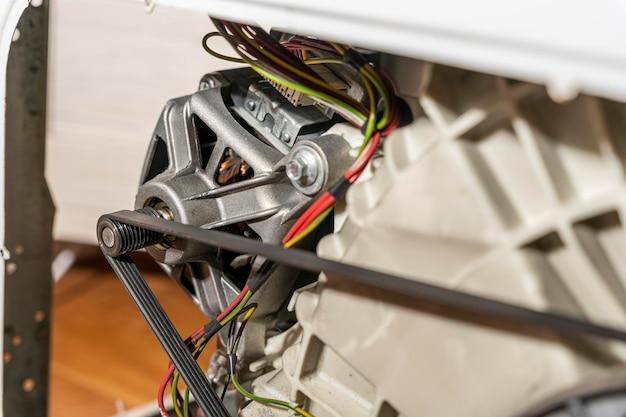
Before we jump into troubleshooting, let’s quickly understand the basics. The dryer belt pulley is a critical component of your Samsung dryer’s drum rotation system. It’s responsible for providing tension to the dryer belt, keeping it in place and ensuring smooth rotation. In simpler terms, it’s like the captain of the ship, guiding the belt on its path to dryness!
Signs of Trouble
Wondering how you can tell if your dryer belt pulley is acting up? Well, keep an ear out for any unwanted symphonies your dryer might be conducting. If you start hearing high-pitched squeaks or unusual noises when the drum is spinning, it’s a clear indicator that something is amiss. And guess what? Usually, that ‘something’ leads us straight to the dryer belt pulley.
DIY Fixes
Now, let’s tackle the million-dollar question – how can you fix a problematic Samsung dryer belt pulley? Fear not, for we have a few DIY tricks up our sleeves! The first step is to unplug the dryer, because safety first, folks. Next, you’ll need some trusty tools like a screwdriver (phillips or flathead, depending on your dryer) and a spritz of elbow grease.
Step 1: Accessing the Belt Pulley
With your tools in hand, it’s time to get down to business. Start by removing the dryer’s front panel. Different models might have variations in their setup, so be sure to consult your trusty user manual for specific instructions. Once you’ve gained access to the drum, locate the belt pulley – it’s usually a small, wheel-like contraption near the motor.
Step 2: Inspecting and Replacing
Now, give your belt pulley a good inspection. Look out for any signs of wear and tear, such as cracks, fraying, or misalignment. If you notice any of these red flags, it’s time to replace the pulley. Pro tip: it’s always a good idea to replace both the pulley and the dryer belt together to ensure optimal performance and avoid future mishaps.
Step 3: Installation and Reassembly
Once you have your shiny new pulley and belt duo, it’s time to work your magic. Carefully thread the dryer belt around the drum and through the pulley, ensuring it’s adjusted snugly. It might require a bit of maneuvering, but hey, that’s the belt-iest part! Finally, reassemble the front panel and give yourself a pat on the back – you’ve conquered the Samsung dryer belt pulley challenge!
Wrapping It Up
Now that you’re well-versed in the world of Samsung dryer belt pulleys, you have the power to conquer any squeaky, stubborn situations that come your way. Armed with this knowledge and a willingness to tinker, you’ll be the hero of your laundry room in no time. Remember, a happy dryer means happy clothes, and who doesn’t want happy clothes?
Is it worth replacing the dryer belt
If you’ve been dealing with a rumbling, off-balance dryer that’s not doing the job anymore, it might be tempting to toss it out the window and start the search for a shiny new appliance. But wait! Before you go down that rabbit hole, have you considered replacing the dryer belt? Yes, that humble elastic strap might just be the saving grace of your laundry routine. In this section, we’ll dive into the pros and cons of replacing your dryer belt and help you decide if it’s worth the effort.
Extend the life of your loyal companion
Let’s face it – good dryers are not cheap! By opting to replace the dryer belt, you’re potentially giving your trusty laundry sidekick another lease on life. It’s like a superhero power-up for your appliance, reenergizing its ability to spin those clothes like a champ. Plus, think of all the money you can save by not splurging on a brand new dryer.
DIY Challenge: Accepted!
Are you someone who loves a good challenge? Replacing the dryer belt is the ultimate test of your DIY skills. It’s like taking on the “Mission Impossible” of laundry repairs. But fear not, brave soul! With a bit of patience, some YouTube tutorials, and possibly a few choice words thrown in, you can conquer this task like a true handy-person extraordinaire. Just make sure to unplug that dryer before diving in, unless you fancy mimicking a lightning storm in your laundry room!
Time to weigh the pros and cons
Before you embark on this epic DIY journey, it’s important to weigh the pros and cons. On the plus side, replacing the dryer belt is relatively inexpensive, especially compared to buying a new appliance. It’s a great budget-friendly option, particularly if your dryer is still in good shape besides the belt issue. However, keep in mind that the process can be a bit time-consuming, and if you’re not the most patient person in the world (like me), it might test your nerves a bit. But hey, think of it as a test of character!
The verdict: To replace or not to replace?
Ultimately, the decision to replace the dryer belt comes down to personal preference and circumstances. If you’re up for the challenge, have some spare time, and are looking to save a few bucks, then go for it! Your trusty dryer might just give you a standing ovation for extending its existence. However, if you’re not the DIY type, lack the time, or simply prefer the convenience of a new appliance, then it might be time to bid farewell to your old dryer and explore the world of shiny new alternatives. The choice is yours, my friend, with the fate of your laundry routine in your hands!
How Do I Know What Dryer Belt I Need
When it comes to dryer belts, it’s not always easy to know which one you need. After all, belts don’t exactly come with fancy nametags or sizes plastered across them. But fear not, dear reader! I’m here to help you navigate the mysterious world of dryer belts and find the perfect match for your Samsung dryer. Let’s dive right in!
Checking Your Existing Belt
Before you embark on a quest for the perfect dryer belt, it’s a good idea to start by checking the belt already in your machine. Turn off the dryer, unplug it (safety first, folks!), and open up the door to get a sweet peek inside. Now, grab a flashlight and take a look around. You’re looking for the belt wrapped snuggly around the drum, connecting it to the motor pulley.
Taking Measurements
Now that you’ve located the belt, it’s time to play detective and gather some intel. Using a measuring tape, gently remove the belt from the dryer and lay it out flat on a table or any flat surface. Take note of the belt’s length, width, and the number of ribs or grooves on its surface. These measurements will be essential in finding the perfect replacement.
Consulting the Manual
If you’re lucky enough to still have the manual for your Samsung dryer, kudos to you! Grab that trusty booklet and flip through the pages. Look for a section dedicated to parts and diagrams, specifically targeting dryer belts. You might find helpful information, such as part numbers or even step-by-step instructions on how to replace the belt. Manuals have their hidden perks, don’t they?
Seeking Professional Help
If you’ve hit a dead end in your quest for the perfect dryer belt, fear not – help is just a phone call away! Reach out to Samsung’s customer support or a trusted appliance repair technician. They have the knowledge and expertise to guide you in the right direction. Sometimes, it’s best to let the pros handle it while you sit back and sip on your favorite beverage.
Checking Online Resources
In this modern age, the internet is your trusty sidekick in times of need. Whip out that smartphone or fire up your computer because it’s time to embark on a virtual hunt for the ideal dryer belt. Visit reputable appliance parts websites or even Samsung’s official website for information on compatible belt models. Look for resources that provide detailed explanations, diagrams, or chat support in case you need a helping hand.
Summing It Up

Finding the right dryer belt may seem like a daunting task, but with a little detective work and the right resources, you’ll be back to drying clothes like a pro in no time. Remember to check your existing belt, take accurate measurements, consult the manual, seek professional help if needed, and dive into the vast ocean of online resources. You’re only a few clicks away from conquering the dryer belt conundrum.
So, let’s get cracking, my friend! Your Samsung dryer awaits its perfectly fitted belt. And remember, the journey to a functioning dryer is half the fun, right? Happy belt hunting!
How Does the Belt Go on a Samsung Dryer
So, you’ve found yourself in a whirlwind with your Samsung dryer belt, and now you’re wondering how to untangle the mystery of its installation. Fear not, for I, your trusty laundry guide, shall lead you through the intricacies of belt placement with both expertise and a sprinkle of humor. Sit tight and let’s spin this tale!
The Belt: A Sordid Affair of Pulleys and Tensions
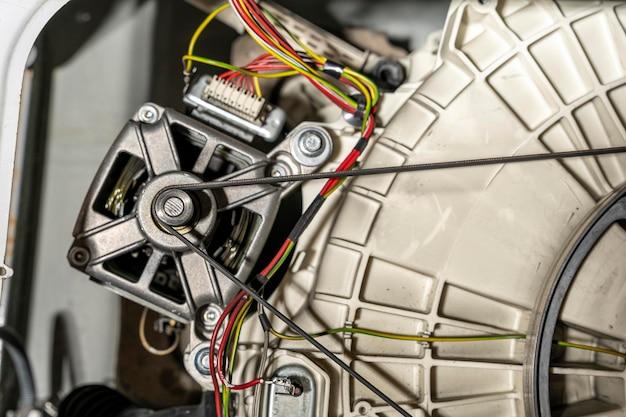
Before we dive into the nitty-gritty, let’s familiarize ourselves with the supporting cast. Meet the pulleys: the idler pulley and the motor pulley. These partners in crime form the backbone of the belt system, providing the necessary tension and power to keep things moving.
Step 1: Opening the Dryer, Like a Detective on a Case
To begin our quest for dryer enlightenment, we must first open the dryer’s front panel. Grab a screwdriver and unscrew those screws like a DIY detective on a mission. With the panel out of your way, you’ll have a clear view of the belt’s battleground.
Step 2: Navigating the Belt Obstacle Course
Now, let’s take a closer look at our elusive belt snaking its way around the pulleys. You’ll notice that it forms a mighty loop, embracing both the motor pulley and the idler pulley. Think of it like a roller coaster ride for laundry, only without the thrill-seeking screams.
Step 3: The Tug of War: Belt Tensioning
Ah, tension – it follows us everywhere, even in the laundry room. The secret to a successful belt placement lies in understanding this tug of war. You’ll need to release the tension by pushing the idler pulley towards the motor pulley, making way for the belt’s tantalizing entrance.
Step 4: Circling the Motor Pulley: A Dance of Laundry Fates
With the idler pulley playing nice and the tension released, it’s time for the belt to perform its delicately choreographed dance routine. Slide the belt over the motor pulley, guiding it gently into place, making sure it nestles into the motor pulley’s welcoming groove.
Step 5: Completing the Loop of Dryer Harmony
We’re almost there! With the belt now wrapped affectionately around the motor pulley, it’s time to steer it towards the idler pulley. Take a deep breath and release your inner Michelangelo as you maneuver the belt, ensuring it glides perfectly into the idler pulley’s waiting arms.
The Finale: Double-Checking for Dryer Belt Brilliance
Congratulations, my fellow dryer aficionado, you’ve conquered the art of belt placement! Now, before you screw everything back together like the handy DIY-er you are, give yourself a pat on the back and give the belt a gentle tug. It should feel taut, like the perfect symphony of laundry efficiency.
Wrapping Up: The Delightful Dance of Dryer Belts
And there you have it, dear reader—a step-by-step guide to demystifying the perplexing world of Samsung dryer belts. Remember, while the belt may appear daunting at first, with a little knowledge and a dash of humor, you can conquer even the trickiest laundry obstacles. Until our next adventure in the realm of laundry hacks, happy drying!