Stone foundations have been a popular choice for centuries due to their durability and timeless appeal. However, over time, these foundations may start showing signs of wear and tear, such as cracks and crumbling mortar joints. That’s where repointing comes into play. In this blog post, we’ll explore what repointing a stone foundation is, the different types of stone foundations, the cost of repointing, and the best mortar for the job. Whether you’re a homeowner or a DIY enthusiast, read on to discover how to restore and maintain the beauty and structural integrity of your stone foundation.
Repointing Stone Foundation: What You Need to Know
Introduction
So, you’ve got yourself a stone foundation. That’s pretty cool. I mean, not everyone can say they have rocks supporting their house. But hey, sometimes those rocks need a little love, and that’s where repointing comes in. In this guide, we’re going to dive into the world of repointing stone foundations and give you all the information you need to know. Don’t worry, we’ll keep it light and entertaining because, let’s face it, we’re talking about rocks here.
Getting to Know Your Mortar
Before we jump into the nitty-gritty of repointing, let’s take a moment to talk about mortar. Mortar is that magical stuff that holds your stones together. It’s like the glue that keeps your foundation intact. Over time, though, mortar can start to crumble and fall apart. It’s a sad reality, really. But fear not, because repointing is here to save the day!
Step 1: The Prep
Before you start slapping new mortar onto your foundation like you’re Van Gogh with a trowel, you need to do some prep work. First things first, get yourself a chisel and start removing any loose or damaged mortar. Think of it as grooming your foundation. Get rid of all the dead stuff, so the new mortar has a nice clean surface to cling to. Don’t worry, this process won’t hurt your foundation’s feelings.
Step 2: Mix It Up
Now that your foundation is looking all spiffy and clean, it’s time to mix up some fresh mortar. Think of this as baking a cake, but instead of flour and sugar, you’re using sand and cement. Add a little water, mix it up, and voila! You’ve got yourself some mortar batter. Just don’t try to eat it, no matter how tempting it may be.
Step 3: Time to Get Dirty
Alright, it’s time to get down and dirty. Grab that trowel and start slathering that fresh mortar onto your foundation. You want to fill in all the gaps and cracks, like you’re playing a real-life game of Tetris. Make sure to smooth it out so it looks all nice and neat. This is your chance to show off your artistic abilities. Who said repointing couldn’t be a form of self-expression?
Step 4: The Finishing Touches
Once you’ve covered your foundation in all its mortar glory, it’s time for the finishing touches. Grab a brush and gently sweep away any excess mortar. You want your foundation to look clean and polished, like it’s ready for a fancy gala. You can even give it a little pat on the back and tell it how great it looks. Go ahead, we won’t judge.
And there you have it, folks, a crash course in repointing stone foundations. We hope you’ve enjoyed this lighthearted journey through the world of mortar and rocks. Remember, repointing is a way to give your foundation some love and ensure it stays strong for years to come. So go forth and get to repointing, my friend. Your stones will thank you.
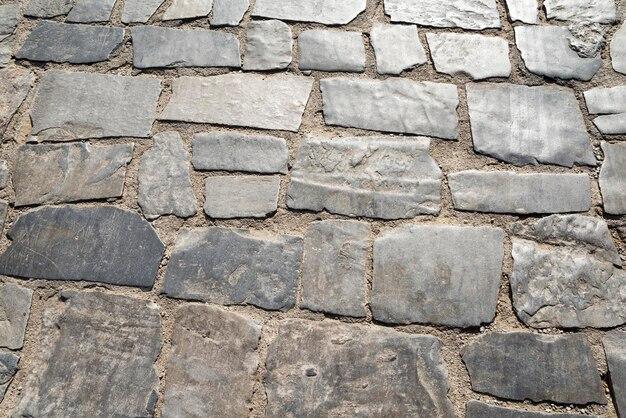
Types of Stone Foundations
Determining the Right Stone for Your Foundation
So, you’re thinking about repointing your stone foundation, but before you get started, it’s important to know what type of stone you’re working with. Not all stones are created equal, my friend, and each type has its own unique characteristics and quirks. Let’s take a closer look at some of the most common types of stone foundations out there.
Granite: The Rock Hard Superstar
When it comes to stone foundations, granite is the rock star of the show. Known for its incredible strength and durability, granite is like that friend who always has your back. It can withstand the test of time, the elements, and even your clumsy Uncle Bob’s attempts at home improvement. If you have a granite stone foundation, consider yourself lucky.
Sandstone: The Softie with a Heart of Gold
Sandstone, on the other hand, is like that lovable, easygoing friend who never fails to make you smile. It’s softer than granite, but don’t let that fool you. Sandstone is still a reliable choice for foundation material. Just make sure to give it a little extra TLC during the repointing process to ensure its longevity.
Limestone: The Quirky Yet Charming Option
Ah, limestone. It’s a bit of an oddball in the stone foundation world, but hey, some people like quirky, right? Limestone can be a bit more challenging to work with due to its porous nature, but with the right techniques, it can make for a solid foundation. Just make sure to take extra precautions to prevent water damage – limestone tends to hold onto moisture like a teenage girl clings to her smartphone.
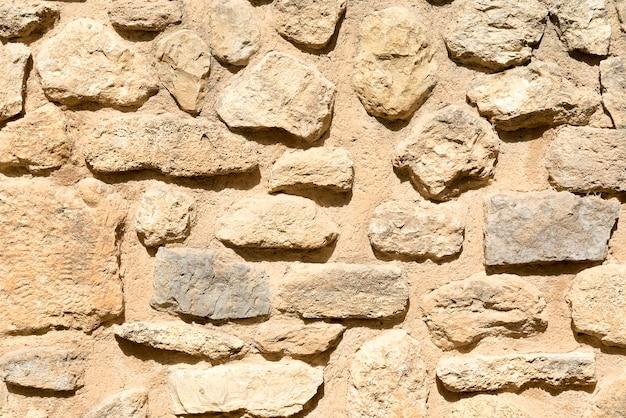
Fieldstone: The Wild Card
Fieldstone is the maverick of stone foundations. It’s a mix of different types of rocks, making it a bit unpredictable. One minute you’re dealing with limestone, the next it’s granite, and before you know it, you’re throwing your hands up in confusion. But hey, that’s the beauty of fieldstone – it’s like a surprise party for your foundation. Embrace the chaos, my friend.
Wrap-Up
And there you have it! A crash course in the types of stone foundations you might come across during your repointing adventures. Remember, each type of stone has its own quirks and considerations, so be sure to do your research and consult with a professional if needed. Happy repointing!
- Granite: The rock-solid choice.
- Sandstone: The softie with a golden heart.
- Limestone: The quirky yet charming option.
- Fieldstone: The wild card, ready to surprise you.
What is Repointing a Foundation
Rebuilding the Brick Jenga: The Basics of Repointing
So, you’ve stumbled upon this whole “repointing a foundation” thing and you find yourself scratching your head, wondering what in the world it means. Fear not, my puzzled friend, because I’m about to break it down for you in a language even your great-grandma would understand.
First things first, let’s set the stage. Imagine your home’s foundation as a massive stack of bricks, playing a never-ending game of Jenga. Over time, due to various factors like the weather and the weight of your house, some of those bricks start to loosen or crumble. That’s where the magical art of repointing comes in.
Filling the Cracks: Restoration at Its Finest
Repointing, or the process of restoring a crumbling foundation, involves removing the old and damaged mortar between the bricks and replacing it with fresh, gooey goodness. Think of it as giving your wobbly brick structure a generous slathering of mortar botox, if you will.
But why should you care, you ask? Well, for starters, a solid foundation keeps your house standing tall and proud, like a confident giraffe in the wild. Plus, it helps prevent sneaky critters from turning your basement into their cozy winter retreat.
Seeking Out the Artisans: Hiring the Right Repointing Experts
Now, before you grab a trowel and channel your inner DIY maven, here’s a friendly PSA: repointing is no small feat and requires a skilled artisan with experience and expertise. It’s a bit like finding the perfect hairstylist who can transform your wild bedhead into a red carpet-worthy ‘do.
When seeking out the masters of the mortar, make sure to do your homework. Read up on reviews, ask for recommendations, and maybe even conduct a secret interview to assess their level of brick-bound brilliance. After all, you don’t want a novice turning your foundation into a leaning tower of Pisa.
Don’t Jinx It: Signs Your Foundation Needs Repointing
Alright, so now you know what repointing entails and how crucial it is for your home sweet home’s stability. But when should you start waving the repointing flag? Here are a few telltale signs that your foundation might be crying out for some mortar rejuvenation:
1. Cracks Like a Troubled Supermodel
Is your foundation sporting more cracks than a shattered mirror? If the cracks are wider than a hairline or appear in a zigzag pattern, it might be time to call in the experts.
2. Tenant Invaders
Have uninvited guests in the form of creepy crawlies moved into your basement without paying rent? If so, it’s possible that deteriorating mortar has created an open-door policy for critters. Time for some repointing, dear friend!
3. Crumbling Bricks: The Cinderella Effect
If your once proud and sturdy bricks have fallen victim to the merciless hands of time, crumbling like a stale cookie at the slightest touch, it’s time to roll up those sleeves and bring in the repointing cavalry.
So, my inquisitive friend, now you know what repointing a foundation is all about. It’s like giving your home’s base a much-needed spa treatment, ensuring its strength, and keeping unwelcome visitors at bay. Just remember, always entrust this task to the brick whisperers who know their trowels from their truffles.
Exterior Stone Foundation Repair
Signs Your Exterior Stone Foundation Needs Some TLC
Has your exterior stone foundation seen better days? Here are a few telltale signs that it’s time to give it some much-needed attention:
Cracks That Beg For Attention (And Some Magic)
If your stone foundation has cracks reminiscent of the Grand Canyon, it’s probably time to summon your inner magician and work some repair magic. These cracks can allow water to seep in, causing further damage and potentially turning your basement into an indoor swimming pool. No one wants that, except maybe your pet goldfish.
Misaligned Stones Playing Hide and Seek
Are your stones playing a game of hide and seek, constantly shifting and misaligning themselves? It may seem like they’re having more fun than you, but it’s a sign that your foundation needs attention. Over time, the shifting stones can compromise the stability of your entire house. Time to put an end to their rebellious game and restore order.
Vegetation Putting Down Roots (Literally)
Do you have some unruly plants taking residence in the crevices of your stone foundation? While it might seem like nature is reclaiming its territory, those plant roots can wreak havoc on your foundation. By pushing against the stones, they can cause cracks and destabilize the whole structure. It’s time to evict those plant squatters and regain control.
DIY or Call the Pros
So, you’ve identified some issues with your exterior stone foundation. Now comes the dilemma: should you grab your trusty duct tape and channel your inner Bob Villa, or should you call in the professionals?
DIY: Danger is Your Middle Name (Sort Of)
Sure, there are some minor repairs you can tackle on your own, like filling small cracks with mortar or repositioning a slightly skewed stone. But if your foundation resembles the ruins of an ancient civilization, it might be best to leave it to the experts. Don’t let your middle name be “Danger” – play it safe and seek professional help.
The Pros: Saving the Day, One Foundation at a Time
When it comes to major repairs or complete repointing of your stone foundation, calling in the pros is the way to go. They have the experience, knowledge, and tools to tackle any foundation problem with finesse. Plus, they’ll save you from hours of frustration, sweaty brows, and the solid possibility of making the situation worse.
Your exterior stone foundation may be in need of some repair. Cracks, misaligned stones, and pesky vegetation are all clues that it’s time to take action. While minor repairs can be a fun DIY project, it’s best to leave the major repairs to the professionals. With their expertise, you’ll have your stone foundation looking as good as new in no time. So bid adieu to those cracks, keep the stones in line, and put those plants back in the garden where they belong. Your foundation will thank you, and your goldfish will no longer have to worry about living in an underwater wonderland.
Repointing Stone Foundation Cost
Repointing a stone foundation is a noble pursuit indeed, but it’s not all sunshine and rainbows—unless, of course, you’re repointing your stone foundation with rainbow-colored mortar! In the world of repointing, there’s one question that haunts homeowners like a bat in a belfry: how much is this going to cost? Well, fear not, fellow foundation fanatics, for I am here to shed some light on the matter.
Factors That Impact the Cost
Before we dive into the nitty-gritty, it’s important to understand that the cost of repointing a stone foundation can vary depending on a variety of factors, including:
1. Foundation Size and Condition
The larger your foundation, the more materials and labor will be required, which inevitably affects the cost. Additionally, the condition of your foundation plays a starring role. If it’s in dire straits, with crumbling mortar and loose stones, you can expect to pay more for extensive restoration work.
2. Access and Scaffolding
Is your foundation located in a cramped corner of your backyard that would make even a yogi wince? Or is it easily accessible? Tricky access or the need for scaffolding can drive up the cost since it adds complexity and time to the process.
3. Mortar Type and Detailing
You have a world of mortar options at your fingertips, from traditional lime mortars to modern cement-based mixes. Each comes with its own pros and cons, and the choice you make will impact the cost. Additionally, if you’re looking to add intricate detailing or decorative elements, be prepared to empty your pockets a little wider.
Ballpark Figure
Now, for the moment of truth—the cost! While it’s challenging to provide an exact figure without evaluating your specific project, a rough estimate for repointing a stone foundation falls within the range of $10 to $25 per square foot. Keep in mind that this figure encompasses the cost of materials, labor, and any additional factors discussed above.
Hiring a Professional vs. DIY
Ah, the eternal debate—should you hire a professional or embark on a dark and dangerous journey into the world of repointing yourself? Well, my friend, that depends on your expertise, time, and level of patience. Remember, repointing is not for the faint of heart, as it requires precision, skill, and a steady hand. If you possess these qualities, go forth and conquer. If not, it’s best to call in the professionals to ensure your foundation stands strong.
So, there you have it—the lowdown on the cost of repointing a stone foundation. With this knowledge in your toolbox, you can take the next steps confidently, armed with a budget and a newfound appreciation for the craftsmanship involved. Happy repointing!
Tuckpointing Stone Basement Walls
If you thought repointing stone foundations was a challenging endeavor, wait till you hear about tuckpointing stone basement walls. Brace yourself, my friend, because we’re diving into the depths of basement maintenance like never before. So grab your hard hat and let’s get started!
What is Tuckpointing Stone Basement Walls
Let’s put it this way – tuckpointing is like giving your stone basement walls a fancy little facelift. It involves removing damaged mortar joints and replacing them with new, fresh mortar. But here’s the kicker: tuckpointing adds a bit of pizzazz by filling those grooves with a contrasting color to make them pop. It’s like the mascara and lipstick of basement maintenance!
The Quest for the Perfect Mortar
Before you begin your noble quest of tuckpointing, you must first embark on a mission to find the ideal mortar mix. Seek ye a mortar that matches the texture, strength, and color of the original stonework. Trust me, you don’t want your basement walls looking like they belong in a Picasso painting.
Tools of the Trade
Gather your weapons of mortar destruction – a trusty chisel, a sturdy trowel, and a hammer. Picture yourself as a medieval knight, battling the evil forces of crumbling mortar joints. But hey, don’t forget to wear safety goggles and gloves, unless you want to look like a basement-style pirate.
Step-by-Step Tuckpointing Shenanigans
-
Expose those naughty joints – gently remove the old mortar like a master surgeon using your chisel and hammer. Show no mercy to the flaking mortar, for it has lived long enough!
-
Cleanse the wounds – use a wire brush or a vacuum cleaner to rid the joints of dust, debris, and spider webs. Time to say goodbye to those eight-legged tenants!
-
Hot date with mortar – prepare your mortar mix, like a master chef skillfully blending ingredients. Slather it onto the joints with the finesse of an artist painting a masterpiece.
-
Smooth it out – carefully shape the mortar with your trusty trowel, making sure it blends seamlessly with the surrounding stonework. It’s all about that flawless finish, my friend.
-
Let it cure – give your mortar the peace and quiet it deserves. The curing process takes time, so be patient like a wise old wizard waiting for a magical potion to brew.
Celebrate Your Victorious Tuckpointing
Congratulations, my brave friend! You have conquered the treacherous realm of tuckpointing stone basement walls. Marvel at the glorious transformation of your basement, knowing that your handiwork shall stand the test of time. Now, sit back, relax, and bask in the charm of your rejuvenated stonework. Cheers to a job well done!
Now that we’ve covered tuckpointing stone basement walls, get ready for our next adventure – repointing chimney bricks. Stay tuned, fellow DIY warriors!
Best Mortar for Fieldstone Foundation
So, you’ve got yourself a fabulous fieldstone foundation, huh? Well, my friend, you’re going to need some top-notch mortar to make sure it stays strong and sturdy. But with so many options out there, how do you know which is the best mortar for your precious fieldstone? Don’t worry, I’ve got you covered!
The Mountain Crusher Mortar
If you’re looking for mortar that can withstand the wrath of a mighty avalanche, then the Mountain Crusher Mortar is the one for you. This mortar is specially designed for those tough fieldstone foundations that need some serious strength. Made from a blend of crushed granite and mammoth strength, this mortar will ensure that no stone will dare to budge.
The Smooth Operator Mortar
For those who want a mortar that spreads like butter on a hot scone, the Smooth Operator Mortar is the way to go. This mortar is a master of finesse, making it perfect for those delicate fieldstone foundations that need a gentle touch. With its creamy texture and smooth application, this mortar will have your fieldstone looking flawless in no time.
The Flexi-Bond Mortar
Who says mortar can’t be adaptable? The Flexi-Bond Mortar is here to prove them wrong. This mortar is all about flexibility, making it ideal for fieldstone foundations that might experience movements due to shifting soils or pesky moose trying to make your foundation their personal playground. It’s like yoga for your fieldstone!
The Goldilocks Mortar
Looking for a mortar that’s just right? Well, look no further than the Goldilocks Mortar. This mortar is the perfect balance of strength and flexibility, making it suitable for a wide range of fieldstone foundations. Not too hard, not too soft – just right! Your fieldstone will thank you for choosing the Goldilocks Mortar.
The Magic Mortar
Now, if you want a mortar that’s truly out of this world, then the Magic Mortar is the one for you. This mortar might not turn your fieldstone into an actual castle overnight, but it sure comes close. With its mystical properties and enchanting formula, the Magic Mortar will make your fieldstone foundation the envy of every fairy tale character.
In conclusion, finding the best mortar for your fieldstone foundation doesn’t have to be a daunting task. Whether you need strength, finesse, flexibility, balance, or a touch of magic, there’s a mortar out there that’s perfect for you. So go forth, my friend, and give your fieldstone the mortar it deserves!
How to Repoint a Stone Foundation
So, you’ve found yourself with a stone foundation that’s seen better days. Don’t worry, my friend, because I’m here to show you how to repoint that bad boy and bring it back to life. Now, before we dive in, let’s make sure we’re on the same page here. When we talk about “repointing,” we’re basically giving those old and worn out mortar joints between the stones a fresh new look. It’s like giving your foundation a snazzy makeover!
Step 1: Gear up!
Before you start channeling your inner handyman, let’s make sure you’re armed with the right tools. You’ll need a few essentials: a trusty tuckpointing trowel, a mortar mix, a pointing chisel, a masonry brush, and, of course, some safety goggles. I know, I know, the goggles may not be the most fashionable accessory, but hey, safety first, my friend!
Step 2: Expose those joints
Alright, now it’s time to get down to business. Grab your pointing chisel and carefully remove any loose or crumbling mortar from the joints. It’s like a dentist appointment for your foundation. Just remember to be gentle, we don’t want any unnecessary pain for the poor old stones.
Step 3: Mix it up
Now, let’s get our mortar mix ready. Follow the instructions on the package and mix it up just like you would a cake batter. Well, maybe not exactly like a cake batter, but you get the idea. Make sure it’s a nice, smooth consistency, like a creamy peanut butter. Mmm, now I’m hungry…
Step 4: Fill ‘er up
Time to get your tuckpointing trowel in action! Take a scoop of mortar and press it into the joints, making sure it fills up all those nooks and crannies. Smooth it out with the trowel, but be careful not to smear it all over the stones. We want those joints to look clean and fresh, not like they’ve been attacked by a preschooler with finger paints.
Step 5: Brush it off
Once you’ve filled up all the joints, grab your trusty masonry brush and lightly brush away any excess mortar. Kind of like when you sweep up the trail of crumbs after indulging in a delicious sandwich. Those joints should be looking sharp!
Step 6: Relax and admire your handiwork
Sit back, my friend, and take a moment to appreciate your newfound repointing skills. Your stone foundation is looking mighty fine, all thanks to your hard work and this handy-dandy guide. Now, go ahead and show it off to all your friends. They’ll be amazed at your DIY expertise!
And there you have it, folks! A step-by-step guide on how to repoint a stone foundation. So, roll up those sleeves, put on your favorite tunes, and get ready to give your foundation the facelift it deserves. Happy repointing!
What to Use to Repoint a Stone Foundation
So you’ve decided to tackle the project of repointing your stone foundation. It’s a big job, but don’t worry, I’ve got you covered! In this section, I’ll walk you through the essential tools and materials you’ll need to get the job done right. Let’s dive in!
1. A Mortar Mixer That’s Tougher Than Your Ex!
When it comes to repointing a stone foundation, you’ll need a mixer that can handle some serious mixing action. Think of it as your partner in crime, or rather, your partner in repointing. Look for a sturdy mortar mixer that can handle the tough stuff, like mixing the perfect consistency of mortar.
2. Mortar Mix: A Magical Blend of Sand, Lime, and Cement
Ah, mortar mix. It’s like the fairy godmother of repointing. You’ll want to choose a high-quality mix that’s specially formulated for stonework. Look for a mix that contains the perfect blend of sand, lime, and cement. This magical blend will ensure a strong and durable bond between your stones.
3. Trowels: The Magic Wands of Repointing
Next up, we have the trusty trowels. These babies will be your magic wands throughout the repointing process. Invest in a good-quality pointing trowel for the fine details, and a margin trowel for mixing and applying the mortar. Remember, the trowel is your best friend, so choose wisely!
4. Jointing Tools: The Beauty Queens of Repointing
Now, let’s talk about the jointing tools. These beauties will help you achieve those neat and tidy joints that make your stone foundation look like a million bucks. Look for a jointing tool that matches the width of your existing joints. And remember, practice makes perfect, so don’t be afraid to experiment with different techniques.
5. Brushes: The Cleanup Crew of Repointing
Last but not least, we have the cleanup crew – the brushes! After all the hard work of repointing, it’s time to clean up the mess. Invest in some stiff-bristle brushes to sweep away any excess mortar and give your stone foundation that polished finish. Your foundation will thank you, and so will your guests!
Now that you know what tools and materials to use, you’re ready to tackle the repointing of your stone foundation like a pro. Remember, take your time, follow the proper techniques, and have a little fun along the way. Happy repointing!
What Does It Mean to Repoint Foundation
Rebuilding Your Stone Sanctuary
So, you’ve got yourself a stone foundation. Nice choice, by the way! But, as with most things in life, even stone foundations need a little extra love and care from time to time. That’s where the fancy term “repointing” comes into play. Don’t worry, though – it’s not some obscure ancient ritual involving magical incantations and sacrificing a chicken. Nope, it’s just a way of saying “fixing up your stone foundation, friend!”
Filling in the Cracks
You see, over time, your stone foundation can start to show some wear and tear. Those little cracks that start to appear? Yeah, they might seem innocent enough, but they can actually cause some serious problems. Moisture can sneak in through those cracks, leading to all sorts of trouble, like mold, mildew, and water damage. So, to prevent your home from becoming a tropical rainforest, you’ll want to repoint your foundation.
Step 1: Gather Your Tools (And Your Wits)
Before you start slapping on the mortar like a medieval mason, you’ll need to gather a few supplies. Don’t worry, you don’t need a secret stone-fixer handshake or anything like that. Just grab yourself a trowel, a chisel, a wire brush, and some mortar mix. Oh, and don’t forget a good ol’ pair of safety goggles – you want to protect those pretty peepers of yours.
Step 2: Get Your Hands Dirty

Now, it’s time to get to work, my friend! With your trusty chisel, carefully remove any loose or damaged mortar from the cracks. Consider it a mini demolition party – without the confetti, unfortunately. Once the cracks are all nice and clean, grab that wire brush and give ’em a good scrubbin’. You want to make sure that any dirt, grime, or bugs (yuck!) are long gone.
Step 3: The Art of Rebuilding
Now comes the fun part: rebuilding! Mix up your mortar according to the instructions and get ready to channel your inner Michelangelo. Using your trowel, carefully apply the mortar into the cleaned-out cracks. Think of it as filling in a delicious sandwich – except instead of mayo and mustard, you’ve got mortar. Yum.
Step 4: Smooth Operator
Once you’ve filled in all the cracks with your mortar magic, it’s time to make everything nice and smooth. Grab that trusty trowel again and gently scrape away any excess mortar. Smooth it out like you’re frosting a cake – except, you know, without actually eating the frosting. That would be weird.
Step 5: Take a Bow
Congratulations, my friend! You’ve officially repointed your stone foundation like a regular Bob the Builder. Now sit back, relax, and bask in the glory of your handy work. Your stone sanctuary is looking as good as new, ready to withstand the test of time. You’ve earned yourself a well-deserved pat on the back. Well done, you repointing rockstar!
Replacing a Stone Foundation with Concrete
Why Concrete is the New Cool Kid on the Block
Let’s be real here, stone foundations are beautiful. They have a certain charm and character that you just can’t replicate with any other material. But sometimes, a stone foundation just doesn’t cut it anymore. Maybe it’s been damaged by the elements or maybe you just want to change things up a bit. That’s where concrete comes into play.
Concrete: The Jack-of-All-Trades
Concrete is like that friend who can do it all. Need a strong foundation? Concrete has got your back. Looking for a material that’s durable and low maintenance? Concrete is your best friend. It’s versatile, customizable, and can be molded into any shape or form you desire. Plus, with concrete, you won’t have to worry about those pesky stone cracks anymore. Say goodbye to water leakage and hello to a solid foundation that can withstand anything.
Step-by-Step Guide to Replacing Your Stone Foundation with Concrete
-
Assessment “On the Rocks”
Before you start tearing down your stone foundation like a wrecking ball, you need to assess the situation. Check for cracks, leaks, or any other signs of damage. Make sure you have a solid plan in place before you go all in with the concrete. -
Who Needs Friends When You Have Tools?
Gather all the tools and materials you’ll need for the project. This includes a jackhammer, shovels, concrete mix, rebar, and of course, an assortment of snacks to keep you fueled for the job. -
Stone, Stone, Go Away!
It’s time to say goodbye to those stone blocks. Use the jackhammer to carefully remove the stone foundation. Be prepared for a little bit of dust and a lot of heavy lifting. -
Pour It Like It’s Hot
Once you’ve demolished the stone foundation, it’s time to pour the concrete. Make sure you have a solid concrete mix and follow the instructions on the bag. Pour it into the foundation area, making sure it’s level and smooth. -
Wait, it’s Magic?
Concrete takes time to dry and set properly. Be patient, my friend. It may take a few days or weeks, depending on the weather conditions. Resist the temptation to jump on your new concrete foundation like a trampoline. Trust the process and let it work its magic.
Replacing a stone foundation with concrete may seem like a daunting task, but with the right tools and a little bit of elbow grease, you can give your home a solid foundation that will stand the test of time. Concrete may not have the same nostalgic feel as stone, but it brings a whole new level of strength and durability to the table. So, get ready to say goodbye to those stone cracks and hello to a foundation that’s “concrete-ly” awesome!
What is the best mortar for repointing stone foundation
Introduction: The quest for the perfect mortar
When it comes to repointing your stone foundation, choosing the right mortar is crucial. You want a mortar that’s sturdy, reliable, and capable of withstanding the test of time. But with so many options available, how do you know which one is the best? Fear not, my fellow DIYers, for I am here to guide you through this mortar maze with a touch of humor and a dash of wit. So, put on your repointing gloves and let’s dive straight into the world of mortars!
Lime mortar: The timeless classic
If you’re looking for a mortar that has stood the test of time, look no further than lime mortar. This traditional mortar has been used for centuries and is known for its durability and flexibility. Lime mortar allows the stone to breathe, preventing moisture buildup and potential damage. It also has a certain timeless charm that will make your stone foundation look like a true work of art. So, if you want a mortar that’s classic, reliable, and has a touch of elegance, lime mortar is the way to go.
Cement mortar: The modern contender
While lime mortar is the classic choice, cement mortar has entered the ring as a modern contender. Made with a mixture of cement, sand, and water, this mortar offers excellent strength and durability. It’s perfect for areas with high traffic or when there’s a need for extra stability. However, be cautious as cement mortar may not be suitable for older stone foundations, as it can lock in moisture and cause structural issues. So, if you’re dealing with a newer stone foundation or need maximum strength, cement mortar could be your go-to option.
Hybrid mortar: The best of both worlds
Why settle for one when you can have the best of both worlds? Hybrid mortar combines the durability of cement mortar with the breathability of lime mortar. This innovative mortar blend offers excellent strength and flexibility, making it suitable for a wide range of stone foundation repointing projects. It provides a perfect balance between stability and moisture control. So, if you’re looking for a mortar that gives you the best of both worlds, consider going for a hybrid mortar. Your stone foundation will thank you!
Conclusion: Finding the mortar of your dreams
When it comes to repointing your stone foundation, the choice of mortar is crucial. Whether you opt for the timeless charm of lime mortar, the strength of cement mortar, or the best of both worlds with a hybrid mortar blend, make sure to consider the unique needs of your stone foundation. Remember, your foundation deserves the best, so choose wisely. Happy repointing!