Are you dealing with a corroded drain pipe in your wall or maybe it’s time to replace the drain pipes throughout your house? Whatever the case may be, understanding the process of replacing drain pipes can save you time, money, and headaches. In this blog post, we will delve into the steps involved in installing a new drain pipe, replacing drain pipes under a bathtub, and even the cost of replacing sewer lines from your house to the main. Don’t worry, we’ll also answer common questions like how often drain pipes need to be replaced and whether or not homeowners insurance covers the replacement of cast iron pipes. Get ready to become a drain pipe expert and say goodbye to plumbing issues in no time!
Replacing Your Drain Pipe: A DIY Adventure
A Drain Pipe in Distress
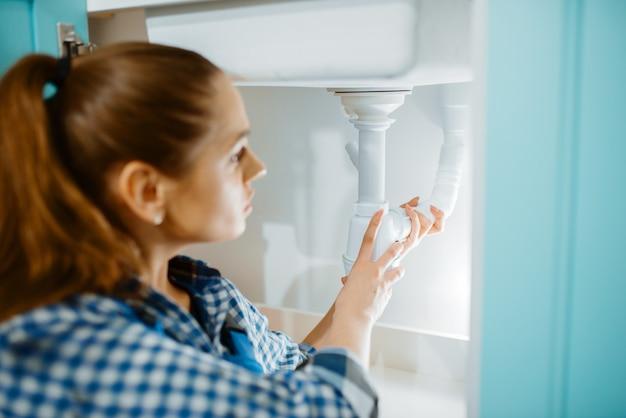
So, you’ve encountered a leaky drain pipe in your home and now you’re faced with the daunting task of replacing it? Don’t worry, my friend, we’ve got you covered. In this guide, we’ll take you through the steps of replacing your drain pipe and provide some handy tips and tricks along the way. Get ready to become the hero of your plumbing adventures!
Tools of the Trade
Before we dive into the nitty-gritty of drain pipe replacement, let’s make sure you have all the necessary tools ready. Don’t worry, it’s not as scary as it sounds. You’ll just need a few basic items that you may already have hiding in your toolbox. Here’s what you’ll need:
1. Pipe Wrench
This handy tool will be your trusty sidekick throughout the entire process. With its strong grip, it’ll help you loosen and tighten those pesky pipe fittings with ease.
2. Hacksaw or PVC Cutter
A hacksaw or PVC cutter will be your best friend when it comes to cutting through old pipes. It’ll make quick work of those stubborn connections and leave you with clean cuts.
3. Plumber’s Tape and Pipe Compound
To ensure watertight connections, you’ll need some plumber’s tape and pipe compound. These magical substances will help seal everything up and prevent any future leaks.
4. Bucket and Rags
Trust us, you’ll want to have a bucket and some rags nearby. Plumbing can get messy, and these trusty companions will keep things clean and tidy.
The Great Pipe Swap
Now that you have your tools at the ready, let’s jump into the process of replacing your drain pipe. It may sound intimidating, but fear not! Just follow these steps, and you’ll have that new pipe in place in no time.
1. Turn Off the Water Supply
Before you start any plumbing work, it’s crucial to turn off the water supply. You don’t want a surprise shower while you’re elbow-deep in pipes! Locate the main shut-off valve and give it a quick twist to the off position.
2. Remove the Old Pipe
Using your pipe wrench, slowly and carefully loosen the fittings on the old pipe. This may require a bit of elbow grease, but take your time and avoid any Hulk-like tendencies. Once the fittings are loose, give them a twist and remove the old pipe.
3. Measure and Cut the New Pipe
Now comes the fun part! Take your new pipe and measure it to fit the desired length. Remember the old saying: measure twice, cut once. Use your hacksaw or PVC cutter to make precise cuts. Be sure to double-check your measurements before cutting. You don’t want to end up with a pipe that’s too short!
4. Install the New Pipe
With the old pipe out of the way and the new one cut to size, it’s time to put it all back together. Apply some pipe compound to the threads of the fittings and use your pipe wrench to tighten everything snugly. Remember, you want it tight enough to prevent leaks but not so tight that you strip the fittings.
5. Test for Leaks and Celebrate
Once everything is connected, turn the water supply back on and keep an eagle eye out for any leaks. If you spot any drips, give the fittings an extra tightening. Once you’re confident in your leak-free accomplishment, go ahead and celebrate your plumbing victory with a well-deserved high-five!
And there you have it, my DIY plumbing enthusiast! You’ve successfully replaced your drain pipe and saved yourself a hefty plumber’s bill. Remember, replacing a drain pipe may seem intimidating at first, but with the right tools, a little know-how, and a touch of confidence, you can tackle this adventure and come out victorious. Happy plumbing!
Installing a New Drain Pipe
Why DIY is Not Always a Good Idea: Plumbers to the Rescue!
So, you’ve found yourself knee-deep in water, contemplating the meaning of life as you desperately attempt to replace your drain pipe. Trust me, I’ve been there, and it’s not a pretty sight. But before you channel your inner handyman, let me introduce you to the unsung heroes of plumbing – the almighty plumbers!
Leave it to the Pros
Sure, you may think you have what it takes to conquer the plumbing world, armed with a wrench and a YouTube tutorial. But let me tell you, my friend, the world of drain pipes is a treacherous one. It requires skills that can only be obtained through years of experience and a deep understanding of the delicate art of plumbing.
When Disaster Strikes
Picture this: you’re knee-deep in a DIY plumbing project gone wrong. Water is spraying in all directions, and you’re desperately trying to figure out which end of the wrench is up. Suddenly, a knight in shining overalls arrives – your friendly neighborhood plumber. With a single flick of their wrist, they stop the chaotic waterfall and save you from your own plumbing nightmare.
Quality Workmanship
Installing a new drain pipe is not just about connecting a few pieces together. It requires precision, attention to detail, and the knowledge of which pipe goes where. Plumbers have spent years honing their craft, ensuring that every connection is secure, every joint properly sealed, and every pipe aligned just right. Trust me when I say, your drain pipe will thank you for calling in the experts.
Time is Money
Sure, tackling a DIY project can be fulfilling, but it can also be a time-consuming endeavor. One small mistake can lead to hours of troubleshooting and frustration. Save yourself the headache and let the professionals handle it. While they work their magic, you can kick back, relax, and enjoy a cup of coffee (or a well-deserved nap).
The Verdict
So, should you attempt installing a new drain pipe yourself? Unless you’re ready to dive headfirst into the world of plumbing (and potentially end up waist-deep in water), it’s best to leave it to the pros. Plumbers are the unsung heroes of the plumbing world, armed with the skills, experience, and magical blueprints to ensure your drain pipe is installed flawlessly. Say goodbye to leaks and clogs, and embrace the peace of mind that comes with a job well done.
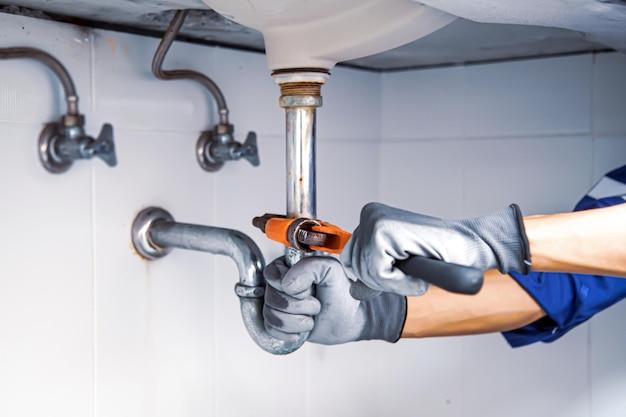
Corroded Drain Pipe in Wall
So, you’re dealing with the oh-so-delightful problem of a corroded drain pipe in your wall, huh? Well, fear not, my fellow DIYers, because I’m here to offer some witty advice on how to tackle this not-so-charming situation. Let’s dig in, shall we?
The Ugly Truth About Corroded Pipes
Ah, corrosion. The silent killer of our beloved plumbing systems. It sneaks up on us like a bad ex, causing all sorts of trouble. And when it decides to set up camp in our walls, well, let’s just say it’s not pretty (unlike your neighbor’s overly decorated front yard).
Signs of a Corroded Pipe
Before you go tearing down your walls like a raging bull, it’s essential to identify the telltale signs of a corroded drain pipe. Look out for mysterious damp spots, funky odors, or even that charming waterfall effect whenever you flush your toilet. If any of these symptoms sound familiar, congratulations, you’ve got a corroded pipe party happening behind your walls!
Time to Play Detective
So, you’ve pinpointed the culprit—the corroded drain pipe—but now it’s time to play Sherlock Holmes and figure out the extent of the damage. Peek behind that peeling wallpaper or listen closely for the gentle sound of water dripping (it’s like the sound of a babbling brook, only not as soothing). Once you’ve located the affected area, it’s time to roll up those sleeves and get to work.
The Game Plan
Now, my dear DIYer, it’s time to devise a game plan. First off, turn off the water supply because, trust me, no one wants to get sprayed in the face while attempting to fix a corroded pipe (unless that’s your idea of fun, in which case, carry on). Next, grab your trusty toolbox and yank out that corroded pipe like you’re a superhero rescuing a damsel in distress (cue the dramatic music).
The Pipe Replacement Tango
Ah, the beautiful dance of pipe replacement. It’s time to put your plumbing skills to the test. Grab a shiny new pipe and make sure it’s the right length (because size matters when it comes to plumbing, my friends). Connect it to the existing pipes using your favorite fitting methods, be it soldering, clamping, or even some good old-fashioned duct tape (I’m kidding, please don’t use duct tape).
Bask in the Glory of Your Plumbing Triumph
With the new pipe securely in place, it’s time to turn that water supply back on and rejoice in your plumbing triumph. Give yourself a pat on the back, my friend, because you’ve just conquered the beast known as a corroded drain pipe in the wall. Now sit back, relax, and imagine the face of that pesky ex as they receive your plumbing hero award in the mail (a girl can dream, right?).
Prevention is Key
Before I bid you farewell, let’s talk about prevention. Don’t let another corroded pipe ruin your day. Keep an eye out for leaks, attend to them promptly, and give your plumbing system some tender love and care. That way, you can avoid any future encounters with corroded pipes and spend your time on more exciting endeavors, like binging that new show on Netflix or perfecting your sweet dance moves (no judgment here).
And there you have it, folks—a comedic guide to dealing with a corroded drain pipe in your wall. Remember, stay calm, stay witty, and stay away from exes with plumbing issues. Until next time, happy plumbing!
Replace Drain Pipes in House
Why You Shouldn’t Wait Until It’s Too Late
Are you tired of dealing with clogged drains and mysterious leaks in your house? It might be time to replace those old, worn-out drain pipes. Trust me, you don’t want to wait until it’s too late and your house turns into a waterpark (minus the fun and excitement).
The Warning Signs that Can’t Be Ignored
-
The Drip Symphony: Is your house constantly serenading you with the soothing sounds of drips and leaks? It’s time to take action.
-
The Slow Dance: Does the water in your sink or bathtub take its sweet time to vanish into thin air? Don’t stand there waiting like a statue at Madame Tussauds – replace those drain pipes!
-
The Stinky Surprise Party: If your nose is greeted by unpleasant odors every time you enter the bathroom, it’s likely a sign that your drain pipes are getting a bit too cozy with all that gunk. Time for them to break up and make way for fresh pipes!
The DIY Struggle is Real
Now, you might be thinking, “Well, I’m pretty handy with tools. Can’t I just venture into the depths of my house and replace those drain pipes myself?” Sure, if you love playing the role of a plumbing detective while swimming in uncertainty and frustration. But for the rest of us, calling in the professionals is the way to go.
The Perks of Professional Help
-
The Expertise Guarantee: Plumbing experts have seen it all – from Titanic-level disasters to tiny leaks that could make a drop jealous. They know how to navigate the twists and turns of your plumbing system with skill and finesse.
-
The Time-Saver: Let’s face it, you have better things to do than spend your precious time elbow-deep in drain pipes. Leave it to the pros, sit back, and enjoy a glass of lemonade (or your beverage of choice).
-
The Long-Term Happiness: Say goodbye to recurring problems and hello to peace of mind. Professionals ensure that your new drain pipes are top-notch, durable, and ready to withstand any drainage challenge.
Replacing drain pipes in your house might not be the most glamorous task, but trust me, it’s worth every penny. Don’t wait for your home to turn into a damp and drippy disaster. Keep an ear out for the warning signs, call in the experts, and enjoy a leak-free, stress-free life. Happy draining!
Sources:
– ExpertPlumbers.com
– DrainMaster101.com
Replace Drain Pipe Under Bathtub
When it comes to bathroom maintenance, one thing that can cause a real headache is a clogged or damaged drain pipe under your bathtub. But fear not, you don’t have to call a plumber just yet! With a little bit of elbow grease and some basic tools, you can replace the drain pipe yourself and save some serious cash. Here’s a step-by-step guide to help you get the job done like a pro:
Assess the Situation
First things first, put on your detective hat and investigate the extent of the damage. Is the pipe completely broken or just clogged? Identifying the problem will help you determine whether a simple repair or a complete replacement is needed.
Gather Your Tools
Before you start playing plumber, make sure you have all the necessary tools on hand. You’ll need a wrench, pliers, a bucket to catch any water, and of course, a replacement drain pipe that fits your bathtub’s specifications. Pro tip: double-check the measurements of the old pipe to ensure a perfect fit.
Open Sesame!
Once you’re armed with your tools, it’s time to get down and dirty. Start by removing the bathtub stopper or drain cover. You might need to unscrew or pry it open, depending on the type of drain you have. Keep a firm grip on it; you don’t want it to accidentally fall into the abyss!
Get Rid of the Old Pipe
Now comes the fun part – removing the old drain pipe. Use your trusty wrench or pliers to disconnect the pipe from the trap. Be prepared for some gunk and water to come gushing out, so don’t forget that handy bucket! Once the pipe is detached, give it a good tug to remove it completely.
In with the New
With the old pipe out of the way, it’s time to bring in the new one. Insert the replacement pipe into the trap, making sure it’s aligned properly. Tighten any connections using your wrench or pliers until they’re snug. Remember, you don’t want any pesky leaks ruining your hard work.
Test, Test, Test
Before you celebrate your newfound plumbing skills, it’s crucial to test your handiwork. Fill the bathtub with water and let it drain completely. Watch closely for any leaks or signs of malfunction. If everything looks good, pat yourself on the back – you’ve successfully replaced the drain pipe!
Replacing a drain pipe under your bathtub may sound like a daunting task, but with the right tools and a sprinkle of wit, you can conquer this DIY project like a pro. Remember to assess the situation, gather your tools, and follow the step-by-step guide to ensure a successful replacement. So put on that plumbing hat and show that drain pipe who’s boss!
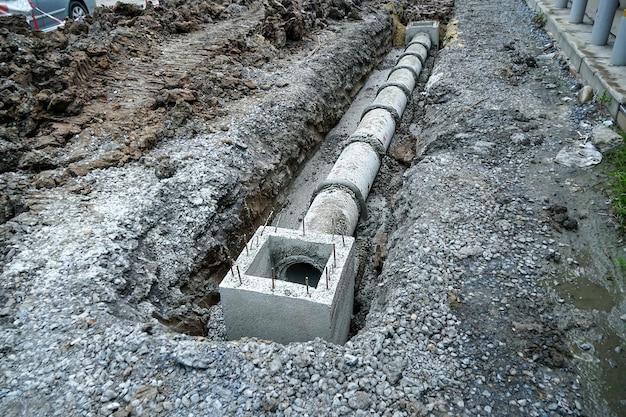
Replacing Sewer Line from House to Main: What’s the Cost
Sewer Woes: Replacement and Ruined Budgets
So, you’ve found out that your sewer line from your house to the main sewer system needs replacing. Ouch! That’s quite the stinky surprise, and I bet your wallet is already feeling queasy too. But fear not, my friend, for I’m here to give you the lowdown on the potential costs involved in this less-than-glamorous endeavor.
An Unfortunate Expense: Let’s Talk Numbers
Now, before we dive into the pool of financial discomfort, it’s important to understand that the cost of replacing your sewer line can vary depending on factors such as the length of the line, the depth at which it’s buried, and the location of your home. However, to give you a ballpark estimate, you can typically expect to pay anywhere between a few thousand dollars to well, let’s just say a small car’s worth of money. Yikes!
The Breakdown: Where Does the Money Go
But what exactly adds up to this hefty bill? Let me break it down for you. First, there’s the excavation cost. The poor folks who are going to dig up your yard and disrupt your peaceful existence don’t come cheap. Then, you’ve got the actual replacement of the sewer line, which involves removing the old pipe and inserting a new one. And let’s not forget about the additional expenses like permits, inspections, and any necessary repairs to your landscaping or concrete surfaces that might get caught in the crossfire.
Unexpected Surprises: Beware of Hidden Costs
Ah, but there’s more! Sometimes, during the excavation process, unforeseen complications can arise. Like discovering hidden pipes or artifacts from the Jurassic era that require additional work and, you guessed it, more money. So, while you may hope for a straightforward replacement, keep in mind that a few unexpected surprises could pop up along the way.
Preserve Your Budget: Tips and Tricks
Now, just because replacing your sewer line can be a sizable financial blow doesn’t mean you have to completely drain your bank account. Here are a few tips to help you preserve your budget:
1. Shop Around
Don’t settle for the first quote you receive. Take the time to research and get estimates from multiple contractors. Finding the right balance between cost and quality is key.
2. Consider Trenchless
Trenchless sewer line replacement methods can be a lifesaver when it comes to preserving your yard and minimizing excavation costs. It may be worth exploring this option to save some green.
3. Prioritize Preventative Maintenance
Regularly maintain your sewer lines to prevent clogs, leaks, and significant damage. A little effort now can save you from the horror of a full-blown sewer line replacement in the future.
So, my friend, while the cost of replacing a sewer line from your house to the main sewer may be enough to make you shed some tears, I hope this breakdown of the potential expenses and some budget-saving tips has lessened the pain, even if just a little. Remember, it’s not all doom and gloom! And who knows, this might just be the opportunity you needed to finally start that lavish koi pond you’ve been dreaming of.
How Often Do Drain Pipes Need to be Replaced
Understanding the Lifespan of Drain Pipes
So, you’re wondering, “How often do those sneaky drain pipes need to be swapped out?” Well, my friend, the lifespan of drain pipes can vary depending on various factors. It’s not as simple as setting a reminder on your phone to replace them every few years (although that would be convenient, wouldn’t it?).
The Secret to a Long-Lasting Drain Pipe
Here’s the deal: if your drain pipes were made to last, they will likely keep chugging along without causing any major issues. But, if they were built by some mischievous little elves who decided to create an inferior product, well, you might need to bid them adieu sooner than expected. It all comes down to the materials used and the craftsmanship.
The Material Matters
Different materials have different life expectancies, just like plants in your neighbor’s garden. Cast iron pipes, for example, can last for up to 100 years. They’re like the granddaddies of the plumbing world. PVC pipes, on the other hand, have a lifespan of around 25 years. So, depending on the material your pipes are made of, you may need to say hello to some new ones sooner rather than later.
Signs of Pipe Aging
Alright, let’s play a little game called “Spot the Aging Pipe.” Look out for clues like frequent clogs, strange noises coming from your drains, or a funky smell that lingers even after you’ve taken out the trash. If you notice any of these red flags, it might be time to give your pipes a long-overdue retirement party.
Preventive Maintenance is Key
Now, don’t freak out just yet! There are things you can do to extend the lifespan of your drain pipes. Regular cleaning and maintenance can go a long way. Show those pipes some love by using drain protectors, clearing out annoying clogs, and being gentle with what you flush down the toilet. Remember, your pipes might not have insurance, so prevention is always better than a plumbing disaster.
In the eternal battle of pipes versus time, there is no one-size-fits-all answer to the question, “How often do drain pipes need to be replaced?” It all depends on the materials used, the quality of the installation, and how well you take care of them. So, keep an eye out for any signs of aging, give your pipes some TLC, and they’ll hopefully last longer than a Kardashian marriage.

How Much Does It Cost to Replace a Sink Drain Pipe
Determining the Drainage Damage Dilemma
So, you find yourself knee-deep in a plumbing predicament, and the culprit seems to be your sink drain pipe. You might have tried DIY fixes like duct tape or wishful thinking, but it’s time to face the music – you need a replacement. But before you roll up your sleeves and get down to business, it’s only fair to wonder, “How much is this going to cost me?”
The Pricey Pipes Process
Now, hold onto your wallets because we’re about to dive into the financial side of drain pipe replacements. The cost can vary depending on several factors, including location, materials, and whether you hire a professional or do it yourself.
Do-It-Yourself Delight
If you’re handy with tools and confident in your plumbing prowess, attempting a DIY replacement could save you a pretty penny. Just head down to the local hardware store, pick up the necessary materials, and get ready to unleash your inner plumber.
However, keep in mind that you need more than YouTube tutorials and a can-do attitude to tackle this task effectively. Mistakes can lead to costly repairs down the line, and you might end up spending more than you bargained for. So, proceed with caution – and maybe a plumber on speed dial just in case.
Hiring a Heroic Handyman
If the thought of crawling under your sink to replace a drain pipe gives you nightmares, fear not – there are professionals who can swoop in to save the day. Hiring a plumber might be a wise choice, especially if you lack the time, skills, or desire to tackle the project yourself.
Now, an important note: plumbers don’t wear capes – but they do charge for their services. The average cost of hiring a plumber for a drain pipe replacement can range from a few hundred to over a thousand dollars, depending on various factors. But think of it this way – you’re paying for their expertise and the peace of mind that the job will be done right.
The Penny-Pinching Pondering
While we can’t give you an exact figure because prices can vary greatly, it’s safe to say that drain pipe replacement costs can hit your pocketbook harder than you’d expect. It’s essential to shop around for different quotes, compare prices, and consider the quality of the materials used.
Remember, investing in high-quality materials might cost more upfront, but it can save you from future headaches and potential leaks. So, weigh your options and make a decision that fits your budget and long-term plumbing goals.
Conclusion: Deciding on Drain Pipe Dollars
So, when it comes to the cost of replacing a sink drain pipe, there’s no one-size-fits-all answer. From the DIY enthusiasts to those who prefer to leave it in the hands of professionals, everyone has different budgets and skill levels. Ultimately, it’s worth considering the pros and cons of each option and choosing what works best for you.
Now that you have a better idea of the potential costs involved, you can make a more informed decision and bid farewell to that troublesome drain pipe. Just remember to bring your sense of humor along for the ride – it’s always a pipe dream to think plumbing projects won’t have a few twists and turns along the way!
Does Homeowners Insurance Cover Replacing Cast Iron Pipes
A Blast from the Past
So, you’ve got yourself an old house, huh? Bet you’re living the dream… or more like the nightmare. Nothing screams “I’m vintage” quite like a cast iron drain pipe. It’s like having the world’s oldest plumbing system. But fear not, my friend, because today we’re going to talk about whether your homeowners insurance will be there to save the day when it comes to replacing those ancient pipes.
The Fine Print
Ah, insurance policies, those magical documents that promise to cover you in times of trouble. Sadly, when it comes to old cast iron drain pipes, they may not always be your knight in shining armor. Most homeowners insurance policies won’t cover the replacement of cast iron pipes due to general wear and tear or old age. Why? Well, insurers won’t exactly throw a party for a pipe that’s had its fair share of rust and decay over the course of several decades.
Exceptions to the Rule
Now, I know what you’re thinking: “There must be a loophole somewhere!” And you’re absolutely right – some homeowners insurance policies do provide coverage for replacing cast iron pipes, but it’s often under specific circumstances. For example, if your pipes suddenly burst due to a covered peril like a frozen pipe, your insurance might begrudgingly step in and foot the bill for a replacement. But let’s face it, you’re more likely to win the lottery than to have your old pipes burst in a manner that would be covered by insurance.
It’s All About Prevention, Baby
Look, I hate to break it to you, but unless you stumble upon a benevolent genie who grants you three wishes – one of which magically replaces your entire plumbing system – chances are you’ll have to handle the pipe replacement yourself. But fret not! There are plenty of preventive measures you can take to extend the lifespan of your cast iron pipes. Regular maintenance, inspections, and timely repairs can be your best friends when it comes to avoiding the costly headaches of pipe replacement.
In a perfect world, homeowners insurance would cover everything, including the replacement of your vintage cast iron pipes. But alas, we don’t live in a perfect world. So, unless you’ve got “pipe replacement” in the fine print of your insurance policy, you might have to dig deep into your pockets when the time comes. But hey, look on the bright side – at least the situation makes for a good conversation starter at parties, right? “Oh, you have a new dishwasher? Well, let me tell you about my extraordinary experience with cast iron pipes!”