If you’ve discovered cut trusses in your attic, don’t panic just yet! Accidents happen, and while it may seem like a daunting task, repairing cut trusses is definitely possible. In this blog post, we’ll walk you through the process of fixing broken trusses, discuss the cost implications, and explore whether you can tackle the repair yourself or if you’ll need to enlist professional help. So, let’s dive in and learn how to restore the structural integrity of your attic trusses!
Repairing Cut Trusses in Your Attic
Understanding the Problem
So, you find yourself faced with the unfortunate situation of cut trusses in your attic. Don’t panic! This is a common problem that can be remedied with a few simple steps. But before we delve into the solutions, let’s gain a better understanding of what cut trusses actually are.
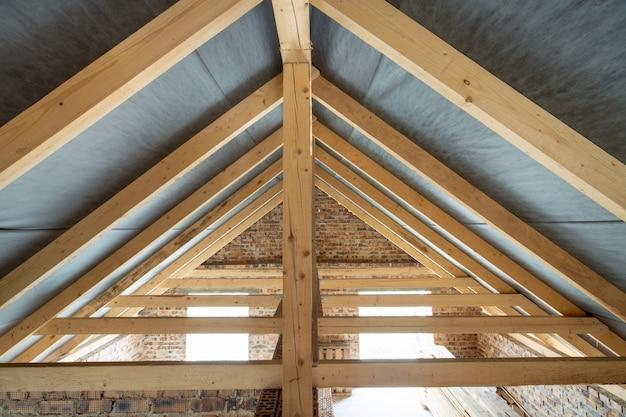
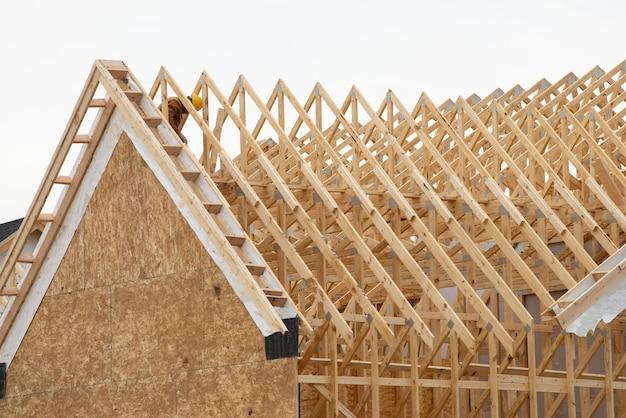
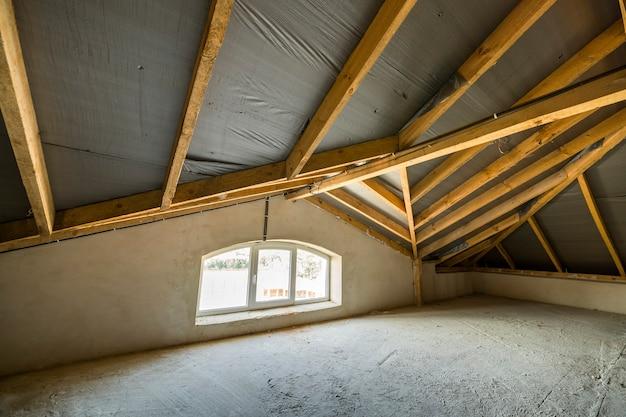
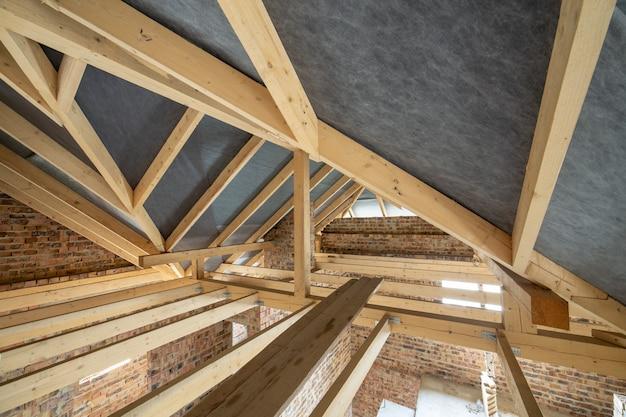
What are trusses?
Trusses are structural components that provide support for the roof of your home. They consist of multiple beams that work together to distribute the load evenly. When these trusses are cut, the structural integrity of your attic can be compromised.
Assessing the Damage
Before jumping into any repairs, it’s important to assess the extent of the damage. Are the trusses cut partially or completely? Is the damage localized or widespread? These factors will determine the best course of action for resolving the issue.
Signs of Cut Trusses
Figuring out whether you have cut trusses might seem like a daunting task. Look out for visible signs such as irregularities in the roofline, sagging or bowing areas, or cracks in the drywall and ceiling. These are all potential indicators of damaged trusses that need immediate attention.
DIY Solutions
With the right tools and a bit of DIY panache, you can tackle this problem yourself. However, proceed with caution. Remember that safety should be your top priority, so if you are unsure or uncomfortable about performing the repairs, it’s best to call in a professional.
Reinforcing the Trusses
One common solution is to reinforce the cut trusses using plywood gussets. These triangular pieces of plywood are placed over the damaged area and secured with nails or screws. They act as a supportive brace, redistributing the weight and strengthening the truss.
Consult a Professional
Sometimes, the damage may be beyond your DIY capabilities. In such cases, it’s crucial to seek the expertise of a professional contractor. They have the knowledge, experience, and specialized tools to repair the cut trusses effectively and ensure the structural integrity of your attic.
Preventive Measures
Once you’ve successfully resolved the issue, it’s essential to take preventive measures to avoid a repeat occurrence. Consider installing protective shields or covers to safeguard the trusses from future damage. Regular inspections, especially after any work is done in your attic, can also help you catch potential problems early on.
Wrap-Up
Repairing cut trusses in your attic is a task that requires attention, but it’s not an impossible feat. By understanding the problem, assessing the damage, and choosing the right repair method, you can restore the structural strength of your attic. Remember, when in doubt, it’s always better to consult with a professional. So grab those tools, put on your DIY hat, and get ready to repair those cut trusses like a pro!
Truss Scab Repair
In this section, we will dive deeper into the topic of truss scab repair. If you’ve discovered cut trusses in your attic, it’s essential to understand the steps to repair them correctly. One common method is utilizing a technique known as truss scab repair.
What is Truss Scab Repair
Truss scab repair involves reinforcing the damaged truss by adding a scab, which is basically a piece of wood that is attached to the damaged area. This technique helps to restore the structural integrity of the truss and prevent further damage.
Materials You’ll Need
To carry out truss scab repair, you’ll need a few materials. Make sure you have the following:
- Scabs: Prepare a few pieces of compatible wood to create the scabs.
- Screws: Get heavy-duty screws that are suitable for attaching the scabs securely.
- Drill: Have a reliable drill to make pilot holes for the screws and attach the scabs firmly.
- Measuring Tape: Use a measuring tape to ensure accurate placement of the scabs.
- Safety Gear: It’s always important to prioritize safety, so make sure you have safety goggles, gloves, and a dust mask.
Step-by-Step Guide
Now let’s go through the step-by-step process of truss scab repair:
- Inspect the Damage: Start by carefully examining the damaged area to assess the severity of the cut truss. This will help you determine the extent of repair required.
- Prepare the Scabs: Using your chosen wood material, cut pieces that are slightly bigger than the damaged section. This will provide enough surface area for a strong connection.
- Mark and Measure: Measure the length and width of the scab, and mark the corresponding area on the damaged truss.
- Drill Pilot Holes: Drill pilot holes in the damaged truss and the scab. Ensure the pilot holes are in alignment for a reliable connection.
- Attach the Scab: Place the scab over the damaged area and line up the pilot holes. Securely attach the scab to the truss using heavy-duty screws.
- Repeat if Necessary: Depending on the extent of the damage, you may need to repeat the process for multiple areas on the truss.
- Inspect and Reinforce: Once all the scabs are attached, inspect the repair to ensure it is robust and secure. If necessary, reinforce the surrounding trusses for added support.
By following these steps, you can effectively repair cut trusses in your attic using the truss scab repair technique. Remember, if you are uncertain or uncomfortable with performing the repair yourself, it’s always best to consult a professional to ensure the job is done safely and correctly.
Repairing Attic Trusses
When it comes to maintaining your attic, ensuring the health of your trusses is crucial. Over time, trusses in the attic may experience wear and tear, requiring some repair work to keep them in tip-top shape. In this section, we’ll explore some common problems with attic trusses and discuss practical solutions to repair them.
Identifying Damaged Trusses
Inspecting your attic trusses regularly is the first step in identifying any issues. Look out for signs such as cracks, splits, or sagging. These can indicate structural weaknesses that may compromise the integrity of the trusses. Additionally, be on the lookout for any signs of water damage, as it can weaken the wood and lead to rot.
Fixing Cracks and Splits
If you notice cracks or splits in your attic trusses, don’t panic! These issues are often repairable with some basic DIY skills. Start by cleaning the affected area and removing any loose debris. Then, using a wood glue specifically designed for structural repairs, carefully apply it to the crack or split. Hold the pieces together firmly until the glue dries completely. For added reinforcement, consider using screws or brackets.
Strengthening Sagging Trusses
Sagging trusses can be a cause for concern, as they can compromise the overall stability of your attic. To address this issue, one option is to use temporary braces to support the sagging trusses before reinforcing them permanently. Install adjustable braces perpendicular to the trusses, using them to exert gentle upward pressure. However, keep in mind that this is a temporary solution and professional assistance may be necessary for a permanent fix.
Preventing Water Damage
Water damage is a common culprit behind weakened attic trusses. To safeguard your trusses against moisture, ensure proper ventilation in the attic. Good airflow can help prevent condensation and minimize the chances of wood rot. Moreover, consider adding insulation to your attic to regulate temperature and prevent moisture buildup.
Consulting a Professional
While minor repairs can often be handled independently, it’s wise to call in a professional if you encounter more complex or severe issues. Trained experts possess the knowledge and experience to evaluate the condition of your attic trusses thoroughly. They can provide sound advice on the most effective repair methods, ensuring your trusses are repaired safely and effectively.
Maintaining healthy attic trusses is essential for the overall stability and longevity of your home. By staying vigilant and addressing any issues promptly, you can keep your attic safe and secure. Don’t ignore those tiny cracks or slight sagging—repairing your attic trusses is an investment in the structural integrity of your home!
Broken Truss in Attic: Evaluating the Cost
Introduction
If you have a broken truss in your attic, don’t panic just yet. While it may seem like a big problem, there are ways to repair it without breaking the bank. In this subsection, we’ll take a closer look at the cost of repairing a broken truss in the attic and explore some factors that influence the overall expense.
Factors Affecting the Cost
Repairing a broken truss in your attic doesn’t have a fixed cost and can vary depending on several factors. Here are a few key elements that can impact the overall expense:
Extent of Damage
The extent of the damage to the truss plays a crucial role in determining the cost of repairs. Minor damage may only require a simple fix, whereas a severely broken truss may require complete replacement, leading to higher costs.
Accessibility
The accessibility of your attic can also affect the cost. If it’s easy to reach, contractors can quickly assess and fix the truss. However, if there are obstacles in the way or limited space, it may take extra time and effort, potentially increasing the overall expense.
Materials
The type of materials used during the repair process can significantly impact the cost. Higher-quality materials might come with a higher price tag, but they often ensure better stability and durability in the long run.
Contractor Rates
Contractor rates can vary from one professional to another. It’s essential to get multiple quotes and compare prices to find a balance between quality and cost. Remember, it’s not always about choosing the cheapest option, but finding a contractor who offers a reasonable rate and delivers top-notch service.
Estimating the Cost
While it’s difficult to pinpoint the exact cost of repairing a broken truss in the attic, you can get a rough estimate by considering the factors mentioned above. On average, the cost can range anywhere from a few hundred dollars to a few thousand.
To get a more accurate estimate, it’s advisable to reach out to a trusted contractor who can assess the damage firsthand and provide you with detailed pricing information.
Repairing a broken truss in your attic doesn’t have to break the bank. By considering factors like the extent of damage, accessibility, materials, and contractor rates, you can get a better idea of the overall cost involved. Don’t hesitate to seek professional help to assess the situation and receive an accurate estimate specific to your attic. Remember, investing in a timely repair can help you maintain the structural integrity of your home and avoid further damage in the long run.
Attic Truss Repair Near Me
Understanding the Importance of Attic Truss Repair
When it comes to the structural integrity of your house, one area that often gets overlooked is the attic truss. These interconnecting wooden beams play a vital role in supporting the roof and distributing its weight evenly. However, over time, issues such as cuts or damage can occur, compromising their effectiveness. Don’t panic though! There are solutions available, and if you’re looking for attic truss repair in your area, we’ve got you covered.
Locating the Right Professionals
When it comes to fixing your attic truss, you want to ensure that you find reliable professionals who can get the job done efficiently. Start by reaching out to local construction companies or contractors specializing in roof repairs. They will have the experience and expertise necessary to handle your attic truss repair needs.
Reviews: Your Best Friend
One of the best ways to find reliable attic truss repair services near you is by checking online reviews. Hearing feedback from homeowners who have previously used these services can help give you peace of mind. Look for positive reviews, testimonials about their attention to detail, and their ability to complete the repairs within the agreed-upon time frame.
Word of Mouth Recommendations
Don’t underestimate the power of word of mouth recommendations. Ask friends, neighbors, or colleagues for any recommendations they might have. Often, personal experiences can be the most reliable indicator of the quality of service. Don’t hesitate to reach out and start a conversation with individuals who have recently gone through attic truss repairs in your area.
Signs Your Attic Truss Needs Repair
While seeking professional help is crucial, it’s also essential for homeowners to be aware of the signs that indicate a need for attic truss repair. Some common signs include sagging or drooping ceilings, cracks in the walls or ceilings, and visible damage to the truss itself. If you notice any of these indicators, it’s time to call in the experts.
The Cost Factor
Repairing cut trusses in the attic is a task that requires skill, time, and materials. As with any service, it’s important to get an estimate before proceeding with the repairs. Contact multiple professionals in your area, provide them with detailed information about the issue, and request a quote. Don’t forget to compare prices and ensure that the chosen service offers a fair price for the quality of work they provide.
When it comes to attic truss repair near you, it’s essential to find professionals who are reliable, experienced, and within your budget. Make sure to do your research, read reviews, and ask for recommendations. By taking the time to find the right experts, you’ll ensure a successful attic truss repair that will safeguard the structural integrity of your home for years to come.
How to Fix Broken Truss Web
What is a Truss Web
First, let’s understand what a truss web is. In the attic, trusses are the structural framework that supports the roof. The truss web is the web-like pattern of timber pieces that make up the truss itself. It serves a vital role in distributing the weight and maintaining the stability of the roof.
Signs of a Broken Truss Web
Before diving into the repairs, it’s crucial to identify if you have a broken truss web. Look out for sagging or uneven areas in your roof, cracks in the ceiling, or visible damage to the truss framework. These signs indicate the need for repair.
Tools and Materials You’ll Need
Now that you’ve identified a broken truss web, let’s gather the necessary tools and materials for this repair job. You’ll need:
- A sturdy ladder
- Safety goggles
- A headlamp or flashlight
- Hammers and nails
- 4×8 plywood sheets
- Measuring tape
- Circular saw
- Carpenter’s pencil
- Safety gloves
Step-by-Step Repair Instructions
Step 1: Safety First
Before starting any repairs, prioritize safety. Wear your safety goggles and gloves, and make sure the attic space is well-lit and ventilated.
Step 2: Assess the Damage
Take a closer look at the broken truss web to determine the extent of the damage and identify any additional repairs needed.
Step 3: Measure and Cut the Plywood
Measure the dimensions of the damaged area and cut a piece of plywood to fit. Use the circular saw for precise cuts.
Step 4: Remove the Damaged Web
Carefully remove the broken section of the truss web using a hammer and nail to pry it away. Be cautious not to cause further damage to the surrounding structure.
Step 5: Install the New Web
Using the nails and hammer, attach the new plywood to the remaining truss members. Ensure a secure fit and proper alignment.
Step 6: Reinforce the Repair
To strengthen the repair, consider adding additional plywood, forming a cross shape over the damaged area. Secure it using nails or screws.
Step 7: Double-Check the Repair
Give the repaired truss web a final inspection to ensure it is securely in place and there are no loose connections or areas that need further attention.
Repairing a broken truss web in your attic is no small task, but with the right tools, materials, and careful steps, you can restore stability to your roof structure. By following this guide, you’ll be well on your way to fixing those pesky damaged trusses and keeping your home safe and secure. Remember, if you’re unsure about tackling this repair yourself, it’s always best to consult a professional for assistance.
Is a broken truss a big deal
Understanding the Implications of a Broken Truss
When it comes to trusses in your attic, a broken one might seem like a cause for concern. But just how big of a deal is it? Let’s dive into the details and shed some light on this common homeowner’s dilemma.
The Basics: What is a Truss?
A truss is a structural framework made up of interconnected beams and posts, designed to provide support for the roof above. It’s like the backbone of your attic, ensuring everything stays in place and distributes the weight evenly.
Signs of a Broken Truss
While it’s important to act diligently and address any roof-related issues promptly, not every cracked or damaged truss spells disaster. Minor issues can occur over time due to natural settling or changes in the surrounding environment. However, certain signs may indicate a bigger problem.
Visible Damage: Cracks, Sagging, or Misalignment
If you notice any visible signs of damage on your trusses, such as cracks, sagging, or misalignment, it’s wise to call in an expert for further evaluation. These signs might indicate a more significant structural problem that needs attention.
Consequences of Ignoring a Broken Truss
Although a broken truss might not bring your whole house tumbling down (cue dramatic effect), it is not a issue that should be taken lightly. Ignoring a damaged truss can lead to potential complications.
Compromised Structural Integrity
A damaged truss means compromised structural integrity. Over time, this can result in further damage to your attic and eventually your entire home. It’s like having a weak link in a chain – sooner or later, it could give way, causing a domino effect.
Safety Hazards
A broken truss also poses safety risks. Any sudden structural failure could potentially harm occupants or damage property. As much as we like the thrill of unexpected twists, we certainly don’t want a roof caving in on us.
The Solution: Seek Professional Help
While you might be tempted to grab your tool belt and get your DIY on, it’s crucial to remember that trusses are key components of your home’s structure. Therefore, it’s best to leave repairs to the professionals who have the necessary expertise and experience.
Conclusion
Although a broken truss might not automatically send you into a full-blown panic, it shouldn’t be taken lightly either. Whether it’s visible damage, compromised structural integrity, or safety hazards, it’s essential to address the issue promptly and seek professional assistance. After all, a sturdy roof and a safe home are no laughing matter!
How to Repair a Cut Roof Truss
Understanding the Basics
Accidents happen, and sometimes roof trusses in our attics get cut. Whether it was an unfortunate mistake during a renovation project or an unintentional mishap, it’s crucial to address this issue promptly. Repairing a cut roof truss requires careful attention and precision to ensure the structural integrity of your attic and overall home. So, let’s dive into the steps you need to take to fix that cut.
Step 1: Assess the Damage
Before diving in headfirst, inspect the cut truss thoroughly to determine the extent of the damage. Look for any splintered or misaligned wooden members and assess how much support has been compromised. Understanding the damage will help you plan your repair strategy accordingly, ensuring the best possible outcome.
Step 2: Gather Your Tools and Materials
To repair the cut truss effectively, you’ll need a few handy tools and materials. Grab a tape measure, carpenter’s pencil, circular saw, brackets, screws, construction adhesive, and a sturdy ladder. Safety goggles and gloves should also be on your checklist to ensure your well-being during the repair process.
Step 3: Reinforce and Reassemble
Meticulously reinforce the cut truss by installing metal brackets on either side of the cut to bridge the gap. These brackets will help provide additional strength and stability to the truss. Use screws to secure the brackets, ensuring a tight and reliable connection. If the cut has affected multiple truss members, repeat this process for each one.
Step 4: Glue it Together
Now it’s time to add extra reinforcement using construction adhesive. Apply the adhesive generously to the cut area before reassembling the truss. This step will help bond the wooden members together, providing additional support and stability. Allow the adhesive to dry completely before moving forward.
Step 5: Seek Professional Advice
While DIY repairs can be effective, some situations may require professional expertise. If you’re uncertain about the severity of the damage or feel unsure about proceeding with the repair, don’t hesitate to consult a structural engineer or a reputable roofing contractor. Their knowledge and experience will ensure that your attic’s structural integrity is fully restored.
Step 6: Ongoing Maintenance and Inspections
Once you’ve successfully repaired the cut truss, it’s important to prioritize ongoing maintenance and regular inspections. Keep an eye out for any signs of sagging, cracking, or additional damage. Small issues can be nipped in the bud before they escalate into larger, costlier problems.
Repairing a cut roof truss in your attic may feel like an overwhelming task, but with the right tools, materials, and guidance, you can tackle it like a pro. By following these steps and taking necessary precautions, you can restore the integrity of your attic’s structure and enjoy your home with peace of mind.
Remember, when in doubt, consult a professional. With their expertise and your handy skills, your attic will be a secure and reliable space once again – with the cut truss repair becoming just another achievement in your DIY journey.
Can You Repair Damaged Trusses
If you’ve discovered damaged trusses in your attic, you might be wondering if it’s possible to repair them. The good news is that in many cases, it is indeed possible to repair damaged trusses and restore their structural integrity. However, it’s crucial to understand the nature of the damage and assess its severity before proceeding with any repairs.
Assessing the Damage
Before attempting to repair damaged trusses, it’s essential to perform a thorough inspection to determine the extent of the problem. Look for any visible signs of damage, such as cracks, splits, or bowed sections. Additionally, check for any rot, insect infestation, or water damage that might have compromised the trusses.
Engage Professionals
In some situations, it may be best to enlist the help of professionals who specialize in truss repair. They have the necessary expertise and experience to accurately assess the damage and recommend the appropriate course of action. Remember, attempting to repair trusses without the necessary skills and knowledge can lead to further damage or even compromise the entire structure.
Repair Techniques
The techniques used to repair damaged trusses can vary depending on the extent of the damage and the specific structural issues. Here are a few common repair techniques that professionals may employ:
1. Reinforcing with Steel Plates
Steel plates can be used to reinforce damaged trusses by adding strength to weakened areas. This method involves attaching the plates to the damaged sections, providing additional support and preventing further deterioration.
2. Sistering Trusses
Sistering is a technique where new trusses are added alongside existing damaged ones to strengthen and support them. It involves attaching the new trusses to the damaged ones, distributing the load and restoring stability.
3. Epoxy Reinforcement
In cases where trusses have suffered from minor cracks or splits, epoxy reinforcement can be an effective solution. Epoxy is applied to the damaged areas to fill the gaps and restore the truss’s strength.
When Replacement is Necessary
Although repair is usually the preferred option, there are instances where trusses may be too severely damaged to salvage. If the damage is extensive, compromising the structural integrity of the trusses, replacement might be the safest and most cost-effective choice. Remember, it’s essential to consult with professionals who can assess the damage accurately and provide the best advice based on the situation.
In conclusion, damaged trusses in the attic can often be repaired, depending on the severity of the damage. Taking the time to assess the extent of the problem and consulting with professionals will help determine the most appropriate repair technique, whether it be reinforcing with steel plates, sistering trusses, or utilizing epoxy reinforcement. By addressing the damage promptly and accurately, you can restore the strength and stability of your trusses, ensuring the long-term integrity of your attic’s structure.
What Happens If You Cut a Roof Truss
Cutting Corners: The Risks of Truss Tampering
Let’s face it – accidents happen. Perhaps you were trying to create some extra storage space in your attic, and in the process, you accidentally cut into one of the roof trusses. But what happens when you take a saw to these vital structural elements that support your roof? Well, it’s not just your attic that gets a little hot under the collar.
The Fractured Framework: Structural Consequences
When you cut a roof truss, you’re compromising the structural integrity of your entire roof system. Trusses are carefully designed to distribute weight evenly and provide stability to your home. By cutting into one of these crucial components, you risk throwing the whole system out of balance. This can lead to sagging ceilings, uneven floors, and even weakened load-bearing walls.
A House of Cards: Cascading Problems
Cutting a truss isn’t just a one-off problem; it can cause a domino effect of issues throughout your home. With a damaged truss, the load-bearing capability of your roof is compromised. This means that the remaining trusses will be strained as they try to compensate for the weakened support. Over time, this additional stress can cause the remaining trusses to fail as well. So, what starts as a small cut can quickly escalate into a full-blown structural nightmare.
Rain, Rain, Go Away: Water Damage Woes
When you slice into a roof truss, you’re not just creating a risk of collapse – you’re also creating an opportunity for water to sneak into your home. Trusses play a critical role in keeping your roof waterproof. By cutting into them, you may inadvertently create gaps or weak points that allow water to seep in. This can lead to water damage, mold growth, and a whole host of other costly issues.
Don’t Get Caught in the Web: Legal and Financial Consequences
Besides the obvious safety and property damage concerns, cutting a truss without the proper knowledge or authorization can have legal and financial repercussions. Altering or tampering with essential structural elements of your home can violate building codes, insurance policies, and warranties. If an accident occurs or a claim needs to be filed, it’s likely that you’ll be left holding the bill.
So, while it may be tempting to take matters into your own hands and make some DIY modifications to your roof trusses, the risks far outweigh the rewards. Cutting a roof truss can compromise your home’s structural stability, lead to a litany of subsequent issues, and even land you in legal trouble. When it comes to keeping your home safe and sound, it’s best to leave the truss repairs to the professionals. Don’t let a simple mistake turn your dream home into a house of horrors.
Can You Cut the Bottom Chord of a Truss
Have you ever wondered if it’s possible to cut the bottom chord of a truss? Maybe you want to make some changes in your attic and need to remove or modify the trusses. Well, I’m here to give you the lowdown on whether or not you can wield your trusty saw and start hacking away at those bottom chords. Let’s dive in and find out!
Understanding Truss Construction
Before we get into whether cutting the bottom chord of a truss is a good idea, let’s quickly go over the basic construction of trusses. Trusses are engineered roof support systems made from wooden beams joined together with metal plates. They are specifically designed to distribute the weight load evenly throughout the structure, ensuring stability and strength.
The Essential Role of the Bottom Chord
The bottom chord of a truss plays a crucial role in the overall stability of the structure. It helps to counteract the tension forces generated by the weight of the roof and other elements on top. By cutting the bottom chord, you are compromising the integrity of the truss and potentially endangering the entire roof system. Yikes!
Alternatives to Cutting the Bottom Chord
Instead of chopping away at the bottom chord, consider alternative solutions that won’t compromise the structural integrity of your roof. For example, if you need extra space in your attic, you can install attic flooring on top of the trusses. This way, you can create a usable area without jeopardizing the stability of your roof.
Consulting a Professional
When it comes to making modifications to your trusses or any structural element of your house, it’s always best to consult with a professional. A licensed structural engineer or an experienced contractor can assess your specific situation and provide expert advice on the best course of action. Safety should always be the top priority!
In short, cutting the bottom chord of a truss is a major no-no. It compromises the structural integrity of your roof and can lead to disastrous consequences. Instead, explore alternative solutions or consult with a professional who can guide you through the process safely. Remember, your home’s safety is worth the extra effort!
So, before you grab that saw and start hacking away, take a step back and consider the long-term implications. Your trusses will thank you, and so will your wallet!