Are you struggling with adding adjustment layers in Premiere Pro? You’re not alone! Many users face issues like “adjustment layer premiere pro not working” or “can’t add adjustment layer.” But don’t worry, we’ve got you covered. In this comprehensive blog post, we’ll walk you through the steps of adding an adjustment layer in Premiere Pro, troubleshooting common problems, and optimizing your workflow. So, let’s dive in and unlock the full potential of Premiere Pro!
Premiere Pro: Adding Adjustment Layers
Adjustment layers are like secret ingredients that can enhance the flavor of your videos in Adobe Premiere Pro. These nifty little layers allow you to apply effects, color corrections, and more to multiple clips simultaneously, saving you tons of time and effort. In this subsection, we’ll walk you through the steps to add adjustment layers in Premiere Pro and explore some of the exciting possibilities they offer. So grab your editing apron and let’s get cooking!
Setting the Stage with an Adjustment Layer
To begin our video editing masterpiece, let’s first create an adjustment layer. Don’t worry, it’s easier than baking a cake! In Premiere Pro, go to the Project panel and right-click. From the dropdown menu, select New Item and then Adjustment Layer. A new adjustment layer will magically appear in your project.
The Art of Layering in Premiere Pro
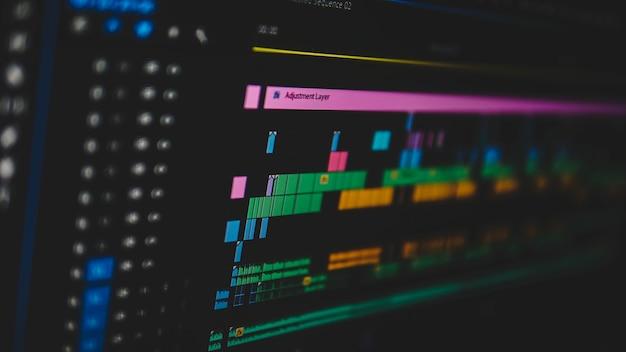
Now that we have our adjustment layer, it’s time to layer our effects and corrections on top of it. Think of it as adding icing to a cake. Select the adjustment layer in the Timeline panel, and head to the Effect Controls panel. Here’s where the fun begins!
Elevate Your Colors with Color Correction
Whether you want to give your video a vibrant summer look or a moody film noir atmosphere, color correction can work wonders. Click on the adjustment layer in the Timeline panel, then go to the Effects tab and search for the Lumetri Color effect. Apply this effect to the adjustment layer, and voila! You can now use the Lumetri Color panel to tweak the color, contrast, saturation, and all that jazz.
Spice It Up with Creative Effects
If color correction is the salt and pepper of video editing, creative effects are the chili flakes that bring the heat. Go wild with effects like Gaussian Blur, Glow, or even Green Screen. Apply these effects to the adjustment layer, and watch your video transform like a chrysalis into a beautiful butterfly.
Superhero Soundtracks with Audio Effects
Adjustment layers aren’t just for visuals. You can also supercharge your audio with the help of audio effects applied to the adjustment layer. Imagine giving your video the powerful roar of a lion or the subtle whispers of the wind. It’s possible! Simply select the adjustment layer in the Timeline panel, head to the Effects tab, and explore the numerous audio effects available. Your audience’s ears will thank you!
Time-Saving Brilliance
One of the greatest advantages of adjustment layers is their ability to save you precious time. Instead of manually applying effects to each individual clip, you can simply apply them to the adjustment layer, and they’ll magically affect all the clips underneath. It’s like having your own personal editing assistant, minus the caffeine addiction!
Adding adjustment layers to your Premiere Pro projects is a game-changer, unleashing a world of possibilities for creative visual and audio enhancements. Whether you want to color-correct like a pro, spice things up with effects, or transform the audio experience, adjustment layers have got you covered. So go ahead, experiment, and let your videos shine brighter than a disco ball on a Saturday night!
Cant Add Adjustment Layer
Have you ever been in a situation where you’re all set to work your magic in Adobe Premiere Pro, only to find out that you can’t add an adjustment layer? It’s frustrating, isn’t it? Well, fear not, my friend, because I’ve got the answers you’re looking for!
What’s the Big Deal with Adjustment Layers
Before we dive into the nitty-gritty of why you can’t add an adjustment layer in Premiere Pro, let’s quickly revisit what they are and why they’re so great.
Adjustment layers are like the Swiss Army knives of video editing. They allow you to apply effects, color corrections, and other changes to multiple clips at once, without altering their individual properties. Think of it as putting a filter on a group of clips to create a cohesive look and feel. It’s a time-saving, sanity-preserving tool that every video editor should have in their arsenal.
The Odd Case of the Missing Adjustment Layer
Now, let’s get to the heart of the matter – why on earth can’t you add an adjustment layer in Premiere Pro? There could be a few reasons behind this peculiar predicament:
1. Update Your Premiere Pro
First things first, have you updated your Premiere Pro recently? Software updates often come with bug fixes and new features, and it’s possible that the version you’re using has a glitch preventing you from adding adjustment layers. So, go ahead and check for updates – you might just find your solution there.
2. “Oh, the Track Header You Say?”
Sometimes, the answer lies in the least expected places. In Premiere Pro, you can only add adjustment layers to tracks with headers – those little rectangles that you see on the left side of your timeline. So, if you’re trying to add an adjustment layer to a track without a header, well, that’s why you’re stuck in this conundrum.
3. A Case of “Premiere Perfectionism”
Let’s face it, Premiere Pro can be a bit of a perfectionist at times. It likes things to be just right, and when it’s not, it throws a temper tantrum. So, if your video clips or audio tracks have some funky settings or unconventional configurations, Premiere Pro might throw a hissy fit and refuse to let you add an adjustment layer. Take a deep breath, double-check your media settings, and make sure everything is in order.
4. Time Travelling Troubles
Okay, before you get too excited about time travel, let me burst your bubble – we’re not talking about Marty McFly kind of time travel here. The time travel I’m referring to is the time you’ve spent working on your timeline. Sometimes, after you’ve added a ton of effects, made umpteen changes, and done numerous edits, Premiere Pro decides that adding an adjustment layer is just not worth the hassle. So, you might have to take a step back, evaluate your timeline, and consider starting afresh if necessary.
The Adjustment Layer Conundrum: Solved!
By now, you should have a better understanding of why adding an adjustment layer in Premiere Pro might be more challenging than you expected. Remember to keep your software updated, make sure you have tracks with headers, check those pesky settings, and never underestimate the power of a good timeline evaluation.
So, fear not, my fellow video editing enthusiasts! Armed with this newfound knowledge, you can conquer the world of adjustment layers in Premiere Pro with ease. Happy editing!
Adjustment Layer Premiere Pro Not Working
1. Outdated Software
One common reason for the adjustment layer in Premiere Pro not working is outdated software. To ensure a smooth editing experience, make sure you’re using the latest version of Premiere Pro. Adobe frequently releases updates with bug fixes and performance improvements that may address the issue you’re facing.
2. Incompatible Plugins
Sometimes, the problem lies within the plugins you’ve installed. If you’ve recently added any new plugins to Premiere Pro, try removing them temporarily and see if the adjustment layer starts working again. You can always reinstall the plugins after resolving the issue to identify which one was causing the problem.
3. Incorrect Layer Placement
Another mistake that can prevent the adjustment layer from functioning properly is incorrect layer placement. Ensure that the adjustment layer is positioned above the layers you want to affect. Premiere Pro processes effects in a top-down manner, so placing the adjustment layer beneath the target layers will render it ineffective.
4. GPU Acceleration
Certain GPU acceleration settings may interfere with the functioning of adjustment layers in Premiere Pro. Try disabling GPU acceleration temporarily to see if it resolves the issue. To do this, go to “File” → “Project Settings” → “General,” and then uncheck the “Enable Mercury Playback Engine GPU Acceleration” option. Remember to re-enable it once the issue is resolved for optimal performance.
5. Corrupted Cache Files
Corrupted cache files can sometimes lead to unexpected problems in Premiere Pro, including the adjustment layer not working correctly. To fix this, try clearing the cache files. Go to “Edit” → “Preferences” → “Media Cache” and click on the “Clean” button to delete all cache files. Restart Premiere Pro and check if the adjustment layer functions as intended.
6. Workspace Layout Conflict
In certain cases, workspace layout conflicts can affect the functionality of adjustment layers in Premiere Pro. Try resetting the workspace to its default layout by going to “Window” → “Workspaces” → “Reset to Saved Layout.” This simple action may resolve any conflicts and restore the adjustment layer’s functionality.
7. Software Conflict
Sometimes, conflicts with other software on your computer can affect the proper functioning of Premiere Pro. Close any unnecessary programs running in the background and try launching Premiere Pro again. If the adjustment layer starts working, it’s possible that a specific software was causing the conflict. You can try identifying the problematic software and adjusting its settings to avoid further conflicts.
8. Reinstall Premiere Pro
If none of the above solutions work, you may consider reinstalling Premiere Pro. This can help resolve any underlying issues that might be preventing the adjustment layer from working correctly. Before reinstalling, make sure to back up your projects and preferences to avoid losing any important data.
Remember, Premiere Pro can sometimes be finicky, but with a little troubleshooting, you can usually get the adjustment layer working again in no time. Hopefully, these tips have shed some light on possible solutions for your predicament. Now go forth, conquer those video edits, and may the adjustment layer be forever in your favor!
How to Add an Adjustment Layer in Premiere Pro
Adjustment layers are a powerful tool in Premiere Pro that allow you to apply effects or modifications to multiple clips at once. They serve as a non-destructive layer that sits on top of your footage, making it easy to make changes without altering your original video clips. Adding an adjustment layer in Premiere Pro is as simple as following these steps:
Step 1: Creating a New Adjustment Layer
To add an adjustment layer, you first need to create a new one. Go to the Project panel, right-click anywhere, and select New Item > Adjustment Layer. Give it a snazzy name that makes it stand out from regular video clips, like “My Awesome Adjustment Layer.”
Step 2: Placing the Adjustment Layer on the Timeline
Once you have your adjustment layer created, you need to place it on the timeline. Simply drag and drop it onto the Video track above the clips you want to apply the effects to. Think of it as giving your footage a stylish hat.
Step 3: Applying Effects to the Adjustment Layer
Now that your adjustment layer is in place, it’s time to make it work its magic. Select the adjustment layer on the timeline, then head over to the Effects Controls panel. Here, you can apply any effect or modification you want to the layer – think of it as dressing up your footage for a fancy party.
Step 4: Customizing the Effects Applied to the Clips
One of the great things about adjustment layers is the ability to customize the effects on the clips. By default, the adjustment layer applies the same effect to all the clips underneath it. However, if you want to make specific adjustments or fine-tune certain clips, you can do so using the Effects Controls panel. It’s like giving each clip its own unique accessory to shine with.
Step 5: Editing the Adjustment Layer
Sometimes, you might need to tweak or change the settings of your adjustment layer. To do this, simply select the adjustment layer on the timeline, go to the Effects Controls panel, and make the necessary modifications. It’s like putting on a different hat to match your outfit – always looking fresh!
Now that you know how to add an adjustment layer in Premiere Pro, you can effortlessly apply effects and modifications to multiple clips at once. So, go ahead and unleash your creativity – make those videos pop with style and flair! Just remember to have fun with it and never underestimate the power of a well-dressed clip.