If you’re looking to maintain a long-lasting and attractive exterior for your building, choosing the right metal siding bottom trim is crucial. While it may seem like a small detail, having the correct steel bottom trim, also known as pole barn base trim, can make a significant difference in how your building looks and functions in the long run.
Additionally, you might be wondering what goes under steel siding and what to put at the bottom of metal siding? In this post, we’ll answer all your questions about metal siding bottom trim and provide you with a step-by-step guide on how to install it correctly. So, let’s dive in and learn more!
The Importance of Metal Siding Bottom Trim
Metal siding may not be in the spotlight as much as other elements of construction projects, but it plays a crucial role in keeping everything together. One of the often-overlooked components of metal siding is the bottom trim, and we’re here to tell you why it’s important.
Protection from the Elements
One of the primary functions of metal siding is to protect your building from the elements. But even if you have the best metal siding money can buy, it won’t do you any good if it’s not installed correctly. The bottom trim is one of the most essential components of metal siding installation, as it helps protect the bottom edge of the siding from water damage.
Keeping Pests Out
Nobody wants uninvited guests in their building, especially not creepy crawlies. Without proper bottom trim, pests can easily make their way into your building through gaps between the siding and the foundation. Not only is this unsanitary, but it can also lead to costly repairs down the line.
Aesthetic Appeal
Let’s face it, we all want our buildings to look nice. Metal siding can certainly add a sleek, modern look to any property, but the bottom edge can be an eyesore if not properly trimmed. Installing bottom trim can provide a more polished and professional appearance to your building.
Longevity of Siding
Metal siding can last for decades when properly installed and maintained. However, without proper bottom trim, the bottom edge of the siding can become damaged over time, leading to corrosion and other issues. Installing bottom trim can help extend the lifespan of your metal siding.
In summary, the bottom trim may not be the most glamorous component of metal siding, but it certainly serves an essential purpose. From protecting against the elements to keeping pests out to enhancing aesthetic appeal to extending the lifespan of your siding, the benefits of metal siding bottom trim cannot be overstated.
Steel Bottom Trim: The Tough and Durable Siding Solution
Do you want siding that can withstand the harshest elements and still look good? Look no further than steel bottom trim! This heavy-duty material is perfect for protecting the lower edge of your metal siding from scratches, dents, and general wear and tear.
Why Choose Steel Bottom Trim
Unlike other materials that may crack, warp or rot, steel bottom trim is designed to be tough and long-lasting. It’s perfect for homeowners who want a low-maintenance siding solution that can withstand anything Mother Nature throws at it.
The Benefits of Steel Bottom Trim:
- Durability: Steel bottom trim won’t crack, rot, or warp, even after years of wear and tear.
- Protection: Protects the lower edge of your metal siding from scratches, dents, and other damage.
- Longevity: The tough yet flexible nature of this material means it can withstand harsh weather conditions, making it an excellent choice for areas with extreme weather.
- Low-Maintenance: Steel bottom trim is easy to clean, and it requires very little maintenance.
Why Metal Siding Needs Steel Bottom Trim
Metal siding is a beautiful and durable choice for homeowners. However, it’s essential to protect it from the elements. Steel bottom trim works with your metal siding to provide that extra layer of protection from the abuses of everyday life.
Without steel bottom trim, the bottom edge of your metal siding may be vulnerable to scratches, dents, and general wear and tear. Over time, this could lead to the need for costly repairs or even replacement of the entire siding.
Steel bottom trim is a tough and durable solution for protecting the lower edge of your metal siding. It’s perfect for homeowners who want peace of mind knowing that their siding is protected from scratches, dents, and other damage. Plus, it’s low-maintenance, making it a hassle-free option for busy homeowners. In summary, if you’re looking for a siding solution that can take whatever life throws at it, steel bottom trim is a great choice.
Pole Barn Base Trim: A Must-Have for Your Metal Siding
When it comes to installing metal siding, the finishing touches matter. And that’s where pole barn base trim comes in. This trim, also known as base or bottom trim, is a crucial component of any metal siding project. Not only does it give the siding a clean, polished look, but it also protects the bottom edge from water damage, insect infestation, and wear and tear.
What is Pole Barn Base Trim
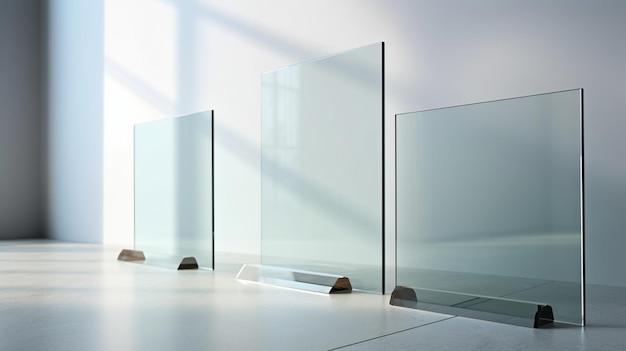
Pole barn base trim is a narrow strip of metal that is installed at the bottom edge of the siding panels. It is typically made of the same material as the siding and comes in a variety of colors to match the panels. The trim is designed to fit over the bottom edge of the siding, creating a snug, watertight seal.
Why Do You Need Pole Barn Base Trim
Think of pole barn base trim as the metal siding’s equivalent of a shoe. Just like shoes protect our feet from the elements, base trim protects the siding panels from moisture, pests, and other environmental factors. Without base trim, the bottom edge of the siding is exposed, making it more vulnerable to damage.
How is Pole Barn Base Trim Installed
Installation of pole barn base trim is a fairly straightforward process. First, the siding panels are installed, leaving a small gap between the bottom edge of the panel and the ground. Next, the base trim is cut to the appropriate length and installed over the bottom edge of the siding, with the bottom lip of the trim extending below the gap between the panel and the ground.
In conclusion, pole barn base trim is a crucial component of any metal siding installation. It serves both a functional and aesthetic purpose, protecting the bottom edge of the siding from damage and giving the panels a clean, finished look. So, the next time you’re considering a metal siding project, don’t forget the base trim – your siding (and feet) will thank you!
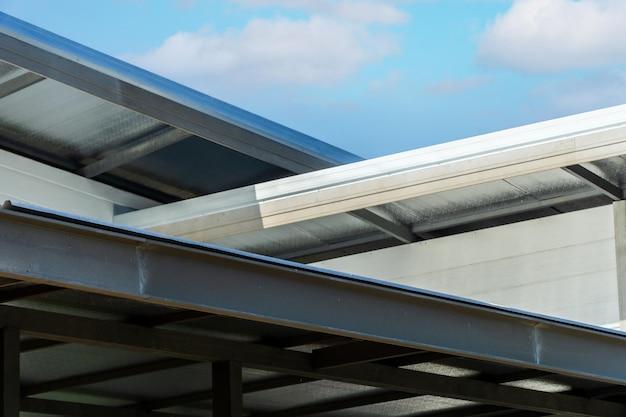
Metal Siding Top Trim
When it comes to metal siding, the top trim is just as essential as the bottom. After all, you don’t want your metal siding to look like it’s wearing a trendy hat. Here are some things to consider when it comes to metal siding top trim.
The Importance of Metal Siding Top Trim
Metal siding top trim is essential to any metal siding installation. It’s the finishing touch that gives your metal siding a polished look. Top trim prevents water from infiltrating the top of your metal siding and causing damage or rust.
Types of Metal Siding Top Trim
Similar to the bottom trim, there are several types of metal siding top trim to choose from. The most common type of metal siding top trim is J-trim. J-trim sits on top of the metal siding and creates a neat edge along the top. Another option is drip edge, which is a metal strip that extends beyond the metal siding, providing a lip that directs water away from the building.
Choosing the Right Metal Siding Top Trim
Choosing the right metal siding top trim can be overwhelming since there are several options available. However, the type of trim you choose depends on several factors. For instance, if you live in an area with high precipitation, a drip edge may be the best option to prevent water from penetrating the metal siding.
Installation of Metal Siding Top Trim
Installing metal siding top trim is similar to installing the bottom trim. You’ll want to make sure the metal siding is cut to the correct length and that the trim fits securely on top of the metal siding. Make sure to seal the joint between the top trim and the metal siding with caulking to prevent water infiltration.
Metal siding top trim is essential to any metal siding installation as it provides a finished look and protects your metal siding from water damage. Ensure you choose the right metal siding top trim, and installation is done correctly for optimal protection.
What Goes Under Steel Siding
Whether you’re getting ready to install a new steel siding or replacing the old siding with new ones, you might be wondering what goes under steel siding. This is one of those questions that has both a short and a long answer. The short answer is simply: “A lot.” The long answer, on the other hand, is a bit more complicated, so let’s break it down.
The Basics
Before we dive in, it’s important to understand the basics. Steel siding is a durable and long-lasting material that’s popular for both residential and commercial buildings. But, to make the most of its durability, you need to think about what goes under it.
The Underlayment
The underlayment is the material that goes underneath the steel siding. It’s typically a moisture barrier that helps to prevent water from getting into the wall cavity. Common types of underlayment include:
- Felt paper
- Synthetic house wrap
- Foam board insulation
- Plywood or OSB sheathing
The Framing
The framing is the structure that supports the walls and roof of a building. It’s what the steel siding is attached to. The most common types of framing are wood and steel. Wood framing is traditional, inexpensive, and easy to work with. Steel framing, on the other hand, is more expensive but offers greater strength and stability.
The Accessories
Finally, there are the accessories. These are the pieces that go around windows, doors, and corners to create a finished look. Some of the most common accessories include J-channel, corner trim, and soffit.
So, to answer the question of what goes under steel siding, the answer is quite a bit. From the underlayment to the framing to the accessories, there are many pieces that work together to create a beautiful and durable steel siding. By understanding these pieces, you can ensure that your steel siding installation goes smoothly and lasts for years to come.
Installing Metal Base Trim: A Step-by-Step Guide
If you’re planning to install metal base trim for your siding project, you might be wondering how to start. Fear not, dear reader, as we shall guide you through the process. Here’s a handy guide to installing metal base trim that will make you feel like a DIY pro!
Gather Your Tools and Materials
Before getting started, gather the tools and materials you’ll need, including a measuring tape, metal snips, drill, screws, a straight edge, and caulking. Make sure you have enough metal base trim for the entire length of your siding.
Measure and Cut the Metal Base Trim
The first step is to measure and cut the metal base trim to fit the length of your siding. Use a straight edge to measure the length accurately, and metal snips to make a clean cut.
Attach the Metal Base Trim to the Siding
Next, align the metal base trim with the bottom of the siding, making sure it’s level. Use screws to attach the trim to the siding; drill pilot holes to prevent the metal from warping. Continue installing the trim along the entire length of the siding, ensuring the pieces are flush with one another.
Seal the Joints
Once the metal base trim is installed, use caulking to seal the joints between the trim and siding. This will prevent water from penetrating the gap and causing damage.
Sit Back and Admire Your Handiwork
Voilà! You’ve successfully installed metal base trim. Now, sit back, admire your handiwork, and take pride in your newfound DIY skills.
In conclusion, installing metal base trim is a straightforward process that requires a few simple tools and a bit of know-how. With this guide, you’re sure to become a pro in no time. So go forth, dear reader, and conquer the world of DIY!
What to Put at the Bottom of Metal Siding
So, you have your metal siding up, but what do you put at the bottom to finish it off? Here are some options to consider:
1. Metal Trim
Metal trim is a popular option for finishing off the bottom of metal siding. Not only does metal trim give your siding a polished finished look, but it also provides additional protection against moisture and debris buildup.
2. Rocks
If you’re feeling adventurous, rocks can be an appealing option to use at the bottom of your metal siding. Not only do they complement the natural look of metal siding, but rocks also allow for better drainage and reduce the risk of water damage.
3. Succulents
If you’re looking for an eco-friendly option, succulents might do the trick. They not only add a pop of color but also help to trap moisture and reduce erosion. Plus, succulents are low-maintenance and can withstand harsh weather conditions.
4. Concrete Slabs
For a sleek and modern look that complements the industrial look of metal siding, consider using concrete slabs at the base. Concrete slabs are durable and easy to maintain, making them perfect for high-traffic areas.
5. Wooden Boards
Lastly, wooden boards are a rustic option to consider. They are affordable and easy to install, making them a favorite for DIY enthusiasts. Plus, they can be painted or stained to match the rest of your siding.
In conclusion, there are several options to choose from when it comes to finishing off the bottom of your metal siding. Whether you’re looking for a polished, natural, or rustic look, there is an option for you. Be creative and have fun!