Are you considering installing gutters on your detached garage? Adding gutters to your garage can provide numerous benefits, such as preventing water damage to the foundation, protecting the exterior walls, and redirecting rainwater away from the surrounding landscape. But where should you start? Can you do it yourself, or do you need to hire a professional? In this blog post, we will guide you through the process of installing gutters on a detached garage. We’ll also answer some common questions you may have, such as the cost and necessity of gutter installation. So, let’s get started!
Installing Gutters on Detached Garage
Why Gutters are Essential for your Detached Garage
Gutters are an often overlooked but crucial feature for any detached garage. These simple channels direct rainwater away from the roof and foundation, preventing water damage and potentially saving you from expensive repairs down the line.
Assessing your Detached Garage for Gutter Installation
Before diving into the installation process, it’s important to evaluate your garage to determine the necessary materials and measurements required. Start by examining the roofline and identifying key areas where water tends to accumulate or cause damage.
Getting Started with Gutter Installation
- Gathering Tools and materials
- Protective gear (gloves, safety glasses)
- Ladder or scaffolding
- Gutter sections
- Downspouts
- End caps and corner pieces
- Hangers and screws
-
Sealant and caulking gun
-
Measuring and Cutting the Gutters
- Measure the length of the roofline where the gutters will be installed.
-
Using a hacksaw, cut the gutter sections to match the required length.
-
Installing the Gutters
- Attach the hangers to the fascia board, ensuring they are evenly spaced.
- Position the gutter sections on the hangers, securing them with screws.
- Connect additional sections using end caps or corner pieces.
-
Check that the gutters have a slight downward slope towards the downspouts to ensure proper drainage.
-
Installing Downspouts
- Measure and cut downspouts to the appropriate length.
- Connect the downspouts to the gutters using connectors or elbows.
- Secure the downspouts to the wall of the garage using brackets or straps.
Tips for a Successful Gutter Installation
- Always take safety precautions and use appropriate protective gear when working at heights.
- Ensure the gutters are properly sloped for effective water drainage.
- Use sealant and caulking to prevent water leaks at connections and joints.
- Regularly clean and maintain your gutters to avoid clogs and blockages.
Installing gutters on your detached garage is a worthwhile investment that protects your roof, walls, and foundation from potential water damage. By following the steps outlined above, you can successfully install gutters and enjoy the peace of mind that comes with a sound drainage system. So, go ahead and give your garage the gutter it deserves!
Gutter Installation Near Me
Finding the Perfect Professional for the Job
When it comes to installing gutters on your detached garage, it’s important to find a professional who specializes in gutter installation. But how do you go about finding the perfect person for the job?
Recommendations from Friends and Neighbors
One great way to find a reliable gutter installer near you is to ask friends and neighbors for recommendations. They might have recently had their own gutters installed and can provide valuable insights and references.
Online Search
Another efficient way to find local gutter installers is through an online search. Simply type in “gutter installation near me” and let the search engine do the work. Don’t forget to read reviews and check their websites for more information about their services.
Local Directories
Local directories, both online and offline, can also be a useful resource. These directories often list various professionals, including gutter installers, along with their contact information. Don’t overlook them as they can provide reliable options.
Factors to Consider
Once you have a few options in mind, it’s important to consider specific factors before making a final decision.
Experience and Expertise
Find out how long the gutter installer has been in the industry and their experience with installing gutters on detached garages specifically. Look for testimonials or reviews that highlight their expertise.
Licensing and Insurance
Make sure the installer is properly licensed and insured. This not only protects you from any potential accidents or damages during the installation but also gives you peace of mind knowing they are qualified professionals.
Cost Estimations
Obtain quotes from different installers and compare their prices. However, keep in mind that the lowest price doesn’t always guarantee the best quality of work. Find a balance between affordability and quality.
Guarantees and Warranties
Ask about any guarantees or warranties provided by the installer. A reliable professional will stand by their work and offer assurances in case any issues arise after the installation.
Making the Right Choice for Your Detached Garage
By considering recommendations, conducting an online search, and looking through local directories, you can find a reliable gutter installer near you. Remember to assess their experience, licensing, costs, and guarantees to make the best choice. With the right professional, your gutter installation on your detached garage will be a seamless and worry-free experience.
Installing Gutters on Fascia
Understanding the Importance of Gutters
Before we dive into the installation process, let’s take a moment to appreciate the importance of gutters. Sure, they may not be the most glamorous feature of your detached garage, but trust me, they play a vital role in protecting your property from water damage. Gutters help to redirect rainwater away from the foundation, preventing erosion, basement flooding, and structural issues. So, let’s make sure we get this installation right!
Assessing the Fascia
First things first, let’s check the condition of your fascia. The fascia is the horizontal board located just below the edge of your roof. It acts as the support for your gutters. Make sure it is in good shape, free from rot, and sturdy enough to hold the weight of the gutters and the water they’ll be carrying. If your fascia needs repairs, it’s best to address those before moving forward with the gutter installation.
Gathering the Tools and Materials
Now that we have a solid fascia, let’s gather our tools and materials. You’ll need a ladder, level, measuring tape, drill, screws, gutter brackets, downspouts, and of course, the gutters themselves. When it comes to gutters, you can choose from various materials, such as aluminum, copper, or vinyl. Consider your budget, climate, and aesthetic preferences to make the best choice for your detached garage.
Measuring and Cutting the Gutters
Measure the length of the fascia and cut the gutters accordingly. Remember to account for any corners or angles that may require additional pieces. It’s better to measure twice and cut once to avoid any costly mistakes. Once you have the right size, attach the gutter brackets to the fascia, ensuring they are evenly spaced for optimal support.
Attaching the Gutters
Now comes the fun part – attaching the gutters! Place the gutter onto the brackets, making sure it’s aligned properly and has a slight slope towards the downspout. This slope will ensure proper water flow. Secure the gutters in place using screws, making sure they are tight but not overly tightened. Repeat this process for each section of the gutter, ensuring they are securely connected.
Installing the Downspouts
Lastly, don’t forget about the downspouts! These vertical pipes are responsible for channeling the water down and away from your garage. Attach the downspouts to the gutters, positioning them strategically to direct the water away from the foundation. Secure them with screws, and voila! You’ve successfully installed gutters on your detached garage.
Installing gutters on your detached garage is a wise investment that will protect your property for years to come. By following these simple steps and taking the time to do it right, you’ll ensure proper water drainage and safeguard your garage from potential harm. So roll up your sleeves, gather your tools, and don’t be afraid to embrace the DIY spirit – your detached garage will thank you later!
Can I Install Gutters Myself
So you’re thinking about installing gutters on your detached garage, but you’re not sure if you can do it yourself? Well, let me tell you, my friend, that installing gutters is not as daunting as it may seem. With a little bit of patience and the right tools, you can take on this project and save some serious cash in the process.
Assess Your Skills and Tools
Before you get started, it’s important to assess your own DIY skills and the tools you have at your disposal. While gutter installation is not rocket science, it does require some basic knowledge of carpentry and a few specialized tools. If you’re comfortable with using a ladder, measuring and cutting materials, and handling basic power tools, then you’re already off to a good start.
Measure Twice, Cut Once
Once you’re confident in your abilities, the first thing you’ll need to do is measure the length of your garage’s roofline. Accurate measurements are crucial for ensuring your gutters fit properly and efficiently divert rainwater away from your garage’s foundation. So grab your tape measure and take your time to get those measurements down pat.
Choose the Right Material
Now that you have your measurements, it’s time to choose the right material for your gutters. Options range from aluminum, vinyl, steel, and even copper. Each material has its pros and cons, so do your research and find one that suits your budget and aesthetic preferences.
Follow the Instructions
With your tools and materials at hand, it’s time to dig into the installation process itself. This is where following the manufacturer’s instructions becomes crucial. They’ll guide you through the necessary steps, from attaching the gutters to the fascia board to securing downspouts and ensuring proper drainage. Don’t skip any steps, and if you feel unsure about anything, consult online tutorials or seek advice from experienced DIYers.
Safety First
While it’s fantastic that you’re taking on this DIY project, remember that safety should always come first. Use a sturdy ladder, wear appropriate protective gear, and be mindful of your surroundings. If you’re not comfortable working at heights or handling power tools, it’s best to seek professional help.
The Satisfaction of a Job Well Done
Once you’ve successfully installed your gutters, step back and admire your handiwork. Not only have you saved money, but you’ve also gained a sense of accomplishment and a valuable new skill. Plus, you can take pride in knowing that you’ve contributed to the longevity and protection of your detached garage.
So, can you install gutters yourself? Absolutely! With the right tools, preparation, and a little bit of DIY spirit, you can tackle this project and become the envy of your neighborhood. Happy gutter installation!
How to Install Gutter Brackets
Introduction
When it comes to installing gutters on your detached garage, one crucial step you can’t overlook is installing gutter brackets. These little wonders play a significant role in ensuring your gutters stay attached securely, preventing any water leakage or damage to your garage. In this guide, we’ll walk you through the process of installing gutter brackets like a pro, so you can tackle this project with confidence.
Choosing the Right Gutter Brackets
Before diving into the installation process, it’s essential to select the right gutter brackets for your garage. Consider factors such as the type of gutters you have, the climate in your area, and the size and pitch of your roof. Opting for high-quality, durable brackets will ensure your gutters stay in place for years to come.
Tools and Materials You’ll Need
To get started with the installation, gather the following tools and materials:
- Gutter brackets (in the quantity required for your garage)
- Measuring tape
- Pencil
- Level
- Screws or nails (check the manufacturer’s recommendations)
- Power drill or hammer
- Ladder or scaffold (for access to the gutters)
- Protective gloves and eyewear (safety first!)
Step 1: Measuring and Marking
Begin by measuring and marking the desired location for your gutter brackets. Typically, the brackets should be placed about 36 inches apart to provide sufficient support. Remember to factor in any downspout locations and corners for proper water flow.
Step 2: Installing the Brackets
With your markings in place, it’s time to install the brackets. Position each bracket against the fascia board, ensuring it aligns with the marker. Use a level to make sure the brackets are straight before proceeding.
Step 3: Securing the Brackets
Once the brackets are in position, secure them to the fascia board. If you’re using screws, pre-drill pilot holes to avoid splitting the wood. For nails, choose ones that are long enough to penetrate the fascia board while providing a secure grip. Attach the brackets firmly but avoid overtightening to prevent damage.
Step 4: Repeating the Process
Repeat Steps 1 to 3 for the remaining gutter brackets, following your initial measurements and spacing guidelines. Take your time to ensure each bracket is correctly aligned and securely fastened.
Installing gutter brackets is a vital part of setting up functional and efficient gutters on your detached garage. By selecting the right brackets and following the step-by-step process outlined above, you’ll be able to install them correctly and enjoy the benefits of a well-maintained garage. So, gather your tools, put on your DIY hat, and get ready to give your garage the guttering it deserves!
Gutter Installation Cost per Foot
Are you considering installing gutters on your detached garage? Well, let’s talk about the all-important topic of gutter installation cost per foot. After all, budgeting for your project is crucial.
Factors Influencing the Cost
When it comes to determining the cost of installing gutters on a detached garage, several factors come into play. The material, style, length, and additional features all play a significant role in the final price.
Material Matters
Choosing the right material for your gutters is essential for both functionality and aesthetics. From aluminum and steel to vinyl and copper, each material comes with its own unique price tag. So, consider your budget and preferences before making your selection.
Style and Length Considerations
The style and length of your gutters also impact the overall cost. Traditional styles, such as K-style or half-round gutters, may vary in price. Additionally, the length of gutters required for your detached garage will influence the total cost, so accurate measurements are a must.
Extras for the Win
While contemplating the cost, take a moment to consider any extra features you might want to include. Gutter guards, downspouts, and splash blocks are among the common accessories that can enhance the functionality and durability of your gutter system. However, keep in mind that these additions will increase the overall cost.
Pricing Estimates
Now that we’ve covered the factors influencing the cost, let’s discuss some pricing estimates to give you a sense of what to expect.
-
For basic aluminum gutters, you can anticipate a cost of around $4 to $8 per linear foot. This option offers affordability and durability, making it a popular choice.
-
If you’re looking for a jazzier option, copper gutters steal the show. These high-end gutters can cost anywhere from $15 to $25 per linear foot. Their stunning appearance and longevity make them worth the investment for some homeowners.
-
Vinyl gutters are often the most cost-effective choice, with prices ranging from $1.50 to $3 per linear foot. However, keep in mind that they may not be suitable for areas with extreme climates.
Crunching the Numbers
To estimate the total cost of your gutter installation, measure the perimeter of your detached garage and multiply it by the cost per linear foot, based on your chosen material. Don’t forget to account for any additional features you wish to include.
Now that you have a better understanding of the factors influencing the cost and some pricing estimates, you’re ready to dive into the exciting world of gutter installation. So, roll up your sleeves, grab those measuring tapes, and get ready to conquer your detached garage gutter project!
Should I Put Gutters on My Garage
So, you’re contemplating whether or not you should put gutters on your garage. It’s a valid question, and one that deserves careful consideration. Let’s dive into the world of garage gutters and explore the reasons why they might just be the right addition for your detached sanctuary.
Keeping Your Garage Dry and Clean
One of the main benefits of installing gutters on your garage is the ability to keep the structure dry and clean during heavy rains. Gutters effectively redirect rainwater away from the roof and foundation, preventing water buildup and potential damage to the garage and its contents.
Protecting the Foundation
By channeling rainwater away from your garage’s foundation, gutters play a crucial role in preventing soil erosion and water damage. Without gutters, rainwater can pool around the base of the garage, leading to structural issues and costly repairs.
Preserving Your Landscape
If your garage sits close to a garden or landscape you’ve worked so hard to maintain, gutters are your best friend. By keeping water away from the edges of the garage, gutters prevent soil erosion and damage to your beautiful flora.
Avoiding Unwanted Waterfalls
Imagine this scenario: you’re getting out of your car after a heavy rain, and as you make your way to the door, you’re greeted with an unexpected waterfall pouring from the roof. Installing gutters on your garage ensures you can avoid this unexpected and drenching surprise, even on the rainiest days.
Enhancing Curb Appeal
Sure, gutters might not be the most glamorous addition to your garage, but they can actually enhance its overall appearance. With a range of styles and colors available, you can choose gutters that seamlessly blend in with the rest of your home, adding a touch of aesthetic appeal to your garage’s exterior.
Easy Installation
Installing gutters on your garage is a straightforward and relatively inexpensive project. With the right tools and a bit of patience, you can have your gutters up and running in no time. Plus, with the multitude of online tutorials and step-by-step guides available, you’ll find plenty of resources to help you along the way.
Now that we’ve explored the benefits and reasons for installing gutters on your garage, it’s clear that they offer more than just functionality. From keeping your garage dry and clean to protecting the foundation and preserving your landscape, gutters are a valuable addition to any detached garage. So, go ahead and take the leap – your garage will thank you!
How to Fit Guttering to Your Detached Garage
Preparing for Gutter Installation
Before you dive into the exciting world of gutter installation, it’s important to gather the necessary tools and materials. Don’t worry; you won’t need a magical toolbox or a spellbook. Just your regular handyman arsenal will do the trick. Make sure you have a measuring tape, a ladder (safety first, folks!), a hacksaw, a drill, screws, brackets, a silicone sealant, and, of course, those lovely gutter sections.
Taking Accurate Measurements
Now that you’re all set, it’s time to get down to business. The first step is to measure the length of your garage’s roofline. Don’t eyeball it, though; this is not a guestimation party. Precision is key here. Measure the roofline twice just to be sure, and note down the measurements. This will help you determine the amount of gutter sections needed.
Preparing the Guttering Sections
You’ve got the tools, you’ve got the measurements – now it’s time to cut those gutter sections. Using your trusty hacksaw, slice the guttering into the lengths that match your measurements. Remember, measure twice, cut once. It’s an age-old saying with a touch of wisdom.
Securing the Gutter Brackets
Now that the gutter sections are ready, it’s time to attach those brackets. Place the brackets at your desired intervals along the roofline, ensuring they’re level and secure. You don’t want your guttering to be wonky; that would be one rollercoaster of a ride for rainwater!
Attaching the Guttering Sections
With the brackets securely in place, it’s time to fit the guttering sections. Slot them into the brackets, making sure they sit snugly. You don’t want any gaps where water can escape like a sneaky liquid ninja!
Sealing the Gutter and Downspout Joints
You’re almost there! Now it’s time to prevent any leaks or water escapes by sealing the gutter and downspout joints with silicone. Apply the silicone sealant to each joint and give it a gentle squeeze, allowing it to spread like butter on a warm piece of toast.
Test It Out
Congratulations, gutter-fitting expert! Your guttering installation is complete. But before you raise the victory flag, it’s essential to perform a quick test to ensure everything is working as it should. Grab a hose, turn on the water, and simulate some good old rain. Check for any leaks, blockages, or misalignments. Adjust as needed until you achieve that perfect water flow.
Fitting guttering to your detached garage may seem like a daunting task at first, but with the right tools, measurements, and a sprinkle of handyman spirit, you’ll have those gutters installed like a pro! So, grab your measuring tape, tighten your belt, and let’s make rainwater routing a true work of art on your garage roofline. Happy fitting!
How to Install Gutters Without Fascia
Introduction
When it comes to installing gutters on a detached garage, one common challenge is dealing with the absence of fascia boards. While fascia boards provide a convenient attachment point for gutters, not all garages are designed with them. But fear not, as there is a solution! In this guide, we will walk you through the steps on how to install gutters without fascia, so you can protect your garage from water damage and redirect rainwater effectively.
1. Assess Your Garage
Before jumping into the installation process, take a moment to evaluate your detached garage. Look for any alternative attachment points that can serve as a substitute for fascia boards, such as exposed rafter tails or eaves. These can provide a secure foundation for mounting the gutters.
2. Gather the Necessary Tools and Materials
To successfully install gutters without fascia, you’ll need a few tools and materials. Grab a ladder, measuring tape, pencil, gutter brackets, screws, sealant, and of course, your gutters. Ensure you have the correct measurements and enough materials to complete the installation.
3. Mark the Attachment Points
Using a pencil, mark the locations where you will attach the gutter brackets. These marks should align with the exposed rafter tails or eaves you identified earlier. Double-check that the markings are level and evenly spaced to ensure proper gutter installation.
4. Install the Gutter Brackets
With the markings in place, it’s time to secure the gutter brackets. Attach them to the marked points using the appropriate screws. Make sure they are firmly anchored to provide stable support for the gutters.
5. Attach the Gutters
Now that the brackets are in position, it’s time to attach the gutters. Carefully align the back edge of the gutters with the bracket lips, ensuring they fit snugly. Secure the gutters to the brackets using screws or bolts, depending on the type of brackets you have.
6. Apply Sealant
To prevent any potential leaks, it’s crucial to apply a bead of sealant along the seams where the gutters meet. This will create a watertight seal and provide added durability.
7. Test the Gutters
Congratulations! You have successfully installed gutters without fascia. But don’t celebrate just yet – it’s essential to ensure they are functioning correctly. Grab a garden hose and run water through the gutters, checking for any leaks or misalignments. Make any necessary adjustments to guarantee proper water flow.
Installing gutters without fascia on your detached garage is not as daunting as it may seem. By following this step-by-step guide, you can effectively protect your garage from water damage and redirect rainwater away from its foundation. Remember to carefully assess your garage, gather the necessary tools and materials, mark the attachment points accurately, install gutter brackets securely, attach the gutters properly, apply sealant, and test the functionality of the gutters. Now sit back, relax, and enjoy the peace of mind that comes with a well-protected garage!
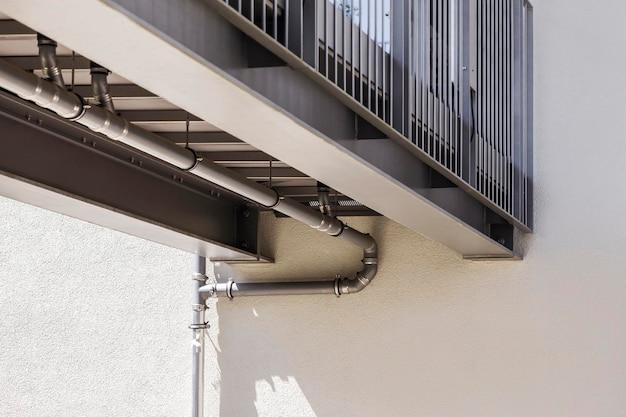
How to Install Guttering and Downpipes
Measuring and Planning
To begin installing guttering and downpipes on your detached garage, you first need to measure the length of the roofline where the gutters will be installed. Make sure to take accurate measurements, as any miscalculations could result in leaks or water overflow. Once you have your measurements, you can start planning the layout of the gutter system. Consider the slope of the roof and determine the best locations for downpipes to ensure proper water flow.
Gather the Necessary Tools and Materials
Before you start installing the guttering and downpipes, it’s essential to gather all the tools and materials you’ll need. Here’s a list to get you started:
- Guttering and downpipe sections
- Gutter brackets and screws
- Downpipe brackets
- Silicone sealant
- Measuring tape
- Hacksaw or tin snips
- Drill with screwdriver bit
- Level
- Ladder or scaffolding
Make sure you have everything handy before you ascend the ladder, because climbing up and down can be a real hassle.
Installing the Gutters
Once you have all your tools and materials ready, it’s time to start installing the gutters. Begin by attaching the gutter brackets to the fascia board at regular intervals, ensuring they are level. Next, connect the gutter sections together, using silicone sealant to create firm, watertight seals. Make sure to slope the gutters slightly towards the downpipe to allow for proper water drainage.
Mounting the Downpipes
Now that the gutters are securely in place, you can move on to mounting the downpipes. Attach the downpipe brackets to the wall at regular intervals, ensuring they align with the downpipe’s positioning. Cut the downpipe sections to the desired length using a hacksaw or tin snips. Fit the downpipe sections together, making sure they are securely joined. Finally, connect the downpipe to the outlet of the gutter, using silicone sealant to prevent any leaks.
Finishing Touches
To ensure the guttering and downpipes work effectively, it’s crucial to check for any gaps or leaks. Run water through the system and inspect for any water escaping from areas other than the downpipe. Seal any gaps or leaks with silicone sealant to ensure a watertight system. Additionally, double-check that all brackets and connections are secure.
Congratulations! You’ve successfully installed guttering and downpipes on your detached garage. Now you can relax knowing that your garage and its surroundings will be protected from rainwater. Time to kick back and enjoy a well-earned break. Cheers!
Do I need gutters with a slab foundation
Rain gutters are an essential feature of any building to help protect its foundation and prevent water damage. But what about detached garages with a slab foundation? Do they really need gutters? Let’s explore this common question and find out why it’s worth considering.
Understanding Slab Foundations
Before we dive into the gutter debate, let’s quickly understand what a slab foundation is. In simple terms, it’s a large, thick concrete slab that serves as the base for a building. Unlike traditional foundations with crawl spaces or basement areas, slab foundations are built directly on the ground.
Why Gutters Are Important
Gutters on a detached garage with a slab foundation may not seem necessary at first glance, but they play a crucial role in preventing various issues. Without gutters, rainwater can collect and pool around the garage, leading to potential problems such as:
1. Soil Erosion
Excessive water flow from rain can cause soil erosion around your garage. Over time, this can create uneven terrain and compromise the stability of your foundation.
2. Foundation Damage
Even though slab foundations are durable, they are not immune to the effects of water. Continuous exposure to moisture can weaken the concrete, leading to cracks, shifting, and costly foundation repairs.
3. Exterior Damage
Rain cascading off the roof of your garage may seem harmless, but it can actually cause significant damage to the exterior walls. With gutters in place, rainwater is collected and channeled away, preventing water stains, chipping paint, and other unsightly issues.
Advantages of Gutters
Now that we understand why gutters are important, let’s explore the advantages they offer:
1. Foundation Protection
By diverting rainwater away from your garage, gutters help protect your slab foundation from excessive moisture, reducing the risk of cracks and other foundation problems.
2. Landscaping Preservation
Without gutters, rainwater falling from the roof can erode your landscaping, potentially damaging plants and creating a messy, muddy environment.
3. Enhanced Aesthetics
Gutters not only serve a functional purpose but can also enhance the overall look of your detached garage. They come in various styles and colors, allowing you to choose an option that complements your garage’s design.
Although a detached garage with a slab foundation may not immediately strike you as needing gutters, they are indeed a valuable addition. Gutters protect your foundation, prevent soil erosion, and help maintain the aesthetics of your garage. So, don’t overlook the importance of gutters when it comes to safeguarding your detached garage from the damaging effects of rainwater.