If you are a craft enthusiast or simply looking to add a personal touch to your ceramic projects, Mod Podge can be your new best friend. This versatile adhesive, sealant, and finish is known for its ability to transform ordinary items into unique works of art. But how exactly do you use Mod Podge on ceramic? And what are the secrets to achieving a smooth, streak-free finish?
In this comprehensive guide, we’ll answer all your burning questions about using Mod Podge on ceramic. We’ll explore topics such as drying times, brush stroke prevention, dishwasher-safe options, and waterproofing techniques. Whether you’re a seasoned crafter or a novice looking to explore this popular crafting medium, this blog post will provide you with step-by-step instructions and expert tips to help you achieve stunning results.
So, grab your favorite ceramic piece, a bottle of Mod Podge, and let’s dive into the world of ceramic crafts!
Using Mod Podge on Ceramic: A Sticky Situation Made Fun
So, you’ve decided to dive into the world of DIY crafts with some ceramic masterpieces. The good news is that you’ve stumbled upon the perfect solution to make your creations last longer and shine brighter – Mod Podge! This magical concoction has been a secret weapon for crafters and artists alike, helping them achieve that perfect finish and protect their precious pottery. In this guide, we’re going to spill the beans on how to use Mod Podge on ceramic and bring your creativity to new heights. So, grab your paintbrush and let’s get sticky!
Gather Your Tools, Brave Potter!
Before we embark on this sticky journey, let’s make sure we have everything we need. Just like a knight needs his armor, a crafter needs their tools. Here’s what you’ll need to conquer the world of Mod Podge on ceramic:
1. Mod Podge – The Magical Elixir
Is it glue? Is it a sealant? Well, Mod Podge is like the chameleon of crafting supplies. It sticks things together like glue, and it seals and protects like a sealant. It’s a versatile mate that comes in various formulas, such as Gloss, Matte, and Satin. So, pick the one that suits your fancy and ceramic creation.
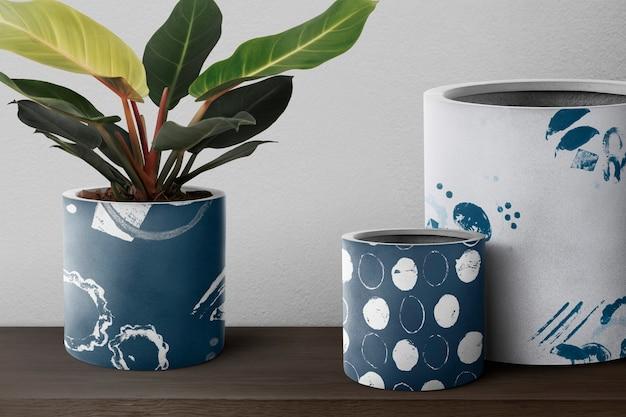
2. Ceramic Pieces – Unleash Your Potter Soul
Whether it’s a vase, a plate, or a cute little figurine, you’ll need some ceramic pieces to work your magic on. Clean them up and make sure they are free from dust and dirt. Ceramic surfaces must be as smooth as a baby’s bottom before you dive in with Mod Podge.
3. Paintbrush – The Magic Wand
Your trusty paintbrush will be your magic wand throughout this whole process. Make sure it’s clean and free from any unwanted lint or bristle particles. An old, beaten-up brush might leave behind some unwanted marks, so best to use one in good shape.
4. Sandpaper – The Ceramics Masseuse
If your ceramic piece has any rough edges or imperfections, sandpaper will be your secret weapon. A bit of TLC with some sandpaper will smoothen things out, making the surface perfect for Mod Podge application.
How to Apply Mod Podge on Ceramic: The Art of Sticky Brilliance
Now that you’ve gathered your tools and your ceramic piece is prepped for glory, let’s move on to the juicy part – the application. Here’s a step-by-step guide on using Mod Podge on ceramic like a pro:
Step 1: Start with a Clean Slate
Like a fresh canvas awaits the artist’s brush, your ceramic piece should be squeaky clean before you begin. Give it a gentle wipe to remove any dust or grease that might have found its way there.
Step 2: Smoothing Out Imperfections
Remember that sandpaper we talked about? Now is the time to use it. Make sure to smooth out any rough spots or imperfections on the surface. A gentle touch will do the trick without creating too much mess.
Step 3: The Mod Podge Dance
Time to bring out the star of the show – Mod Podge! Dip your paintbrush into the bottle and gently apply an even layer on the ceramic surface. Smooth and stroke your brush, making sure to cover the entire area. Be patient, dear crafter, and watch the magic unfold.
Step 4: Dry, Baby, Dry
Allow your Mod Podge-coated ceramic piece to dry. This might take some time, so make sure to find a safe, undisturbed spot for it. A little patience goes a long way in the world of crafting.
Step 5: Encore Performance
One coat of Mod Podge might not be enough to achieve your desired magnificence, especially if you want that glossy shine. Repeat steps 3 and 4, adding additional coats until you’re positively giddy with the finished result.
Seal, Shine, and Celebrate!
Congratulations, you’ve mastered the art of using Mod Podge on ceramic! Your creations are now not only protected but also sealed with a touch of brilliance. Whether you want a glossy, matte, or satin finish, Mod Podge is your arty genie. So, go ahead, create to your heart’s content, and let your ceramic masterpieces shine bright like a diamond!
Remember, crafting is all about enjoying the journey and embracing your creative spirit. With Mod Podge by your side, there’s no limit to what you can achieve in the world of ceramic artistry. So, go forth, brave crafter, and may your ceramic adventures be filled with joy, laughter, and the occasional happy dance!
Tool List Recap:
- Mod Podge: The versatile glue-sealant hybrid.
- Ceramic Pieces: Your pottery waiting to be adorned.
- Paintbrush: Your trusty magic wand for application.
- Sandpaper: The ceramist’s masseuse for smoothing out imperfections.
FAQ: How To Use Mod Podge On Ceramic
Hey there, craft enthusiasts! Are you ready to explore the wonderful world of Mod Podge and its magical powers on ceramic? We’ve gathered the most frequently asked questions about using Mod Podge on ceramic and compiled them into this handy FAQ guide. So, grab your favorite mug, fill it with something delicious, and let’s dive right in!
How long should Mod Podge dry before sealing
Ah, the eternal question. You’ve painstakingly applied your Mod Podge masterpiece and now you’re wondering when to seal the deal. Well, dear reader, the general rule of thumb is to allow your Mod Podge to dry for at least 24 hours before applying a sealer. Patience is a virtue, my friends, especially when it comes to crafting!
How does Mod Podge prevent brush strokes
Ah, the elusive brush strokes that can ruin the smooth finish of your ceramic project. Fear not, for Mod Podge is here to save the day! This marvelous concoction dries clear, which means brush strokes magically disappear, leaving you with a flawless, brush-stroke-free surface. It’s like a wizard’s spell for crafters!
Can you bake dishwasher safe Mod Podge
Wouldn’t it be fantastic if you could just pop your ceramic creation into the oven and have it come out dishwasher safe? Sadly, my friends, Mod Podge is not a fan of the oven. While it’s perfect for countless craft projects, it’s not designed to withstand the heat of baking. So, let’s keep our Mod Podge out of the kitchen and stick to sealing, shall we?
Can you use Mod Podge instead of varnish
Ah, the eternal battle between Mod Podge and varnish. While they both serve the noble purpose of sealing and protecting your ceramic masterpieces, they do have their differences. Mod Podge is water-based and offers a slightly more rustic, matte finish, perfect for a vintage vibe. Varnish, on the other hand, is oil-based and provides a glossy, professional-looking finish. So, it all boils down to personal preference. Choose your weapon, fellow crafter!
Why does my Mod Podge look streaky
Oh no, streaky Mod Podge strikes again! But fear not, my friend, for I am here to help you troubleshoot this crafty conundrum. Streaks often occur due to an uneven application or overbrushing. To avoid this, make sure to apply Mod Podge in smooth, even strokes and resist the urge to overwork it. A light touch is the key to a streak-free finish. So, go forth and conquer those streaks with confidence!
How do you permanently write on a coffee mug
Ah, the desire to immortalize your artistic brilliance on a coffee mug is truly commendable. To achieve this feat, you’ll need some special tools in your arsenal. Grab some ceramic paint pens or markers, unleash your creativity, and let your imagination run wild on that blank canvas. Once you’ve finished your masterpiece, allow it to dry for a few hours before sealing it with Mod Podge. Voila! Your personalized coffee mug is ready to make a statement with every sip.
What type of paper is used for mug printing
So, you’ve decided to venture into the realm of mug printing. Wise choice, my friend! When it comes to printing designs for your ceramic creations, look no further than waterslide decal paper. This magical paper allows you to transfer your designs onto mugs effortlessly. Just print, soak, and slide those decals onto your mug. It’s like giving your ceramic a temporary tattoo!
Does dishwasher safe Modge podge really work
Ah, the promise of dishwasher safe Mod Podge! But does it truly live up to its name? Well, my friend, the answer is a resounding yes! Dishwasher safe Mod Podge works its magic by creating a protective seal on your ceramic projects that can withstand the perils of the dishwasher. So, go ahead and put your creations to the ultimate cleanliness test. Just remember to skip the oven, as we’ve discussed earlier.
How do you waterproof Mod Podge
Ah, the desire to protect your Mod Podge masterpieces from the elements is a wise one, my friend. To waterproof Mod Podge, you have a couple of options. You can either use a waterproof sealer spray or mix a waterproofing agent, such as clear acrylic sealer or resin, directly into your Mod Podge. Whichever path you choose, rest assured that your projects will become impervious to water damage. Raindrops, beware!
Is Mod Podge water-resistant
While Mod Podge is a fantastic sealant and protector for your ceramic creations, it is not entirely water-resistant. It can withstand some exposure to water, but prolonged soaking or submersion may cause it to break down. So, keep your Mod Podge-embellished items away from the deep end of the swimming pool. Just a friendly tip to keep your crafts afloat!
What finishes are food safe
Ah, the quest for food-safe finishes! When it comes to your ceramic creations that come into direct contact with food or drinks, it’s crucial to choose the right finish. Look for finishes that are labeled as food safe, such as FDA-approved epoxy resins, polyurethane, or specific ceramic glazes. These finishes will ensure that your edible masterpieces remain safe and delightful to devour. Bon appétit!
How do I get a smooth finish with Mod Podge
Smooth finishes with Mod Podge are the crafters’ holy grail, my friend. To achieve that dreamy, flawless surface, follow these simple steps. First, make sure your surface is clean and free from dust or debris. Apply Mod Podge in thin, even coats, allowing each layer to dry before applying the next. Lightly sand any imperfections between coats, and voila! The smooth finish of your dreams is within reach. Smooth sailing, fellow crafter!
Can I use Mod Podge to seal a cup
Absolutely, my friend! Mod Podge is a versatile beast that can conquer many crafting challenges, including sealing your beloved cups. Whether you want to protect your hand-painted designs or keep stickers firmly in place, Mod Podge has got your back. Apply a few coats, let it dry, and bask in the glory of a cup that is sealed and ready to withstand the trials and tribulations of your daily caffeine fix. Cheers!
How do you prevent Mod Podge streaks
Streaks, ah, the bane of every Mod Podge enthusiast’s existence. To keep those pesky streaks at bay, here’s a simple trick. When applying Mod Podge, use long, smooth strokes in one direction, rather than going back and forth. This technique will help achieve a more even distribution and minimize the risk of streaks. So, put your steady hand to work and say goodbye to streaky messes. May your Mod Podge be forever streak-free!
Is Mod Podge sealer food safe
Ah, the crucial question of whether Mod Podge sealer is food safe. While Mod Podge is a fantastic sealant and protector for your artistic endeavors, it is not specifically formulated for direct food contact. So, if your project involves items that come into direct contact with food, it’s best to choose a finish specifically labeled as food safe. Safety first, my friends!
What sealant is food safe
When it comes to sealants that are food safe, my friend, the options are surprisingly abundant. Look for specific sealants designed for food contact, such as FDA-approved epoxy resins, food-grade polyurethane, or certified ceramic glazes. These trusty companions will keep your edible creations safe and sound. Craft with confidence and bite into that beautiful, food-safe masterpiece!
Is Mod Podge acrylic sealer non-toxic
Rest assured, dear reader, for Mod Podge acrylic sealer is indeed non-toxic. This means you can craft away to your heart’s content, knowing that you’re not releasing any harmful fumes into the world. So, embrace the joy of crafting without worry, and create your ceramic wonders with peace of mind. Safety and creativity go hand in hand!
How long should Mod Podge dry before sealing
Ah, the burning question that just keeps popping up. To answer your query, dear reader, Mod Podge should dry for a minimum of 24 hours before you even think about sealing it. We know, waiting can be tough, but trust us, patience is the secret ingredient in any successful crafting endeavor. Embrace the anticipation, and your sealed masterpiece will be worth the wait!
And there you have it, my crafty comrades! We’ve journeyed through the magical realm of Mod Podge on ceramic, tackling your burning questions with enthusiasm and a sprinkle of humor. Armed with this knowledge, there’s no limit to the ceramic wonders you can create. So, go forth, get your hands dirty (but not too dirty), and let your imagination soar. Happy crafting!