Are you tired of spending a fortune on expensive salon waxing treatments? Look no further—DIY sugar waxing is the perfect solution for achieving smooth and hair-free skin, right from the comfort of your own home. In this comprehensive guide, we’ll walk you through the step-by-step process of making and using your very own sugar wax.
From understanding the ideal temperature for sugar waxing to the benefits of sugaring over traditional waxing methods, we’ll address all your burning questions. Whether you’re looking to wax your legs, arms, face, or even attempting a Brazilian sugaring, we’ve got you covered!
But before you dive into the world of DIY sugar waxing, we’ll share some essential tips on what you need to do before and after the process, as well as how to troubleshoot if your sugar wax isn’t achieving the desired consistency. So, get ready to embrace the natural and effective art of sugar waxing and say goodbye to those costly salon visits. Let’s get started!
How to Master the Art of DIY Sugar Waxing
So you’ve decided to dive into the world of DIY sugar waxing? Bravo! Not only will you save a few bucks, but you’ll also get a sense of accomplishment that no store-bought product can give you. But before you embark on this sticky adventure, let me guide you through the process with some humor and valuable tips. Get ready to become a sugaring pro!
Gather Your Weapons of Hair Destruction
To start your DIY sugar waxing journey, you’ll need to assemble the necessary tools. Don’t worry; you won’t be needing a samurai sword, but prepare to wield something equally menacing. Here’s your shopping list:
- Sugar: Regular granulated sugar, the kind that makes your cookies oh-so-delicious, is the main ingredient. And no, don’t worry, you won’t have to sacrifice your chocolate chip cookies for smooth skin!
- Lemon Juice: Grab a couple of these zesty wonders. Not only will they add a tangy twist to your sugar wax, but they also possess magical powers that help prevent your newly hairless legs from turning into a prickly mess.
- Water: An essential ingredient to turn your sugar and lemon juice into a syrupy concoction. And no, don’t splurge on mineral water; your tap water will do just fine.
- Popsicle Stick: No, you’re not making frozen treats. This humble little stick will be your weapon of choice for applying the sugar wax. Just make sure you don’t absentmindedly lick it!
- Strips of Cloth: Think of these as the red carpet for your hairy follicles. Stock up on cotton or muslin strips. You can reuse them, but let’s not cut corners when it comes to hygiene, okay?
- Baby Powder: This magical powder will help ensure your skin stays dry and taut, making it easier to remove the unwanted hair. And no, it’s not just for babies; it’s for hair-removing warriors like yourself!
Applying the Sugary Nectar
Now that you’ve gathered your tools, it’s time to put them to good use. Follow these step-by-step guidelines to achieve sugar waxing perfection:
Step 1: Prep Like a Pro
Before your grand sugar waxing performance, make sure your skin is clean and dry. Dust some baby powder over the area you’ll be working on to prevent any moisture-induced mishaps. You’re all set to become a hairless superhero!
Step 2: Sugar Alchemy
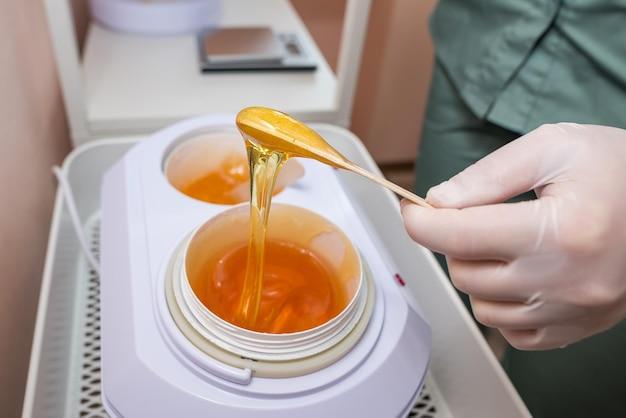
In a saucepan, mix 1 cup of sugar, 2 tablespoons of lemon juice, and 2 tablespoons of water. Stir it over low heat until the sugar dissolves and the mixture transforms into a sticky golden potion. Keep an eye on it; this isn’t a time to relive your Harry Potter movie marathon!
Step 3: Test the Waters (Or Rather, Wax)
Let the mixture cool for a few minutes, and then check the temperature by dipping your finger into the syrup. Be careful, my friend! We don’t want you to end up in the emergency room with a sugar burn. If it’s comfortably warm, not hot, you’re ready to move on to the next step.
Step 4: Wax On, Wax Off
With your popsicle stick at the ready, apply a thin layer of the sugary wax in the direction of hair growth. Smooth on a strip of cloth over the wax, pressing gently to ensure it sticks. Channel your inner karate kid and swiftly pull the strip against the direction of hair growth. And voila! You’ve conquered your first patch of unwanted hair!
Step 5: Repeat and Revel
Keep going, my fearless wax warrior! Repeat the waxing process until you’ve banished all those pesky hairs. Don’t be disheartened if you don’t achieve picture-perfect results on your first try. Remember, Rome wasn’t built in a day, and neither was silky smooth skin.
Post-Wax Celebrations
Congratulations, you’ve made it through the trials of DIY sugar waxing! But hold on, we’re not done just yet. Here are a few tips to savor your newfound smoothness:
- Moisturize: Give your skin some love post-waxing by applying a gentle, fragrance-free moisturizer. Your skin deserves some pampering after all the sticky adventures it endured.
- Avoid Sun Exposure: Shield your freshly waxed skin from the sun’s powerful rays. Remember, your skin is delicate, and the last thing you need is to look like a tomato in a beauty blender commercial.
- Exfoliate, Darling: To prevent those pesky ingrown hairs from gatecrashing the party, exfoliate regularly. Keep those pores clear and say goodbye to that bumpy aftermath.
Now that you’re armed with sugar waxing knowledge, go forth, my fellow smooth-skinned warrior! Embrace the stickiness, conquer unwanted hair, and revel in the freedom of silky smoothness. But remember, an aspiring sugaring pro such as yourself knows when to call it quits. If your attempts become more ‘Wax on, wax off’ than ‘wax on, stay off,’ it might be time to seek professional help. Until then, happy sugaring!
FAQ: How To Use DIY Sugar Wax
Can I put my sugar wax in the fridge to cool
No need to chill, my friend! Sugar wax is best used at room temperature. You don’t want it too cold or too hot—just like Baby Bear’s porridge, it needs to be just right.
What temperature do you make sugar wax
We’re not whipping up a delicate soufflé here, but rather a sweet and sticky concoction. To make sugar wax, you’ll want to heat it until it reaches around 250°F (121°C). But remember, safety first! Be cautious when handling hot wax.
What is Brazilian sugaring
Ah, the Brazilian sugaring—a true Brazilian beauty secret. This technique removes hair from your nether regions, leaving you smooth as a samba dancer’s moves. Tempted to try? Get ready for a hair-free adventure!
Can sugaring be done at home
Absolutely! Why let professionals hog all the fun? With a little practice and the right technique, you can do sugaring right in the comfort of your own bathroom. No need to leave the house—or your dignity—behind!
What should I do before and after sugar waxing
Before jumping into the sticky situation, here’s a little prep work: exfoliate the area using gentle circular motions to slough off dead skin. After your sugary session, cool your skin down with a cold compress and apply a soothing lotion. You’ll be feeling silky smooth, my friend!
Can I make sugar wax in the microwave
Who needs a microwave when you have the power of stovetop magic? It’s better to heat your sugar wax on the stove, keeping a watchful eye until it reaches that perfect temperature. Wave goodbye to microwaves and say hello to homemade sweetness!
Does sugar wax need to be heated
Yes, indeed! Sugar wax needs a little heat to become pliable and ready for action. So, fire up that stove and let the magic of heat transform your sugar concoction into a velvety weapon against unwanted hair.
Does sugar wax expire
Well, sugar wax might not sprout legs and walk away like that mysterious moldy cheese in your fridge, but it does have a shelf life. It’s best to use your homemade sugar wax within six months to ensure its optimal stickiness. Time to get waxing before it’s too late!
Why is sugaring better than waxing
Ah, the age-old debate—sugaring versus waxing! Sugaring takes the crown for being gentler on the skin, as it sticks to the hair and not the precious epidermis. Plus, sugar wax is all-natural, so you won’t have to worry about mysterious chemicals unsettling your delicate skin.
Can you use sugar wax without strips
Absolutely! If you’re feeling bold, you can go commando and use sugar wax without any strips. Just roll the wax into a ball, spread it on your skin, and with all your courage, rip it off like a band-aid. It’s a hair removal technique that’s not fit for the faint of heart!
Can I use vinegar in sugar wax
Vinegar for hair removal? It may sound tempting, but for your sugar wax recipe, it’s best to steer clear of the condiment aisle. Stick to the tried and true ingredients—sugar, lemon juice, and water—as vinegar might throw off the delicate balance. Save the vinegar for your fries!
Do you need lemon for sugar wax
Absolutely! Lemons are not only for making refreshing summer drinks—they’re also your secret weapon in the quest for smooth skin. The natural acidity of lemons helps break down the sugar, ensuring your wax is just the right consistency. Time to pucker up to that citrusy goodness!
Can I use sugar wax for a Brazilian
Oh, you adventurous soul! Sugar wax is indeed suitable for a Brazilian wax. With a flick of the wrist and a sweet touch, you can achieve that hairless paradise you’ve been dreaming of. Just remember to brace yourself for a little discomfort before enjoying silky smooth results.
What can I use if I don’t have wax strips
No wax strips? No problemo! Look around your house for some handy alternatives. Grab a clean, thin cloth, an old t-shirt, or even parchment paper. With a touch of creativity, you can turn the simplest objects into hair removal superheroes. Just don’t use your favorite superhero cape!
How long does homemade sugar wax last
Your homemade sugar wax is made with love and care, so it’ll stick around for about six months. Just be sure to store it in a cool, dry place away from direct sunlight. Plus, with all that hair being removed, you’ll have plenty of time to test its longevity!
Why is my sugar wax not sticky
Oh no, did your sugar wax lose its stickiness? Fear not! This sticky situation can be tackled. If your wax is too hard, try adding some water and reheating it. If it’s too soft, a little more sugar might do the trick. Keep experimenting until you find that perfect stickiness—you’ve got this!
What should I do before sugar waxing
Before diving into the sticky world of sugar waxing, make sure to prep your skin properly. Cleanse the area, exfoliate gently, and ensure your skin is dry. Oh, and brace yourself for a little pain (but remember, beauty is pain, right?). Ready, set, wax!
Can I sugar wax my face
Sure thing, beautiful! You can absolutely use sugar wax on your face, but be cautious around delicate areas like your eyebrows or upper lip. This technique is perfect for larger areas like cheeks or sideburns. Get ready to unveil your smooth and luminous complexion!
How can I prepare myself for waxing at home
Get yourself in the right mindset, my friend! Set the mood with some relaxing music, light a few scented candles, and envision your smooth skin. Gather all your waxing supplies, put on your confident pants, and get ready for a DIY home waxing extravaganza!
Can you reuse DIY sugar wax
Sure thing, sustainable superstar! You can reuse your DIY sugar wax for multiple rounds of hair removal. Just store it in an airtight container to keep it fresh and sticky. Remember, a little recycling goes a long way—both for the environment and your silky smooth skin!
Can you make sugar wax with orange juice
While orange juice may be a delicious and refreshing way to start your day, it won’t help you with your sugar wax adventure. Stick to the classic recipe of sugar, lemon juice, and water to keep your DIY sugar wax in tip-top shape. Save the orange juice for breakfast, my friend!
Is homemade sugar wax safe
Absolutely! Homemade sugar wax is a safe and natural alternative to store-bought waxes. With its simple ingredients, you can rest assured that you’re treating your skin with care. Just remember to follow proper hygiene and safety precautions during your DIY waxing escapades.
Can you use sugar wax cold
While sugar waxing might be cool, using cold sugar wax might not yield the results you desire. To achieve that perfect stickiness, warm up your sugar wax to room temperature. Trust us, a little warmth will do wonders for your sugar waxing journey!