Are you a chocolate lover who wants to take their homemade treats to the next level? Look no further! In this blog post, we will dive into the fascinating world of metal chocolate molds and explore how to use them to create beautifully shaped chocolates.
From adorable bunnies to elegant truffles, metal chocolate molds offer endless possibilities for creating delicious and visually stunning chocolates. But using these molds can be a bit tricky if you’re new to the process. That’s why we’re here to guide you through the ins and outs of using metal chocolate molds, answering common questions like how to remove chocolates from the molds and whether or not they need to be greased.
But that’s not all! We’ll also debunk some common myths, such as whether refrigerating chocolate ruins its texture, and explore alternative uses for these molds, like making hard candy. So, let’s roll up our sleeves and dive into the world of metal chocolate molds together!
How To Master the Art of Using a Metal Chocolate Mold
Get Your Melt On
Before we can dive deep into the world of metal chocolate molds, we need to start at the beginning: melting the chocolate. Picture this—a molten pool of silky smooth chocolate just waiting to be transformed into delectable delights. Ah, the possibilities!
To kick things off, grab some high-quality chocolate and break it into smaller pieces. Now, pop it into a microwave-safe bowl, and zap it in short bursts, stirring in between, until it reaches a luxurious, pourable consistency. Remember, patience is key, my friends. No burnt chocolate allowed!
Choosy Molds Choose Delicious Chocolate
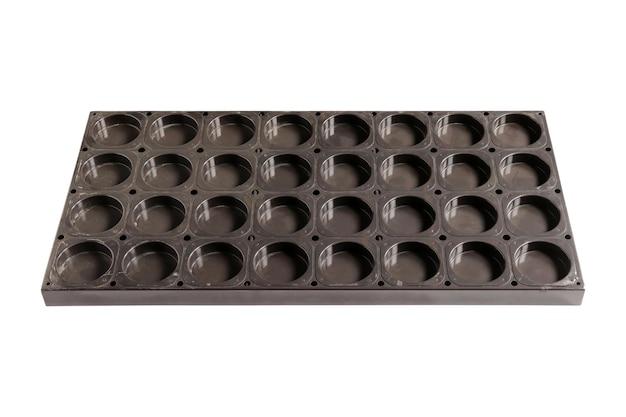
Next up, it’s time to choose your metal chocolate mold. Think of this as a marriage of two arts—the art of chocolate making and the art of mold selection. You want a mold that will make your chocolate creations shine, so choose wisely.
Look for a metal mold that is sturdy and durable, preferably made of food-grade stainless steel. And don’t forget to inspect the details of the molds. Are they intricate? Are they unique? The more intricate and unique, the better, because who doesn’t love a little extra flair?
Grease Up, Buttercup
Now that you have your molten chocolate and your perfect mold, it’s time to prep those babies. Grease up your mold with a thin layer of cooking spray or a light brushing of vegetable oil. You wouldn’t want your chocolate creations to stick, would you?
But hey, don’t go overboard with the greasing. A little goes a long way, and you certainly don’t want your chocolates to taste like they just popped out of an oil slick. Balance is key, my chocolate-loving comrades.
Fill ‘Em Up, Buttercup
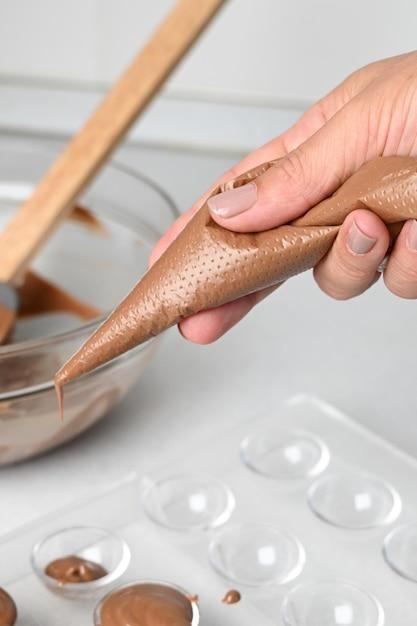
With your mold prepped, it’s time for the main event—the filling. Take a deep breath, steady your hand, and start pouring that luscious melted chocolate into each cavity of the metal mold. Ah, the sweet sound of chocolate cascading into its designated spot. It’s music to our taste buds!
Feel free to use a spoon or a piping bag to help guide the chocolate into those intricate corners. And just a gentle reminder: don’t overfill the molds. Leave a little space at the top to allow for easier unmolding later. Remember, we’re going for perfection here!
Getting Refined with Gentle Tapping
Once your mold is filled to perfection, it’s time to get a little rough—gentle tapping rough, that is. Give the mold a light tap on the countertop to release any air bubbles lurking beneath the surface. We want our chocolates to be smooth and refined, just like a skilled diplomat.
Now, don’t go Hulk on that mold. A light tap will do the trick. If you go full-on Hulk, you risk the chance of creating uneven chocolates or worse, chocolate splatter all over your kitchen. And trust me, no one wants to be cleaning that mess up!
Time to Cool and Set
Patience, my friends, patience. After you’ve conquered the art of filling and tapped those bubbles away, it’s time to let your chocolates cool and set. You can either leave them at room temperature or pop them in the fridge for a bit.
But remember, chocolate is a temperamental creature. Be cautious not to expose them to extreme temperatures too quickly, or they might rebel and develop that dreaded white film called “bloom.” No one wants their chocolates to look like they’ve aged prematurely, right?
The Great Unmolding
The moment has finally arrived—the great unmolding! Take a deep breath and gently turn your metal mold upside down, holding onto those chambers for dear life. If the chocolate gods are on your side, the chocolates should slide right out, revealing their magnificent forms.
If a chocolate happens to get stuck, fear not! Simply pop the mold back in the fridge for a little longer to let the chocolate firm up some more. Eventually, it will let go of its snug mold and embrace the world.
The Joyful Reward
Now, my fellow chocolate enthusiasts, it’s time for the most joyous part—the reward of your hard work. Admire those beautiful chocolate creations you’ve brought into existence. Marvel at the precision of the details, the smoothness of the surface, and the delightful sheen.
And of course, what’s left to do but indulge? Allow yourself a moment of pure bliss as you savor each bite of your homemade chocolate delights. After all, you’ve mastered the art of using a metal chocolate mold, and that calls for celebration!
Remember, my dear readers, the world of metal chocolate molds is your oyster. Explore, experiment, and unleash your creativity. With these tips and tricks up your sleeve, there’s no limit to the chocolatey wonders you can create. So go forth, my friends, and may the chocolate gods guide your sweet endeavors!
FAQ: How To Use A Metal Chocolate Mold
How do you get chocolate out of metal molds
Removing chocolate from metal molds requires a gentle touch and a bit of finesse. Here’s a foolproof method to free your delectable creations from their metal prisons:
- Allow the chocolate to set completely in the mold. Don’t rush this step, my impatient friend. Patience is a virtue, especially when it comes to chocolate!
- Once the chocolate is completely solid, firmly tap the mold on the countertop or give it a gentle shake. This will help loosen the chocolate from the mold.
- Hold the mold upside down over a clean surface or a sheet of parchment paper, and give it a confident yet compassionate whack with the palm of your hand. Voilà! The chocolate will gracefully pop out, ready to be devoured or admired.
Remember, practice makes perfect! Don’t be disheartened if your first attempt ends up in a mangled mess of chocolate. Rome wasn’t built in a day, and neither were chocolate masterpieces.
Do chocolate molds need to be greased
No, chocolate molds don’t require greasing like the squeaky wheels of life. Metal chocolate molds are designed to have a non-stick surface, which means you can skip the greasing altogether. Just pour your melted chocolate into the ungreased mold, and it’ll come out smooth and shiny, like a mirror reflecting your impeccable taste.
Does putting chocolate in the fridge ruin it
Ah, the age-old debate: Should chocolate chill out in the fridge or bask in room temperature glory? While some argue that refrigeration can cause chocolate to lose its luster or develop unpleasant moisture on its surface (a chocolate dew, if you will), rest assured, my fellow chocolate aficionados. Storing your chocolate creations in the fridge won’t ruin them completely.
However, when it comes to aesthetics, be aware that condensation may form when you remove the chilled chocolates from the fridge and expose them to warmer temperatures. So, if you’re seeking picture-perfect chocolates, it’s best to store them in a cool, dry place at a consistent room temperature.
Can I use chocolate molds for hard candy
Absolutely! Chocolate molds aren’t just for chocolatey creations. They can also be used for molding hard candy delights. Just make sure the candy mixture reaches the desired consistency before pouring it into the mold. And remember, my friend, once you use a mold for hard candy, consider it forever dedicated to the candy cause.
Do you put chocolate molds in the fridge or freezer
While you can store chocolates in the fridge, the freezer is not your chocolate’s BFF. Freezing chocolates can cause them to develop a case of the dreaded freezer burn. Trust me, freezer burn is not a fashion statement you want your chocolates to make. So, keep your chocolatey dreams chilled but not frozen by opting for the refrigerator instead.
How do you clean metal candy molds
After creating chocolatey wonders, it’s time to clean your metal candy molds for their next glorious adventure. Follow these steps to restore your molds to their pristine condition:
- Fill your sink with warm, soapy water. Create a luxurious bubble bath for your molds.
- Gently wash each mold using a soft sponge or cloth. Show them the tender love and care they deserve.
- Rinse the molds thoroughly with warm water to bid farewell to any lingering soap suds.
- Pat them dry with a soft towel, or let them air dry majestically. Just remember, slow and steady drying wins the mold care race.
How do you clean chocolate molds
Cleaning chocolate molds is a delicate task, as you don’t want to harm the intricate design or leave any residue behind. Follow these steps for a squeaky clean and ready-to-go mold:
- Start by gently tapping the mold upside down over a trash can or sink. This will dislodge any excess chocolate crumbs or remnants.
- Fill a bowl or sink with lukewarm water. Avoid using hot water, as it can damage the mold.
- Dunk the mold into the water, making sure not to submerge it entirely. The goal is to melt away any chocolate residue, not drown the mold.
- Use a soft sponge or cloth to gently wipe the mold, ensuring you reach every nook and cranny. Treat it like a delicate piece of art, for it truly is.
- Rinse the mold with lukewarm water, taking away any remaining chocolate particles.
- Pat the mold dry with a soft towel, or let it air dry like a diva on a red carpet.
How do you make a hollow chocolate bunny
Ah, the quintessential symbol of the Easter season – the hollow chocolate bunny! Here’s how you can create this coveted treat:
- Melt your choice of chocolate in a microwave-safe bowl, stirring it at regular intervals to ensure smoothness.
- Coat the inside of your bunny mold with a thin layer of melted chocolate. Be careful not to go too overboard; you want just enough chocolate to form a strong shell.
- Place the mold in the refrigerator for a few minutes, allowing the first layer of chocolate to set.
- Take the mold out and repeat the process, adding another layer of chocolate. You’re building the bunny’s hollow shell, layer by delicious layer.
- Once you’ve achieved the desired thickness, refrigerate the mold for a final setting. Patience, my friend, the best things in life need time to solidify.
- Carefully remove the mold, holding your breath in anticipation. Pop out your beautiful, hollow chocolate bunny, ready to enchant taste buds and bring smiles to faces.
What are polycarbonate chocolate molds
Polycarbonate chocolate molds, my delectable friend, are the superheroes of the chocolate molding realm. Made from strong and durable polycarbonate material, these molds are like the Tony Stark of chocolate creation.
Featuring intricate designs and a flawless non-stick surface, polycarbonate molds ensure your chocolates come out with stunning detail. Plus, they’re easy to clean and maintain. So, equip yourself with a polycarbonate mold, and become the chocolatier superhero you were born to be.
What kind of chocolate is best for melting and molding
When it comes to melting and molding chocolate, not all chocolates are created equal. Look for chocolate that melts smoothly and maintains its tempered state for the perfect molding experience. The ideal options include couverture chocolate, chocolate wafers, or chocolate bars with a high percentage of cocoa.
Avoid using chocolate chips, as they often contain stabilizers that can interfere with the melting and molding process. Remember, your chocolate deserves only the finest ingredients, just like you deserve only the finest chocolate!
How long can you store chocolate molds
Ah, the eternal question of chocolate storage. Properly stored chocolate molds can dazzle taste buds for an extended period. To keep your chocolate creations at their best:
- Ensure the molds are clean and dry, with not a crumb in sight.
- Store the molds in a cool, dry place away from direct sunlight, heat sources, or overly curious chocolate thieves.
- Through the power of rotation, use the oldest chocolate first to prevent any potential sadness caused by time-induced staleness.
Remember, chocolate molds aren’t just for special occasions, but for any time you need a decadent morsel to uplift your soul.
Should I grease candy molds
Unlike metal chocolate molds that prefer a life without grease, candy molds might appreciate a light greasing to make their candy-coated dreams come true. Use a cooking spray or a brush and a generous sprinkle of cocoa powder, powdered sugar, or cornstarch to offer a gentle lubrication to the mold. This will help release the candy with ease, leaving your creations unscathed and ready to delight.
Does chocolate stick to metal mold
Frustrating as it may be, chocolate sometimes clings to metal molds like a bear to honey. Fear not, my sweet-toothed friend; there’s a way to coax the chocolate out of its metallic grasp. To prevent stickiness between chocolate and metal molds:
- Ensure the molds are clean and dry before using them.
- Properly temper your chocolate to give it the ideal texture and consistency.
- Once the chocolate sets, gently tap and wiggle the mold to loosen it.
- Apply a bit of pressure to the mold while releasing the chocolate, reminding it who’s boss. With a firm yet gentle hand, you shall prevail!
How do you remove chocolate from silicone molds
To liberate your chocolatey creations from the loving embrace of silicone molds, follow these simple steps:
- Allow the chocolate to set completely in the mold. Patience, my friend, you’re almost there!
- Gently flex the silicone mold to loosen the chocolate. Silicone is a forgiving material, so give it a little wiggle and jiggle.
- Carefully peel back the sides of the mold, coaxing the chocolate out bit by tasty bit.
- If stubborn bits of chocolate cling to the mold, employing a little encouragement with a soft, clean toothbrush can work wonders. Give those tenacious remnants a gentle brush, and off they shall go!
Can I use normal chocolate for molds
Yes, indeed! Normal chocolate, as long as it’s of good quality and suitable for melting, can be used in molds to create delicious treats. Choose your favorite chocolate bars or chocolate chips and give them a splendid second life as sculpted masterpieces. Just be sure to melt it gently and temper it properly for best results. Your imagination is the limit!
What is polycarbonate chocolate molds
Polycarbonate chocolate molds are like the divine marriage of science and art, resulting in molds that are durable, versatile, and a joy to behold. Made from a lightweight and strong material called polycarbonate, these molds offer exceptional heat resistance and intricate designs that will make your chocolates shine.
Polycarbonate chocolate molds are the preferred choice of professional chocolatiers for their excellent detail reproduction and ease of use. So, embrace the magic of polycarbonate molds and embark on a chocolatey adventure!
How do you melt chocolate chips for molds
Melting chocolate chips for molds requires a gentle approach to preserve their melty goodness. Follow these delicious steps:
- Place your chocolate chips in a microwave-safe bowl.
- Microwave your chocolate in short bursts of 15-20 seconds, stirring between each interval. Show that chocolate who’s the boss of even heat distribution!
- As you approach the last few lumps, reduce the microwave time to 10 seconds or even less, and stir until the remaining lumps melt in the warmth of the bowl.
- Exercise caution, my friend, as overheating chocolate can result in a sad, grainy mess. Remember, patience is the sweeter virtue here.
Do I need to spray chocolate molds
While chocolate molds appreciate a gentle coating of love, spraying them with cooking spray might not be their preferred form of affection. Instead, consider a light dusting of cocoa powder, powdered sugar, or cornstarch to offer a subtle release aid. Your chocolate molds will thank you for the gentle touch and reward you with flawlessly molded treats.
Can candy molds go in the oven
Are your candy molds yearning for a heated affair with your oven? Sorry to be the bearer of sticky news, but most candy molds aren’t Oven-Safe Susans. Candy molds are commonly made of plastic or silicone, which can warp, melt, or release harmful substances at high oven temperatures.
Instead, use candy molds for the purpose they were born for – molding glorious, sugary creations. Leave the oven escapades for your trusty baking pans, my adventurous friend.
Why does my melted chocolate not harden
Oh, the heartbreak of melted chocolate refusing to solidify! Fear not, for I shall illuminate the path to chocolate enlightenment. Several factors can prevent your chocolate from hardening, including:
- Incorrect tempering: Chocolate, being a fickle creature, demands proper tempering to achieve the desired texture. Look up tempering techniques to ensure you’ve truly tamed this edible beast.
- Humidity: High humidity can cause chocolate to absorb moisture from the air, resulting in a sad, soft state. Optimal humidity for chocolate is around 50-60%.
- Overheating: Heating chocolate beyond its melting point can cause it to lose its temper, just like a mad scientist gone astray. Be gentle and patient with your chocolate, my friend.
- Poor-quality chocolate: Like dodgy friendships, not all chocolate is created equal. Using low-quality chocolate can lead to less stable results. Treat your chocolate creations to the finest ingredients they deserve.
So, my aspiring chocolatier, take these tips to heart, and be prepared to dazzle taste buds with your achievements.
How do you use a chocolate mold
Using a chocolate mold is like conducting a symphony of deliciousness. Follow these sweet steps to become a maestro of chocolate molding:
- Ensure your chocolate mold is clean and dry. Give it a gentle inspection; no crumbs shall be left behind!
- If you wish to add decorative elements to your chocolate, use food-safe brushes to paint colored cocoa butter or edible luster dust onto the mold’s surface. Let your creativity run wild!
- Melt your chosen chocolate (tempered, of course), and pour it into the mold using a jug or a trusty ladle. Fill each cavity to the brim, making sure no chocolate is left behind.
- To eliminate air bubbles, gently tap the mold on the countertop. Release those unwanted air pockets like a chocolate-scented symphony.
- Place the mold in the refrigerator or a cool area and let the magic happen. Allow ample time for the chocolate to set and solidify.
- Once the chocolate has hardened, it’s showtime! Carefully remove the mold, hold your breath in anticipation, and witness the masterpiece you’ve created.
- Share your chocolatey wonders with friends, family, or your own deserving taste buds. Revel in the delight and satisfaction of being a chocolate mold maestro.
Now, go forth, my chocolatier companion, and make the world a sweeter place, one molded delight at a time.