Are your Rad Power Bike’s brakes feeling a little loose or not as responsive as they should? No worries! It’s a common problem that, luckily, you can fix yourself with some simple adjustments. In this blog post, we’ll take a deep dive into brake tightening techniques for different Rad Power Bike models, including Radrunner, Radrover 6 Plus, and Radcity 5 Plus.
From adjusting the brake lever tension to hydraulic brake adjustments, we’ll cover everything you need to know to achieve better braking on your bike. Plus, we’ll also give you some bonus tips on how to adjust brakes on other bike models, including Roadmaster.
Don’t let poor brake performance put a damper on your cycling experience. Keep reading to learn how to tighten the brakes on your Rad Power Bike and get back on the road with confidence and control.
Tighten Your Rad Power Bike Brakes: A Comprehensive Guide
Having a well-functioning braking system is crucial for any bike. It’s even more important when you’re riding an electric bike like the Rad Power Bike. In this subsection, we will walk you through the process of tightening your Rad Power Bike brakes step-by-step.
Gather Your Tools and Safety Equipment
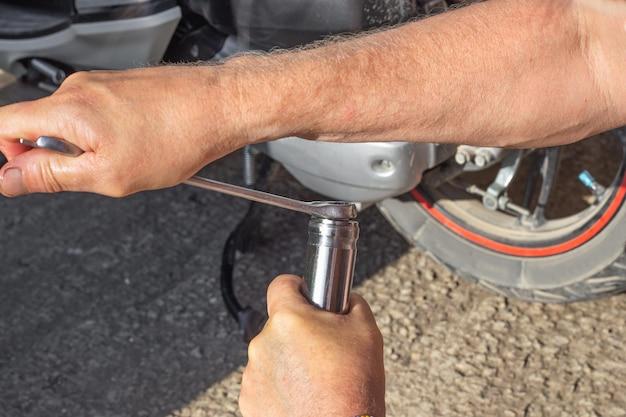
Before you start working on your brakes, you’ll need to have the necessary tools and safety equipment. These include:
- A set of Allen wrenches
- A torque wrench
- A brake cable cutter (or a pair of wire cutters)
- A clean cloth
- A bike repair stand (optional but highly recommended)
- Safety glasses and gloves
Loosen the Brake Cable
Start by loosening the brake cable using an Allen wrench. This will allow you to adjust the tension on the brake cable once you’ve tightened the brakes.
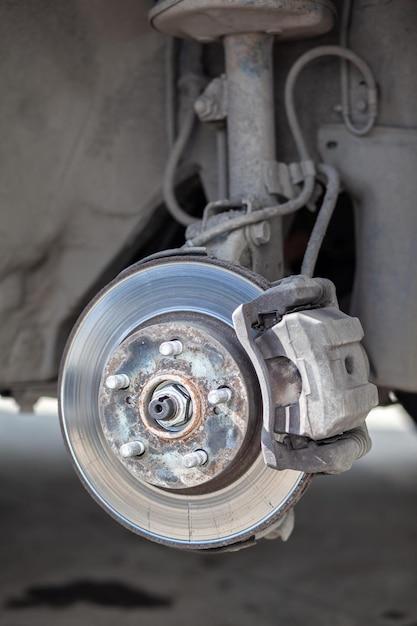
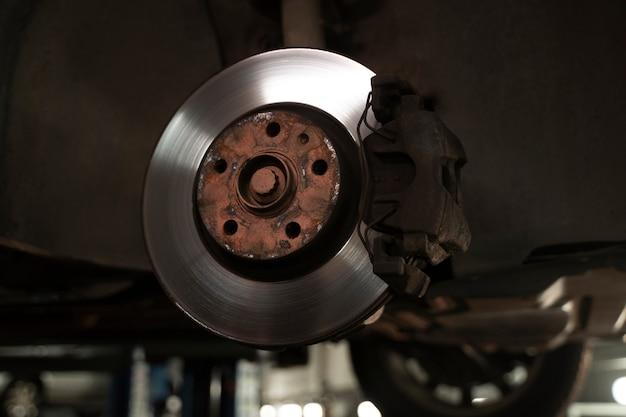
Check the Brake Pads
Next, check the brake pads to see if they need to be replaced. Worn brake pads can affect your bike’s braking power and may need to be replaced. If your brake pads need to be replaced, remove the old pads and install the new ones according to the manufacturer’s instructions.
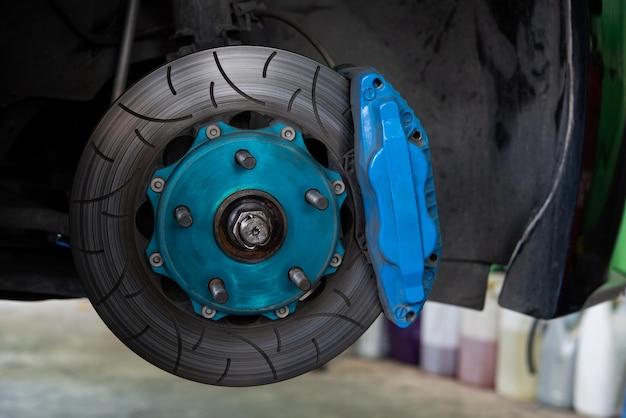
Tighten the Brake Caliper Bolts
Using an Allen wrench, tighten the brake caliper bolts. Do this on both sides. Start by tightening the bolts snugly and then use a torque wrench to tighten them to the manufacturer’s recommended torque setting.
Adjust the Brake Pads
Adjust the brake pads so that they are properly aligned with the rim. Use a clean cloth to hold the brake pads in place while you tighten them.
Re-tighten the Brake Cable
Using an Allen wrench, re-tighten the brake cable. Make sure that there is no slack in the cable and that the brake pads are properly aligned with the rim.
Test the Brakes
Finally, test the brakes to make sure they are working properly. When you apply the brakes, there should be a smooth and consistent response. If the brakes are not functioning properly, repeat the steps above until they are.
By following these steps, you should be able to tighten the brakes on your Rad Power Bike and ensure that it is safe and ready for your next ride.
Tightening Your RadRunner Brakes
If you’re an avid RadRunner rider, then you know how important brakes are for the safety and control of your bike. And like any other type of brakes, they can become loose over time, which may result in reduced stopping power or a spongy brake lever. This might make you feel unsure about your bike and, ultimately compromise your safety.
Signs That Your Brakes Need Tightening
It would be best if you looked out for some signs that your RadRunner needs your attention. The following are some of the signs that your brakes need tightening;
-
You hear screeching or squealing sounds coming from your brakes when you’re slowing down or coming to a stop.
-
You notice that your brake lever feels soft, spongy, or loose and needs a more significant pull for the brakes to activate.
-
You experience reduced stopping power or sudden failure as it can cause injury to you.
How to Tighten Your RadRunner Brakes
Tightening your RadRunner brakes is a quick and simple process. Follow these steps to tighten your brake cables and improve stopping power on your bike:
-
Begin by flipping your RadRunner bike upside down and support it with a bike stand.
-
Next, locate the barrel adjusters on the brake levers, which are generally present near the brake lever.
-
Now, Turn the barrel adjuster in the desired direction, clockwise or anticlockwise, to tighten the brake cables.
-
Test the brakes after adjusting them – be careful, be sure not to tilt the bike when testing the brakes. If the brakes still remain soft, turn the barrel adjuster again to achieve the desired tightness.
If you notice any significant wear or damage to the brake cables or brake pads of your RadRunner, then it may be time to replace them for optimal performance.
Tightening your RadRunner brakes can improve your stopping power and make your rides more enjoyable and safer. Don’t take your brake safety for granted; it’s better to have them tightly adjusted, well-working brakes than the opposite.
Now that you know how to tighten your RadRunner brakes, get set to change the game and experience the full power of your bike’s brakes.
Rad Power Bikes Brake Lever
One crucial component of the Rad Power bike braking system is the brake lever. It is located on the handlebar and is used to control the braking power of the bike. In this subsection, we will explore what brake lever is and how to adjust it on a Rad Power bike.
Understanding the Brake Lever
The brake lever on a Rad Power bike is a small lever located on the handlebar. It is typically made up of a metal bar and a rubber grip. When the lever is squeezed, the brake pads located on the wheel rims are pushed against the wheels, causing the bike to slow down or stop depending on the force applied.
Adjusting the Brake Lever
Over time, the brake lever on a Rad Power bike may become loose or too tight, making it difficult to control the braking power of the bike. To adjust the brake lever, you need to follow these steps:
-
Loosen the bolt on the brake lever using a hex key.
-
Adjust the position of the brake lever, making sure that it is facing upward, to provide easy access to the brake lever.
-
Tighten the bolt back once the lever is in the right position.
-
Test the braking system to ensure that it is working correctly.
Common Brake Lever Problems
Some common problems that users face with the brake lever on a Rad Power bike are:
-
The brake lever is too loose, causing the bike to brake slowly.
-
The brake lever is too tight, making it challenging to brake.
-
The brake lever is too far from the handlebar, making it difficult to reach.
To avoid these problems, make sure to check and adjust the brake lever regularly. Also, keep an eye on the brake pads’ condition as worn-out pads can interfere with the brake lever’s performance.
In Conclusion, understanding how the brake lever works on your Rad Power bike is crucial in maintaining the bike’s safety. Regular maintenance and check-ups are necessary to ensure that the braking system is working correctly, so you need to familiarize yourself with how it works and how to adjust it. By doing so, you can enjoy the bike’s full potential and keep yourself safe while cycling.
RadRover 6 Plus Brake Adjustment
Are your RadRover 6 Plus brakes not responding as fast as they should? It might be time to tighten them up. Here’s how to do it:
Step 1: Check Your Brake Pads
Before adjusting your brakes, make sure the pads are in good shape. Worn-out or damaged brake pads can’t provide enough grip for your bike to come to a complete stop. If you need to replace them, follow these steps:
- Loosen the mounting screw that holds the brake pad in place.
- Remove the pad and insert a new one.
- Adjust its position, then tighten the screw.
Step 2: Adjust the Brake Cable Tension
If your brake pads are in good shape, the next step is to adjust the brake cable tension. Here’s how:
- Locate the brake cable adjustment barrel.
- Turn the barrel clockwise to tighten the cable, or counterclockwise to loosen it.
- Check the brake lever to ensure it moves smoothly and without any resistance.
Step 3: Fine-Tune the Brake Pads
Finally, adjust the position of the brake pads to ensure they hit the rim at the right angle. Here’s how:
- Loosen the mounting nut that holds the brake arm in place.
- Adjust the pad so it hits the rim squarely.
- Tighten the mounting nut.
Tightening your RadRover 6 Plus brakes is easy and can be done in just a few steps. Remember to check your brake pads and cable tension before fine-tuning the pad position. This will ensure your brakes work properly and keep you safe on the road.
Don’t let loose brakes ruin your next ride; follow these steps and enjoy a smoother, safer journey.
How to Tighten Rad Power Bike Brakes
Brakes are a crucial component of any bike, and the Rad Power Bike is no exception. If your brakes aren’t functioning correctly, it can compromise your safety and the safety of others. So, it’s essential to know how to tighten your Rad Power Bike brakes. In this section, we’ll show you how to do it easily and with confidence.
Gather the Required Tools
Before you start tightening your Rad Power Bike brakes, you need to gather some tools. The tools required to tighten your Rad Power Bike brakes are:
- 5 mm Allen Wrench
- 10 mm or 15 mm wrench
- A pair of pliers
Locate the Brake Pads
The brake pads are located inside the brake caliper, and you need to lift up the rubber cover to access them. The brake pads are usually visible and should be positioned directly opposite the rim.
Tighten the Brake Pads
Use the 5 mm Allen wrench to loosen the bolt that holds the brake pads in place. Once it’s loose, hold the brake caliper arms and pull them slightly towards the rim. This action will push the brake pads closer to the rim. Next, hold the brake pads in place and tighten the bolt using the 5mm Allen wrench. Ensure the pads are adequately adjusted by pulling the brake lever until you feel appropriate force.
Adjust the Cable Tension
You can adjust the cable tension by turning the barrel adjuster located on the brake lever assembly. To increase the tension, turn the adjuster nut clockwise, and to decrease tension, turn the nut counterclockwise. Ensure you make the adjustment evenly on both front and rear brakes to avoid an imbalance that can lead to an accident.
In conclusion, learning how to tighten Rad Power Bike brakes is essential and straightforward. Gather the necessary tools, locate the brake pads, tighten them, and adjust the cable tension, and your brakes will be working correctly in no time.
Radcity 5 Plus Hydraulic Brake Adjustment
The Radcity 5 Plus is an excellent e-bike that comes with hydraulic brakes. As we all know, stopping power is essential when it comes to cycling, especially at high speeds. So, it’s crucial to ensure that your bike’s brakes are working correctly.
Why You Need to Adjust Your Radcity 5 Plus Hydraulic Brakes
Hydraulic brakes are reliable and robust, but they sometimes require adjustment to maintain optimal performance. Over time, the brake pads can wear down, causing reduced stopping power. Adjusting your Radcity 5 Plus hydraulic brakes will ensure that you’re getting the most out of your e-bike.
Tools You Will Need
Before adjusting your bike’s hydraulic brakes, you’ll need a few tools. These include a 4mm and 5mm hex wrench, a flathead screwdriver, and a clean rag or towel.
Steps to Adjust Your Radcity 5 Plus Hydraulic Brakes
-

Identify the brake caliper and locate the adjustment bolt. This bolt is usually located on the bottom or front of the caliper.
-
Use the 4mm hex wrench to loosen the adjustment bolt. You should be able to turn it by hand once it’s loose enough.
-
Squeeze the brake lever gently to move the brake pads closer to the rotor. You should be able to feel the rotor’s resistance against the brake pads.
-
Once the brake pads are in contact with the rotor, tighten the adjustment bolt using the 4mm hex wrench. Make sure it’s tight enough, but don’t over-tighten it.
-
Test the brake lever to see if it engages the brake pads correctly. If not, repeat steps 2-4 until you get the desired level of stopping power.
Adjusting your Radcity 5 Plus hydraulic brakes isn’t difficult, and it’s something you can do at home. By following the steps outlined above, you’ll be able to maintain optimal stopping power and enjoy a smooth and safe ride. So, get your tools out, and start adjusting your bike’s brakes today!
How to Adjust Brakes on a Roadmaster Bike
If you have trouble stopping your Roadmaster bike or notice that the brakes aren’t working as they should, it may be time to adjust them. Here’s a quick guide on how to adjust the brakes on a Roadmaster bike.
Assess the Brakes
The first step is to assess the brakes. Check the brake pads to ensure they are not worn out. Also, check the brake cable to make sure it’s not frayed or damaged. If the brake pads or cable are worn out, damaged, or broken, you need to replace them.
Loosen the Brake Cable
Loosen the brake cable by loosening the bolt that holds the cable in place. Once the bolt is loosened, pull the cable through the brake lever. This will give you room to adjust the brake pads.
Adjust the Brake Pads
Using an Allen wrench, adjust the brake pads. Make sure they are aligned with the rim and not touching the tire. The distance between the brake pads and the rim should be no more than the thickness of a credit card. Test the brakes to ensure they are working properly.
Tighten the Brake Cable
Once the brake pads are adjusted, tighten the brake cable by pulling it through the brake lever and tightening the bolt that holds the cable in place. Be careful not to tighten the cable too much, as it can cause the brakes to rub against the rim and slow down your bike unnecessarily.
Safety Check
Before you ride, make sure to test your brakes. Squeeze the brake levers several times to ensure they are working properly and stopping the bike. If you notice any issues, repeat the adjustment process until the brakes are properly aligned.
Adjusting the brakes on a Roadmaster bike is a simple process that can improve the safety and efficiency of your bike. If you’re unsure about any of the steps, don’t hesitate to consult a professional bike mechanic.
Rad Power Bikes Hydraulic Brakes Adjustment
Hydraulic brakes are a crucial component of a Rad Power Bike. If you’re familiar with bike brakes, you’ll know that hydraulic brakes offer better stopping power than mechanical brakes. However, if you don’t know much about bike brakes, don’t worry; I’ve got you covered. Let’s dive into everything you need to know about adjusting hydraulic brakes on your Rad Power Bike.
Understanding Hydraulic Brakes on Your Rad Power Bike
Before we get into adjusting hydraulic brakes on your Rad Power Bike, let’s first understand what hydraulic brakes are. A hydraulic brake system comprises a lever, a hose, and a piston. In response to pressure, hydraulic fluid moves from the lever to the piston, which presses the brake pads against the rotor to stop the bike.
Signs Your Rad Power Bike’s Hydraulic Brakes Need Adjustment
Brakes, like every other bike component, eventually wear down and need adjustment. Here are some signs that your Rad Power Bike’s hydraulic brakes need adjustment:
- The brake lever requires more force than usual to stop the bike.
- The brake lever pulps all the way to the handlebar.
- You hear rubbing sounds as you ride.
Step-by-Step Guide to Adjusting Rad Power Bikes Hydraulic Brakes
Adjusting hydraulic brakes on your Rad Power Bike is simple and can be done at home. Follow these steps, and you’ll be good to go:
- Start by loosening the brake caliper bolts.
- Squeeze the brake lever and hold it down.
- Tighten the caliper bolts while holding down the brake lever.
- Release the brake lever.
- Check if there’s any brake rub by spinning the wheel forward and backward.
- If there’s brake rub, adjust the caliper placement and repeat steps 2–5 until there’s no rub.
Adjusting hydraulic brakes on a Rad Power Bike once in a while will ensure your bike’s brakes work correctly, ensuring your safety while riding. As always, if you’re having any trouble adjusting your hydraulic brakes or don’t feel comfortable doing it yourself, seek help from a professional bike mechanic. Ride safe!
Adjusting the Brakes on Your Radrover 6 Plus Rad Power Bike
If you’ve been using your Radrover 6 Plus bike for a while, you may notice that the brakes aren’t working as well as they should be. Luckily, adjusting the brakes on this bike is a straightforward process that anyone can do with a few simple tools and a bit of patience.
Tools You Will Need
Before you start adjusting your brakes, gather the following tools:
- Allen wrench set
- 15mm wrench
- Phillips head screwdriver
- Flat-head screwdriver
Adjusting the Brake Caliper
The first step is to adjust the brake caliper. Begin by loosening the two bolts on either side of the caliper. These bolts hold the caliper in place and allow you to adjust its position.
Next, squeeze the brake lever and hold it down. While holding down the brake lever, use the 15mm wrench to loosen the bolt located on the brake cable. This will allow you to adjust the tension on the brake cable. Tighten the bolt back up once you’ve made the necessary adjustments.
Now, move the caliper until it is centered over the rotor. Tighten the two bolts on either side of the caliper to secure it in place. Make sure the rotor is straight and not rubbing against the brake pads.
Adjusting the Brake Pads
The next step is to adjust the brake pads. Locate the small screw on the side of the brake caliper that holds the brake pads in place. Use the Phillips head screwdriver to adjust the screw until the brake pads are the proper distance from the rotor.
Once you’ve adjusted the brake pads, spin the wheel to make sure nothing rubs against it. If there is any rubbing, adjust the brake caliper until the wheel spins freely.
Adjusting the brakes on your Radrover 6 Plus bike is a simple process that can make a significant difference in the bike’s performance. By following the steps outlined above, you can ensure that your brakes are working correctly and safely. Remember always to test the brakes before taking your bike out for a ride.