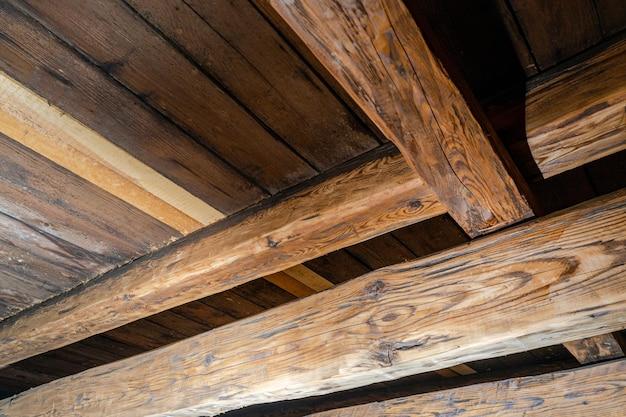
Cedar beams offer a timeless and rustic charm to any space, whether it’s indoors or outdoors. But if you want to truly enhance the beauty of cedar beams and protect them from weathering, staining is the way to go. Staining cedar beams not only adds a rich color but also helps to seal and preserve the wood, ensuring its longevity.
In this blog post, we will delve into the world of staining cedar beams. From answering questions like “Can cedar posts be stained?” or “Can you stain the rough side of cedar?” to exploring options for colors and finishes, we’ve got you covered. We’ll even tackle techniques for refinishing old wooden beams and caring for wooden beams in general.
So, if you’re ready to bring out the natural beauty of your cedar beams and transform your space, let’s dive into the wonderful world of staining cedar!
How To Stain Cedar Beams
If you’re lucky enough to have beautiful cedar beams in your home, you’ll want to keep them well-maintained and looking their best. Staining cedar beams not only enhances their natural beauty but also protects them from the elements. In this guide, we’ll walk you through the process of staining cedar beams, from preparation to application. So grab your apron and let’s get started!
Gather Your Supplies
Before diving into the staining process, make sure you have all the necessary supplies on hand. You’ll need:
- Safety goggles and gloves: Protect yourself while working with stain and other chemicals.
- Sandpaper: Smooth out any rough patches on the cedar beams before staining.
- Wood cleaner: Prep the surface by cleaning the beams to remove dirt and grime.
- Stain: Choose a high-quality stain that suits your desired color and finish.
- Brushes and rollers: Opt for brushes with natural bristles for better coverage.
- Drop cloths and painter’s tape: Shield surrounding areas from accidental stains.
- Stir sticks and paint trays: Ensure the stain is well-mixed and easy to work with.
- Optional: Stain conditioner or sealer: These products can help achieve an even finish.
Prepare the Surface
The key to successful staining is proper preparation. Start by thoroughly cleaning the cedar beams. Use a wood cleaner specifically designed for outdoor use and follow the instructions on the label. Scrub the beams gently with a brush or sponge, paying attention to any particularly dirty areas. Rinse off the cleaner with water and let the beams dry completely.
Next, give the beams a light sanding to create a smooth surface for the stain to adhere to. Use a medium-grit sandpaper and work in the direction of the wood grain. Wipe away any dust or debris with a damp cloth.
Choose the Perfect Stain
Now comes the fun part—selecting the stain that will give your cedar beams that wow factor. Consider the overall style and aesthetic of your space when choosing a color. If you want to preserve the natural hue of the wood, opt for a clear or transparent stain. For a richer, darker tone, go for a semi-transparent or solid color stain. Don’t forget to test the stain on a small, inconspicuous area of the beam to ensure you love the final result.
Apply the Stain
It’s finally time to get that stain applied! Before diving in, make sure you’re wearing your safety goggles and gloves. Stir the stain thoroughly to ensure any settled pigments are well-mixed. Pour the stain into a paint tray, and if desired, add a stain conditioner or sealer to enhance the finish.
Using a brush or roller, start applying the stain to the cedar beams. Work in long, even strokes, following the wood’s natural grain. Be sure to coat all sides and edges of the beams for complete protection and a seamless finish. If you notice any drips or pools of excess stain, gently brush them out to avoid uneven drying.
Let It Dry and Enjoy the Results
After applying the stain, let the cedar beams dry completely. The drying time can vary depending on the weather conditions, so be patient. Once dry, carefully inspect the beams for any missed spots or areas that appear lighter than others. If necessary, apply a second coat for a deeper color.
Once you’re satisfied with the staining, sit back and admire your handiwork. The beautifully stained cedar beams will add warmth and character to your home. Don’t be surprised if your friends start asking for staining tips—just remember to share this handy guide with them. Happy staining!
Get Your Cedar Beams to Beam!
Staining cedar beams is a rewarding DIY project that allows you to showcase the natural beauty of this incredible wood. Remember, proper surface preparation and using high-quality stain are the keys to success. With a little patience and a steady hand, you’ll have stunning cedar beams that are the envy of your neighbors. So channel your inner DIY guru and start staining—your cedar beams are waiting to shine!
FAQ: How To Stain Cedar Beams
Can Cedar Beams Be Stained?
Yes, cedar beams can indeed be stained. In fact, staining cedar beams is a popular way to enhance their natural beauty and protect them from the elements. Staining can bring out the rich colors and distinctive grain patterns of cedar, giving your beams a stunning and professional finish.
Can You Stain the Rough Side of Cedar?
Absolutely! Whether your cedar beams have a smooth or rough surface, you can still stain them to achieve the desired look. Staining the rough side of cedar can create a rustic and textured appearance, adding character and depth to your beams.
Can You Stain Cedar Dark?
Absolutely! Staining cedar dark is a fantastic way to achieve a dramatic and elegant look. You can choose from a variety of dark stains, such as espresso or ebony, to create a striking contrast against the natural lighter tones of cedar. Just make sure to test the stain on a small inconspicuous area first to ensure it achieves the desired color.
How Do You Finish Rough Cedar?
To finish rough cedar, first, sand the surface lightly using fine-grit sandpaper to smooth out any roughness and ensure an even application of stain. Next, wipe away any dust using a clean cloth. Finally, apply a high-quality stain using a brush or roller, following the manufacturer’s instructions. Allow the stain to dry completely before applying additional coats, if desired.
What Do You Stain Cedar With?
When it comes to staining cedar, using an oil-based stain is generally recommended. Oil-based stains penetrate the wood deeper, offering better protection and longer-lasting results. Additionally, they bring out the natural beauty of cedar and provide a rich, durable finish.
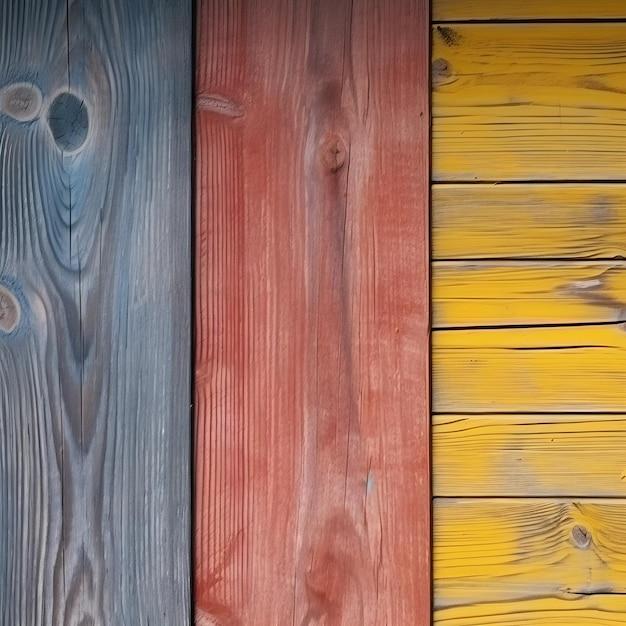
What Colors Can You Stain Cedar?
You have a plethora of options when it comes to staining cedar. From classic browns and reds to modern grays and blues, the color choices are virtually endless. Whether you prefer a warm and traditional look or a trendy and contemporary vibe, you can find a stain to match your personal style and complement your space.
How Do You Refinish Old Wooden Beams?
Refinishing old wooden beams can breathe new life into them. Start by cleaning the beams thoroughly, removing any dirt or debris. Then, lightly sand the surface to remove any existing finish and reveal fresh wood. After wiping away any dust, apply a suitable wood stain using a brush or roller, and let it dry completely. Finally, protect the refinished beams with a coat of clear varnish or sealant for added durability.
Can You Stain Cedar White?
Staining cedar white is not a common choice, as cedar typically has beautiful natural tones that people prefer to highlight rather than cover. However, if you still want to achieve a white finish, consider using a semi-transparent or opaque white stain specifically designed for use on cedar. Keep in mind that this may require multiple coats to achieve the desired opacity.
Can You Stain Cedar Wood?
Yes, you can definitely stain cedar wood. In fact, staining cedar is a great way to enhance its natural beauty, protect it from the elements, and prolong its lifespan. Whether you have cedar siding, furniture, or beams, a quality stain can transform the look of cedar wood and provide long-lasting protection against the elements.
How Do You Look After Wooden Beams?
Taking care of your wooden beams is essential for maintaining their beauty and structural integrity. Regularly inspect them for any signs of damage, such as cracks or rot, and address any issues immediately. Keep the beams clean and free from dirt or debris, especially in outdoor applications. Additionally, consider applying a fresh coat of stain or sealant every few years to protect them from moisture and UV damage.
Should Cedar Be Primed?
Cedar typically does not require priming before staining. However, if your cedar beams have been previously painted or are severely weathered, priming the surface can help ensure an even and long-lasting stain application. Choose a primer specifically formulated for use on cedar and follow the manufacturer’s instructions for best results.
How Do You Finish Exterior Beams?
When it comes to finishing exterior cedar beams, it’s essential to use a stain and sealant specifically designed for outdoor use. These products provide added protection against UV rays, moisture, and temperature fluctuations. Prepare the surface by cleaning and lightly sanding it, then apply the stain using a brush or roller. Finally, apply a high-quality exterior sealant to protect the beams and ensure their longevity.
How Do You Seal Rough Cedar Posts?
To seal rough cedar posts, first, ensure the surface is clean and dry. Next, apply a suitable wood sealer or preservative using a brush or sprayer, following the manufacturer’s instructions. Pay special attention to the end grains of the posts, as they tend to absorb more moisture. Allow the sealer to penetrate the wood and dry completely before applying additional coats, if necessary.
How Long Does Rough Cedar Need to Dry Before Staining?
Before staining rough cedar, it’s crucial to allow it enough time to dry properly. Depending on the local weather conditions and the moisture content of the wood, rough cedar can take anywhere from a few days to several weeks to dry completely. To ensure the wood is ready for staining, perform a moisture test using a moisture meter. Once the moisture content is below the recommended level, you can proceed with staining.
What Stain Looks Good on Cedar?
Cedar’s natural beauty pairs well with a wide range of stains. Classic colors like cedar-tone and redwood can enhance its warm tones, while darker stains like mahogany or walnut can create a bold and sophisticated look. For a more contemporary style, try gray or ebony stains to add a touch of elegance and modernity to your cedar beams.
How Do You Stain Rough Cedar Beams?
Staining rough cedar beams can be a straightforward process. First, prepare the surface by sanding lightly to remove any roughness. Wipe away any dust using a clean cloth. Then, apply the stain using a brush or roller, following the wood grain for an even application. Allow the stain to penetrate the wood for the recommended time, then wipe away any excess stain. Finally, let the beams dry completely before applying additional coats or sealant, if desired.
Do You Need to Prime Cedar Before Staining?
In most cases, priming cedar before staining is not necessary. However, if your cedar beams have significant imperfections or previously painted surfaces, using a primer can create a smoother surface and improve the stain’s adhesion. Choose a primer specifically formulated for use on cedar, and follow the manufacturer’s instructions for optimal results.
How Do You Gel Stain Wood Beams?
Gel staining wood beams can create a beautiful and durable finish. To begin, ensure the surface is clean and free from dust or debris. Apply the gel stain using a brush or cloth, following the direction of the wood grain. Let the stain sit on the wood for a few minutes to allow for better penetration. Afterward, wipe away the excess stain using a clean cloth. Let the gel stain dry according to the manufacturer’s instructions, and apply additional coats if desired.
How Do You Stain Wood Beams Without Sanding?
While sanding is typically recommended before staining wood beams, it is possible to skip this step under certain circumstances. If the wood is already smooth and free from roughness, you may proceed with staining directly. Just ensure the surface is clean and free from any dust or debris. Additionally, keep in mind that staining without sanding may result in a slightly less even finish, so testing on a small inconspicuous area is always a good idea.