Are you tired of your pictures looking flat and one-dimensional? Do you want to add a creative touch to your images? Well, you’re in luck! In this blog post, we’ll explore the art of stacking pictures on top of each other. Whether you’re a professional photographer or just someone who enjoys capturing memorable moments, this technique can take your photos to the next level.
With the advancement of technology, you no longer need expensive editing software or a professional camera to stack pictures. We’ll cover various methods and tools that can help you achieve stunning results, including smartphone apps and popular editing programs like Lightroom. So, whether you want to overlap pictures on your phone or merge photos together for a more artistic impression, we’ve got you covered.
Join us as we delve into the exciting world of image stacking and unlock the secrets to creating captivating visual stories. Get ready to elevate your photography skills and bring your pictures to life in ways you never thought possible. Let’s dive in!
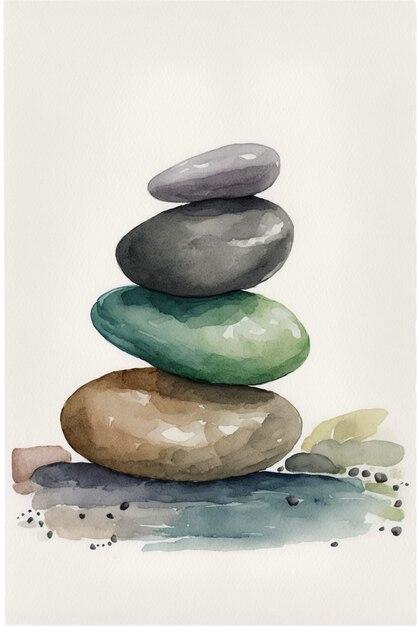
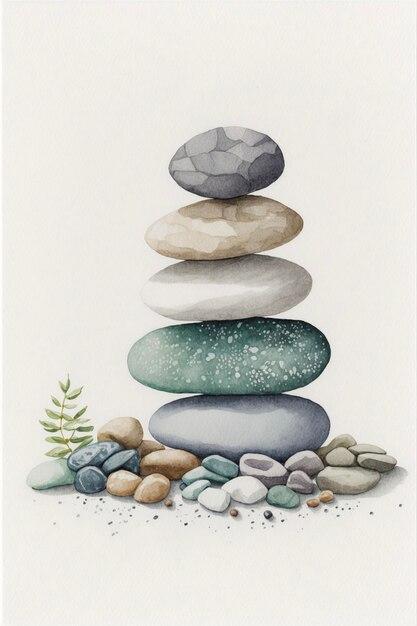
How to Easily Stack Pictures on Top of Each Other
Have you ever wondered how to stack pictures on top of each other in a neat and organized way? Well, look no further! In this guide, we will take you through the step-by-step process of effortlessly stacking pictures to create stunning visual displays.
Choosing the Perfect Picture Stack
Before we dive into the nitty-gritty of stacking pictures, let’s talk about the importance of selecting the right images. You want your stack to tell a story or evoke a certain emotion, so choose pictures that complement each other in terms of colors, themes, or subjects. Break out all those treasured memories captured in photos or gather a collection of artsy shots to create an eye-catching visual arrangement.
Organizing the Picture Stack
The key to a visually appealing picture stack is organization. You don’t want your pictures scattered haphazardly; instead, strive for an artfully arranged display. Start by sorting your pictures in the desired order. Consider the flow and narrative you want to create with your stack. You could go for a chronological arrangement or arrange them based on themes or colors. The choice is yours!
Preparing Your Workspace
Now that you’ve chosen and organized your pictures, it’s time to prepare the space where you will build your stack. Find a clean and flat surface, such as a table or a desk, with enough room to lay out your pictures. Make sure the surface is large enough to accommodate the entire stack and any additional props you may want to include.
Materials You’ll Need
To stack pictures like a pro, gather the following materials:
- Pictures: Whether printed or digital, make sure you have all the pictures you want to include.
- Mounting tape or adhesive putty: These will ensure your pictures stay in place when stacked.
- Ruler or measuring tape: This will help you measure and align the pictures accurately.
- Level or carpenter’s square: Using these tools will help you maintain straight lines and ensure a professional-looking stack.
Building Your Picture Stack
Now comes the exciting part—building the picture stack itself! Follow these steps:
-
Start with the bottom picture: Lay your first picture on the workspace, ensuring it is aligned and straight. Use the ruler or measuring tape to measure the distance from the edge of the picture to the surface to keep consistent spacing.
-
Adding subsequent pictures: For each additional picture, apply a small piece of mounting tape or adhesive putty on the back and carefully stick it on top of the previous picture. Remember to align the edges and maintain a consistent spacing. Use your ruler or measuring tape to check that everything is perfectly aligned.
-
Checking for levelness: Periodically use a level or carpenter’s square to ensure your stack is straight. This will help you maintain a professional and polished appearance.
-
Completing the stack: Continue adding pictures one by one until you’ve built your entire stack. Take your time and enjoy the creative process. Adjustments can always be made along the way.
Displaying Your Picture Stack
Congratulations! You’ve successfully stacked your pictures like a pro. Now it’s time to decide how and where to display your masterpiece. Whether you choose to frame the stack, mount it on a wall, or create a freestanding arrangement, make sure it is showcased in a location where it can be admired and appreciated.
Stacking pictures on top of each other doesn’t have to be a daunting task. With the right approach and a dash of creativity, you can effortlessly create stunning visual displays that tell captivating stories. Follow the steps outlined in this guide, and you’ll soon have a picture stack that will be the envy of all who see it.
Happy stacking, and may your pictures always be perfectly aligned!
FAQ: How To Stack Pictures On Top Of Each Other
Welcome to our comprehensive FAQ guide on how to stack pictures on top of each other! If you’ve ever wondered how to combine multiple images or add one picture on top of another, you’re in the right place. In this FAQ-style guide, we’ll address common questions and provide easy-to-follow answers on stacking pictures. So let’s dive right in and discover the exciting world of picture stacking!
How do I put a picture on another picture
To put one picture on top of another, you can use photo editing software like Adobe Photoshop or smartphone apps like Canva. With these tools, you can easily overlay one image onto another, adjust the opacity, position, and size to achieve the desired effect. It’s a fantastic way to create unique and artistic compositions!
How do you add a picture on top of another in Lightroom
While Adobe Lightroom primarily focuses on photo adjustments and organizing your image library, it does offer limited capabilities for stacking pictures. Although it may not have the same level of control as Photoshop, you can still combine images in Lightroom by using the “Print” module to overlay and position them manually. Consider using Photoshop for more advanced overlaying needs.
Can I combine photos on iPhone
Absolutely! If you’re an iPhone user, you’ll be happy to know that combining photos is a breeze. Utilize built-in features like the “Markup” tool or third-party apps such as Snapseed or Adobe Photoshop Express. These apps provide intuitive interfaces that allow you to overlay pictures seamlessly to create stunning compositions.
Can Lightroom stack photos
While Lightroom is primarily designed for photo editing and organization, it does offer a limited capability for stacking photos. To stack images in Lightroom, you can use the “Library” module, select the images you want to stack, right-click, and choose “Stacking” > “Group Into Stack.” This feature is handy when dealing with multiple exposures or similar shots.
What is camera focus stacking
Camera focus stacking is a technique used in photography to achieve a greater depth of field. By capturing multiple images at different focus points and then blending them together, you can create a final image with enhanced sharpness throughout. It’s especially useful for close-up macro shots or landscape photography with foreground elements.
How do I stack multiple images in Lightroom
To stack multiple images in Lightroom, follow these simple steps:
1. Navigate to the “Library” module.
2. Select the images you want to stack.
3. Right-click on the selected images.
4. Choose “Stacking” > “Group Into Stack.”
5. Lightroom will automatically stack the selected images together for easy organization and management.
How do I overlap pictures on my phone
If you want to overlap pictures on your phone, you can use various photo editing apps available for both Android and iOS. Apps like PicsArt, Superimpose, or Pixlr provide intuitive interfaces that allow you to easily overlap and blend multiple photos together. Get creative and let your imagination run wild!
Is there an app to merge two pictures together
Yes, several apps allow you to merge two pictures together effortlessly. You can try popular apps like Photoshop Express, Snapseed, or Canva. These apps offer user-friendly interfaces and a range of features to overlay, blend, and merge two pictures seamlessly. Start exploring and let your inner artist shine!
What is image stacking photography
Image stacking photography involves combining multiple images of the same scene to reduce noise, achieve greater dynamic range, or enhance details. This technique is commonly used in astrophotography, where multiple exposures are stacked to reveal finer details of stars and galaxies. Image stacking can also be applied in various other genres of photography to achieve optimal results.
What app lets you put pictures on top of each other
If you’re looking for an app that lets you put pictures on top of each other, you can try versatile options like Adobe Photoshop Express, Canva, or Pixlr. These apps provide user-friendly interfaces and powerful tools to overlay, blend, and position multiple pictures to create stunning compositions. Unleash your creativity and have fun experimenting!
How do you take focus stacking photos
To take focus stacking photos, follow these steps:
1. Set your camera on a sturdy tripod to eliminate any potential movement.
2. Choose a subject with multiple depth layers, such as a flower or product.
3. Set your camera to manual focus mode.
4. Take a series of photos, adjusting the focus point slightly between each shot.
5. Import all the images into focus stacking software like Adobe Photoshop or Helicon Focus.
6. Let the software work its magic and automatically blend the images to create a final photo with increased sharpness throughout.
How do I stack pictures on top of each other on iPhone
On an iPhone, you can stack pictures on top of each other using apps like Adobe Photoshop Express, Canva, or Pixlr. These apps offer simple and intuitive interfaces that allow you to overlay, blend, and position multiple pictures seamlessly. Take your iPhone photography to the next level and create stunning compositions with ease!
Is Focus stacking cheating
Absolutely not! Focus stacking is a legitimate technique used in photography to overcome the limitations of depth of field. It allows photographers to capture and present subjects with incredible detail and sharpness. Like any other artistic tool, focus stacking is simply a means to achieve a desired visual outcome. So go ahead, explore this technique, and create breathtaking images!
What is HDR stacking
HDR (High Dynamic Range) stacking is a technique used to capture a wide range of tones in a single image. By taking multiple exposures at different exposure values and blending them together, you can create an image that showcases both shadow and highlight details more effectively. HDR stacking is widely used in landscape photography to capture scenes with high contrast.
How do you use focus bracketing
To use focus bracketing, follow these steps:
1. Set your camera to manual focus mode.
2. Frame your subject and compose your shot.
3. Enable focus bracketing in your camera settings.
4. Take a series of photos with different focus points.
5. Import the images into focus stacking software like Adobe Photoshop or Helicon Focus.
6. Let the software automatically blend the images to create a final photo with enhanced depth of field.
Is Focus stacking worth it
Absolutely! Focus stacking is definitely worth it, especially if you’re striving for impeccable sharpness and detail in your images. It’s particularly beneficial in macro photography or situations where a greater depth of field is required. By using focus stacking, you can elevate the quality of your photos and amaze viewers with the level of detail captured.
How do I paste a picture onto another picture on iPhone
To paste a picture onto another picture on an iPhone, you can use apps like Snapseed, Adobe Photoshop Express, or Canva. These apps provide straightforward ways to overlay and blend pictures seamlessly. With just a few taps, you’ll be able to combine images and create fantastic compositions directly from your iPhone.
How can I merge two photos together
Merging two photos together is easy with various photo editing tools available. On a computer, you can use software like Adobe Photoshop or GIMP. If you’re on a smartphone, apps like Adobe Photoshop Express, Pixlr, or Snapseed provide intuitive interfaces to merge, blend, and overlay two photos. Explore these options and let your creativity soar!
How can I merge two photos for free
There are several free options available to merge two photos. For computer users, software like GIMP and Photopea offer powerful photo editing features for free. On smartphones, apps like Snapseed, Adobe Photoshop Express, or Pixlr also provide free tools to merge and blend photos seamlessly. Start experimenting and create stunning merged images without breaking the bank!
How do you stack exposures
To stack exposures, follow these simple steps:
1. Set your camera on a sturdy tripod to prevent movement between shots.
2. Choose a subject and select the desired exposure settings.
3. Capture multiple photos of the same scene, varying your exposure settings between each shot.
4. Import the images into exposure stacking software like Adobe Photoshop or Photomatix.
5. Let the software blend the images together, generating a final photo with a wider dynamic range and better exposure balance.
How do I stack two photos
Stacking two photos is a straightforward process using software like Adobe Photoshop or GIMP. Follow these steps to stack two photos:
1. Open both images in the desired software.
2. Select and copy one image.
3. Paste the copied image onto the other image as a new layer.
4. Adjust the opacity, position, and blending mode to achieve the desired effect.
5. Fine-tune the result by using layer masks or other editing tools.
6. Flatten the image and save your stacked masterpiece!
Congratulations! You’ve reached the end of our comprehensive FAQ guide on how to stack pictures on top of each other. We hope this resource has provided you with the information you were seeking and inspired you to unleash your creativity in the world of picture stacking. Whether you’re a beginner or seasoned photographer, there’s always something new to explore in this captivating art form. So grab your camera or smartphone, start merging and stacking, and let your imagination run wild! Happy picture stacking in 2023!