Speeding up a specific section of a video can add excitement and dynamic energy to your footage. Whether you want to create a fast-paced montage or emphasize a particular moment, Premiere Pro offers a variety of tools to help you achieve this effect. In this blog post, we will explore different methods to speed up part of a clip in Premiere Pro, as well as provide answers to common questions like how to slow down a video, change the speed of a clip, and more.
If you’ve ever wondered how to slow down the middle of a clip or make your first fast then slower video, we’ve got you covered. In addition, we’ll delve into other related topics such as speed ramping and frame blending in Premiere Pro. Whether you’re a beginner or an experienced user, these tips and tricks will enhance your editing skills and make your videos stand out. So let’s dive in and discover the secrets of speeding up parts of a video in Premiere Pro!

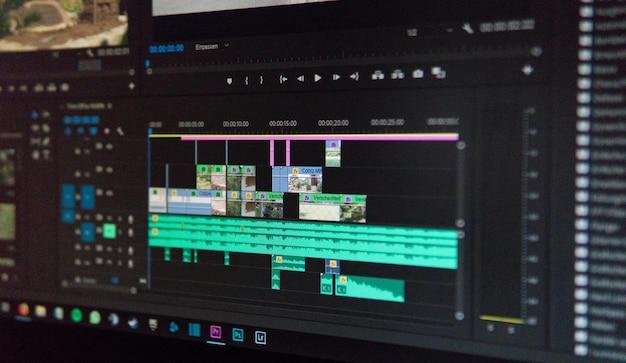
How to Accelerate a Portion of a Clip in Premiere Pro
So you’ve got a video clip that just doesn’t quite have the right pacing. Maybe the middle part drags on a bit too long, and you want to speed it up to keep your audience entertained. Lucky for you, Adobe Premiere Pro has got your back! With a few clicks and a touch of creative finesse, you can easily accelerate a specific segment of your footage. Let’s dive in and learn how to speed up part of a clip in Premiere Pro!
Adjusting Speed in Adobe Premiere Pro
Before we get started, make sure you have Adobe Premiere Pro installed on your computer. Once you have the software up and running, follow these steps to accelerate a portion of your video clip:
-
Import Your Footage: Open Premiere Pro and import your desired clip into the project. Drag and drop it onto the timeline to begin editing.
-
Set Sequence Settings: Right-click on your clip in the timeline and select “Set to Frame Size” to ensure optimal viewing.
-
Cut and Isolate the Segment: Use the razor tool (shortcut: C) to split your clip into three sections – the part you want to speed up, the section before it, and the section after it.
-
Select the Target Segment: Click on the segment you wish to accelerate to highlight it.
-
Access Time Remapping: Right-click on the highlighted segment and choose “Show Clip Keyframes” followed by “Time Remapping” from the drop-down menu.
Ace the Acceleration
Now that you’ve reached the Time Remapping feature, it’s time to give your clip the boost it needs. Here’s how to proceed:
-
Enable Time Remapping: In the Effect Controls panel, click on the stopwatch icon next to “Time Remapping” to enable keyframes. This action will create a new keyframe at the beginning of the target segment.
-
Add the Speed Keyframes: Move the playhead to the start of the segment you want to accelerate. Click on the “Add/Remove Keyframe” button to create a new keyframe at this point.
-
Adjust the Speed: Position the playhead at the end of the segment and add another keyframe using the “Add/Remove Keyframe” button. Now, change the speed percentage in the Effect Controls panel for the second keyframe. Increase it to speed up the selected portion.
Pro tip: If you want a subtle acceleration, simply increase the speed by a modest amount like 25% to maintain smoothness and avoid a hectic feel.
- Smooth the Transition: If you prefer a gradual transition in speed, select the keyframes and right-click on them. From the context menu, choose “Temporal Interpolation” and then “Ease Out” for the first keyframe and “Ease In” for the second one. This adjustment will ensure a smoother transition between the normal speed and the accelerated segment.
Exporting and Enjoying Your Accelerated Clip!
Once you’re satisfied with the speed adjustments, it’s time to export your masterpiece. Follow these final steps to complete the process:
-
Preview and Review: Playback your clip in the timeline to ensure the timing and acceleration meet your expectations.
-
Save Changes: Save your project by clicking on File in the menu bar and selecting Save. This step will preserve all your hard work.
-
Export to Video File: To create a video file of your accelerated clip, navigate to File in the menu bar and choose Export. Select the appropriate settings and save your file to your desired location.
Congratulations! You’ve successfully accelerated a portion of your clip in Adobe Premiere Pro. Now you can showcase your editing skills and keep your viewers engaged with a video that moves at just the right pace. Give yourself a pat on the back and keep experimenting with this powerful tool to take your video editing to the next level!
So go forth, my fellow video editors, and may your acceleration endeavors be both exhilarating and smooth!
FAQ: How To Speed Up Part Of A Clip In Premiere Pro
How do I slow down part of a video
To slow down part of a video in Premiere Pro, you can use the “Time Remapping” feature. This allows you to adjust the speed of specific sections of the clip. Simply right-click on the clip, select “Speed/Duration,” and enable “Time Remapping.” Then, add keyframes to the clip’s timeline and adjust their positions to create a slowdown effect. Easy peasy!
How do you speed up a clip in Final Cut Pro
If you prefer using Final Cut Pro, speeding up a clip is a breeze. First, select the desired clip on your timeline. Then, go to the “Modify” menu and choose “Retime” and “Fast” or “Fastest.” Voila! Your clip will now play at an accelerated pace. Don’t blink or you might miss something!
How do you slow down the middle of a clip in Premiere
Ever wanted to slow down the middle of a clip for dramatic effect? Premiere Pro has got your back! After splitting the clip at the point where you want the slowdown to begin, apply the “Rate Stretch” tool to that section. Dragging the right edge of the clip will extend the duration and create a slow-motion segment. Perfect for adding emphasis to the juiciest parts of your footage!
How do you change the speed of a clip in Premiere
To change the speed of a clip in Premiere, follow these steps. Right-click on your clip, go to “Speed/Duration,” and tada! A little window will pop up, allowing you to adjust the clip’s speed by percentage. Increase it to make things speed up, or decrease it for a leisurely pace. Get creative and let your video fly or take a leisurely stroll!
How do you speed a keyframe
Speeding up a keyframe? No problemo! In Premiere Pro, select the keyframe you want to speed up and hold down the “Shift” key. Then, drag it left or right. This nifty trick lets you control the speed of your keyframes like a seasoned pro. Zoom, zoom, and off you go!
What is ramp in Premiere Rush
Ah, the glorious ramp effect in Premiere Rush! It allows you to smoothly transition from one speed to another within a clip. Simply add a “Speed” keyframe at the beginning and end of where you want the ramp effect. Then, adjust the speed values to create a seamless acceleration or deceleration. It’s like riding a rollercoaster of cinematic wonders!
How do I speed up keyframes in After Effects
To speed up keyframes in After Effects, select the desired keyframes and press “Control” + “Shift” + “D” on your keyboard. This snazzy shortcut duplicates the keyframes and places them closer together, effectively speeding up the animation. Isn’t it neat when things move faster than The Flash?
How do I speed up a video on my computer
To speed up a video on your computer, you can make use of various video editing software like Premiere Pro, Final Cut Pro, or even Windows Movie Maker. Just import your video, locate the speed settings, and increase the playback speed. Watch your video zoom past like a rocketship! 3…2…1…blastoff!
How can I increase the speed of my recording
If you’re looking to increase the speed of your recording, you can do so using audio software like Audacity or Adobe Audition. Import your recording, find the tempo or speed settings, and increase it to your desired pace. Your speech will become snappy and energetic, leaving your listeners in awe of your accelerated brilliance!
What is speed ramping in Premiere Pro
Ah, speed ramping in Premiere Pro, the secret ingredient to make your videos go from zero to hero! Speed ramping helps you smoothly transition from one speed to another within a single clip or across multiple clips. It adds flair and excitement to your footage, making it feel like an adrenaline-fueled masterpiece. Buckle up, because things are about to get intense!
How do you speed up a section in Premiere Pro
To speed up a specific section in Premiere Pro, you’ll need to use keyframes. Start by enabling the “Time Remapping” feature, then add keyframes where you want the speed to change. Increase the clip’s speed between these keyframes, and voilà! You’ve just turbocharged that section of your video. Get ready for some turbo-charged awesomeness!
How do you make your first fast then slower video
Creating a video that starts fast and gradually slows down is a fun way to engage your viewers. In Premiere Pro, apply the “Speed Ramp” effect to your desired clip. Set the speed to increase at the beginning and decrease towards the end. This clever technique gives your video a dynamic vibe, capturing attention until the very last frame. Prepare for an unforgettable visual journey!
How do you speed up parts of a video
To speed up specific parts of a video, you can use the “Time Remapping” feature in your video editing software. This allows you to customize the speed of different sections within a single clip. Simply add keyframes at the desired start and end points of the speed change, and adjust accordingly. It’s like having your own magic speed wand!
How do you speed up videos
Speeding up videos is a piece of cake! In your video editing software, locate the speed adjustment settings for your clip. Increase the speed by a percentage and watch the magic happen! Your video will zip through at an accelerated pace, leaving your audience breathless. Ready, set, speedy!
How do you speed up a video in Adobe Premiere
To speed up a video in Adobe Premiere, right-click on the clip and select “Speed/Duration.” Then, simply increase the speed percentage until you achieve your desired result. Be prepared for some serious excitement as your video races ahead, leaving snail-paced clips in the dust!
What is a speed ramp
Speed ramps are like rollercoasters for your videos! A speed ramp is a technique used to smoothly transition from one speed to another within a clip or across multiple clips. It adds a dash of style and impact to your footage, making your audience hold on for the thrilling ride. Get ready to accelerate or decelerate like a pro!
What are two ways to change the speed of a clip in Premiere Pro
In Premiere Pro, you have not one, but two slick ways to change the speed of your clips. The first method involves using the “Speed/Duration” option, where you can adjust the speed by percentage. The second method is by utilizing keyframes with the “Time Remapping” feature. Both methods are simple yet powerful tools to shape the tempo of your videos. The choice is yours, speedster!
How do you speed up a ramp in Premiere Pro
Speeding up a ramp effect in Premiere Pro is a piece of cake. Start by creating a speed ramp using two keyframes. Then, with the second keyframe selected, hold down the “Alt” key and drag it towards the end of the ramp. Boom! Your ramp just got a turbo boost, propelling your video faster than ever. Get ready for an exhilarating journey!
How do you frame blend in After Effects
To frame blend in After Effects, right-click on your footage and select “Frame Blending” and “Pixel Motion.” This nifty feature helps create smoother motion by blending frames together. It’s like applying a magical softening filter that makes your animation as smooth as silk. Prepare to witness the wonders of frame blending!
How do you slow transition in Final Cut
If you’re using Final Cut and want to slow down a transition, it’s a piece of cake! After applying your desired transition between two clips, select the transition and choose “Retime Speed” from the menu. Reduce the speed and marvel as the transition slows down to create a dramatic effect. It’s a slow-motion fiesta!
How do I change my keyframe speed
In Premiere Pro, changing the speed of keyframes is super easy. Select the desired keyframes, right-click on them, and select “Keyframe Velocity.” From there, you can adjust the speed and duration of your keyframes. It’s like having a speed dial for your animations. Faster, slower, the choice is yours!
How do you speed up multiple clips in After Effects
When it comes to speeding up multiple clips in After Effects, the secret lies in using an expression. Hold on to your hat, here’s the magic formula: select all the clips you want to speed up, go to the “Time” menu, and choose “Enable Time Remapping.” Then, hold down the “Alt” key while dragging the last keyframe to the desired position. Ta-da! All the selected clips will now speed up together. Speeding up in style!
Let the speedy adventures begin! Now you have all the knowledge to turbocharge your clips, create smooth transitions, and dazzle your audience with filmmaking finesse. Buckle up, hit the gas, and immerse yourself in the captivating world of video speed manipulation. Who said time can’t be manipulated? Happy editing!
Pro tip: Remember to save your work before going full throttle!