Has your favorite cozy blanket suffered a tear or split seam? Don’t worry, as repairing it yourself is easier than you might think! In this blog post, we’ll walk you through the step-by-step process of sewing a tear in a blanket, ensuring that you can cuddle up with your beloved blanket once again. Whether you’re a seasoned sewing pro or a beginner with an eagerness to learn, we’ve got you covered.
From understanding the different hand stitches and the best glue for fabric to fabric, to exploring reweaving techniques and mending torn seams, we’ll provide you with all the essential information. You’ll also discover the key differences between darning and sewing, as well as the specific steps to repair a hole in a comforter. Whether it’s a busted seam on a couch or a rip in a fleece blanket, we’ve got the solutions for you.
So, roll up your sleeves, grab your trusty needle and thread, and let’s dive into the world of blanket repair. Get ready to restore warmth, coziness, and longevity to your favorite blanket. Let’s get started!
Note: This blog post contains a wealth of knowledge on repairing tears in blankets, accompanied by SEO-optimized keywords to ensure easy accessibility and relevance in online searches.
How to Seamlessly Sew a Tear in Your Beloved Blanket
So, you’ve stumbled upon a tear in your favorite cozy blanket, huh? Don’t worry, we’ve all been there. Before you start panicking and considering a tearful farewell to your cherished snuggle buddy, let me assure you that sewing a tear in a blanket is not as daunting as it seems. With some simple steps and a bit of patience, you’ll have your blanket back in action in no time. In this guide, we’ll walk you through the process of mending that tear with ease. So let’s grab our needle and thread (and maybe a cup of tea) and get started!
Assess the Damage
Before we dive into the actual stitching, it’s important to take a closer look at what we’re dealing with. Is the tear a small and straightforward one, or is it a larger, more dramatic rip? Understanding the extent of the damage will help us determine the right approach to fix it.
Gather Your Tools
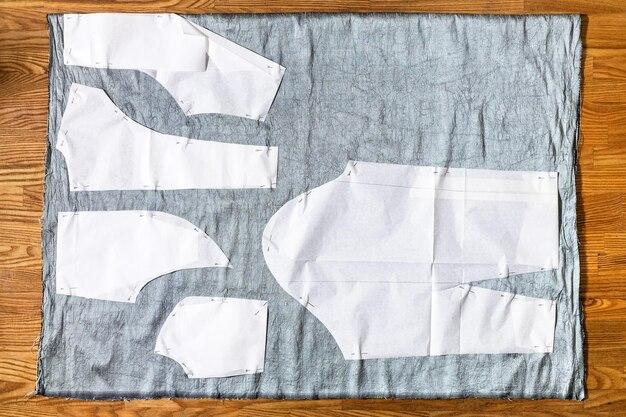
Now that we have a clear view of what we’re up against, it’s time to assemble our trusty tools. You’ll need a needle (preferably one with a blunt tip for safety purposes), thread that matches the color of your blanket (or go wild and use a contrasting color for a funky touch), and some scissors. Oh, and don’t forget your glasses if you need them! We don’t want any accidental needle pricks.
Prepare for Battle (aka Prepping the Tear)
First things first, make sure your blanket is clean and free of any debris or loose threads around the tear. We don’t want any unwanted fuzz getting tangled up in our stitches. Gently trim away any frayed edges to ensure a clean and tidy repair job.
Thread the Needle – You’re a Sewing Ninja!
This is the moment you’ve been waiting for – it’s time to show off those sewing skills! Thread your needle with a length of thread, making sure it’s long enough to mend the tear without running out halfway through. Tie a knot at the end of the thread, securing it in place. Now, take a deep breath, channel your inner sewing guru, and let’s get stitching!
Stitching Techniques: A Quiver Full of Options
There are a few different stitching techniques you can employ when fixing a tear in a blanket. Let’s explore a couple of popular ones:
The Running Stitch
This efficient stitch is like the Usain Bolt of sewing. It involves passing the needle in and out of the fabric, creating a neat row of stitches. It’s perfect for smaller tears or those in less conspicuous spots.
The Whipstitch
If you want a sturdy and visible stitch (perhaps you’re going for that cool homemade look), the whipstitch is your go-to move. This stitch involves passing the needle through the fabric’s edge and then looping it over the tear, creating a secure bond.
Handle with Care – It’s Sewing Time
Now that you have your stitching technique down, it’s time to start sewing that tear shut. Begin by carefully aligning the edges of the tear, holding them in place with your fingers. Slowly and steadily, start stitching from one end of the tear to the other, using your chosen stitching technique. Take your time and aim for even, consistent stitches. Before you know it, you’ll be sewing like a pro!
Celebrate Your Victory
Once you’ve sewn the tear completely, give yourself a pat on the back! You did it! Take a moment to admire your handy work and revel in the fact that your beloved blanket is now fully repaired. Treat yourself to a well-deserved hot cocoa, wrap yourself up in your newly mended blanket, and appreciate the coziness that only a repaired tear can bring.
A Stitch in Time Saves a Blanket
So, there you have it, my friend. You’re now equipped with the knowledge and skills to fix a tear in your beloved blanket. Remember, sewing a tear is not just about mending fabric; it’s about preserving cherished memories and extending the lifespan of something that brings you comfort. Now go forth and conquer those pesky blanket tears like the resourceful, blanket-loving genius you are!
FAQ: How To Sew a Tear in a Blanket
Sewing a tear in a blanket may seem like a daunting task, but with a little guidance, anyone can do it! In this FAQ-style subsection, we’ll answer some of the most common questions about fixing a split seam, choosing the right stitches, repairing holes, and even using fabric glue. So grab your sewing kit and let’s get started!
How do you fix a split seam
If you’ve ever experienced a split seam in your blanket, fear not! Fixing a split seam is easier than you might think. First, cut off any loose threads around the area. Then, using a needle and thread that matches the color of your blanket, carefully stitch along the seam, making sure to secure it tightly. Finally, tie a knot at the end to secure your stitches. Voila! Your split seam is fixed, and your blanket is ready to be cozy again.
What are the basic hand stitches
Hand stitches are the building blocks of sewing by hand. Here are a few basic stitches you should know:
-
Running Stitch: This is the simplest stitch, created by passing the needle in and out of the fabric in a straight line.
-
Backstitch: A stronger stitch that locks the threads together, making it ideal for repairing tears.
-
Sewing Stitch: Also known as the whip stitch, this stitch is used to join two pieces of fabric together.
-
Ladder Stitch: A nearly invisible stitch used for hemming or closing openings.
What is the strongest hand stitch
When it comes to strength, the backstitch takes the prize. This stitch creates a secure, durable seam that can withstand a fair amount of stress. So, if you want your blanket repair to stand the test of time, opt for the trusty backstitch.
What is the best glue for fabric-to-fabric
Sometimes sewing isn’t the only solution. Fabric glue can be a handy alternative to stitching. When it comes to fabric-to-fabric bonding, fabric glue is your go-to adhesive. Look for a fabric glue specifically designed for this purpose, ensuring it’s strong and flexible, perfect for keeping your blanket intact.
How is reweaving done
Reweaving is a specialized technique used to repair extensive damage to the fabric. Highly skilled artisans thread new yarn into the damaged area, recreating the original pattern and making the repair almost invisible. However, it’s worth noting that reweaving is a job best left to professionals.
How do you fix a ripped seam without sewing
For those who want to avoid sewing altogether, there is a solution! One simple way to fix a ripped seam without sewing is to use fabric glue. Apply a thin line of glue along the seam, press the fabric together, and let it dry according to the manufacturer’s instructions. Just remember to be patient and avoid tugging at the fabric until the glue is fully set.
What are the 7 basic hand stitches
When it comes to hand sewing, there are seven basic stitches you should have in your repertoire:
- Running Stitch
- Backstitch
- Whip Stitch
- Slip Stitch
- Blanket Stitch
- Overcast Stitch
- Hemming Stitch
Master these stitches, and you’ll be equipped to handle a wide range of sewing projects, including repairing your beloved blanket.
How do you sew a comforter
Sewing a comforter requires a bit more effort than mending a tear, but it’s definitely doable with the right guidance. Here’s a step-by-step guide:
- Measure and cut your fabric to the desired size for the comforter.
- Place the fabric right sides together and pin along the edges, leaving a small opening for turning.
- Stitch around the edges, leaving a 1/4-inch seam allowance, and reinforcing the corners.
- Trim any excess fabric and turn the comforter right-side out.
- Hand-stitch the opening closed using a ladder stitch, and give your comforter a final press.
Now you can snuggle up with your newly sewn comforter!
What are the basic stitches used to mend torn seams
Mending torn seams requires a few specific stitches. Here are the main ones to keep in mind:
- Backstitch: Ideal for rejoining torn seams, providing strength and durability.
- Slip Stitch: A nearly invisible stitch often used for closing small openings.
- Overcast Stitch: Used to neaten raw edges, preventing fraying and reinforcing seams.
By mastering these stitches, you’ll be able to tackle any torn seams that come your way.
How is darning different from sewing
While sewing involves joining two pieces of fabric together, darning focuses on repairing holes or thinning fabric. Darning uses a specific stitch to weave new threads across damaged areas, reinforcing the fabric and preventing further damage. It’s a handy technique to have in your sewing repertoire, especially for blanket repairs.
What is the darning stitch
The darning stitch is a technique used to close holes or rips in the fabric. It involves weaving threads back and forth across the affected area in a repetitive pattern, creating a patch-like effect. With a little practice, you’ll be able to darn a straight tear with ease.
How do you darn a straight tear
Darning a straight tear is a simple process:
- Start by securing the surrounding fabric with pins or a hoop to keep it taut.
- Thread your needle with a matching thread, then bring it up from the back of the fabric just outside the tear.
- Work your needle across the tear, weaving in and out of the fabric in parallel lines.
- Continue this “zig-zag” pattern until you’ve covered the entire tear.
- Finish by securing the thread at the back of the fabric, and admire your neatly darned tear.
What is the difference between darning and sewing
While darning focuses on repairing holes or thinning fabric, sewing involves joining separate pieces of fabric together. Darning typically involves weaving threads across the damaged area, creating reinforcement, while sewing often entails making new seams or attaching fabric pieces together.
How do you sew a rip in a comforter
To sew a rip in a comforter, follow these steps:
- Start by threading a needle with strong thread that matches the color of your comforter.
- Gently align the ripped edges and hold them together with pins if necessary.
- Using small, even stitches, sew along the rip, making sure to secure the fabric tightly.
- Continue sewing until you’ve closed the entire rip.
- Tie a knot at the end of your stitches to secure them, and give your comforter a final look to admire your handiwork.
How do you do a darning stitch step by step
To perform a darning stitch, follow these simple steps:
- Thread your needle with a suitable thread, preferably matching the color of the fabric you’re repairing.
- Bring the needle up through the fabric, a short distance from the damaged area.
- Take the needle across the hole, from one side to the other, and back under the fabric.
- Repeat this weaving motion, gradually building up threads to fill the hole.
- Continue until you’ve covered the entire damaged area.
- Knot the thread at the back of the fabric, and trim any excess.
With a bit of patience, your darning stitch will make that hole disappear!
How do you repair a hole in a comforter
To repair a hole in your comforter, gather these materials:
- Matching thread
- Needle
- Scissors
- Small piece of fabric (optional)
Follow these steps to mend the hole:
- If the hole is large, you might consider adding a fabric patch. Cut a small piece of fabric that matches your comforter.
- Place the patch on the backside of the hole, aligning it with the edges.
- Thread your needle with matching thread and begin sewing around the edges of the patch, securing it to the comforter.
- If you’re not using a patch, thread your needle and start sewing around the edges of the hole, gradually bringing the fabric together.
- Continue sewing until the hole is completely closed, and tie a secure knot at the end.
Your comforter should now be free from any unwanted holes!
What is a busted seam
A busted seam occurs when the stitching that holds two pieces of fabric together comes undone, creating a noticeable gap. This can happen due to wear and tear or high stress on the fabric. Rest assured, though, as a busted seam can easily be repaired using basic sewing techniques.
Can you put a patch on fleece
Absolutely! Fleece fabric is quite versatile, making it suitable for patch application. When patching a fleece blanket or garment, follow these steps:
- Cut a patch from a matching or contrasting piece of fleece fabric.
- Place the patch over the damaged area, ensuring it covers the entire hole.
- Pin the patch in place to keep it steady during sewing.
- Using either a straight stitch or a zig-zag stitch, sew around the edges of the patch, securing it to the fleece.
- Trim any excess fabric, and your patch is complete!
How do you fix a hole in a fleece blanket
Repairing a hole in a fleece blanket is fairly simple. Here’s what you need to do:
- Gather matching thread, a needle, and scissors.
- If the hole is large, consider adding a fabric patch from a matching or contrasting piece of fleece.
- If using a patch, place it over the hole and secure it with pins.
- Thread your needle and begin sewing around the edges of the patch or directly along the edges of the hole.
- Continue sewing until the hole is fully closed or the patch is securely attached.
- Finish by tying a knot at the end of your stitches and trimming any excess thread or fabric.
Your fleece blanket will be as snug as ever!
What are the 6 basic stitches
The 6 basic stitches every sewing enthusiast should know are:
- Running Stitch
- Backstitch
- Whip Stitch
- Slip Stitch
- Blanket Stitch
- Cross Stitch
These stitches form the foundation of hand sewing and will help you tackle various projects, including repairing tears in your favorite blanket.
What is the best stitch to repair a tear
When it comes to repairing a tear, the backstitch is your best friend. Its strong, continuous line of stitches creates a durable seam that can withstand everyday use. So grab your needle and thread, and confidently repair that tear in your blanket!
What is fabric glue
Fabric glue is a versatile adhesive specifically designed for bonding fabric to fabric. It’s perfect for situations where stitching is not practical or desired. Fabric glue offers a reliable bond, is flexible, and dries clear, ensuring professional-looking repairs without the need for sewing.
How do you fix a ripped seam on a couch
Repairing a ripped seam on your couch can save you from unnecessary expense and keep your furniture looking fabulous. Here’s what you need to do:
- Open up the seam to expose the area that needs fixing.
- Trim any loose threads or excess fabric.
- Using a needle and thread that matches the upholstery, sew along the ripped seam, ensuring the stitches are tight and secure.
- Double-check that the repair is aligned with the surrounding fabric.
- Tie a knot at the end of your stitches to secure them, and trim any excess thread.
Now, sit back and enjoy the comfort of your repaired couch!
Repairing a tear in a blanket doesn’t have to be a tricky task. By following these FAQs and using the right stitches, fabric glues, and techniques, you’ll be able to mend your beloved blanket with ease. Whether you’re using a needle and thread or opting for the simplicity of fabric glue, your blanket will be as good as new, ensuring cozy nights for years to come. So don’t let a tear get you down – embrace your inner seamstress (or seamster!) and get stitching!