Are you planning a summer party and want to include everyone’s favorite frozen treat – popsicles? Well, you’ve come to the right place! Serving popsicles at a party may seem simple, but there are a few tricks to ensure that your icy delights stay frozen and satisfying until the very last bite. In this blog post, we will cover everything from packing and transporting popsicles to keeping them frozen throughout the event. So, get ready to impress your guests with perfectly chilled popsicles that will keep them coming back for more!
How do you pack and transport popsicles
When it comes to packing and transporting popsicles, you want to ensure that they stay frozen and intact. One option is to use a cooler packed with ice or dry ice. Dry ice is an excellent choice for longer trips, as it can keep your popsicles frozen for several hours. However, be cautious when handling dry ice, as it can be dangerous if not handled properly. If you’re only going a short distance, using regular ice in a cooler can also do the trick. Wrapping each popsicle individually in plastic wrap or parchment paper can help prevent them from sticking together and preserve their shape.
Now that we have the fundamentals covered, let’s dive into the rest of the article to discover more tips and tricks for serving popsicles at your next party!
How to Make Popsicle Time a Party Hit!
Are you ready to take your popsicle game to the next level? Look no further! In this guide, we’ll show you how to serve popsicles in a way that will make your party unforgettable. From unique presentation ideas to delicious flavor combinations, get ready to become the popsicle guru of your circle!
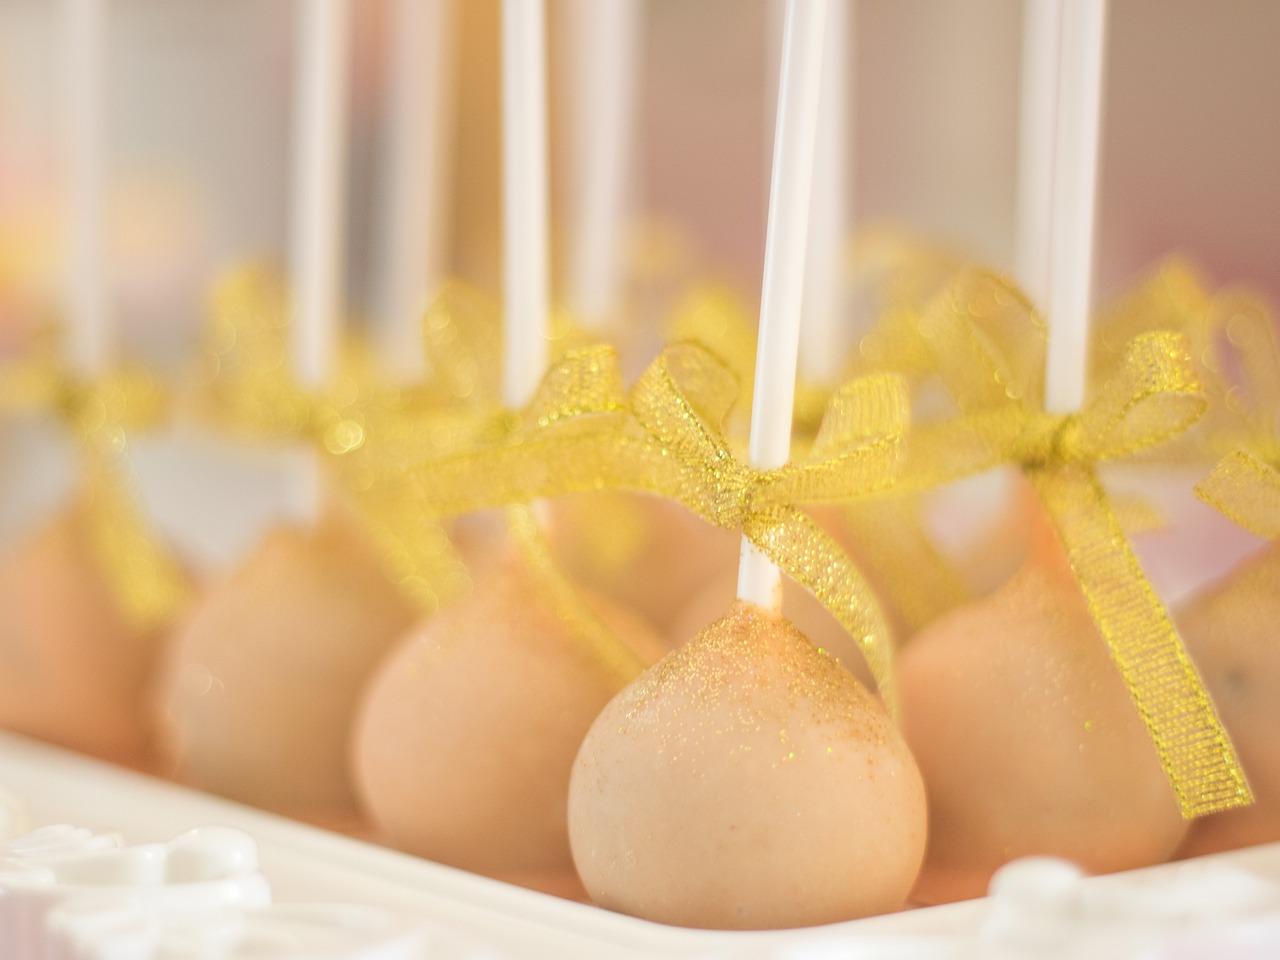
Get Creative with Presentation
1. Popsicle-Infused Cocktails: A Match Made in Party Heaven!
Why settle for ordinary drinks when you can combine them with popsicles to create mind-blowing cocktails? Imagine a margarita with a zesty lime popsicle dunked right in – it’s the perfect balance of refreshing and boozy! Trust us; your guests will be clamoring for more of these liquid popsicle wonders.
2. Ice, Ice Baby: Popsicle Ice Cubes that Wow!
Who needs regular ice cubes when you can jazz up your beverages with popsicle ice cubes? Simply freeze popsicles in cube trays and add them to glasses of lemonade, soda, or even sangria for an extra burst of flavor. These colorful and tasty ice cubes will melt away any dull moments at your party!
Standout Flavor Combinations
3. Not Your Grandma’s Popsicles: Gourmet Flavors to Impress
Say goodbye to the usual cherry and orange popsicles and give your guests something unexpected. Experiment with gourmet flavors like lavender and honey, watermelon jalapeno, or even champagne raspberry! Your popsicle game will be so strong that your guests won’t even remember grandma’s boring old classics.
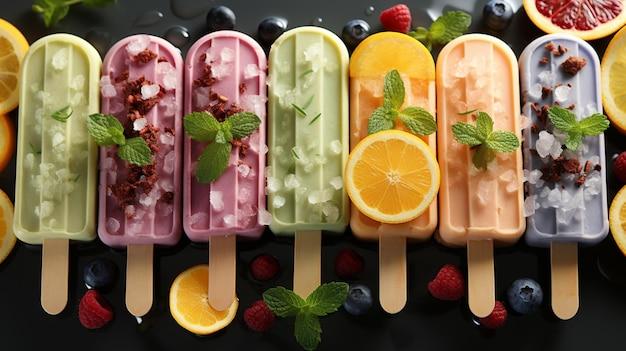
4. Swirls of Yum: Layered Popsicles for the Win!
Take your popsicle game to the next level by creating beautiful layered popsicles with different flavors. Get fancy with vibrant swirls or elegant ombre effects. Not only will they taste amazing, but they’ll also look like a work of art. Prepare for the oohs and aahs!
The Ultimate Popsicle Experience
5. Popsicle DIY: Let Your Guests Play Chef
Set up a DIY popsicle station where guests can create their own frozen masterpieces. Provide various flavors, toppings like crushed cookies or sprinkles, and even a selection of flavored syrups for drizzling. Let the creativity flow as your guests become popsicle artists and take pride in their icy creations.
6. Popsicle Pairings: Treats that Go Hand in Hand
Don’t let your popsicles feel lonely! Pair them with complementary treats to enhance the experience. Serve fruit popsicles with a side of fresh fruit skewers, or dip chocolate popsicles into a bowl of warm chocolate sauce. The combination of flavors and textures will leave your guests utterly delighted.
Now armed with the knowledge of how to serve popsicles like a boss, go forth and create the most epic popsicle party ever! Your guests will be in awe of your popsicle prowess, and your party will be the talk of the town. So, gather your supplies, freeze those popsicles, and let the popsicle party begin! Cheers to frozen delights and memorable moments!
FAQ: How To Serve Popsicles At A Party
How do you pack popsicles
When it comes to packing popsicles, you want to make sure they stay icy and delicious until it’s time to serve them. To pack your popsicles, follow these quick and easy steps:
- Gather your popsicles and a suitable container.
- Place the popsicles upright in the container, ensuring they are snug and won’t tip over.
- If you’re worried about melting, wrap the popsicles in plastic wrap or parchment paper to create a barrier against heat.
- Cover the container tightly with a lid or aluminum foil to further keep the cold air in.
- For added insulation, you can place the container in a cooler or wrap it in a towel before storing in the freezer.
How do you transport frozen popsicles
Transporting frozen popsicles may seem like a challenge, but with these tips, you’ll have no trouble bringing them to your party intact:
- First, make sure your popsicles are properly packed according to the previous instructions.
- Once packed, transfer the container of popsicles to a cooler or insulated bag.
- Fill any empty spaces in the cooler or bag with ice packs or crushed ice.
- Make sure the cooler or bag is sealed tightly to prevent warm air from entering.
- Place the cooler or bag in a well-ventilated area of your car to minimize exposure to heat.
- Avoid opening the cooler or bag frequently during transportation to maintain a consistent temperature.
How do you serve ice pops at a party
Serving ice pops at a party is a surefire way to beat the heat and wow your guests. Follow these steps to ensure a successful popsicle extravaganza:
- Remove the container of popsicles from the freezer and let them sit at room temperature for a few minutes to soften slightly. This will make them easier to remove from their molds.
- Gently twist or push each popsicle from its mold. If they’re being stubborn, running the mold under warm water for a few seconds should do the trick.
- Arrange the popsicles on a tray or in a container lined with parchment paper to catch any drips.
- Provide guests with napkins or paper towels, as popsicles can be delightfully messy.
- Encourage creativity by offering various toppings or dips for guests to enhance their popsicle experience.
- Enjoy watching your guests delight in the cool and refreshing treat!
How do you keep popsicles frozen at a party
Keeping popsicles frozen at a party may seem like a challenge, especially when the heat starts to bear down. But with these tips, you’ll be able to keep your popsicles frosty and refreshing:
- Begin by setting up a designated area for your popsicles, such as a table with a tablecloth or tray lined with ice packs.
- Before transferring your popsicles to the serving area, make sure they have spent enough time in the freezer to reach the desired level of frozen goodness.
- Use a cooler or insulated container filled with ice packs or crushed ice to maintain a chilly environment for your popsicles.
- As guests help themselves to popsicles, periodically check and replenish the ice in the cooler or container to ensure a consistently cool temperature.
- Keep the serving area shaded from direct sunlight to minimize heat exposure.
- Remind your guests to eat their popsicles in a timely fashion to prevent them from melting into a puddle of disappointment.
How do you keep dry ice popsicles frozen
Dry ice popsicles add an element of magic and intrigue to any party. To keep them frozen and awe-inspiring, follow these steps:
- Place your dry ice popsicles in a deep cooler or well-insulated container.
- Layer the bottom of the cooler with regular ice or ice packs.
- Carefully place the dry ice popsicles on top of the ice layer, making sure they are not in direct contact with the dry ice.
- Use towels or additional insulation material to fill any gaps between the popsicles and the sides of the cooler.
- Cover the popsicles with more regular ice or ice packs, ensuring they are well surrounded.
- Keep the cooler closed as much as possible to maintain the freezing temperature.
- Monitor the level of dry ice in the cooler and replenish if necessary.
- Enjoy the mesmerizing effect of the dry ice as it slowly evaporates and keeps your popsicles icy cold!
How do you transport ice cream for 12 hours
Transporting ice cream for an extended period can be a tricky endeavor, but with these tips, your sweet treat will survive the journey:
- Start by placing your ice cream containers in a freezer for at least 12 hours prior to transportation, ensuring they are thoroughly frozen.
- Once properly frozen, quickly transfer the containers to a sturdy cooler or insulated bag.
- Fill any empty spaces in the cooler or bag with crushed ice or ice packs.
- Securely close the cooler or bag to prevent warm air from entering.
- Place the cooler or bag in the trunk or an air-conditioned part of your vehicle. Avoid direct sunlight and areas prone to excessive heat.
- Limit opening the cooler or bag during transportation to maintain a consistently cold environment.
- Arrive at your destination promptly and transfer the ice cream to a freezer as soon as possible.
How Long Will ice cream last in a cooler with ice
Ice cream is a delightful treat, but it doesn’t fare well in warm temperatures. However, with proper insulation, you can prolong the life of your frozen delight:
- In a cooler with ice, ice cream can last approximately 2-3 hours without significant melting, depending on the conditions.
- To extend the duration, keep the cooler in a shaded, cool area and avoid opening it frequently.
- Remember that the type and thickness of insulation will also affect the longevity of your ice cream in a cooler.
What goes well with popsicles
While popsicles are fantastic on their own, pairing them with complementary flavors and treats can elevate the experience. Here are some delightful ideas to accompany your popsicles:
- Fresh fruit slices or chunks, such as watermelon, pineapple, or strawberries, provide a burst of juiciness.
- Dip or drizzle your popsicles with melted chocolate or caramel for added indulgence.
- Crushed cookies, nuts, or sprinkles make fantastic toppings, adding texture and flavor.
- Pair fruity popsicles with tangy yogurt for a refreshing and creamy twist.
- For a grown-up treat, consider serving popsicles alongside a selection of chilled wines, bubbly beverages, or creative cocktails.
What happens if you mix dry ice with regular ice
Mixing dry ice with regular ice can create a chilling and visually captivating effect. However, it’s important to proceed with caution:
- Dry ice, which is extremely cold at around -78.5 degrees Celsius (-109.3 degrees Fahrenheit), can cause regular ice to freeze faster and form an icy crust.
- When combining dry ice with regular ice, ensure proper ventilation to prevent the buildup of carbon dioxide gas.
- Avoid direct contact between skin and dry ice, as it can cause frostbite.
- Remember to always handle dry ice with protective gloves and follow safety guidelines.
Will dry ice mess up a cooler
Dry ice can be a fantastic tool for keeping your goodies cold, but it’s essential to use it properly to avoid any mishaps:
- When using dry ice in a cooler, make sure it is well-ventilated to prevent the buildup of carbon dioxide gas.
- Avoid placing dry ice directly in contact with the cooler’s plastic or other delicate materials, as it can cause damage.
- Do not seal the cooler completely when using dry ice, as carbon dioxide gas can build up pressure and potentially damage the cooler.
- Follow proper safety precautions when handling dry ice to prevent any accidents or injuries.
How do you wrap paletas
To ensure your paletas stay intact and remain ice-cold until serving, follow these simple steps to wrap them securely:
- Start by taking a sheet of parchment paper or wax paper and lay it flat on a clean surface.
- Place the paleta diagonally on the paper, ensuring the stick is facing upwards and positioned towards the bottom corner.
- Fold the bottom corner of the paper over the paleta, covering the stick.
- Gently roll the paleta towards the opposite corner of the paper, wrapping it tightly.
- Once completely wrapped, twist the excess parchment paper around the stick to create a secure seal.
- Repeat the process for each paleta, and you’re ready to serve!
How do you seal a popsicle
Sealing a popsicle is not only practical for transporting or storing, but it also adds an element of fun to your frozen treat. Try these methods for sealing your popsicles:
- Dip the open end of the popsicle into melted chocolate or a sweet syrup, such as caramel or fruit puree. Allow it to harden, creating a delicious seal.
- Use plastic wrap or parchment paper to tightly cover the exposed portion of the popsicle. Twist the ends or secure with a rubber band for extra protection.
- Slide the popsicle back into its original mold, ensuring the sticks are aligned. Freeze until the seal is solid, then remove from the mold and enjoy.
Will popsicles stay frozen in a cooler with dry ice
Absolutely! Using dry ice in conjunction with a cooler is an excellent way to keep your popsicles frozen and ready to enjoy. Here’s how:
- Place your popsicles in a sealed bag or container to protect them from direct contact with the dry ice.
- Line the bottom of the cooler with regular ice or ice packs.
- Carefully place the dry ice on top of the ice layer, making sure it doesn’t touch the popsicles directly.
- Layer more regular ice or ice packs on top to insulate the popsicles further.
- Close the cooler securely and watch as the combination of dry ice and regular ice creates an ultra-cold environment, keeping your popsicles perfectly frozen.
Do you have to put an ice pack in a lunch box
Using an ice pack in a lunch box is a wise decision to keep perishable items fresh and safe to eat. Here’s why it’s essential:
- An ice pack helps maintain a cool temperature inside the lunch box, preventing bacteria growth and food spoilage.
- It keeps food items, such as sandwiches, fruits, yogurt, and drinks, at an optimal temperature until lunchtime.
- Investing in a reusable ice pack is environmentally friendly and cost-effective in the long run.
How do you make ice packs for lunch boxes
Making your own ice packs for lunch boxes is a simple and economical solution. Follow these steps:
- Fill a sealable plastic bag or a leak-proof container with water, leaving some space at the top to allow for expansion when freezing.
- For a more flexible ice pack, consider adding a small amount of rubbing alcohol to the water before sealing the bag or container.
- Remove any excess air from the bag, ensuring it is tightly sealed, or securely close the container lid.
- Place the bag or container in the freezer and allow it to freeze completely.
- Once frozen, remove the ice pack from the freezer and place it in your lunch box to keep your food chilled and fresh throughout the day.
How do you keep popsicles frozen in a lunch box
Keeping popsicles frozen in a lunch box requires a little extra care to ensure they don’t melt before snack time. Try these tips:
- Use an insulated lunch box or bag to provide some degree of temperature control.
- Wrap the popsicles in plastic wrap or parchment paper to create a barrier against heat and minimize melting.
- Place the wrapped popsicles in a freezer-safe zipped bag before putting them into the lunch box.
- If possible, pack the lunch box with an ice pack or frozen water bottle to create a cool environment.
- Keep the lunch box away from direct sunlight and high temperatures, such as near a window or a radiator.
- Encourage your child to eat the popsicles earlier during lunchtime to prevent them from melting completely.
How do I keep my disposable lunch cold
Keeping a disposable lunch cold is all about proper insulation and a little extra planning. Follow these tips to keep your disposable lunch chilled:
- Start with a sturdy and insulated disposable lunch box or bag.
- Prepare your lunch the night before and place it in the refrigerator overnight to chill.
- Add an ice pack or a frozen water bottle to the lunch box to maintain a cool temperature throughout the day.
- Use individual containers or compartments to separate perishable items, reducing the chances of them affecting one another’s temperature.
- Keep the lunch box in a cool area, away from direct sunlight and heat sources.
- If possible, eat your lunch within 3-4 hours of packing it to ensure food safety and optimal taste.
How do you freeze popsicles without a cooler
Freezing popsicles without a cooler is entirely possible if you follow these simple steps:
- Prepare your popsicle mixture and pour it into popsicle molds as usual.
- Once the molds are filled, carefully place them on a flat tray or baking sheet that will fit in your freezer.
- Find a flat and stable area in your freezer to prevent any tipping or spilling.
- Carefully slide the tray or baking sheet with the filled molds into the freezer, ensuring they are level.
- Allow the popsicles to freeze for the recommended time, often around 4-6 hours, or as specified in your recipe.
- Once completely frozen, remove the tray or baking sheet from the freezer, gently separate the molds, and enjoy your delicious homemade popsicles!
Content generated by OpenAI.