Wooden ceilings can add a touch of warmth and natural beauty to your bathroom. However, since the bathroom is a high-moisture environment, it’s crucial to properly seal the wood to protect it from water damage and prevent rotting. In this blog post, we’ll explore different methods and products you can use to seal your wood ceiling effectively.
From selecting the right type of wood to applying sealants, we’ll cover everything you need to know about keeping your bathroom ceiling in top shape. Whether you’re wondering how to protect wooden bathroom ceilings, seal a tongue and groove ceiling, or waterproof a bathroom ceiling, we’ve got you covered.
So, if you’re ready to learn the best practices for sealing wood ceilings in the bathroom and ensuring their longevity, let’s dive in!
How to Achieve a Watertight Wooden Ceiling in Your Bathroom
So, you’ve decided to bring a touch of rustic beauty into your bathroom by installing a wooden ceiling. Good choice! But before you start mentally channeling your inner DIY expert, there’s one important step you shouldn’t overlook: sealing that lovely wooden ceiling to protect it from the inevitable moisture and humidity in a bathroom. Don’t worry, we’ve got your back! Follow this guide to seal your wood ceiling like a pro without a single leak or drip.
Choose the Right Sealant
First things first, you need to choose the right sealant for your wooden ceiling. Pay attention, though, because not all sealants are created equal! Look for a high-quality polyurethane-based sealant specially formulated for bathroom use, as it provides excellent moisture resistance. Yes, you heard that right: a sealant that’s both functional and bathroom-friendly. Who says you can’t have your cake and eat it too?
Prepare the Surface
Okay, you’ve got your sealant in hand, but hold your horses! Before you apply it, you need to make sure the surface is prepped and ready. A clean and smooth surface is key to achieving a waterproof wood ceiling. Get rid of any existing finish by sanding the surface gently. You don’t want to go all out and turn your bathroom into a sawdust disco, so be sure to wear a dust mask and sweep up any residue. We’re going for a rustic vibe, not a messy one!
Apply the Sealant
Now comes the fun part—applying the sealant. Before you start, though, open a window or turn on the exhaust fan, because things are about to get a little fumey. Follow the manufacturer’s instructions for the best application method, but here are a few pro tips to keep in mind: use a high-quality brush or roller for even coverage, and work in small sections to ensure you don’t miss any spots. It’s like painting, but with a watertight twist!
Don’t Forget the Cracks
No, we’re not talking about your favorite ’80s dance move. We’re referring to the gaps and cracks between wood panels that exist even in the finest craftsmanship. To ensure your wooden ceiling is truly watertight, don’t forget to seal these little crevices. Reach for a tube of wood filler and fill in any gaps, cracks, or holes before applying the sealant. Think of it as a spa day for your wooden ceiling—it deserves a little pampering too!
Repeat for Added Protection
One coat may be good, but two coats are even better. If you really want to go the extra mile and give your wood ceiling maximum moisture resistance, apply a second coat of sealant. Let the first coat dry completely before applying the second, and make sure to follow the recommended drying time on the packaging. It may feel like waiting for your favorite TV show to start, but trust us, the end result will be worth it!
Enjoy Your Sealed Wood Ceiling (Responsibly)
Once your wood ceiling is completely sealed, it’s time to sit back, relax, and revel in your DIY accomplishment. But wait, before you turn your bathroom into a splash zone, remember that even a sealed wood ceiling requires some care. Avoid excessive moisture and humidity by using the exhaust fan during showers and wiping away any water droplets that may find their way onto the ceiling. With a little bit of responsibility, your wooden ceiling will remain beautiful and watertight for years to come.
Sealing a wooden ceiling in your bathroom doesn’t have to be an intimidating task. With the right sealant, proper preparation, and a touch of patience, you can achieve a watertight wood ceiling that adds warmth and character to your bathroom for years to come. So, go ahead and bring the beauty of nature into your bathroom sanctuary—you’ll be singing the praises of your sealed wood ceiling in no time. Happy sealing!
Note: The information provided in this blog post is for educational purposes only and does not replace professional advice. Always consult with a qualified contractor or expert before undertaking any home improvement projects.
FAQ: How To Seal Wood Ceiling In Bathroom
What can I use to protect my bathroom ceiling
When it comes to protecting your bathroom ceiling, you want to choose materials that can withstand the moisture and humidity that often linger in this space. One great option is to use a sealant specifically designed for wood surfaces. This will create a protective barrier and help to prevent any moisture from seeping into the wood.
How can I shield my bathroom vanity from water damage
To protect your bathroom vanity from water damage, you can apply a waterproof sealant or finish. This will provide a layer of protection against any water that may come into contact with the surface. Additionally, consider using a silicone caulk to seal any gaps or joints between the vanity and the surrounding walls or floor.
What is the best way to finish a tongue and groove ceiling
Finishing a tongue and groove ceiling requires a few steps to ensure its longevity and beauty. Start by thoroughly cleaning the surface and removing any dirt or debris. Then, apply a high-quality primer to seal the wood and create a smooth base for your finish. Finally, choose a paint or stain that is specifically designed for wood surfaces and apply it evenly to achieve a professional-looking finish.
How can I protect wood in an outdoor setting
Protecting wood in an outdoor setting requires a robust defense against the elements. One effective method is to apply a clear outdoor sealant or finish. This will provide a protective layer that helps to prevent water damage, UV rays, and mildew growth. Don’t forget to reapply the sealant periodically to maintain its effectiveness.
What is the process of sealing a tongue and groove ceiling
Sealing a tongue and groove ceiling is a straightforward process that begins with cleaning the surface thoroughly. Next, apply a wood sealant using a paintbrush or roller, making sure to cover all the nooks and crannies between the boards. Allow the sealant to dry completely before applying additional coats if necessary. This will create a protective barrier against moisture and ensure the wood ceiling’s durability.
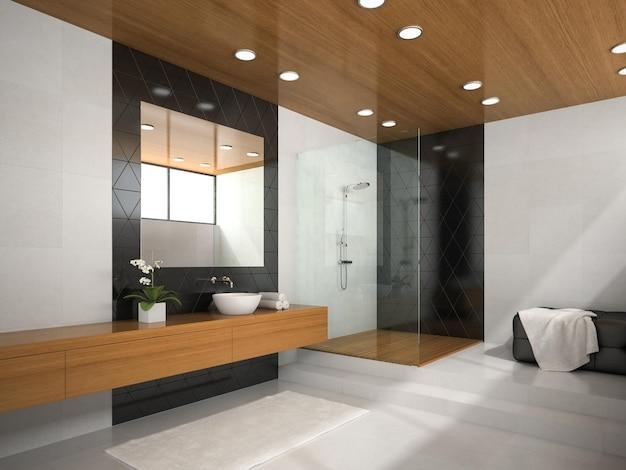
What material should I use for the shower ceiling
When it comes to choosing a material for your shower ceiling, it’s crucial to consider moisture resistance. One popular option is to use moisture-resistant drywall or cement board. These materials are specifically designed for use in damp areas and can withstand the humidity and occasional splashes of water that come with showering.
Can I use shiplap for my bathroom ceiling
Absolutely! Shiplap can add a stylish and rustic touch to your bathroom ceiling. Just ensure that you properly seal the wood before installation to protect it from any moisture and humidity in the bathroom. Applying a water-resistant finish or sealant will help maintain the beauty of the shiplap while safeguarding it against potential water damage.
How can I safeguard my wooden bathroom ceiling
To protect your wooden bathroom ceiling, start by applying a waterproof sealant or finish. This will create a barrier that shields the wood from moisture and prevents it from warping or rotting. Additionally, ensure proper ventilation in the bathroom to minimize the amount of moisture present in the space.
How can I shield my wooden bathroom vanity from water
To safeguard your wooden bathroom vanity from water, start by applying a waterproofing sealant or finish. This will provide a protective layer that repels water and prevents it from penetrating the wood. Additionally, wipe up any spills or splashes promptly and ensure adequate ventilation in the bathroom to minimize humidity levels.
What is the process of applying polyurethane to a wood ceiling
Applying polyurethane to a wood ceiling is a relatively simple process. First, prepare the surface by sanding it to create a smooth and even base. Then, use a brush or roller to apply the polyurethane in thin, even coats, following the wood grain. Allow each coat to dry completely before applying additional coats. This will create a durable and protective finish for your wood ceiling.
How do I protect wooden cabinets from water damage
To protect your wooden cabinets from water damage, consider applying a waterproof sealant or finish. This will create a protective barrier that prevents water from seeping into the wood and causing warping or rotting. In addition, be vigilant about wiping up any spills or splashes promptly to minimize contact with water.
How do I seal a wood ceiling effectively
Sealing a wood ceiling effectively requires a few steps. Start by cleaning the surface thoroughly to remove any dirt or debris. Next, apply a wood sealant using a brush or roller, making sure to cover all exposed areas thoroughly. Pay special attention to joints and corners where moisture can infiltrate. Allow the sealant to dry completely according to the manufacturer’s instructions before enjoying your beautifully sealed wood ceiling.
What should I apply to wood to make it waterproof
To make wood waterproof, you should apply a waterproof sealant or finish specifically designed for wood surfaces. These products create a protective barrier that repels water and helps to prevent damage such as warping, rotting, or mildew growth. Be sure to apply the sealant or finish according to the manufacturer’s instructions for optimal results.
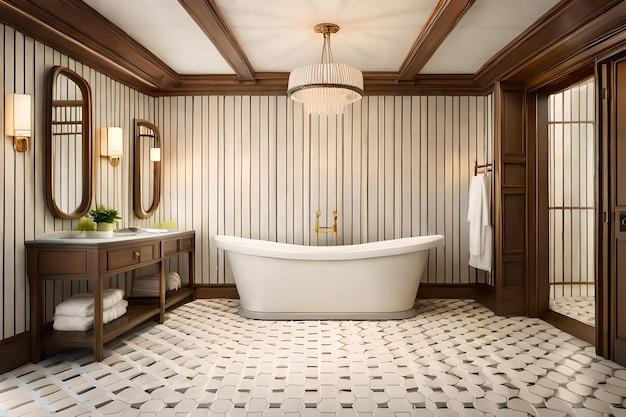
What type of wood can be used for a bathroom ceiling
When selecting wood for a bathroom ceiling, it’s important to choose a species that can withstand high humidity and moisture levels. Cedar, redwood, or cypress are popular choices due to their natural resistance to decay and moisture. Additionally, pressure-treated wood or specially coated hardwoods can also be suitable options for a durable bathroom ceiling.
Can I install wood planks on my bathroom ceiling
Certainly! Wood planks can add warmth and character to a bathroom ceiling. Ensure you choose the right type of wood that’s suitable for moist environments and properly seal the planks with a water-resistant finish or sealant before installation. This will protect the wood from water damage and ensure its longevity in your bathroom.
How can I waterproof my bathroom ceiling
Waterproofing your bathroom ceiling starts with selecting suitable materials that can withstand moisture and humidity. Choose moisture-resistant drywall or cement board for the ceiling and apply a waterproof sealant or paint designed for wet areas. Additionally, make sure there are no leaks in the plumbing above the ceiling and maintain proper ventilation to minimize moisture buildup.
Can I use tongue and groove for my bathroom walls
Absolutely! Tongue and groove can be a beautiful and practical choice for bathroom walls. This interlocking wood paneling provides an elegant look while creating a tight seal that helps to prevent moisture from getting behind the wall. Be sure to properly seal the tongue and groove panels with a water-resistant finish or sealant to protect the wood and maintain its beauty.
Does wood stain protect against water
Yes, wood stain can help protect against water to a certain extent. While stain does enhance the appearance of the wood, it is primarily a colorant and does not provide a strong barrier against moisture. To ensure proper water protection, it’s essential to apply a waterproof sealant or finish over the stained wood surface.
Is it necessary to waterproof my bathroom ceiling
Waterproofing your bathroom ceiling is essential to prevent water damage and maintain the integrity of the structure. Bathrooms are prone to high levels of humidity and moisture, which can lead to mold, mildew, and warping of materials. By waterproofing the ceiling, you create a protective barrier that helps to prevent these issues and ensures a long-lasting, beautiful bathroom.
How can I prevent untreated wood from rotting
To prevent untreated wood from rotting, there are several steps you can take. First, consider using pressure-treated wood, which has been infused with chemicals to resist rot and decay. If using untreated wood, apply a wood preservative or sealant that contains water repellents and fungicides. Ensure proper ventilation in the area and avoid direct contact with soil or prolonged exposure to moisture.
Remember, protecting and sealing your wood ceiling in the bathroom is crucial to maintaining its beauty and durability. By following these guidelines and using the right materials, you can ensure that your wood ceiling will stand the test of time, humidity, and enjoyable bathroom moments!
Note: This article is for informational purposes only and should not be considered professional advice. Always consult with a qualified professional for specific recommendations and guidance tailored to your unique situation.