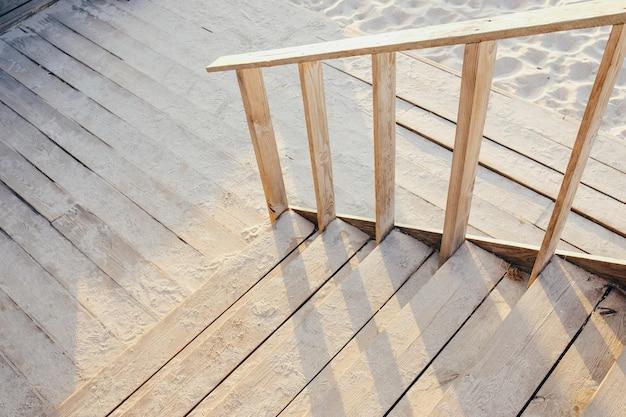
Are your stair spindles looking worn out and in need of some TLC? Sanding them is a crucial step in refinishing or painting your staircase and restoring its former glory. While it may seem daunting at first, with the right tools and techniques, you can easily achieve professional results.
In this comprehensive guide, we’ll walk you through everything you need to know about sanding stair spindles. From selecting the best grit for sanding wood to preparing the spindles for painting, we’ve got you covered. We’ll also answer common questions like whether you need to sand stairs before staining and share tips for cleaning up after sanding.
So, roll up your sleeves and get ready to transform your staircase. With our step-by-step instructions and handy tips, you’ll be well-equipped to tackle this rewarding DIY project. Let’s dive in and discover the secrets to sanding stair spindles like a pro!
Keywords: sand stair spindles, grit for sanding wood, refinish turned legs, sanding spindles, sand stairs before staining, sand chair spindles, clean stairs after sanding, best way to sand stairs, prepare stair spindles for painting, paint oak banister white, orbital sander vs palm sander, best sander, sand or strip furniture, liquid sandpaper for paint removal, paint stair spindles without removing, best sander for sanding stairs, strip wood spindles, sand rounded surfaces, sand varnished Bannister, sand spindles before painting.
How to Get Your Stair Spindles Sanded in Style
Gather Your Gear
Before you dive headfirst into the adventure of sanding your stair spindles, let’s make sure you have everything you need. Get your hands on some sanding paper, an electric or manual sanding tool (whichever tickles your fancy), and don’t forget to grab goggles and a mask to protect yourself from flying debris. Trust me, you don’t want splinters in your eyeballs or lungs – that wouldn’t be a look anyone strives for in 2023.
Start with a Pep Talk
Now that your gear is ready, you can give yourself a little motivational speech to get in the zone. Look at those stair spindles, standing tall and proud, just begging to be sanded. Tell yourself that you’re up for the challenge, that you’re capable of turning those wooden beasts into polished wonders. It might sound silly, but hey, a little self-affirmation never hurts anyone. Plus, it’s always good to have a cheering section, even if it’s just you and your pet goldfish.
Sanding Technique 101
It’s time to dig into the nitty-gritty of sanding those spindles. Hold your sandpaper or sanding tool firmly, but not with a death grip – you don’t want to end up with Popeye arms. Start from the top and work your way down, using gentle, circular motions. This way, you’ll ensure an even sanding surface without any pesky scratches. Remember, slow and steady wins the race, and in this case, that race is against Father Time, who always seems to be ticking faster than we’d like.
Patience is a Virtue
Be prepared to invest some quality time and patience into this endeavor. Sanding stair spindles is not a task to be rushed, my friend. Take it slow, sip some tea (or your beverage of choice), and let the sanding enchantment happen. You’ll be surprised at how relaxing it can be – almost like a spa day for your home. Enjoy the journey, and before you know it, those spindles will be looking smoother than a baby’s bottom.
Bonus Tip: Dance Like Nobody’s Watching
Who said sanding couldn’t be fun? Crank up your favorite tunes, channel your inner dance superstar, and bust some moves while sanding those spindles. Let the rhythm guide your sanding technique and turn this mundane task into a full-blown party. Who knows, your dancing might even attract a curious neighbor or two. Just make sure not to sand and twirl at the same time – safety first, my dear reader.
Celebrate Your Sanding Success
Once you’ve conquered the sanding journey and your stair spindles have undergone their makeover, it’s time to bask in your accomplishment. Take a step back (carefully) and marvel at the beauty you’ve created. Your spindles are now ready to take center stage, dazzling guests as they ascend your stairs. Remember, my friend, with a little sanding and a sprinkle of humor, nothing is impossible.

FAQ: How To Sand Stair Spindles
Welcome to our comprehensive FAQ guide on sanding stair spindles! Whether you’re a DIY enthusiast or a homeowner looking to freshen up your staircase, this guide is here to answer all your burning questions. We’ll cover everything from the best grit for sanding wood to preparing stair spindles for painting. So, let’s dive right in!
What is the Best Grit for Sanding Wood
When it comes to sanding wood, it’s crucial to choose the right grit for the job. For sanding stair spindles, we recommend starting with a medium grit sandpaper, such as 120 or 150. This will help remove any rough surfaces or imperfections. After that, you can progress to a fine grit sandpaper, around 220 or higher, for a smooth and polished finish.
How Do I Refinish My Turned Legs
Refinishing turned legs, including stair spindles, can breathe new life into your staircase. To achieve this, start by stripping off any old paint or finish using a paint stripper or sanding. After that, sand the surface using the recommended grit(s) we mentioned earlier until you achieve the desired smoothness. Finish off by applying a stain or paint of your choice, followed by a protective clear coat.
What Do You Use to Sand Spindles
To sand stair spindles effectively, you have a few options. If you’re working on a large area, an orbital sander can save you time and effort. However, for intricate and hard-to-reach places, a palm sander or sanding sponge is your best bet. These tools provide better control and allow you to navigate those tight corners with ease.
Do You Have to Sand Stairs Before Staining
Yes, sanding stairs before staining is highly recommended. Sanding helps to eliminate any scratches, rough patches, or old finish residues, ensuring a smooth and even surface for the stain to adhere to. Moreover, it helps the stain penetrate better, resulting in a richer and more vibrant color.
What is the Best Way to Sand Chair Spindles
Sanding chair spindles can be a real challenge, testing both your patience and dexterity. To make the task more manageable, wrap a piece of sandpaper around a small dowel or a pencil, and voila! You’ve created a handy makeshift sanding tool that can reach those tight spots effortlessly. Just be sure to use the appropriate grit for effective sanding.
How Do You Clean Stairs After Sanding
After sanding your stairs, it’s essential to remove all the dust and debris before applying any finishes. Start by vacuuming the area to eliminate loose particles. Then, using a damp cloth or tack cloth, wipe down the stairs to collect any remaining dust. This step ensures a clean surface, ready for staining or painting.
What is the Best Way to Sand Stairs
To tackle the task of sanding stairs, it’s best to work from top to bottom. Start by sanding the topmost step, moving downward systematically. Make sure to sand in the direction of the wood grain to avoid any unsightly scratches. Take your time and be thorough, ensuring consistent sanding across all steps for a professional-looking finish.
How Do You Prepare Stair Spindles for Painting
Preparing stair spindles for painting is crucial to achieve a flawless finish. Begin by sanding the spindles using the recommended grit(s) we mentioned earlier. This removes any existing finish and creates slight abrasions on the surface, allowing the paint to adhere better. Once sanded, wipe down the spindles with a damp cloth to remove all traces of dust, and you’re ready to apply your paint.
Should I Paint My Oak Banister White
Ah, the timeless dilemma of paint or preserve the natural beauty of oak. Ultimately, the choice between painting your oak banister white or leaving its natural color is a matter of personal preference and the style you’re aiming to achieve. If you prefer a fresh, modern look or wish to match your decor, painting it white can work wonders. However, if you admire the warmth and sophistication of natural oak, it’s best to preserve it with a clear coat or stain.
Which is Better, Orbital or Palm Sander
Choosing between an orbital or palm sander depends on the task at hand. For larger, flat surfaces, such as stair treads or landings, an orbital sander is more efficient, covering more ground quickly. On the other hand, if you’re dealing with rounded or intricate areas, like spindles or balusters, a palm sander provides better control and maneuverability. Both sanders have their strengths; it’s about selecting the right tool for the specific job.
Which is the Best Sander
When it comes to selecting the best sander, it often boils down to personal preference and the project requirements. However, two popular choices among DIY enthusiasts are the random orbital sander and the belt sander. The random orbital sander is versatile and excels at providing a smooth finish, while the belt sander is more powerful and ideal for tackling larger, more robust surfaces. Consider the project scope and your comfort level when choosing the best sander for you.
Is it Better to Sand or Strip Furniture
When restoring furniture, the decision to sand or strip depends on several factors. If your furniture has multiple layers of paint or varnish, stripping is often the preferred method to remove them all at once. Sanding, on the other hand, is suitable for removing old finish residues, light scratches, or imperfections. In some cases, a combination of both stripping and sanding may yield the best results. Assess the condition of your furniture and choose the method that suits it best.
Does Liquid Sandpaper Remove Paint
Liquid sandpaper is a convenient alternative to traditional sanding, but it does not remove paint or finishes like a stripping agent would. Instead, it serves as a deglosser, creating a rougher surface for better paint adhesion. So, if you’re looking to strip off paint entirely, liquid sandpaper won’t do the trick. However, for light surface preparation before painting, it can be a time-saving option.
How Do You Paint Stair Spindles Without Removing Them
The thought of removing and reinstalling stair spindles for painting can be daunting. But don’t worry, there’s a way around it! To paint stair spindles without removing them, start by protecting the surrounding surfaces with painter’s tape and drop cloths. Then, using a small brush or a sponge brush, carefully apply your chosen paint. Take your time, work methodically, and be sure to maintain a steady hand for a neat and professional finish.
What is the Best Sander for Sanding Stairs
When it comes to sanding stairs, convenience and maneuverability are key. A palm sander is often the best choice for this task. Its compact size and ergonomic design make it easier to navigate the tight spaces between stair spindles and treads. Additionally, it allows you to maintain control and precision while achieving a smooth and even finish.
How Do You Strip Wood Spindles
Stripping wood spindles requires careful attention and patience. Start by applying a paint stripper following the manufacturer’s instructions. Once the stripper has softened the old finish, gently scrape it off using a plastic scraper or putty knife. Take care not to damage the wood while scraping. Afterward, clean the spindles with mineral spirits or an appropriate cleaner to remove any residue. Finally, sand the spindles to achieve a smooth surface before applying a new finish.
How Do You Sand Rounded Surfaces
Sanding rounded surfaces, like stair spindles, can present a challenge. To make the task easier, consider using sanding sponges or sanding pads. These flexible and multipurpose tools conform to the shape of the surface, allowing you to effectively sand those curved areas. They bring control, precision, and a touch of finesse to the sanding process.
How Do You Sand a Varnished Banister
Sanding a varnished banister requires a systematic approach. Start by sanding the varnished surface with the recommended grit(s), working in the direction of the wood grain. This helps remove the glossy finish and smooth out imperfections. As you progress, change to finer grits for a smoother surface. Once you achieve the desired smoothness, wipe down the banister with a tack cloth to remove any dust before finishing or refinishing.
Do You Need to Sand Spindles Before Painting
Yes, sanding spindles before painting is highly recommended. Sanding creates a rougher surface, allowing the paint to adhere better and preventing it from chipping or peeling. It also helps ensure a smooth, professional finish. So, even if your spindles are already smooth, giving them a light sanding will improve paint adhesion and give your paint job longevity.
And there you have it – our comprehensive FAQ guide on sanding stair spindles! We hope we’ve answered all your burning questions and provided you with the information you need. Now go ahead, grab those sanders, and transform your staircase into a thing of beauty!
Happy sanding!