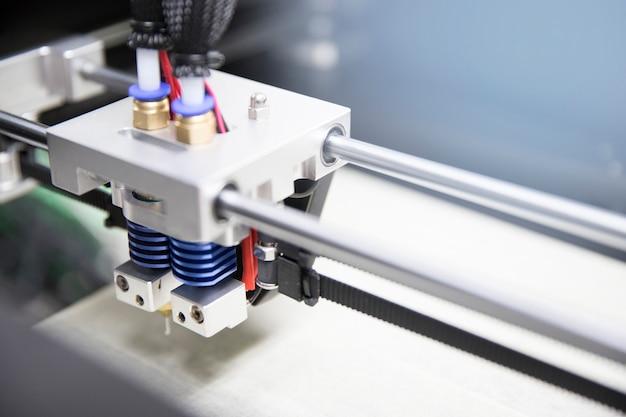
The Ender 3 3D printer has gained immense popularity among hobbyists and professionals alike. One crucial component of this printer is the Bowden tube, which plays a vital role in guiding the filament from the extruder to the hot end. However, over time, the Bowden tube may wear out or become clogged, affecting the print quality.
In this blog post, we will provide a step-by-step guide on replacing the Bowden tube on your Ender 3 printer. We’ll also address common issues such as filament jams and offer solutions to alleviate them. So, if you’re ready to optimize your printing experience and achieve excellent print results, let’s dive in and learn how to replace the Bowden tube on your Ender 3!
How to Easily Replace the Bowden Tube on Your Ender 3
Why Replace the Bowden Tube
Replacing the Bowden tube on your Ender 3 may not be at the top of your to-do list, but trust me, it’s worth the effort. Over time, the Bowden tube can wear down or become clogged, leading to poor filament feeding and frustrating print failures. Don’t let a flimsy tube stand between you and printing greatness!
Gather Your Tools
Before diving into this simple yet satisfying task, you’ll need a few tools to ensure a smooth replacement process:
- A set of wrenches or pliers
- Some snippers or wire cutters
- A replacement Bowden tube (ensure you choose the correct size for your printer)
- And, of course, a well-oiled sense of adventure!
Step 1: Prepare for Surgery
First things first, let’s make sure our patient is ready for some tube transplanting. Start by powering down your Ender 3 and safely unplugging it from its power source. We don’t want any shocking surprises during this operation, except for maybe a mind-blowing print result later on!
Step 2: Free the Filament
Now that your printer is safely unplugged, it’s time to remove the filament. Heat up your hotend, press the extruder lever, and gently pull back on the filament to release it from its cozy home. Once it’s out, bid farewell to your old filament and set it aside for future projects or sentimental value. Goodbye, faithful filament. You served us well.
Step 3: Bye-Bye, Bowden Tube
With the filament out of the way, we can now focus on removing the old Bowden tube. Start by unscrewing the compression fitting at the top of the hotend. Be gentle, this is a delicate operation. Once loose, carefully pull out the old tube, making sure not to damage the surrounding components. Precision is key, my friend!
Step 4: Insert the New Tube
Now comes the exciting part: implanting the new Bowden tube. Take your fresh tube and insert it into the hotend, ensuring it goes all the way in until it reaches the nozzle. You want that tube snug and secure, just like your grip on reality while delving into the depths of 3D printing.
Step 5: It’s All About Connections
Once the tube is in place, it’s time to reattach the compression fitting. Firmly screw it back into the hotend, ensuring a tight connection to prevent any filament leakage. Remember, we want those plastic threads sealed up tighter than a pickle jar on a hot summer day.
Step 6: Testing, Testing, 1, 2, 3
Congratulations! You’ve successfully replaced the Bowden tube on your Ender 3. Now, it’s time to put your 3D printing prowess to the test. Load up some filament, fire up your printer, and let the magic happen. Keep an eagle eye on that first print to ensure smooth filament feeding and flawless layers. You’ve got this!
Replacing the Bowden tube on your Ender 3 might seem like a daunting task, but fear not, intrepid maker. Armed with the right tools, a little know-how, and an indomitable spirit, you can tackle this obstacle like a pro. So go forth, my friend, and embrace the world of limitless 3D printing possibilities!
FAQ: How To Replace Bowden Tube Ender 3
Introduction:
Welcome to our comprehensive FAQ-style guide on replacing the Bowden tube on the Ender 3 3D printer! Whether you’re a seasoned 3D printing enthusiast or a beginner, this guide is here to help you with all your questions and concerns. We’ll walk you through the process, offer troubleshooting tips, and provide valuable insights on the infamous Bowden tube. So, let’s dive in and get your Ender 3 back up and printing flawlessly!
How do you remove a broken filament in Ender 3
Removing a broken filament from your Ender 3 is easier than dealing with a bad hair day! Here’s a step-by-step guide on how to get that stubborn filament out of your printer’s clutches:
1. Heat your printer’s nozzle to the temperature suitable for the filament material.
2. Use a pair of handy-dandy pliers to gently pull the filament out of the extruder. If it doesn’t budge, try applying a little wiggle or using a smooth, firm tug.
3. Once the filament is free, give your printer a round of applause for a job well done!
How long is the Bowden tube on the Ender 3
Ah, good question! The Bowden tube on the Ender 3 measures around 1 meter or roughly 3.3 feet. That’s long enough to support your wildest 3D printing dreams without any limitations.
How do you get a filament stuck in a Bowden tube
Oh, boy! It’s like playing hide-and-seek with an unruly filament. Here’s how to outsmart it and get it unstuck:
1. Heat your printer’s nozzle to the appropriate printing temperature for the filament.
2. Gently push down on the extruder arm lever to release the tension on the filament.
3. While keeping the extruder arm lever pressed, pull the filament out of the Bowden tube. If it’s really being stubborn, a little jiggle or twist might do the trick.
4. Victory! Your filament is free, and your Bowden tube is sighing with relief.
Can you cut the Bowden tube
Sometimes, you just need to lay the scissors on the table and have a little chop-chop session. Cutting the Bowden tube to the right length is sometimes necessary. Just remember these easy steps:
1. Mark the desired length on the Bowden tube with a marker or get fancy with a ruler if you like.
2. Wrap a piece of tape around the marked spot to ensure a clean, precise cut.
3. Carefully slice through the tube at the marked location using a sharp pair of scissors or, better yet, a tube cutter.
4. Bask in the glory of your trimmed and well-behaved Bowden tube!
How do you unclog a PTFE tube
Ah, the dreaded clog. Fear not! Follow these instructions to unclog your PTFE tube and bring back the sweetness to your printing endeavors:
1. Heat your printer’s nozzle to the maximum temperature for the filament you’re using.
2. Use a clean, non-abrasive tool (like a small wire or specialized unclogging needle) to gently poke and prod the clogged filament from the nozzle end of the PTFE tube.
3. Once the clog is dislodged, take a well-deserved victory lap around your printing space. You’re a hero!
Is Capricorn PTFE worth it
If you dream of printing with the precision and reliability of a Swiss watch, then Capricorn PTFE is worth every single penny. This high-quality PTFE tube offers superior performance, reduced friction, and tighter tolerances. It’s like upgrading your 3D printer to the luxury class, ensuring smoother filament flow and enhancing your overall printing experience. So yes, Capricorn PTFE is worth the hype!
Why is Capricorn PTFE so special
Ah, the wonders of Capricorn PTFE! Unlike regular PTFE tubing, Capricorn is made from a secret recipe handed down through the ages. Just kidding! But it is engineered with precision to provide a smoother, more consistent filament feed. Its low coefficient of friction makes filament travel through the hot end with less resistance, leading to improved print quality and reduced chances of clogs. It’s like having a personal chauffeur for your filament!
How do you change the filament on a 3D printer
Tired of the same old color? It’s time for a filament makeover! Quickly swap that filament like a chameleon changes its colors:
1. Preheat your printer’s nozzle to the temperature required for the filament you’re removing.
2. Once warm and toasty, press the extruder arm lever and gently pull the filament out of the printer.
3. Insert the new filament into the extruder until it reaches the hot end. Give it a little push to ensure proper feeding.
4. Voilà! You’ve successfully transformed your 3D printer’s wardrobe and are ready to rock some fresh prints!
How do you fix a filament jam
Filament jams happen to the best of us, and it’s okay to shed a tear or two. But fear not, for we shall conquer this pesky problem together:
1. Heat your printer’s nozzle to the recommended temperature for the filament that’s causing the jam.
2. Gently push on the extruder arm lever to release the tension on the filament.
3. Use a reliable pair of pliers to grab hold of the filament and give it a gentle but firm tug to pull it free from the jammed zone.
4. Give your printer an encouraging pat and get ready to resume your 3D printing adventures!
How long does a Bowden tube last
The Bowden tube, like a loyal companion, will stick by your side for quite some time. Typically, a well-cared-for Bowden tube can last anywhere from 6 to 12 months. However, factors such as filament type, print frequency, and printing conditions may affect its lifespan. So keep an eye on your tube’s health and show it some love when needed!
Who invented the Bowden tube
Ah, the Bowden tube, a marvel of engineering! Praise goes to its creator, Mr. Ivor Bowden, for bestowing this magical invention upon us. Mr. Bowden, a British engineer, introduced the world to this fantastic tube in 1900. Thanks to his brilliance, we can now enjoy hassle-free, filament-fueled 3D printing adventures!
How do you change filaments in Ender 3
Changing filaments in your Ender 3 is as easy as changing your mind about what to have for dinner! Follow these simple steps:
1. Preheat your printer’s nozzle to the temperature suitable for the filament you’re replacing.
2. Press the extruder arm lever and remove the current filament from the printer.
3. Insert the new filament into the extruder until it reaches the hot end. Give it a little nudge to ensure a secure seating.
4. Take a moment to appreciate the beauty of change and get ready to print in a whole new color!
How do you remove a Bowden tube from a 3D printer
Sometimes, the best way to deal with a stubborn Bowden tube is to separate it from the printer. Here’s how you do it:
1. Unclip the tube from the extruder assembly by depressing the small plastic piece.
2. Gently pull the Bowden tube away from the hot end, making sure not to damage or kink it.
3. Celebrate your newfound freedom from the clutches of the Bowden tube and proceed with your desired maintenance or replacement.
When should I replace my Bowden tube
Timing is everything, especially when it comes to your trusty Bowden tube. Here are some signs that it’s time to bid farewell to your old tube and welcome a fresh one into your printer:
– If you notice visible wear and tear, such as cracks or discoloration, it’s time for an upgrade.
– When you experience frequent filament jams or clogs that make you want to pull your hair out, it’s a clear indication that your Bowden tube is not performing at its best.
– If you’ve been using the same tube for an extended period, around 6 to 12 months, it may be wise to consider a replacement to maintain optimum print quality and reliability.
How hot is Capricorn tubing
Ah, the temperature of Capricorn tubing, the subject of many curious minds! This high-performance PTFE tube can handle the heat like a seasoned chef in the kitchen. Capricorn tubing is designed to withstand temperatures up to 280°C (536°F) without breaking a sweat. So rest assured, your filament will flow smoothly even in the hottest of print jobs!
How do you fix a clogged Bowden tube
A clogged Bowden tube is no match for your problem-solving skills! Follow these steps to unclog that tube and get back to printing perfection:
1. Heat your printer’s nozzle to the maximum temperature recommended for the filament causing the clog.
2. Remove the Bowden tube from both ends by carefully releasing the fittings or connectors.
3. Soak the clogged end of the tube in a cleaning solution or isopropyl alcohol for a little relaxation time.
4. Use a soft brush or specialized cleaning needle to gently scrub away any dirt or residue. Be gentle, we’re not preparing the tube for a heavy metal concert!
5. Rinse the tube with clean water and marvel at its reborn cleanliness.
6. Reattach the Bowden tube to your printer, and let the smooth printing resume!
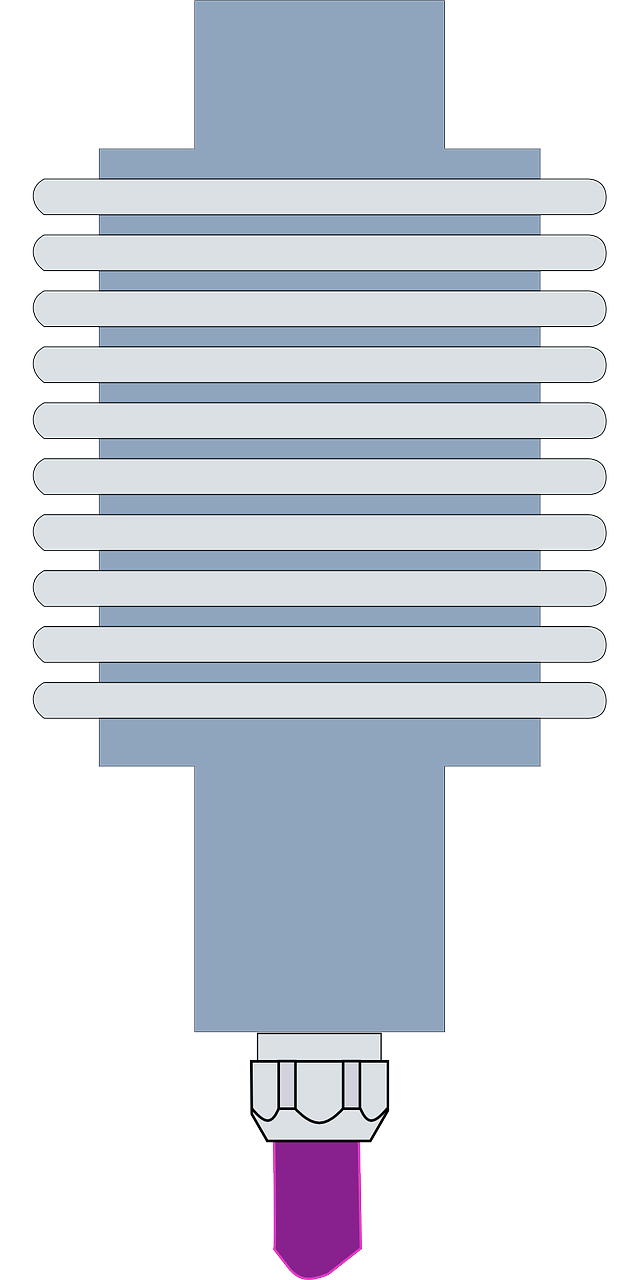
What does a Bowden tube do
Ah, the unsung hero of the 3D printing realm: the Bowden tube! This slender tube plays a crucial role in guiding your filament from the printer’s extruder to the hot end. Not only does it ensure consistent and precise filament feeding, but it also minimizes the weight on the printer’s moving parts, resulting in smoother and more accurate prints. So, let’s tip our hats to the marvelous Bowden tube, making 3D printing dreams come true one filament at a time!
Why is Capricorn PTFE better
Capricorn PTFE is like that overachiever in school who always raises the bar! Here’s why it reigns supreme in the world of PTFE tubes:
– Capricorn PTFE offers tighter tolerances and a more consistent internal diameter, ensuring smoother filament flow and reducing the chances of clogs or jams.
– It has a lower coefficient of friction compared to regular PTFE tubes, providing improved performance and more accurate extrusion.
– Capricorn PTFE is designed to withstand higher temperatures without deforming or losing its structural integrity, guaranteeing a longer-lasting and more durable solution.
– The Capricorn team is continuously pushing the boundaries of PTFE technology, so you can expect innovative updates and even better performance in the future. They’re like the cool kids on the PTFE block!
How do you remove a filament
Bid farewell to your filament with grace and ease using these simple steps:
1. Preheat your printer’s nozzle to the printing temperature suitable for the filament you want to remove.
2. Gently push down on the extruder arm lever to release the filament’s grip on your printer’s heart.
3. As soon as the filament is free from the extruder, give it a loving tug to release it entirely from your printer.
4. Voilà! Your filament is now free to explore the world and embark on its next 3D printing adventure!
And there you have it, folks! Our comprehensive FAQ-style guide to replacing the Bowden tube on the Ender 3 has reached its glorious end. We hope this article answered all your burning questions, alleviated any concerns, and sparked a little joy along the way. Now go forth, fearless 3D printer, and conquer the world, one filament at a time! Happy printing!