Are you tired of that old window that just doesn’t fit the aesthetic of your home anymore? Or maybe you need more wall space for that perfect piece of artwork? Whatever the reason, replacing a window with a wall can be a great solution. In this guide, we’ll show you step-by-step how to turn your window into a beautiful, seamless wall that will breathe new life into your space.
Filling in a Window Opening: Say Goodbye to Unwanted Drafts
Before diving into the transformation, you might be wondering how to effectively close an existing window opening. We’ve got you covered! From removing the window panes to carefully measuring and cutting the wood, we’ll guide you through the process of filling in your window opening, ensuring a tight seal and a draft-free environment.
Covering a Window with Wood: Add a touch of Charm and Elegance
One popular method for closing off a window without removing it is to cover it with wood. By following our simple instructions, you can easily learn how to take a window out and build a wall using this aesthetically pleasing approach. Say goodbye to those outdated curtains and hello to a stunning, wood-covered wall that will elevate the style of your room.
Cost Considerations: Transforming Your Space without Breaking the Bank
Thinking about the cost to remove a window and close up the opening might have you worried. However, with our expert tips, you can confidently tackle this project on a budget. We’ll cover everything from the materials needed to the estimated costs of removing a window and replacing it with a wall, ensuring that you can create the space of your dreams without breaking the bank.
Enhancing your Exterior: Bid Farewell to Unwanted Window Views
But what if you have an unwanted window that you want to cover up from the outside? We’ll also provide you with creative solutions for concealing those eyesores. From innovative landscaping ideas to exterior cladding options, you’ll discover ways to transform your home’s exterior while maintaining its curb appeal.
Whether you’re looking to update the interior or exterior of your home, swapping a window for a wall can make a remarkable difference. So, grab your tools, follow our comprehensive guide, and get ready to transform your space into something extraordinary. Time to say goodbye to that old window and hello to a whole new world of possibilities!
Replace Window with Wall
If you’ve ever looked at your windows and thought, “I wish I could just replace them with walls,” you’re not alone. It might sound like a drastic change, but there are actually several reasons why people may choose to replace a window with a wall. In this article, we’ll explore some of these reasons and discuss the process of replacing a window with a wall.
More Privacy, Less Light
One of the main reasons why someone may want to replace a window with a wall is to increase privacy. While windows allow natural light to enter a space, they also allow others to see inside. By replacing a window with a wall, you can create a more secluded area, shielded from prying eyes. It’s perfect for bedrooms, bathrooms, or any room where privacy is essential.
Enhanced Insulation and Energy Efficiency
Another advantage of replacing a window with a wall is improved insulation. Old windows can be a significant source of energy loss, letting drafts in and causing your heating or cooling system to work harder. By replacing the window with a well-insulated wall, you can significantly reduce energy leaks and make your home more energy-efficient.
Extra Wall Space
If you’re struggling with limited wall space in a room, replacing a window can provide you with additional options for furniture placement, decorations, or storage. Sometimes, the location of a window may not be ideal for maximizing wall space, and turning it into a solid wall can open up many new possibilities for interior design and organization.
Noise Reduction
Living on a busy street or near an area with high noise levels can make it challenging to relax and focus. Windows, especially if they are old or single-pane, can allow unwanted sounds to permeate your space. By replacing the window with a wall, you can significantly reduce noise infiltration, creating a calmer and more peaceful environment.
Professional Help and DIY Tips
Replacing a window with a wall is not a simple task and usually requires professional assistance. Consulting with a contractor or architect is recommended to ensure structural integrity and adherence to building codes. However, if you’re a seasoned DIYer and have the necessary skills and tools, you may be able to tackle this project yourself. Just remember to do thorough research, follow safety precautions, obtain the required permits if necessary, and take proper measurements before getting started.
Replacing a window with a wall can offer various benefits, such as increased privacy, improved insulation, additional wall space, and noise reduction. However, it’s important to carefully consider the implications and consult with professionals if needed. Whether you decide to hire a contractor or embark on a DIY adventure, replacing a window with a wall can transform your space and make it more enjoyable and functional.
Replace Windows with Wallpaper
If you’re looking to give your home a quick and affordable makeover, consider replacing your windows with wallpaper. Wallpaper has come a long way in recent years, with a wide variety of styles, colors, and patterns to choose from. Not only can it add a touch of elegance to your space, but it can also disguise unattractive windows or create the illusion of larger windows. In this subsection, we’ll explore the many advantages of replacing windows with wallpaper and give you some tips on how to do it effectively.
Disguise Problematic Windows
Do you have windows that are old, outdated, or simply not to your taste? Rather than going through the hassle and expense of replacing them, why not cover them up with wallpaper instead? With the right wallpaper, you can easily conceal any unsightly windows and create a fresh, new look for your room. Whether it’s cracked glass, unsightly frames, or outdated designs, wallpaper can provide a cost-effective solution.
Create Illusion of Space
If you have small rooms or windows that are on the smaller side, wallpaper can work wonders in creating the illusion of a larger space. Opt for wallpaper with bold patterns, such as vertical stripes or large floral prints, to make your windows appear taller or wider. By strategically placing wallpaper, you can visually enhance the size of your windows and make the room feel more open and airy.
Enhance Aesthetic Appeal
Wallpaper is a versatile design tool that allows you to express your personal style and add a unique touch to your space. With countless designs to choose from, you can find wallpaper that complements your existing decor or makes a bold statement. Whether you prefer a modern, minimalistic look or a bold and colorful aesthetic, there’s a wallpaper pattern for every taste. By carefully selecting the right wallpaper for your windows, you can transform your room into a stylish and inviting space.
Easy Installation and Removal
Replacing windows can be a time-consuming and costly process, requiring professional assistance. Conversely, wallpaper installation is a relatively simple and DIY-friendly project. With just a few tools and some patience, you can easily apply wallpaper to your windows and achieve professional-looking results. Furthermore, if you ever decide to change your wallpaper or revert to the original windows, removal is a breeze. Simply peel off the wallpaper and enjoy a blank canvas for your next creative project.
Replacing windows with wallpaper is a creative and cost-effective way to transform your living space. Whether you’re looking to disguise problematic windows, create the illusion of larger windows, enhance aesthetic appeal, or enjoy easy installation and removal, wallpaper is a versatile solution. With its wide range of designs and patterns, there’s no shortage of possibilities for making your windows the focal point of your room. So why wait? Get started on your window makeover project today and let your creativity shine through with beautiful wallpaper.
Filling in a Window Opening
Why Do You Need to Fill in a Window Opening
So, you’ve decided to replace that old window with a stunning wall, huh? Well, congratulations on taking the bold step towards transforming your space! But before you get carried away with visions of a fully-transformed room, let’s talk about filling in that window opening.
Assessing the Situation: What’s Behind the Window
First things first, it’s essential to take a good look at the window opening. Is it just a beautiful view of the neighbor’s backyard or an opportunity for additional storage? Understanding what lies behind the window will help determine the best way to fill the opening.
Drywall to the Rescue
One popular method for filling in a window opening is using drywall. It’s affordable, relatively easy to work with, and provides a smooth, clean finish. Simply measure the dimensions of the window opening, cut the drywall to fit, and secure it in place with screws. Then, apply joint compound, sand it down, and voila! You’ve got yourself a seamless wall.
Get Fancy with a Bookshelf
If you’re looking to add a touch of elegance to your space, consider filling the window opening with a custom-built bookshelf. Not only does it provide extra storage, but it also becomes a statement piece that showcases your literary taste. Channel your inner bookworm and get creative with shelf heights, adjustable sections, and maybe even a cozy reading nook!
Let There Be Light with a Window-Like Mirror
Feeling a little hesitant about completely covering up the window? You can maintain the illusion of natural light by filling in the opening with a large mirror. A mirror will reflect the light in the room, making it feel brighter and more spacious. It’s like having a window that never looks out onto your neighbor’s laundry!
Filling in a window opening doesn’t have to be a daunting task. Whether you go for the clean look of drywall, the functionality of a bookshelf, or the illusion of a window-like mirror, remember to choose an option that complements your space and brings you joy. So, go ahead, grab your tools, and transform that window into a wall that’ll make your space truly shine!
How to Cover a Window with Wood
Preparing to Cover Your Window
So, you’ve decided to replace that old window with a sleek, modern wall made of wood? Great choice! Before diving into the transformation, you’ll need to gather a few essential items to ensure everything goes smoothly.
Gather Your Supplies
First off, we’ll need some supplies. Here’s a quick checklist to go through:
- Wood: Purchase enough wood boards to cover the entire window area. Make sure to measure the dimensions of the window accurately to avoid any last-minute mishaps.
- Tools: To install the wooden wall, you’ll require a hammer, nails, screws, a saw, a tape measure, and a level. If you don’t already have these essential tools in your arsenal, consider borrowing or renting them.
- Paint or Finish: Decide on the look you want for your new wooden wall. Whether you prefer a natural finish or a vibrant color, get the necessary paint or finish to match your style.
Once you’ve checked off everything on your supply list, it’s time to roll up your sleeves and get to work!
Step-by-Step Guide to Cover a Window with Wood
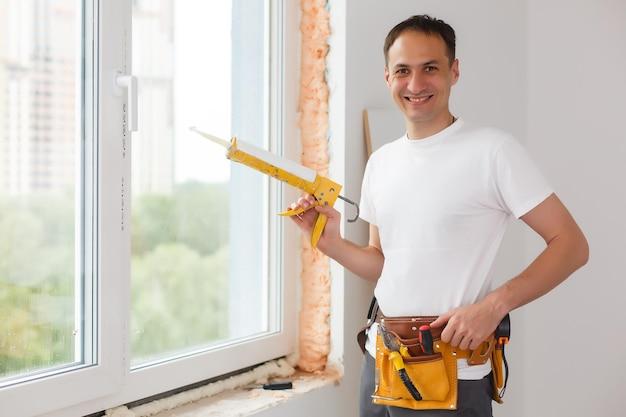
Now that you have your supplies ready, it’s time to dive into the nitty-gritty of transforming that window into a stunning wooden feature. Follow these steps to cover your window with wood like a pro:
Step 1: Measure and Cut the Wood
Start by carefully measuring the dimensions of your window. Remember to account for any trim and allow for overlapping if desired. Once you have the measurements, cut the wood boards accordingly, using a saw. Take your time and double-check the measurements to ensure a precise fit.
Step 2: Attach the Wood Boards
With the wood cut to size, it’s time to attach the boards to the window frame. Start by positioning the first board at the bottom and securing it in place using nails or screws. Continue attaching the rest of the boards using the same method until the entire window area is covered.
Step 3: Finishing Touches
After attaching the wood boards, step back and admire your handiwork! Now it’s time to give your wooden wall a finishing touch. Apply your chosen paint or finish to achieve the desired look. Take your time to ensure an even application and allow ample drying time before moving on to the next steps.
Covering a window with wood may seem like a daunting task, but with the right preparation and these step-by-step instructions, it becomes an achievable project. By following these guidelines, you’ll transform your window into a stunning wooden feature that adds warmth and character to your space. So grab those tools, gather your supplies, and get ready to embark on a wood-covered adventure!
How to Close an Existing Window
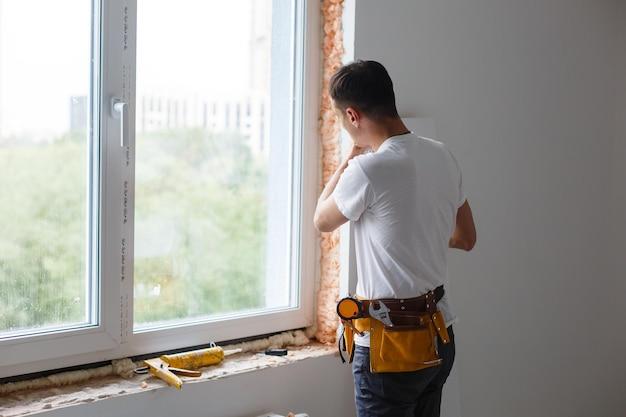
So, you’re thinking about replacing that old window with a shiny new wall? Well, before you can start on that exciting project, you’ll need to close your existing window properly. Don’t worry, it’s not as complicated as it sounds. In this section, we’ll walk you through the steps to help you close that window with ease.
Assess the Window
The first thing you need to do is assess the condition of your window. Is it functioning properly? Are there any cracks or damages? It’s important to take note of these factors as they can help you determine the best approach for closing the window.
Gather Your Tools
Now that you’re ready to tackle the window closure, make sure you have the right tools on hand. You’ll typically need a screwdriver, a pry bar, a utility knife, and some caulk or sealant.
Remove the Window Frame
To close the existing window, you’ll first need to remove the window frame. Start by carefully unscrewing any screws or nails holding the frame in place. Once the screws are removed, use the pry bar to gently pry the frame away from the wall. Be cautious not to damage the surrounding area.
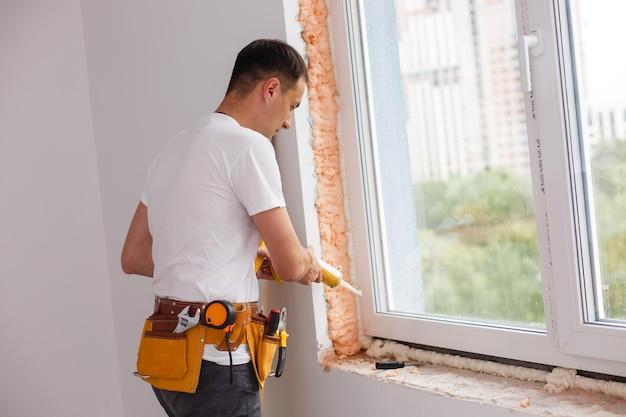
Fill the Gaps
Once the frame is removed, you might notice some gaps or openings around the window opening. To ensure a proper seal, use your utility knife to trim away any excess materials or old caulk. Then, apply a generous amount of caulk or sealant to fill in the gaps. This will help prevent any drafts or leaks in the future.
Patching and Painting
After filling the gaps, you’ll want to patch up any holes or damaged areas around the window opening. Use a suitable patching compound and follow the manufacturer’s instructions for applying it. Once the patched areas are dry, sand them down to create a smooth surface. Now, you can apply a fresh coat of paint to match the surrounding wall.
Enjoy Your New “Wall”
Voila! You’ve successfully closed your existing window and are one step closer to transforming it into a wall. Admire your handiwork and get ready for the next phase of your project.
Closing an existing window may seem like a daunting task, but with the right tools and a little patience, it can be a breeze. Just remember to take your time, follow each step carefully, and before you know it, you’ll have a beautifully closed window ready for its transformation into a wall.
How to Change Wallpaper on Windows
Changing the wallpaper on your Windows computer is a simple and fun way to personalize your workspace. Whether you’re tired of staring at the same old background or just want to switch things up, here’s a step-by-step guide on how to change wallpaper on Windows.
Step 1: Access the Personalization Settings
To change your wallpaper, start by accessing the Personalization settings. This can be done by right-clicking anywhere on your desktop and selecting “Personalize” from the drop-down menu.
Step 2: Choose a New Wallpaper
Once you’re in the Personalization settings, click on the “Background” tab. Here, you’ll find a range of options for changing your wallpaper. You can choose from a collection of built-in wallpapers or upload your own by clicking on the “Browse” button.
Step 3: Adjust the Wallpaper Position
If the wallpaper doesn’t fit perfectly on your screen, you can adjust its position. Click on the “Choose a fit” drop-down menu and select an option that suits your preferences. You can choose from options like “Fill,” “Fit,” “Stretch,” “Tile,” or “Center.”
Step 4: Customize Additional Settings
Windows offers additional settings to further customize your wallpaper experience. To access these options, click on the “Colors” or “Lock screen” tabs. Here, you can choose accent colors, enable or disable transparency effects, and even set a separate wallpaper for your lock screen.
Step 5: Save and Enjoy
Once you’re satisfied with your wallpaper selection and customization, click on the “Save changes” button to apply the new look to your desktop. Voila! You’ve successfully changed the wallpaper on your Windows computer.
Changing your wallpaper is a quick and easy way to add a personal touch to your computer. Whether you prefer serene landscapes or funny memes, the options are endless. So go ahead, explore the vast collection of wallpapers available in the Personalization settings and make your desktop truly your own.
So, next time you feel the urge to spruce up your workspace, follow these simple steps and say goodbye to the old and hello to the new. Happy wallpaper changing!
How to Turn a Window into a Wall
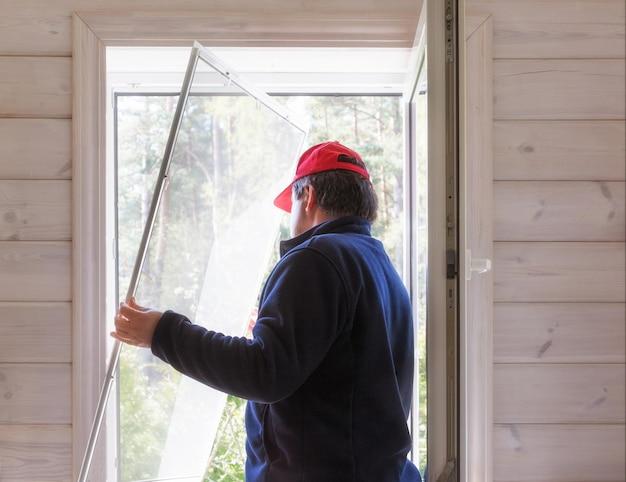
Close Off a Window without Removing It
So, you’ve got a window that you want to close off, but you’re not quite ready to take on the task of removing it altogether. Don’t worry, I’ve got you covered! In this section, I’ll walk you through some simple steps on how to close off a window without breaking out the sledgehammer.
Step 1: Measure Twice, Cut Once
Before you start blocking out that pesky window, you’ll want to make sure you have accurate measurements. Grab a tape measure and measure the length, width, and height of the window frame. Write down these measurements so you don’t forget them later.
Step 2: Cover it Up
Now that you have your measurements, it’s time to cover up that window. One option is to use drywall to create a seamless transition from the window frame to the surrounding wall. Measure and cut the drywall to fit the dimensions of the window frame. For a flawless finish, secure the drywall with screws and use joint compound to fill in any gaps or seams. Finish it off with a smooth layer of primer and paint to match the rest of the wall.
Step 3: Get Creative with Cladding
If you’re looking for a more creative solution, consider using cladding to close off the window. Materials like wood, brick, or stone can give your wall a unique and rustic look. Measure and cut the cladding to fit the window frame, then secure it in place using adhesives or screws. Don’t forget to seal any gaps between the cladding and the existing wall to keep out drafts and moisture.
Step 4: Dress it Up
Now that your window has magically transformed into a wall, it’s time to give it some personality. You can hang artwork, install shelves, or even create a cozy reading nook. The possibilities are endless! Let your creativity run wild and turn this once open window into a stunning focal point in your room.
Closing off a window without removing it may seem like a daunting task, but with a little creativity and some basic handyman skills, you can easily turn that window into a seamless part of your wall. Whether you choose the simple route of covering it with drywall or the more adventurous path of using cladding, the end result will be a transformed space that reflects your personal style.
So go ahead, grab your measuring tape and let’s get to work!
How to Remove a Window and Build a Wall
If you’ve decided to replace a window with a wall, you might be wondering where to start. Don’t worry; we’ve got you covered! In this guide, we’ll take you through the step-by-step process of taking out a window and building a wall in its place. So let’s grab our tools and get started!
1. Safety First: Prepare the Workspace
Before you begin, ensure you prioritize safety. Make sure you have protective gear like gloves and goggles. Additionally, clear the area around the window, removing any furniture or obstructions. It’s always better to have a clutter-free workspace to avoid accidents or damage.
2. Measure Twice, Cut Once: Take Out the Window
Start by removing any curtains, blinds, or window coverings. Then, carefully remove any trim or molding around the window frame using a pry bar or a utility knife. Next, using a reciprocating saw, cut through any screws or nails that are securing the window frame to the wall. Once you’ve done that, gently push the window frame out of the opening, being cautious not to damage the surrounding walls.
3. Patch it Up: Fill the Window Opening
Now that the window has been removed, it’s time to patch up the opening with a wall. Measure the dimensions of the opening and cut a piece of drywall to fit. Secure the drywall to the opening using drywall screws, making sure to attach it firmly to the studs. Once the drywall is in place, apply drywall joint compound to the seams and smooth it out with a putty knife. Allow it to dry, then sand it down to achieve a smooth finish.
4. Adding Finishing Touches: Paint and Texture
After the joint compound has dried, it’s time to add some finishing touches. Start by priming the patched area with a coat of primer, especially if you’re planning to repaint the entire wall. Once the primer is dry, apply your chosen paint color to blend the patched area with the rest of the wall seamlessly. If you want to match the texture of the surrounding wall, you can use a texture spray or a texture roller to achieve a similar finish.
5. Voila! Your Window is now a Wall
And there you have it! By following these steps, you’ll successfully have replaced your window with a newly built wall. Now you can enjoy your transformed space and revel in the sense of accomplishment that comes with completing a DIY project.
Removing a window and building a wall might seem like a daunting task, but with the right tools, preparation, and guidance, it can be a rewarding experience. So go ahead, turn that window into a wall, and take your home improvement skills to the next level!
Removing a Window and Replacing with a Wall: Cost Breakdown
Introduction
So, you’ve decided to take out that old window and replace it with a beautiful new wall. Good choice! But before you get started on this exciting home renovation project, it’s essential to understand the costs involved. In this subsection, we will break down the expenses you can expect when removing a window and replacing it with a wall. Let’s dive in!
Evaluating the Expenses
1. Materials
The first significant cost you will encounter is the materials needed for this project. You’ll need items such as drywall, insulation, studs, paint, and possibly electrical wiring if there were outlets or light switches near the window. The amount of materials required will depend on the size of the window and the desired wall area. Remember to account for any additional materials you may need for finishing touches like trim or baseboards.
2. Labor
Unless you’re an experienced DIYer, it’s likely you’ll need to hire professionals to do the job for you. Labor costs can vary depending on your location, the complexity of the project, and the contractor you choose. Remember to get multiple quotes and ensure the professionals you hire are trustworthy and reliable.
3. Permits and Inspections
Before embarking on this project, be sure to check if you need any permits or inspections. These regulations may differ based on your local building codes. The costs associated with permits and inspections can add up, so it’s crucial to factor them into your overall budget.
4. Dealing with Existing Wiring
If there were electrical outlets or switches near the window, you’ll need to deal with the wiring when converting the window into a wall. Depending on the complexity of the wiring, you may require an electrician to handle this aspect. Keep in mind that electrical work can add to the overall cost, so make sure to budget for it.
Now that we’ve discussed the main cost factors involved in removing a window and replacing it with a wall, you’re better prepared to embark on your renovation journey. Remember to budget for materials, labor, permits, inspections, and any necessary electrical work. By planning ahead, you can ensure a smooth and successful transformation from window to wall. Good luck with your project, and enjoy your new, updated space!
How to Cover Up an Unwanted Window from the Outside
Introducing the Problem
Let’s face it: sometimes windows just don’t fit the vibe of a room. Maybe it’s too small, too big, or simply in the wrong location. Whatever the reason, if you’re tired of dealing with an unwanted window, don’t worry, we’ve got you covered! In this section, we’ll walk you through some creative ways to cover up that window from the outside, transforming it into a beautiful wall that seamlessly blends with the rest of your space.
Embrace Nature with Climbing Vines
If you’re looking to add a touch of nature to your home, covering up that pesky window with some climbing vines might just be the perfect solution. Choose a fast-growing variety like ivy or trumpet vine, and watch as they gracefully take over the window frame. As they grow, these beautiful plants will not only create a stunning green wall effect, but they will also provide shade and privacy to your space. Don’t forget to regularly trim the vines to maintain the desired shape and prevent them from infiltrating other areas.
Reimagine with a Living Wall
For those wanting to make a bold design statement, consider turning your unwanted window into a living wall. Installing a vertical garden system is not only an innovative way to get rid of the window, but it also adds a unique touch to any exterior. You can choose a variety of plants, from colorful flowers to herbs and succulents, and create a stunning visual display that will be the envy of your neighbors. Plus, your new living wall will bring a breath of fresh air to your space, quite literally.
Artistic Alternatives: Murals and Trompe-l’oeil
If you’re feeling artsy or want to add a touch of whimsy to your home, why not turn that unwanted window into a captivating mural or a trompe-l’oeil masterpiece? Find a talented local artist or unleash your inner creativity and create a scene that blends seamlessly with the rest of your outdoor space. Whether it’s a picturesque landscape, an optical illusion, or an intriguing abstract design, transforming your window into a work of art will not only cover it up but also become a focal point that sparks conversation and intrigue among your visitors.
Utilize Weather-resistant Materials
For those seeking a more practical approach, covering up an unwanted window with weather-resistant materials is a reliable option. Consider using materials like weatherproof siding, cedar planks, or even brick to seamlessly blend the exterior wall where the window once stood. This method not only ensures long-lasting durability but also allows for easy maintenance, providing you with a hassle-free solution to hide that unwanted window and create a clean, uniform look.
In conclusion, when confronted with an unwanted window, don’t be dismayed. Instead, get creative and transform it into a wall that brings beauty and functionality to your home. Whether you prefer the natural charm of climbing vines, the artistic allure of a mural, or the simplicity of weather-resistant materials, there are numerous options to suit every taste and style. So, bid farewell to that unwanted window and say hello to a new, stunning wall that will enhance the overall aesthetics of your space.
How Much Does It Cost to Remove a Window and Make It a Wall
If you’re considering replacing a window with a wall, you’re probably wondering about the cost. While it’s difficult to provide an exact figure without knowing the specifics of your project, there are a few factors that can influence the cost of removing a window and making it a wall. Let’s take a closer look.
Assessing the Scope of Work
Before diving into the costs, it’s essential to understand the scope of work involved. The complexity of the project will play a significant role in determining the overall cost. Factors such as the size of the window, the type of wall you want to install, and any structural modifications needed will affect the price.
Hiring a Professional vs. DIY
Deciding whether to hire a professional or take on the project yourself can greatly impact the cost. While DIY can save you money on labor, it’s important to note that this type of project requires skill and expertise. Any mistakes could end up costing you more in the long run. Hiring a professional ensures the job is done correctly, but it will come at a higher price.
Materials and Equipment
The materials and equipment required for the project will also contribute to the overall cost. This can include items such as the wall materials, insulation, plaster, paint, and any necessary tools. It’s important to factor these costs into your budget to avoid any surprises.
Additional Expenses
In addition to the main costs, it’s essential to consider any additional expenses that may arise during the project. This can include permits, debris removal, and potential repairs or modifications to the existing structure. These costs can add up, so it’s important to budget accordingly.
Getting Quotes
To get an accurate estimate for your specific project, it’s best to consult with professionals in your area. They can assess the scope of work, provide an accurate quote, and answer any questions or concerns you may have. Getting multiple quotes will give you a better understanding of the average cost in your area.
In conclusion, the cost of removing a window and making it a wall can vary depending on several factors. While it’s difficult to provide an exact figure without more information, assessing the scope of work, deciding between professional or DIY, considering materials and equipment, and factoring in additional expenses are crucial steps to determining the overall cost. Consulting with professionals in your area will provide the most accurate estimate for your specific project. Remember to budget accordingly and plan for any unexpected costs that may arise.