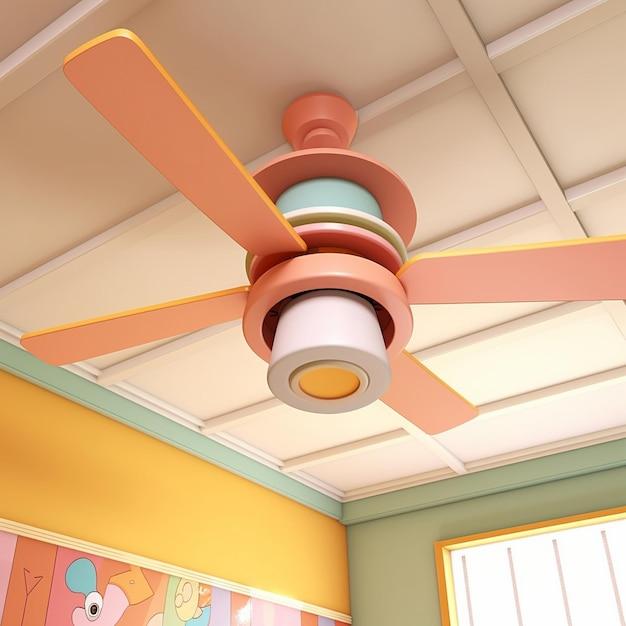
Is your Hampton Bay ceiling fan light cover giving you a hard time? Don’t worry, we’ve got you covered! In this blog post, we will guide you through the step-by-step process of removing the light cover from your Hampton Bay ceiling fan.
Whether you’re dealing with a ballast, a circular fluorescent cover, or a plastic square ceiling light cover, we have the answers to all your questions. We’ll also cover topics like removing ceiling medallions, glass shades, and even decorative plaster molding.
So, if you’re ready to take on the challenge of removing your Hampton Bay ceiling fan light cover and giving your fan a fresh new look, let’s get started! Follow our expert tips and tricks to make this task a breeze.
Introduction
Is your Hampton Bay ceiling fan light cover giving you a hard time? Don’t worry, we’ve got you covered! In this blog post, we will guide you through the step-by-step process of removing the light cover from your Hampton Bay ceiling fan. Whether you’re dealing with a ballast, a circular fluorescent cover, or a plastic square ceiling light cover, we have the answers to all your questions. We’ll also cover topics like removing ceiling medallions, glass shades, and even decorative plaster molding. So, if you’re ready to take on the challenge of removing your Hampton Bay ceiling fan light cover and giving your fan a fresh new look, let’s get started! Follow our expert tips and tricks to make this task a breeze.
How to Remove the Hampton Bay Ceiling Fan Light Cover
So, you’ve decided to take on the challenge of removing the light cover from your Hampton Bay ceiling fan. Congratulations, brave soul! Don’t worry, we’ve got your back—or rather, your ceiling fan’s back. In this guide, we’ll walk you through the step-by-step process of freeing your beloved ceiling fan’s light cover from its cage. Let’s get started, shall we?
Gather Your Tools
Before we dive into the nitty-gritty, make sure you gather all the necessary tools for this endeavor. You wouldn’t want to be halfway through the process and realize you’re missing a crucial toolkit item. Trust us, we’ve been there. Prepare yourself with the following items:
- Stepladder – You’ll need a secure platform to reach your ceiling fan safely.
- Screwdriver – Grab your trusty screwdriver; you’re going to need it.
- Pliers – These can be handy for tight spots or stubborn screws.
- A fluffy cat or a pom-pom – Just kidding, these aren’t really tools, but they can provide some moral support during the process. Plus, who can resist a cute feline cheerleader or a bouncy pom-pom?
Turn Off the Power
Safety first, folks! Before you embark on any electrical escapades, it’s crucial to cut the power supply. The last thing you want is to end up with a shocking surprise or a mini fireworks show. Locate your circuit breaker box and switch off the power to the room where your ceiling fan resides. Remember, it’s better to be safe than sorry, especially when it comes to electricity.
Locate the Screws
Now that the power is off and you’ve ensured your safety, it’s time to locate the screws that are holding the light cover in place. Depending on the design of your Hampton Bay ceiling fan, you may find these screws on the outer rim or underneath the light cover. Grab your screwdriver and let’s play a game of “find the screws.”
Unleash Your Inner Handyman (or Handywoman)
With the location of the screws successfully discovered, it’s time to channel your inner handyman or handywoman. Take your screwdriver and start gently loosening the screws. Remember, no need to Hulk-smash them; a steady hand will do the trick. Once the screws are loose, carefully remove them and set them aside on a safe surface. You wouldn’t want them rolling off into the Bermuda Triangle of lost screws.
Free the Light Cover
You’re so close to victory, we can practically hear the celebration music. Once the screws are out of the picture, it’s time to liberate the light cover from its confines. Give the cover a gentle tug, and it should come off easily. If it puts up a fight, don’t worry—sometimes these things need a little encouragement. Just be patient, give it a gentle wiggle, and it should surrender to your ceiling fan freedom mission.
Celebrate Your Triumph
Congratulations, fearless ceiling fan warrior! You have successfully removed the Hampton Bay ceiling fan light cover. Take a moment to bask in the glory of your achievement. Admire your fan’s lightbulbs in all their naked splendor. We hope you found this guide helpful and that your ceiling fan enjoyed the newfound freedom from its light cover.
Remember, 2023 is the year of conquering ceiling fan challenges. Stay tuned for more blog posts on how to tackle life’s everyday adventures with humor, style, and a hint of silliness. Until then, happy un-covering!
FAQ: How To Remove Hampton Bay Ceiling Fan Light Cover
How Do You Remove a Ballast
If you’re dealing with a ceiling fan light cover that uses a ballast, removing it might seem intimidating at first. But fear not! Follow these simple steps to remove a ballast like a pro:
-
Turn off the power: Before you start any electrical work, make sure to turn off the power supply at the breaker box. Safety first, folks!
-
Detach the light bulbs: Unscrew the light bulbs and set them aside. They deserve a break too!
-
Remove the cover: Now it’s time to remove the outer cover of the ceiling fan light. Gently pull it down, or if it has screws, remove them with a screwdriver.
-
Identify the ballast: Look for a rectangular or square-shaped box usually located in the center of the light fixture. That’s your ballast buddy!
-
Disconnect the wires: Carefully detach the wires connected to the ballast. Remember to make a mental note or snap a photo so you can reconnect them later without any confusion.
-
Remove the ballast: Unscrew or unclip the ballast from its mounting, and voila! You did it! You’ve successfully removed the ballast.
Can You Remove a Ceiling Medallion
Oh, absolutely! Removing a ceiling medallion can give your ceiling fan a fresh new look. Here’s how to bid adieu to that medallion:
-
Switch off the power: Just like with any electrical work, turn off the power supply at the breaker box. Safety is the name of the game!
-
Loosen the medallion: Most ceiling medallions are attached with adhesive or screws. If it’s adhered with adhesive, use a putty knife or scraper to gently pry it away from the ceiling. If it’s screwed in, grab a screwdriver and remove those screws like a champ.
-
Patch up the ceiling: Once the medallion is out of the picture, you might find a hole or some scars left behind. Don’t worry! Just patch up any imperfections with some spackle or filler and give it a smooth finish.
-
Paint it up: Now it’s time for the finishing touch! Grab a paintbrush and color-match the ceiling paint to cover those patches seamlessly. Your ceiling will look as good as new in no time!
How Do You Remove an Acrylic Light Cover
Removing an acrylic light cover is a piece of cake! Follow these easy steps to make that cover disappear:
-
Turn off the power: Before you get your hands dirty, flip the switch at the breaker box and turn off the power supply. We don’t want any unexpected light shows!
-
Locate the tabs or screws: Acrylic light covers are often held in place by tabs or screws. Look for these little fellas around the edge of the cover.
-
Press or unscrew: If you have tabs, gently press or squeeze them inward to release the cover. If there are screws, grab your trusty screwdriver and give them a counterclockwise twist.
-
Remove the cover: With the tabs pressed or screws loosened, the acrylic cover should be free to slide or drop out of its groove. Take a deep breath, and pull it down gently.
-
Handle with care: Acrylic can be sensitive, so be sure to handle the cover with care. Avoid any sudden movements or accidental drops. Treat it like the delicate beauty it is!
How Do You Remove a Circular Fluorescent Cover
Say goodbye to that old circular fluorescent cover with these simple steps:
-
Lights out: As always, start by switching off the power at the breaker box. Safety should be your number one fan!
-
Find the clips or screws: Look for clips or screws holding the circular cover in place. They’re usually located around the edge or at regular intervals on the cover.
-
Release the clips or unscrew: If you see clips, press them inward or squeeze them together to release the cover. For screws, grab a screwdriver and unscrew them counterclockwise.
-
Lower the cover: Once the clips are pressed or screws are loose, carefully lower the circular cover from its position. Mind your fingers and take it slow!
-
Clean it up: While the cover is off, why not take a moment to clean it? Use a microfiber cloth or a gentle cleaner to remove any dust or grime. It’ll make your fan shine brighter!
How Do You Remove the Glass Shade from a Ceiling Fan
To remove the glass shade from your ceiling fan, follow these quick steps:
-
Safety first: As always, start by turning off the power supply at the breaker box. We want sparks of joy, not sparks of electricity!
-
Loosen the screws or finials: Look for screws or decorative finials around the rim of the glass shade. Gently unscrew or loosen them counterclockwise.
-
Support the shade: Hold the glass shade firmly with one hand while you loosen the screws or finials. It’s like a delicate dance, but you’ve got this!
-
Remove the shade: Once the screws or finials are loose, carefully lift the glass shade away from the ceiling fan. Ta-da! It’s as easy as pie!
-
Clean it up: While you have the glass shade off, take this opportunity to give it a good cleaning. Use a mild glass cleaner or soapy water to wipe away any dust or fingerprints. Your ceiling fan will thank you!
Remember, if you feel uncertain about any step, don’t hesitate to consult a professional electrician. Safety is the key to a smooth and hassle-free DIY experience!