Are you tired of struggling to remove the cap from your 5-gallon water bottle? Well, look no further! In this blog post, we will guide you through some simple yet effective methods to easily remove the cap from your large water jug. Whether you’re dealing with a tight cap or are unsure of the proper technique, we’ve got you covered.
But that’s not all! We’ll also touch upon some related topics, such as cleaning your water dispenser, resealing alcohol bottles, and opening stubborn glass bottle caps. So, grab your water bottle and let’s dive into the world of cap removal!
Keywords: How do you clean a crock water dispenser?, How do I clean my Primo water dispenser top loader?, How do you reseal alcohol bottles?, How do you open a glass bottle that won’t open?, How do you open a tight bottle cap?, How do you get a lid off a plastic bottle?, How do you open a 5 gallon water jug?, How do you drink water?, How do you open a water jug cap?, How do you take the cap off a 5 gallon water jug?, Can you reseal glass bottles?, How do you open a cap?, How do I clean my Sparkletts water dispenser?, How do you remove a hot water bottle?, How do you open a gallon of water bottle?, Can you reuse Primo water bottle caps?, How do you remove a half full water bottle dispenser?

How to Easily Remove the Cap from a 5-Gallon Water Bottle
Introduction
So, you’ve got a thirst that only a refreshing gulp from a 5-gallon water bottle can quench. You grab the bottle, only to realize that pesky cap is standing in between you and hydration heaven. Well, fear not! In this guide, we’ll show you some clever tricks that will have that cap off before you can say H2O.
Materials You’ll Need:
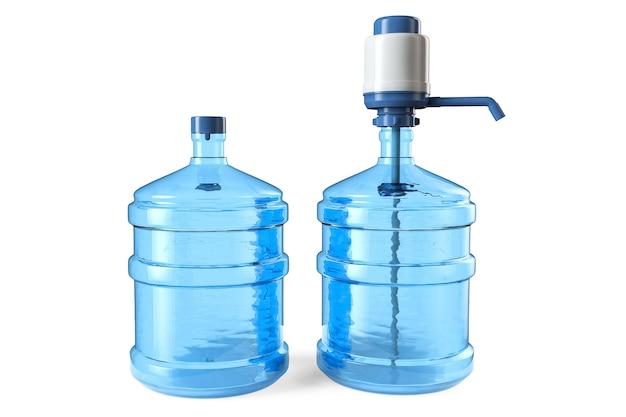
A 5-Gallon Water Bottle and Determination
What’s that? That’s right, the only materials you’ll need for this endeavor are the water bottle itself and a positive attitude. Leave the fancy tools in your toolbox for now; all you need is a bit of elbow grease and a can-do spirit. Let’s dive in!
The Twist and Shake Method
Step 1: Get a Grip
First things first, make sure you have a good grip on the water bottle. We don’t want it slipping through your fingers and causing a wet mess. Trust us, your thirsty self will not appreciate that. So, grab that baby with both hands and hold on tight!
Step 2: Twist It!
Now, here comes the fun part – give that cap a twist! With your trusty grip still intact, twist the cap counterclockwise with all your might. Your muscles might groan, but don’t let that discourage you. Keep twisting until you feel a satisfying release. Victory is just a turn away!
Step 3: Shake It Off
You’ve twisted, you’ve turned, and now it’s time for a little shake, shake, shake! Hold onto the cap firmly and give the bottle a gentle up and down motion. This will help loosen the cap even further. Don’t be afraid to get your whole body into it! Think of yourself as the world’s thirstiest maraca player. The cap will soon surrender its grip.
The Hot Water Method
Step 1: Heat Things Up
If the twist and shake method didn’t quite do the trick, don’t lose hope. We have another trick up our sleeve, and it involves hot water. Fill up a kettle or saucepan with water and bring it to a boil. We’re about to turn up the heat on that stubborn cap!
Step 2: Pour with Caution
Once your water is nice and hot, carefully pour it over the top of the water bottle’s cap. Be mindful of the hot water to avoid any unpleasant burns. The heat will cause the plastic to expand ever so slightly, making the cap easier to remove. Don’t rush this step; patience pays off!
Step 3: Twist Away
After giving the hot water a moment or two to work its magic, grab hold of that cap and give it another twist. The heat should have loosened it up, making the removal a breeze. If you encounter any resistance, repeat the hot water process and try again. We’re confident that cap will surrender soon enough.
The Tap and Spin Method
Step 1: Find a Solid Surface
For this method, you’ll need a flat and solid surface, like a countertop or table. Position the 5-gallon water bottle upside down on this surface, making sure it’s stable and won’t fall over mid-spin. Safety first, folks!
Step 2: The Tap Dance
Now comes the time to put on your dancing shoes, metaphorically speaking. With the bottle inverted on the solid surface, give it a series of gentle taps around the cap area. It’s like a percussion solo but with water bottles. These taps will help loosen the cap and make it more cooperative.
Step 3: Give It a Whirl
After the tapping, it’s time for the grand finale – the spin! With one hand keeping the water bottle steady, use your other hand to spin it rapidly in a circular motion. This spinning motion will create momentum and help dislodge the cap. Think of it as giving the bottle a centrifugal nudge. Keep spinning until the cap gives up and comes off with ease.
Now that you’re armed with these nifty techniques, removing the cap from a 5-gallon water bottle is no longer an Olympic feat. Whether you choose the twist and shake, hot water, or tap and spin method, you can quench your thirst with confidence and a touch of flair. So go forth, conquer those caps, and enjoy your well-deserved gulp of H2O. Stay hydrated, my friend!
FAQ: How To Remove Cap From 5 Gallon Water Bottle
Introduction:
Welcome back, thirsty readers! We know that feeling when you’re dying for a refreshing gulp of water but can’t seem to open that stubborn cap on your 5-gallon water bottle. Well, fret not! In this comprehensive FAQ-style guide, we’ll answer some burning questions on how to crack open that cap and satisfy your thirst. From cleaning your water dispenser to tackling those tricky bottle caps, we’ve got you covered. So, let’s dive in and quench your curiosity!
1. How do you clean a crock water dispenser
Cleaning a crock water dispenser is a piece of cake. Here’s a super simple four-step process to get your dispenser sparkling clean:
Step 1: Empty that beauty! Pour out any remaining water from the dispenser. We wouldn’t want any surprises during the cleaning process.
Step 2: Scrub-a-dub! Use a non-abrasive sponge or cloth with warm, soapy water to give the crock a thorough scrub. Get into every nook and cranny to remove any dirt or residue.
Step 3: Rinse it off! Once your crock is squeaky clean, rinse it thoroughly with fresh water to remove any soap residue. You wouldn’t want your water to taste like lavender-scented bubbles, would you?
Step 4: Dry it up! Make sure to completely dry the crock before refilling it with water. Moisture can lead to funky smells and nobody wants that.
2. How do I clean my Primo water dispenser top loader
Ah, the trusty Primo top loader. Cleaning it will take no time at all! Just follow these quick steps:
Step 1: Unplug and empty! First, unplug the dispenser and remove the water bottle. Then, drain any water left in the tank. Safety first!
Step 2: Wipe it clean! Grab a cloth or sponge and dip it into a mixture of mild detergent and warm water. Give your Primo dispenser a gentle wipe-down, cleaning all those surfaces.
Step 3: Rinse and repeat! Rinse the dispenser with clean water to remove any soapy residue. Trust us, you don’t want a mouth full of soap bubbles.
Step 4: Get technical! Cleaning the water probe is crucial. Use a cotton swab dipped in vinegar to scrub the probe gently. This will ensure fresh and clean water for your next refill.
Step 5: Give it a break! Allow your top loader to dry completely before plugging it back in and inserting a fresh water bottle. Your Primo dispenser will thank you with beautifully chilled water.
3. How do you reseal alcohol bottles
We get it. Sometimes you don’t feel like finishing that bottle of whiskey in one sitting, but you want to prevent a sad waste of quality spirits. Here’s how you can reseal your alcohol bottles like a pro:
Step 1: Attention to detail! Make sure your bottle cap and the bottle’s neck are clean and free from any residue. We wouldn’t want any unwanted flavors mingling in there.
Step 2: Keep it airtight! Seal the bottle tightly with its original cap or cork. If you’ve misplaced it (we won’t judge!), invest in a good-quality bottle stopper or vacuum seal. Your alcohol deserves the best!
Step 3: Store smart! Keep your resealed bottle upright in a cool, dark place. Avoid extreme temperature changes, because nobody likes their whiskey disliking them.
4. How do you open a glass bottle that won’t open
Ah, the battle of wills with a stubborn glass bottle. Fear not! We have some handy tricks up our sleeve to help you conquer that bottle:
Step 1: Grab some grip! Use a rubber glove or wrap a rubber band around the cap for extra grip. Now, that bottle won’t dare to defy you!
Step 2: Hit it gently! No need for aggression. Give the bottom of the bottle a firm tap with the palm of your hand. Sometimes a little shock therapy does the trick.
Step 3: Experience the hot and cold! Run the neck of the bottle under hot water for a minute or two, then immediately cool it under cold, running water. The temperature change can sometimes expand and contract the glass, loosening the cap’s grip.
Step 4: Seek tools of persuasion! If all else fails, grab a bottle opener, a small towel, or even a rubber jar opener for that extra leverage. Together, you can conquer any bottle cap challenge!
5. How do you open a tight bottle cap
Those sneaky tight bottle caps can seem like they’re mocking you, but fear not, my determined friend. Follow these steps to show them who’s boss:
Step 1: Loosen that grip! Place the bottle cap under hot running water for a minute or two. Heat can be a powerful ally in making the cap more pliable.
Step 2: Ice it down! Dampen a washcloth with cold water and wrap it around the cap. Apply gentle pressure and twist to break the icy grip of that stubborn cap.
Step 3: Get techy with it! If the cap still refuses to budge, raid your toolbox for a pair of pliers or channel locks. Use them to get a better grip on the cap while you twist and conquer.
Step 4: Don’t lose your cool! Remember to take a deep breath and channel your inner strength. You can do it!
6. How do you get a lid off a plastic bottle
Plastic bottles, though they may seem innocent, can sometimes hold their lids a little too tightly. Fear not, brave water warrior! Here’s how you can set that cap free:
Step 1: Twist and shout! Give the cap a firm twist clockwise to loosen it. Sometimes all it needs is a gentle coaxing.
Step 2: Channel your inner superhero! For better grip, put on a pair of rubber gloves or grab a rubber band and wrap it around the cap. Enhanced grip power activated!
Step 3: The hot and cold method! Run the neck of the plastic bottle under hot running water for a minute or so to expand the plastic slightly. Now, switch to cold water to rapidly cool it down. Carefully twist the cap while it’s still chilly, and it should surrender.
Step 4: Call for backup! Stubborn caps may require some extra muscle. Use a pair of pliers or channel locks, placing one end of the pliers on the cap and the other on the bottle. Gently twist until the cap admits defeat.
7. How do you open a 5-gallon water jug
The colossal 5-gallon water jug can be intimidating, but fear not. Here’s how you can conquer it and unlock the hydration you deserve:
Step 1: Find your footing! Place the water jug on a stable surface, like the floor. You don’t want it slipping away while you’re battling with the cap.
Step 2: Get a grip! Put on some rubber gloves or grab a rubber jar opener to improve your grip on the cap. Slippery hands are no match for you!
Step 3: Twist with all your might! Place one hand on the handle and the other on the cap. Apply steady downward pressure with the hand on the handle while twisting the cap counterclockwise. Remember, you’re a hydration hero!
Step 4: Cheers to your victory! Once that cap is defeated, pour yourself a refreshing glass of water, raise it to the sky, and revel in your triumph.
8. How do you drink water
Ah, the age-old question: how to drink water? Well, here’s a foolproof guide to enjoying this life-sustaining elixir:
Step 1: The hydration station! Grab a clean drinking vessel. It could be a glass, a cup, or even a fancy water bottle. The choice is yours!
Step 2: Water on the rocks! If you prefer your water colder than your ex’s heart, add some ice cubes. Feel free to dress it up with a squeeze of lemon or a sprig of mint.
Step 3: Gentle pour! Pour the refreshing water into your chosen vessel. Slow and steady wins the hydration race.
Step 4: Sip and savor! Lift your vessel to your lips and take that first satisfying sip. Feel the coolness coursing through your body as you hydrate like a champ. Cheers to H2O!
9. How do you open a water jug cap
Opening a water jug cap is like cracking a secret code. But don’t worry, we’ve got your back! Here’s the ultimate guide to unleashing that refreshing water:
Step 1: Get a grip, champ! The jug cap usually has ridges or indents for better hold. Find those grips and get ready to twist.
Step 2: Turn counterclockwise! Apply downward pressure on the cap while twisting it counterclockwise. Enlist the help of your faithful rubber gloves or a jar opener for added grip strength.
Step 3: Persistence is key! If the cap refuses to budge, take a deep breath, reconfirm your determination, and give it another go. You got this!
Step 4: Victory is sweet! Once the cap finally yields, let out a triumphant cheer! Pour that delicious water and enjoy the satisfaction of conquering the jug cap challenge.
10. How do you take the cap off a 5-gallon water jug
The almighty 5-gallon water jug cap may test your strength, but fear not, mighty thirst-quencher! Here’s how you can liberate that cap and quench your thirst:
Step 1: Assess the situation! Take a moment to locate the handles or ridges on the cap. These cleverly placed features will provide leverage.
Step 2: Apply pressure and twist! Hold onto the handle or ridge with one hand, and with the other hand, push down firmly and twist the cap counterclockwise. Visualize your success and show that cap who’s boss!
Step 3: Reassess and adjust! If the cap is giving you a hard time, try adjusting your grip or using a rubber jar opener to get a better hold. Don’t let a stubborn cap ruin your hydration dreams!
Step 4: Celebrate your victory! Once that cap surrenders, raise your arms in triumph! Pat yourself on the back, fill up your glass, and revel in the glory of overcoming the 5-gallon water jug cap challenge.
11. Can you reseal glass bottles
Absolutely! Glass bottles, unlike secret government files, can be resealed without any drama. Here’s how to put that cap back on and preserve the freshness:
Step 1: Cleanliness first! Ensure both the bottle’s neck and the cap are clean and free of any debris. A little washing goes a long way.
Step 2: Align and seal! Place the cap on top of the bottle and press firmly, aligning it with the threads. Give it a twist clockwise to create an airtight bond. Voila! Your glass bottle is ready for another day.
Step 3: Store in style! Place the resealed glass bottle upright in a cool, dry place. Keep it away from direct sunlight and extreme temperature changes, so it stays as happy and fresh as can be.
12. How do you open a cap
Caps can be finicky little things, but with the right tactics, you’ll always come out on top. Here’s how to navigate this battle of cap and thirst:
Step 1: Assess the cap type! Caps come in various forms, from screw tops to snap-ons. First, identify the type of cap you’re dealing with to choose the best strategy for opening it.
Step 2: Twist and turn! For screw-top caps, apply counterclockwise force while twisting the cap. It’s a simple twist to quench your thirst.
Step 3: Snap and release! Snap-on caps require a different technique. Look for a small tab or lever on the cap and press down or lift it to loosen the seal. Then, simply lift or slide the cap off and enjoy your well-deserved drink.
13. How do I clean my Sparkletts water dispenser
Sparkletts water dispenser looking a little worse for wear? Don’t worry, we’ll help you restore its sparkle with these easy steps:
Step 1: Power down! Ensure the water dispenser is unplugged before you start the cleaning process. Safety first, folks!
Step 2: Drain and detach! Remove the bottle and drain any remaining water from the dispenser. Then, detach any removable parts, such as the drip tray or reservoir.
Step 3: Suds it up! Prepare a solution of warm water and mild dish soap. Use a sponge or cloth to wipe down the exterior and interior surfaces of the dispenser. Scrub away any dirt, residue, or mystery stains (we won’t judge).
Step 4: Rinse and dry! Rinse all the parts thoroughly with clean water to remove any soapy residue. Once everything is squeaky clean, dry the parts completely before reassembling the dispenser. Moisture and electrical appliances don’t mix well.
Step 5: Rehydrate your dispenser! Insert a fresh water bottle, plug in the dispenser, and wait patiently for those refreshing sips. Your Sparkletts dispenser is gleaming and ready to serve!
14. How do you remove a hot water bottle
Hot water bottles, oh the cozy comfort they bring! But when it’s time to part ways, here’s how you can safely remove them:
Step 1: Handle with care! Ensure the hot water bottle isn’t scalding hot before attempting removal. We wouldn’t want any unexpected hot showers.
Step 2: Deflate the beast! Locate the air stopper or cap on the hot water bottle. Carefully remove it and slowly release the trapped air. Remember, patience is a virtue.
Step 3: Easy does it! Once the bottle is deflated, gently lift it away from your body, letting any remaining hot water drain back into the sink or a designated location.
Step 4: Bid farewell! Give your trusted hot water bottle a proper goodbye by storing it in a cool, dry place until the next chilly encounter. See you later, chilly nights!