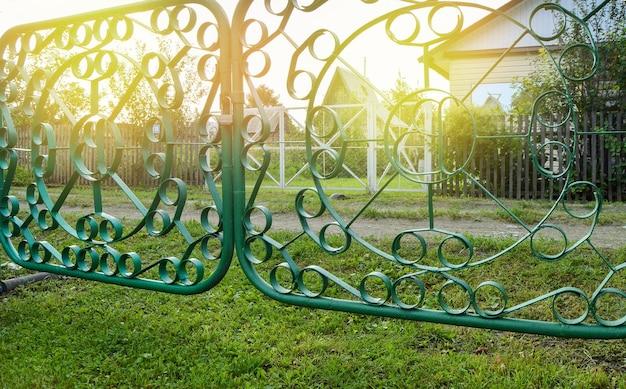
Metal yard art can add a touch of whimsy and personality to your outdoor space, but without proper protection, these unique pieces can quickly succumb to the elements. If you’re wondering how to protect metal statues, garden ornaments, and other metal art from rust and fading, you’ve come to the right place. In this blog post, we’ll explore various methods and products to help you keep your metal yard art looking vibrant and beautiful for years to come.
One of the first steps in protecting metal yard art is addressing any existing rust. We’ll delve into the best spray paint options for rusty metal, as well as the necessary steps to paint metal art. Additionally, we’ll discuss the importance of priming metal before painting and reveal techniques to seal paint on metal effectively.
Furthermore, we’ll provide valuable insights into protecting outdoor decorations from fading, uncover the dos and don’ts of protecting painted metal from rust, and explore the ideal type of paint for metal garden ornaments. Whether you’re a proud owner of garden gnomes or other metal art, we’ve got you covered.
So, if you’re ready to give your metal yard art the care it deserves, let’s dive into the world of protecting and preserving these beautiful outdoor decorations.

How to Safeguard Your Metal Yard Art from the Elements
When it comes to protecting your beloved metal yard art from the unpredictable wrath of Mother Nature, you need to take some serious precautionary measures. After all, you don’t want your artistic investment to rust away like a forgotten dream. But fear not, dear readers! We’ve got you covered (pun absolutely intended) with some expert tips to keep your metal yard art looking fabulous for years to come.
Ensure a Strong Foundation with a Protective Coating
Just like a superhero needs a reliable sidekick, your metal yard art needs a strong foundation to withstand the elements. Start by giving it a sturdy base to rest upon, preferably one that won’t sink or shift with the changing seasons. Then, apply a protective coating to your artwork. It’s like giving your yard art a suit of armor, ready to take on whatever the weather throws at it.
Embrace the Power of Paint
If there’s one thing that can lift your metal yard art to new heights of awesomeness, it’s the power of paint. Choose a high-quality outdoor paint specifically designed for metal surfaces. Not only will it add a pop of color and personality to your yard, but it will also act as a shield against rust and corrosion. Pro tip: go for vibrant hues that can withstand the test of time and make your neighbors green with envy.
Give Rust the Cold Shoulder
Rust is the sworn enemy of metal yard art, lurking in the shadows, just waiting for the perfect opportunity to attack. But fear not, for we have the ultimate weapon to combat this pesky foe: cold galvanizing spray. Give your metal art pieces a generous coating of this magical spray, and rust will think twice before making a comeback. It’s like freezing rust’s plans and leaving it shivering in defeat.
Take Shelter in the Winter Wonderland
Winter might be a wonderland for snowball fights and hot cocoa, but it can be a nightmare for your metal yard art. Before the first snowflake hits the ground, ensure that you provide a cozy shelter for your art to weather the storm. It could be something as simple as covering it with a tarp or finding a snug spot in your garage. Remember, even Superman retreats to his Fortress of Solitude when the going gets icy.
Show Some Love with Regular Maintenance
Just like a relationship, your metal yard art needs a little TLC to thrive. Regular maintenance is the key to keeping it in tip-top shape. Take a few minutes every month to inspect and clean your artwork. Remove any dirt, debris, or insects that have taken up residence. If you spot any signs of wear and tear, address them promptly. Remember, prevention is always better than a rusty cure.
By following these tried-and-true methods, you can become the superhero of metal yard art protection. So, go forth and safeguard your precious creations from rust, weather, and time itself. Your stunning metal masterpieces deserve to stand tall and shine bright for all to admire. Happy yard art protecting!
FAQ: How To Protect Metal Yard Art
How do you protect metal statues
When it comes to protecting your beloved metal statues, there are a few steps you can take to keep them looking shiny and new. First, make sure to clean the statues regularly with a mild soap and water solution. This helps remove any dirt or grime that may accumulate over time. Next, apply a layer of metal wax or automotive wax to provide a protective barrier against the elements. Finally, consider using a clear coat spray specifically designed for metal to add an extra layer of protection. Remember, a little TLC goes a long way in keeping your metal statues looking their best!
What is the best spray paint for rusty metal
Ah, the battle against rusty metal! Fear not, for I have an insider tip to share. When it comes to spray painting rusty metal, look no further than rust-converting spray paint. This magical concoction not only covers up the rust but also transforms it into a more stable surface. The key is to choose a spray paint that contains rust inhibitors. Just make sure to read the label and follow the manufacturer’s instructions for the best results. Say goodbye to rusty eyesores and hello to a vibrant, renewed metal finish!
How do you paint metal art
If you’re eager to add a pop of color to your metal art, painting is the way to go! Here’s a step-by-step guide to help you unleash your inner artist:
-
Clean: Start by cleaning the metal surface thoroughly. Use soap and water to remove any dirt, grease, or grime that may hinder paint adhesion.
-
Prep: Once dry, lightly sand the surface to create a rough texture. This helps the paint adhere better. Remember to remove any dust after sanding!
-
Prime: Apply a metal primer to promote paint adhesion and prevent rust. Choose a primer specifically formulated for metal surfaces.
-
Paint: Grab your favorite metal-friendly paint and start brushing or spraying the color onto the surface. Apply multiple thin coats for better coverage and durability. Allow each coat to dry before adding the next.
-
Protect: To keep your painted metal art looking fresh, consider applying a clear sealant or varnish as a final protective layer. This helps prevent chipping or fading over time.
Now you’re ready to turn that plain metal art into a dazzling masterpiece!
How do you protect outdoor decorations
Outdoor decorations bring life and joy to your yard, but Mother Nature can be a tough critic. To protect your beloved outdoor decor from the elements, follow these expert tips:
-
Weatherproof: Look for decorations specifically designed for outdoor use. These tend to be sturdier and more resistant to weather-induced wear and tear.
-
Clear Coat: Consider applying a clear coat spray designed for outdoor use. This adds an extra layer of protection against UV rays and other potential damage.
-
Cover Up: When winter rolls around, make sure to store or cover your outdoor decorations properly. This helps shield them from harsh weather conditions.
-
Maintenance Mode: Regularly inspect and clean your outdoor decorations. This allows you to catch any signs of damage early on and take appropriate action.
Remember, a little bit of care goes a long way in preserving the beauty of your outdoor decorations!
Can you polyurethane over painted metal
Absolutely! If you want to give your painted metal a boost of protection, polyurethane is here to save the day. Polyurethane acts as a strong and durable sealant, creating a shield against moisture, UV rays, and general wear and tear. Just make sure the painted surface is thoroughly dry before applying polyurethane. Use a brush or foam roller to evenly coat the metal, applying multiple thin layers for optimal coverage. Let each layer dry completely before adding the next. With polyurethane on your side, your painted metal will stay glorious for years to come!
What is the best rustproof paint for metal
Ah, rust, the sworn enemy of metal. But fear not, for rustproof paint is here to save the day! When you’re on the hunt for rustproof paint for your precious metal, look for products labeled as “rust inhibiting” or “rust-resistant.” These special paints contain additives that prevent rust from forming or spreading. Rust-oleum and Krylon are two reputable brands that offer a wide range of rustproof paint options. So, bid farewell to those pesky rust stains and embrace a world of vibrant, rust-free metal!
Do I need to prime metal before painting
Priming metal before painting may sound tedious, but trust us, it’s a crucial step in achieving a long-lasting and professional-looking finish. Here’s why:
-
Improved Adhesion: Metal surfaces can be smooth and slick, making it challenging for paint to adhere properly. Priming creates a rougher surface that helps the paint grip and stay in place.
-
Rust Prevention: Primer provides an extra layer of protection against rust by acting as a barrier between the metal and the elements.
-
Improved Coverage: Priming evens out any surface imperfections and helps the paint achieve a more uniform appearance.
So, while it may add a little extra time to your project, priming is a worthwhile investment for a flawless metal paint job!
How do you seal paint on metal
Sealing the deal with your freshly painted metal masterpiece is essential to protect your artwork from the elements and ensure long-lasting beauty. Here’s how you can seal paint on metal:
-
Wait: First things first, patience is key. Allow your painted metal to dry completely before applying any sealant. Follow the paint manufacturer’s instructions for the recommended drying time.
-
Clear Coat: Opt for a clear coat spray specifically designed for metal surfaces. These sprays provide a protective layer that shields your paint from scratches, fading, and moisture. Apply multiple thin coats for optimal protection.
-
Weatherproof: If your metal art will be exposed to the great outdoors, consider choosing a clear coat spray that offers UV protection. This helps prevent discoloration and fading caused by the sun’s powerful rays.
With a little sealing magic, your painted metal will remain vibrant and protected for years to come!
How can I protect my garden gnomes
Ah, those mischievous garden gnomes deserve all the love and protection they can get. To keep these adorable creatures safe and sound, follow these gnome-guarding tips:
-
Weather Watch: Keep an eye on the weather forecast, especially during harsh seasons. If heavy rain, snow, or hail is on the horizon, consider temporarily relocating your garden gnomes to a covered area.
-
Sturdy Stands: Use sturdy stands or bases to elevate your garden gnomes. This helps protect them from flooding or frost damage caused by direct contact with the ground.
-
Coating Care: If your garden gnomes are made of metal, consider applying a clear coat spray designed for outdoor use. This adds a protective layer against the elements, including UV rays and rust.
-
Gnome Relocation: In extreme weather conditions, it may be necessary to bring your gnome friends indoors for temporary shelter. Just imagine the fun they’ll have exploring your cozy home!
Remember, happy gnomes make for a happy garden!
How do you protect painted metal from rust
Painted metal can be a real showstopper, but rust can quickly ruin the party. To protect your painted metal from the sneaky villain called rust, follow these steps:
-
Prep and Prime: Before painting, make sure the metal surface is clean, dry, and free from any rust. Apply a metal primer to provide an extra layer of protection against rust formation.
-
Quality Paint: Use high-quality paint specifically formulated for metal surfaces. These paints often contain rust inhibitors, preventing those rusty stains from making an unwanted appearance.
-
Clear Coat: Finish off your painted metal with a clear coat spray. This protective layer acts as a shield against moisture and other potential rust triggers.
-
Regular Maintenance: Keep a watchful eye on your painted metal for any signs of wear and tear or chipped paint. Touch up any imperfections promptly to prevent rust from taking hold.
With these armor-like precautions, rust doesn’t stand a chance against your fortified painted metal!
What kind of paint do you use on metal garden ornaments
When it comes to painting metal garden ornaments, not just any paint will do. You need something tough, durable, and weather-resistant to withstand the elements. That’s where outdoor enamel paint comes to the rescue! This type of paint is specially formulated for outdoor use and can adhere well to metal surfaces. Look for paints labeled as “all-surface” or “multi-surface” to ensure compatibility with your metal garden ornaments. So, grab your brushes and let the colorful transformation begin in your garden!
How do you keep paint from chipping on metal
Chipped paint on metal can be quite the eyesore. Thankfully, there are a few tricks up our sleeves to keep that paint intact and looking fabulous:
-
Surface Preparation: Before painting, ensure the metal surface is clean, dry, and free from any debris. Sanding lightly can also help create a better surface for the paint to adhere to.
-
Primer: Apply a metal primer before painting to promote better paint adhesion and provide an extra layer of protection against chipping.
-
Thin and Multiple Coats: Apply thin coats of paint rather than thick layers. This allows for better drying and reduces the likelihood of paint chipping. Applying multiple thin coats also ensures a more durable finish.
-
Clear Coat: Consider adding a clear coat spray specifically designed for metal surfaces. This protective layer acts as a shield, preventing chipping caused by everyday wear and tear.
Remember, with a little extra care and attention, your painted metal will withstand the test of time without those pesky chips!
How do you keep garden statues from fading
Ah, the allure of a vibrant garden statue. To keep your garden statues looking fresh and full of life, follow these tips for preventing fading:
-
UV-Resistant Paint: When painting or choosing garden statues, opt for UV-resistant paint or finishes. These special formulas withstand exposure to the sun’s UV rays, reducing fading over time.
-
Protective Sealants: Apply clear coat spray specifically designed for outdoor use to your garden statues. This adds an extra layer of protection against fading caused by UV rays, rain, and other environmental factors.
-
Shade Seekers: Consider placing your garden statues in areas with partial or filtered shade. This limits direct exposure to sunlight, minimizing the risk of fading.
-
Clean and Care: Regularly clean and dust your garden statues. Gently wipe away any dirt or grime that may accumulate over time, as these can contribute to the dulling of colors.
By taking these preventative measures, your garden statues will continue to mesmerize with their vibrant hues year after year!
How do you protect metal art outside
Outdoor metal art can add a touch of elegance and whimsy to your exterior space. To ensure your metal art withstands the elements and remains a stunning focal point, follow these protective measures:
-
Weather-Resistant Finish: When displaying metal art outdoors, make sure it has a weather-resistant finish or coating. Look for paints or sealants specifically designed for outdoor metal surfaces.
-
Remove Rust: Keep rust at bay by promptly addressing any signs of corrosion on your metal art. Use sandpaper or a wire brush to remove the rust before applying a touch-up of paint or a rust converter.
-
Regular Cleaning: Dust and debris can accumulate on outdoor metal art, so regular cleaning is essential. Simply use a soft cloth or brush to gently remove any dirt.
-
Consider Shelter: If extreme weather conditions are expected, consider temporarily moving your metal art to a covered area. This protects it from potentially damaging elements such as heavy rain, snow, or strong winds.
With a little care, your outdoor metal art will continue to shine brightly and capture the hearts of all who admire it!
How do you spray paint metal art
Spray-painting metal art is a fun and efficient way to add a burst of color to your masterpiece. Follow these steps for a smooth and successful spray-painting experience:
-
Prep the Surface: Clean the metal surface thoroughly to ensure optimal paint adhesion. Remove any dirt, grease, or rust using a mild detergent or appropriate cleaning solution.
-
Protect Surroundings: Lay down a drop cloth or newspapers to protect your work area from overspray. Trust us, you don’t want to redecorate the entire backyard with unintended splashes of color!
-
Shake It Up: Shake the spray paint can vigorously for a minute or two to ensure the paint is well-mixed and ready to go.
-
Test and Technique: Before spraying directly onto your metal art, practice your spraying technique on a piece of scrap material. This helps you get a feel for the pressure and distance needed for even coverage.
-
Spray Away: Holding the can approximately 6-8 inches away from the metal art, apply the paint using smooth, sweeping motions. Start spraying slightly off the art, then move across in a steady, continuous motion. Don’t forget to overlap each stroke slightly for consistent coverage.
-
Multiple Thin Coats: Instead of applying one heavy coat, aim for multiple thin coats, allowing each coat to dry before applying the next. This creates a more even, durable finish.
-
Finishing Touches: Once the final coat is dry, you can decide whether to leave it as is or apply a clear coat spray for additional protection.
Now go forth, armed with your spray can, and transform your metal art into a vibrant kaleidoscope of color!
How do you paint metal garden ornaments
Painting metal garden ornaments is a delightful way to infuse your outdoor space with personality and charm. Follow these steps to ensure your painted garden ornaments shine bright:
-
Prep and Clean: Clean the metal garden ornaments thoroughly, removing any dirt or rust. Sanding the surface lightly helps create a better bond between the paint and the metal.
-
Primer Love: Apply a metal primer to create an even base for the paint and enhance adhesion. Make sure to choose a primer specifically formulated for metal surfaces.
-
Paint Away: Using a brush or spray, apply your chosen paint color to the metal garden ornaments. Start with thin coats, allowing each coat to dry before adding more. This prevents drips and helps achieve a smooth, flawless finish.
-
Creative Touches: Get creative and add designs or patterns to your metal garden ornaments. Stencils or painter’s tape can help create crisp lines or geometric shapes.