Are you a craft enthusiast looking to add a touch of nature to your creations? If so, you’ve come to the right place! In this blog post, we’ll dive into the art of preserving twigs for crafts and explore various techniques to ensure your branches remain intact and ready for creative projects.
From drying branches without cracking them to using real branches for decorations, we’ll cover it all. We’ll even share tips on how to make tree branches for crafts and how to seal them for long-lasting beauty. Whether you have fallen tree branches or garden twigs, we’ll discuss the endless possibilities they hold for unique and eco-friendly creations.
So, grab your glue gun and get ready to unleash your creativity! Let’s discover the wonderful world of preserving and utilizing branches and twigs in our crafting adventures.
How to Preserve Twigs for Crafts
If you have a creative side and love to incorporate natural elements in your craft projects, then preserving twigs for crafts is a skill you need to master. Luckily, preserving twigs is not as complicated as deciphering hieroglyphics or understanding the logic behind fashion trends. In fact, it’s a fun and easy process that will leave you with beautifully preserved twigs ready to be transformed into all sorts of crafty creations. So, grab your twigs and let’s get preserving!
Gather Your Twigs
Before you embark on your twig preservation adventure, you need to gather some freshly fallen twigs. It’s important to collect twigs that are relatively straight and free from any major knots or blemishes. Think of it as choosing the best candidates for your craft projects. Don’t discriminate though; every twig deserves a chance to shine!
Clean & Trim
Once you have your twigs, give them a good clean by gently wiping off any dirt or debris. You can use a soft cloth or a brush for this task. Remember, your twigs need to be squeaky clean, just like a freshly bathed puppy. Next, trim away any excess branches or leaves, leaving behind only the main twig. This will make the preservation process much easier. Plus, your twigs will appreciate the spa treatment!
Choose Your Preservation Method
Now comes the fun part – choosing your preservation method! There are a few different techniques you can use to preserve twigs for crafts. Let’s explore some of the most popular methods:
Air Drying
This is the no-fuss method for preserving twigs. Simply bundle your twigs together and hang them upside down in a cool, dry place with good air circulation. Think of it as sending your twigs on a relaxing vacation to the Bahamas, where they can soak up the sun and air. Leave them there for about 2-3 weeks, allowing them to dry completely. Once they are dry, you can seal them with a clear protective spray to enhance their longevity.
Waxing
Give your twigs a wax on, wax off treatment! Dip your twigs into melted wax and let them dry. This protective layer will give your twigs a glossy finish while preserving their natural beauty. Just make sure to use a non-toxic wax, unless you want your crafts to have an interesting scent of melted crayons.
Glycerin Soaking
If you want to preserve your twigs while keeping them flexible and pliable, glycerin soaking is for you. Create a mixture of 1 part glycerin and 2 parts water in a container. Submerge your twigs in the mixture and let them soak for about 2-6 weeks. During this time, the twigs will absorb the glycerin, which will replace the sap and keep them supple. It’s like giving your twigs a refreshing spa treatment with a side of flexibility.
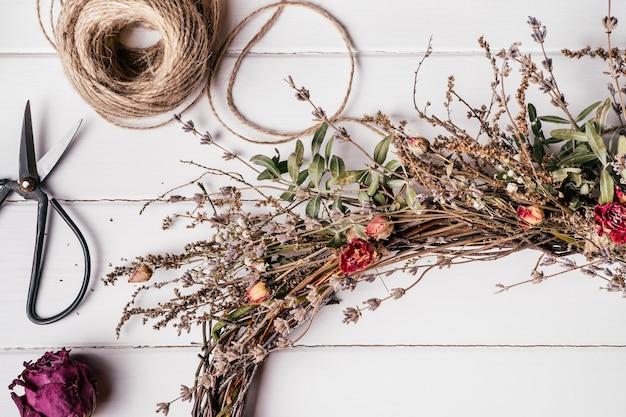
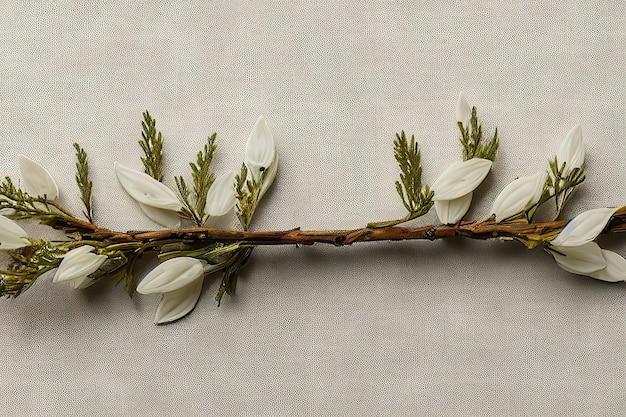
Showcase and Use Your Preserved Twigs
Congratulations! You’ve successfully preserved your twigs and now it’s time to let your creativity run wild. Use your preserved twigs in wreaths, flower arrangements, or even as unique home decor pieces. The possibilities are endless! Just remember, when it comes to crafting with your preserved twigs, the only limit is your imagination. So go forth and create something truly twig-tastic!
So there you have it, amigo! With these preservation techniques in your crafty arsenal, you can now transform ordinary twigs into extraordinary creations. You’ll be the talk of the DIY community, the Twig Whisperer of your neighborhood. Remember, preserving twigs is not just a hobby, it’s an art form. Embrace it, have fun with it, and let your creativity bloom like a well-preserved twig in the springtime!
FAQ: How To Preserve Twigs For Crafts
Welcome to the FAQ section of our blog post on how to preserve twigs for crafts! In this section, we’ll address some of the most common questions you may have about drying and preserving branches. So grab a cup of coffee, sit back, and let’s dive right in!
How do you dry a branch
Drying a branch is a simple process that requires patience. To start, you’ll want to remove any excess moisture by gently wiping the branch with a cloth. Then, find a cool and dry place, like a basement or garage, to hang the branch upside down. Make sure to secure it using twine or string. This will allow the branch to air dry naturally, without cracking or warping. Depending on the thickness of the branch, drying can take anywhere from a few weeks to several months.
How do you preserve wood twigs for crafts
Preserving wood twigs for crafts is a fantastic way to add a natural touch to your creations. One popular method is using a mixture of equal parts glycerin and water. Simply soak the twigs in this mixture for about a week, ensuring that they are fully submerged. The glycerin will replace the water in the twigs, which helps to prevent cracking and preserve their shape. Once they’re done soaking, remove the twigs and let them air dry. Voila! Preserved wood twigs ready for crafting!
How do you dry a branch without cracking it
Ah, the age-old dilemma of drying branches without the dreaded cracks. Fear not, as we have a solution for you! Start by applying a wood sealant to the ends of the branch. This will slow down the drying process and allow the moisture to evaporate more evenly, reducing the risk of cracking. Next, wrap the branch loosely in a plastic bag, leaving a small opening for air circulation. Then, place it in a cool and dry location, and let nature work its magic! Remember, patience is key here.
How do you use real branches for decorations
Real branches make for stunning decorations, adding a touch of rustic charm to any space. One popular way to use real branches is by creating a centerpiece. Gather a few branches of varying heights and widths, and place them in a tall vase. You can then adorn them with fairy lights or hang small ornaments for a festive touch. If you’re feeling adventurous, try spray-painting the branches in metallic colors to create a more modern look. The possibilities are endless!
How do you make tree branches for crafts
Making tree branches for crafts is easier than you might think. Start by gathering fallen branches of various sizes and remove any unwanted twigs or leaves. Next, give them a good rinse to remove dirt or debris. Once they’re clean, let them air dry completely. If you want to add a personal touch, you can paint or stain the branches to match your project. Now you have your very own custom-made tree branches, ready to be transformed into works of art!
How do you dry twigs for crafts
Drying twigs for crafts is a breeze. Start by spreading the twigs out in a single layer on a clean and dry surface. Make sure they are not touching each other to allow for proper airflow. Then, place them in a well-ventilated area, away from direct sunlight. You can speed up the drying process by using a fan or dehumidifier. Depending on the thickness of the twigs, they should be fully dry within a few days to a couple of weeks. Now you’re ready to let your creativity flow!
What do you do with fallen tree branches
Ah, the dilemma of fallen tree branches. Instead of letting them go to waste, why not turn them into something fabulous? Fallen tree branches can be transformed into rustic picture frames, candle holders, or even unique coat racks. You can also use them as natural materials for wreaths or create intricate sculptures. The possibilities are endless! So put on your creative thinking cap and let those fallen branches shine.
What can I do with garden branches
Garden branches are a treasure trove for craft enthusiasts. One fantastic idea is to transform them into a DIY trellis for climbing plants. Simply position the branches in a teepee shape and secure them with twine. You can also use garden branches as stakes for supporting young or fragile plants in your garden. If you’re feeling particularly crafty, consider creating a whimsical garden sculpture by intertwining branches into unique shapes. Embrace your inner artist and let your garden flourish!
How do you dry tree branches with leaves
Drying tree branches with leaves can be a bit trickier since leaves tend to hold more moisture. To dry branches with leaves, start by gently rinsing them under cold water to remove any dirt or insects. Pat them dry with a cloth, being careful not to damage the leaves. Then, follow the same drying process as regular branches: hang them upside down in a cool and dry place. Make sure to provide proper air circulation and allow sufficient time for both the branches and leaves to dry completely. Your nature-inspired crafts await!
How do you seal a tree branch for decorations
Sealing a tree branch for decorations is essential to protect it from moisture and add longevity to your creations. You can use a clear wood sealer or polyurethane spray for this purpose. Simply apply a thin, even coat of sealer to the branch using a brush or spray, making sure to cover all surfaces. Allow it to dry completely before handling or incorporating it into your decorations. Now your tree branch is sealed and ready to take center stage!
What can you do with branches and twigs
Branches and twigs are versatile materials that can be used in a myriad of creative projects. Slice branches into thin disks and use them as unique coasters, or create a whimsical mobile by hanging twigs and small trinkets from a hanger. You can also use branches as a base for floral arrangements or add a rustic touch to your gift wrapping by incorporating small twigs. Don’t be afraid to let your imagination run wild – the possibilities are endless!
How do you glue twigs together
Gluing twigs together requires a strong adhesive that can withstand various stresses. For this purpose, we recommend using a hot glue gun. Simply apply a small amount of hot glue to the area where the twigs connect and press them together firmly. Hold them in place for a few seconds to allow the glue to set. Be cautious not to burn yourself in the process, as hot glue can be, well… hot! Once the glue has dried, your twigs will be securely bonded and ready for your crafting adventures.
How do you preserve fall branches
Fall branches, with their vibrant colors and unique textures, are a perfect addition to seasonal decorations. To preserve them, start by gently spraying the branches with a clear lacquer or hairspray to protect the leaves from crumbling. Then, hang the branches upside down in a cool and dry place, allowing them to air dry completely. Once dried, handle them with care to avoid any breakage. Now you can relish the beauty of fall all year round!
How do you preserve branches for crafts
Preserving branches for crafts is a fantastic way to ensure they last for years to come. One popular method is to treat them with a wood preservative or a mixture of equal parts water and white vinegar. Simply soak the branches in the solution for a day or two, making sure they are fully submerged. This treatment helps to deter insects and prevent decay. After soaking, remove the branches and let them air dry completely before using them in your craft projects. Craft on!
What can I do with old twigs
Old twigs may seem like they’re past their prime, but fear not! They still have plenty of life left in them. One creative idea is to repurpose them as plant markers in your garden. Simply write the names of your plants on the twigs using a permanent marker, and voila! You have a charming, rustic way to keep track of your green friends. Old twigs can also be used as kindling for fires or transformed into miniature wands for fairy gardens. Don’t toss those twigs just yet – they still have so much to offer!
How do you dry a branch quickly
If you’re feeling a bit impatient and need to dry a branch quickly, we have a trick up our sleeve. Start by placing the branch in a microwave-safe container filled with a desiccant such as silica gel or kitty litter. Make sure the container is large enough to accommodate the branch without touching the sides. Microwave the branch in short bursts, checking regularly to avoid overheating. This method can dramatically speed up the drying process, but be sure to keep a close eye on it – you don’t want to end up with a crispy branch!
Can you use twigs for crafts
Absolutely! Twigs are incredibly versatile and can be used in a wide range of crafts. From small DIY projects like jewelry and keychains to larger ones like wreaths and sculptures, twigs add a touch of nature’s beauty to any creation. So go ahead, let your creativity run wild and embrace the twiggy goodness!
Do twigs rot
Given enough time, twigs can indeed rot. Exposure to moisture and the elements can accelerate the decay process. However, with proper drying and preservation techniques, you can significantly delay rotting. So, be proactive in protecting your twigs, and they’ll stay in tip-top shape for much longer.
How long does it take for a branch to dry out
The time it takes for a branch to dry out depends on various factors such as the branch’s thickness, the ambient humidity, and the drying method used. As a general rule of thumb, smaller branches may dry out within a few weeks, while larger ones can take several months. Remember to be patient and give them ample time to dry thoroughly – good things come to those who wait!
How do you preserve pine branches for decorations
Preserving pine branches for decorations is a fantastic way to capture the fresh, aromatic essence of the holiday season. One popular method is to lightly coat the branches with hairspray to help seal in moisture. Then, arrange them in a vase or use them as garlands and wreaths. Avoid placing them in direct sunlight or areas with high humidity to prevent premature drying. With proper care, your preserved pine branches will bring the enchantment of the winter forest into your home!
Congratulations! You’ve reached the end of our FAQ section on how to preserve twigs for crafts. We hope this comprehensive guide has answered your burning questions and inspired you to embark on your own creative projects. Remember, twigs are nature’s tiny treasures waiting to be transformed into masterpieces. So go forth, embrace your inner artist, and let the magic of twigs unfold!