Crafting with branches and twigs adds a rustic and natural touch to any project. Whether you want to create a beautiful centerpiece, make a decorative wall art, or incorporate branches into other crafts, preserving them is essential to ensure their longevity and aesthetic appeal. In this blog post, we will explore various techniques and tips on how to preserve branches for crafts, keeping them fresh and durable for years to come.
From preserving tree bark in crafts to sealing branches for decorations, we will cover it all. You may be wondering how long cut branches can last or how to preserve evergreen branches. We will also delve into the secrets of keeping pine branches green and share methods to ensure that your tree branches retain their natural beauty when used as centerpieces. Additionally, we will explore ways to preserve leaves on branches for unique crafting possibilities.
As we dive into this guide, we will answer questions such as how to dry twigs for crafts and how to preserve Christmas tree branches. We will also discuss techniques for preserving craft sticks, ensuring they remain sturdy and reliable for your projects. So, grab your tools and let’s embark on a journey of preserving branches to enhance your crafting endeavors in 2023 and beyond!
How to Preserve Branches for Crafts
Branches can be a versatile and beautiful addition to your crafts, but they need to be properly preserved to ensure they last and maintain their natural charm. In this guide, we’ll walk you through the process of preserving branches for crafts, so you can make stunning creations that will stand the test of time.
Choosing the Right Branches
Not all branches are created equal when it comes to crafting. You want branches that are sturdy, free from pests, and have interesting shapes or textures. Take a walk in nature and keep an eye out for branches that catch your eye. Just remember to ask for permission if you plan on harvesting branches from public or private property. We don’t want any crafters landing themselves in a sticky situation!
Preparing the Branches
Before preserving your branches, it’s important to give them a good clean. Use a soft brush to remove any loose dirt or debris. If you encounter any stubborn dirt, a gentle wipe with a damp cloth should do the trick. Once your branches are nice and clean, it’s time to move on to the preservation process.
Air Drying
Air drying is a simple and effective method of preserving branches. Start by tying a string around the base of the branch and hang it upside down in a cool, dry place away from direct sunlight. This will allow the branch to dry slowly and evenly, preventing warping or cracking. Patience is key here, as the drying process can take anywhere from a few days to a few weeks, depending on the branch’s size and moisture content.
Using a Drying Agent
If you’re short on time or want a faster preserving method, you can use a drying agent like silica gel or borax. Simply place your branches in a container and cover them with the drying agent. Seal the container and let it sit for a few days to allow the agent to absorb the moisture from the branches. This method is like sending your branches to a spa for a quick rejuvenation!
Heat Treatment
For those who want a more immediate result, heat treatment is the way to go. Similar to baking cookies, but without the delicious aroma, you can use an oven to quickly dry and preserve your branches. Preheat your oven to a low temperature, around 200°F (93°C), and place your branches on a baking sheet. Keep a close eye on them, as the drying process can be pretty speedy. This method is perfect for crafters who are as impatient as a kid waiting for their ice cream to melt!
Sealing and Finishing
Once your branches are fully dried, it’s essential to seal them to protect them from moisture and ensure they maintain their shape. You can use a clear wood sealer or a mix of beeswax and mineral oil for a more natural finish. Apply the sealer with a brush or a clean cloth, making sure to coat all surfaces. Give it a good drying time before moving on to your crafting adventures.
Preserving branches for crafts doesn’t have to be a daunting task. With the right techniques and a little bit of patience, you can turn ordinary branches into extraordinary pieces of art. Remember to choose the best branches, prepare them properly, and use the preservation method that works best for you. Now go forth, embrace your creativity, and let those preserved branches inspire your crafty endeavors!

FAQ: How To Preserve Branches For Crafts
Crafting with branches and twigs can add a touch of nature to your projects. Whether you’re making centerpieces, decorations, or even homemade crafts sticks, preserving branches is essential to ensuring they last and maintain their beauty. In this FAQ-style guide, we’ll answer all your burning questions and provide you with helpful tips on how to preserve branches for various crafts. So, let’s dive in!
How do You Keep Craft Leaves Fresh
If you want to keep your craft leaves fresh and vibrant, there’s a simple trick you can try. Start by gently washing the leaves with water to remove any dirt or debris. Then, fill a spray bottle with water and mist the leaves lightly. Place the branches in a sealed plastic bag and store them in the refrigerator. The cool temperature will help keep the leaves fresh for a longer period, allowing you to enjoy their natural beauty in your crafts.
How do You Preserve Tree Bark in Crafts
Preserving tree bark adds an earthy and rustic look to crafts. To preserve tree bark for your projects, you’ll need to take a few steps. First, carefully remove the desired section of bark from the tree, ensuring not to damage it. Clean off any dirt or insects gently. Then, apply a thin layer of adhesive, such as Mod Podge, onto the back of the bark and press it firmly onto your chosen craft surface. Allow it to dry completely before handling. This method not only preserves the bark but also prevents it from peeling off over time.
How do You Seal a Tree Branch for Decorations
Sealing tree branches is crucial for preserving their integrity and preventing them from decaying or becoming brittle over time. Start by sanding the branch lightly to remove any rough edges and splinters. Next, apply a coat of clear wood sealer to protect the surface and seal the moisture inside. Allow the sealer to dry according to the manufacturer’s instructions before using the branch in your decorations.
How Long Will Cut Branches Last
The lifespan of cut branches can vary depending on various factors, including the type of branch, environmental conditions, and preservation techniques used. In general, cut branches can last anywhere from a few days to several weeks. To maximize their lifespan, it’s essential to store them properly. Keep them in a cool, dry place away from direct sunlight and regularly monitor their condition. If you notice any signs of decay or wilting, it’s time to replace them with fresh branches.
How do You Preserve Tree Branches with Bark for Decoration
Preserving tree branches with bark intact can be a bit challenging but not impossible. Start by selecting branches with strong, healthy bark. Then, follow the sealing method mentioned earlier to protect the bark from deterioration. Additionally, you can apply a thin layer of clear varnish to add an extra protective coating. This will help maintain the natural beauty of the bark and extend the lifespan of your branches for decoration purposes.
How do You Preserve Evergreen Branches
Evergreen branches, with their lush green foliage, are perfect for adding a touch of freshness to your crafts. To preserve evergreen branches, start by trimming fresh branches from a healthy evergreen tree. Remove any excess foliage or unwanted twigs. Next, mist the branches with water to keep them hydrated. Finally, place the branches in a vase filled with water and keep them in a cool, shaded area. This method will help keep the evergreen branches looking vibrant and fresh for a longer duration.
How Long Does it Take for Tree Branches to Dry Out
The drying time for tree branches can vary depending on their size, type, and environmental conditions. On average, it can take anywhere from a few days to a few weeks for tree branches to dry out completely. Factors such as humidity, airflow, and the thickness of the branches play a role in the drying process. To speed up the drying time, you can cut the branches into smaller sections, expose them to sunlight, and ensure proper airflow by placing them on a drying rack.
How do You Keep Pine Branches Green
Keeping pine branches green and vibrant requires a little extra care. Start by cutting fresh pine branches from the tree, making sure to trim them from the bottom. Then, place the branches in a bucket of cool water and let them soak for a few hours. This step helps the branches absorb water and stay hydrated. To maintain their green color even longer, mist the branches with water every few days and avoid exposing them to direct sunlight or excessive heat.
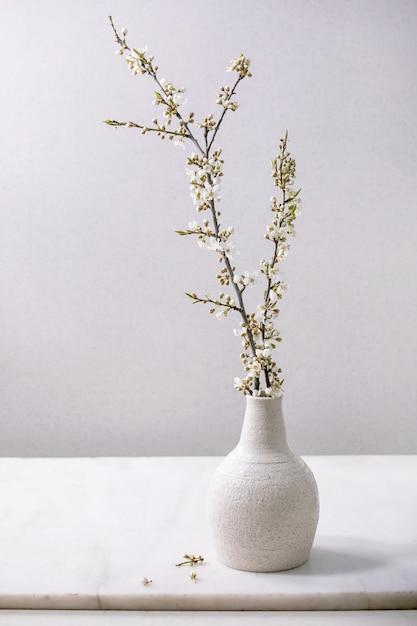
How do You Preserve Tree Branches for Centerpieces
Preserving tree branches for centerpieces involves a combination of techniques, including protection from decay and maintaining their visual appeal. Start by removing any excess foliage or unwanted twigs from the branches and sanding any rough edges. Next, seal the branches with a clear wood sealer to prevent decay and enhance durability. Finally, arrange the branches in a vase or container filled with water to ensure they stay fresh and hydrated, making your centerpieces a stunning focal point.
How do You Preserve Cut Pine Branches
Preserving cut pine branches requires a few simple steps. Begin by trimming fresh pine branches from a healthy tree. Remove any excess foliage or unwanted twigs. Next, lightly mist the branches with water to keep them hydrated. Finally, store the branches in a cool, dry place away from direct sunlight. Regularly check their condition and mist them with water as needed to maintain their freshness and prevent them from drying out.
How do You Preserve Craft Sticks
Craft sticks are versatile and can be preserved easily for repeated use. After each use, make sure to clean the craft sticks using a soft cloth or sponge and mild soap. Rinse them thoroughly and allow them to dry completely before storing them. To prevent warping or bending, stack the craft sticks neatly and secure them with a rubber band or string. Store them in a cool, dry place away from moisture and extreme temperatures to keep them in perfect condition for your future crafting endeavors.
How do You Preserve Branches with Leaves
Preserving branches with leaves intact requires a delicate touch. Start by cleaning the leaves gently with water to remove any dirt or insects. Then, carefully trim the branches to your desired length, ensuring not to damage the leaves. Next, dip the trimmed end of each branch into a rooting hormone powder to promote leaf retention. Finally, place the branches in a vase or container filled with water and keep them in a cool, shaded area. Regularly check the water level and replace it as needed to ensure the leaves stay fresh and vibrant.
How do You Bake Twigs
Baking twigs can be a helpful technique to kill any insects or larvae that may be hiding within them. Begin by preheating your oven to a low temperature, around 200°F (93°C). Line a baking sheet with parchment paper and place the twigs on top, making sure they’re spread out evenly. Bake the twigs in the oven for about 30 minutes to an hour, depending on their thickness. Keep a close eye on them to prevent charring or burning. Once done, remove the twigs from the oven and let them cool completely before using them in your crafts.
How do You Make Cut Branches Last Longer
To make cut branches last longer, proper care and preservation techniques are key. Start by trimming the branches at a 45-degree angle to increase water absorption. Remove any excess foliage or unwanted branches. Next, place the branches in a vase or container filled with fresh water. Add a floral preservative to the water, following the instructions on the package. Regularly check the water level and replace it every few days. Additionally, keep the branches away from direct sunlight and extreme temperature changes, which can speed up decay.
Do Twigs Rot
Yes, twigs can rot over time, especially if they’re not properly preserved or exposed to unfavorable conditions. Factors such as moisture, humidity, and temperature play a significant role in the rotting process. To prevent rot, it’s essential to store twigs in a cool, dry place with good airflow. Regularly check the twigs for any signs of decay, such as soft spots or mold. If you notice any rotting twigs, it’s best to discard them to avoid spreading the decay to other branches or crafts.
How do You Preserve Christmas Tree Branches
Preserving Christmas tree branches ensures they stay fresh and retain their beauty throughout the holiday season. Start by cutting the desired branches from your Christmas tree, making clean cuts at the base. Remove any excess needles or debris. Next, mist the branches with water to keep them hydrated. Finally, wrap the branches loosely with a damp cloth or plastic wrap to maintain moisture. Place them in a cool, shaded area away from direct sunlight and heat sources. By following these steps, your Christmas tree branches will stay green and fragrant, spreading holiday cheer.
How do You Dry Twigs for Crafts
Drying twigs for crafts is a simple process that requires time and patience. Start by gathering the twigs and removing any excess foliage or unwanted branches. Arrange the twigs in a single layer on a dry surface, such as a drying rack or a table covered with newspaper. Place them in a cool, well-ventilated area away from direct sunlight. Allow the twigs to dry naturally for several weeks or until they become brittle. Once completely dry, you can use them in various crafts, wreaths, or decorative arrangements.
Enjoy Your Branch Crafting Adventures!
Now that you have all the answers to your burning questions about preserving branches for crafts, it’s time to let your creativity soar. Whether you’re making centerpieces, decorations, or even craft sticks, these preservation techniques will help your branches stand the test of time. So, grab some branches, get crafty, and let nature become an integral part of your artistic endeavors. Happy crafting!
AI-generated by OpenAI’s ChatGPT