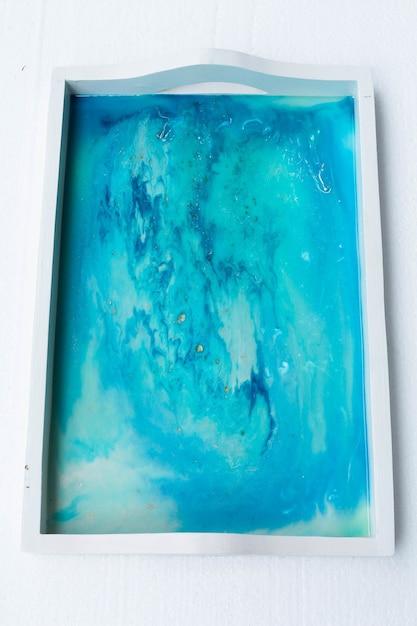
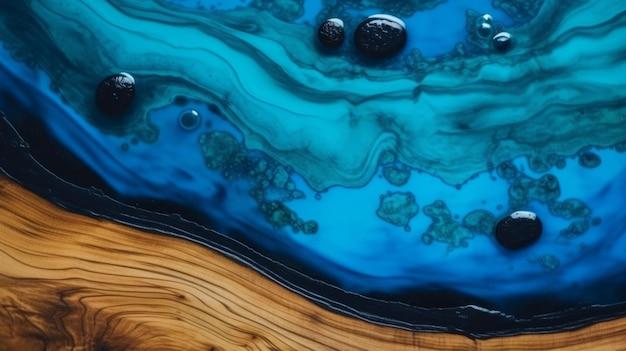
Resin art has become increasingly popular in recent years, captivating artists and art enthusiasts alike with its glossy, vibrant finish. Whether you’re a seasoned resin artist or just starting out, one crucial step in the resin art process is polishing. It not only enhances the clarity and shine of your artwork but also helps in rectifying any imperfections.
In this blog post, we’ll explore the ins and outs of polishing resin art, answering common questions like “Why does my resin look cloudy?” and “How do I fix dull resin after sanding?” We’ll also share some valuable tips and techniques to achieve a professional-looking finish on your resin art pieces. So, let’s dive in and learn how to make your resin art shine like never before.
Keywords: How to polish resin art, resin art polishing tips, fixing cloudy resin, achieving a professional resin art finish, polishing techniques for resin art
Section: How to Polish Resin Art
Understanding the Importance of Polishing
In the realm of resin art, polishing is the cherry on top, the final flourish that elevates your creation from great to jaw-droppingly stunning. Sure, you could skip this step, but why deny yourself the satisfaction of creating a glossy, mirror-like finish that begs to be touched?
Gather Your Tools and Materials
Before you embark on your polishing adventure, make sure you have all the proper tools and materials. You don’t want to end up in a mad frenzy, hunting for items halfway through the process. Trust me, it’s not a pretty sight. Here’s what you’ll need:
Materials:
- Microfiber cloth: This trusty little cloth will become your polishing sidekick, banishing smudges and bringing the shine.
- Polishing compound: A fancy name for a paste or liquid that works its magic, fine-tuning imperfections and creating a glossy surface.
Tools:
- Electric polisher: It’s like a gentle masseur for your resin art, eradicating blemishes and giving it that spa-like glow.
- Sandpaper: When life gives you imperfections, sandpaper smooths them out. Just make sure to choose the right grit for the job. Think of it as matchmaking for your resin art.
Step 1: Prepare and Protect
You wouldn’t throw a dinner party without setting the table, would you? The same principle applies to polishing resin art. Begin by ensuring your art piece is clean and free of any dust, debris, or rogue cat hair (curse those mischievous felines!). Now, protect your surroundings: lay down some newspaper, create a little “no-entry zone” to keep unwanted fingers at bay. Safety first, my friend!
Step 2: Sand it Smooth
Ah, sanding—the resin artist’s secret weapon against imperfections. Start with a coarser grit and work your way up to finer ones. Think of it as a journey from rough seas to smooth sailing. And remember, patience is a virtue—no need to rush this part. Take your time, enjoy the process, and let the resin art gods guide your sanding hand.
Step 3: Apply the Polishing Compound
Now that your resin art is as smooth as a baby’s bottom, it’s time to add some polish to the equation. Squeeze a dab of that glorious polishing compound onto your microfiber cloth and gently massage it into your art piece. Imagine you’re giving it a spa treatment—the kind that leaves you feeling relaxed and rejuvenated. Trust me, your art will thank you later.
Step 4: Power Up the Electric Polisher
Get ready to let the sparks fly! Okay, not literal sparks, but you get the idea. Grab your electric polisher, switch it on, and gently move it across your art piece in circular motions. Let the polisher do its thing, giving your resin art that coveted luster. Just be careful not to go overboard and create a whirlwind of chaos. We’re aiming for a polished masterpiece, not a disaster zone.
Step 5: The Final Touches
You’re in the home stretch now, my resin art aficionado! Once you’ve unleashed the power of the electric polisher, step back and admire the newfound shine of your creation. But wait, there’s more! Give it a final once-over with a clean microfiber cloth to remove any lingering traces of the polishing compound. Stand back, marvel at your masterpiece, and let out a triumphant “Ta-da!”
Voila! You’ve become a resin art polishing wizard, transforming a raw piece of resin into a glossy showstopper. Now, go forth and share your polished beauties with the world. May your art shine as brightly as the stars in the night sky. And remember, polishing isn’t just an art—it’s a state of mind.
FAQ: How To Polish Resin Art
Welcome to our comprehensive FAQ-style guide on polishing resin art. Whether you’re a seasoned artist or a beginner, we’ve got you covered with answers to your most pressing questions about resin polishing. Let’s dive right in!
Why is My Resin Dull After Sanding
Sanding resin is a crucial step in achieving a smooth, glossy finish. However, if your resin appears dull afterward, it may be due to fine scratches left behind by the sandpaper. Fear not! This is easily fixable with proper polishing techniques.
How Do I Fix Cloudy Resin
Cloudy resin can be a frustrating setback, but fear not, there are solutions! One common culprit is moisture trapped within the resin. To fix this issue, try gently heating the resin with a heat gun or torch to remove any trapped moisture. If that doesn’t work, you can use a resin-specific polish to restore its clarity.
Does Epoxy Resin Need to Be Polished
While epoxy resin is known for its impressive shine, it may still benefit from polishing. Polishing helps to eliminate any imperfections like scratches, cloudiness, or dullness, resulting in a truly breathtaking finish. So, yes, polishing epoxy resin is highly recommended.
Why Does My Resin Look Cloudy
Cloudiness in resin can be caused by various factors, such as improper mixing ratios, moisture contamination, or incomplete curing. It’s essential to follow the manufacturer’s instructions carefully and ensure a clean and dry working environment to minimize cloudiness. If cloudiness occurs, don’t fret! It can often be rectified using polishing techniques.
Can You Use Eyeshadow to Color Resin
While it may be tempting to raid your makeup stash for creative resin colors, eyeshadow is not recommended for coloring resin. Eyeshadow generally contains oils and pigments that may interfere with the proper curing and clarity of the resin. It’s best to use resin-specific colorants for vibrant and long-lasting results.
Will Rubbing Alcohol Clean Resin
Rubbing alcohol is indeed a handy tool for cleaning resin. It helps remove any resin residue, sticky spots, or fingerprints from your artwork. However, be cautious when using it on colored resin, as it may affect certain pigments or dyes. Always test a small, inconspicuous area before applying it to the entire piece.
Can You Use Food Coloring in Resin
While food coloring is safe for consumption, it’s not the best choice for coloring resin. Most food coloring options are water-based, which can cause cloudiness, bleeding, or uneven color distribution in resin. For beautiful and vibrant pigmentation, opt for resin-specific colorants formulated for the task.
How Do You Polish Epoxy Resin by Hand
Polishing epoxy resin by hand is a relatively straightforward process. Start by sanding the surface with a fine-grit sandpaper to remove any imperfections. Then, use a resin polish and a soft cloth to buff the resin in circular motions. Rinse with water and pat dry to reveal a stunning, glossy finish.
What Can I Use to Polish Resin
When it comes to polishing resin, your best friends are resin polish and a soft cloth or microfiber cloth. These tools help to buff the resin and restore its shine. Remember to use gentle, circular motions for the best results. Alternatively, you can also use resin-specific polishing compounds for more stubborn imperfections.
Can You Use Clear Nail Polish on Resin
While clear nail polish may share some similarities with resin, it’s not recommended for use on resin art. Nail polish is designed for a different purpose and may react negatively with resin, leading to poor adhesion, cloudiness, or an uneven finish. Stick to resin-specific products to ensure the best outcome.
How Do You Get Resin Clear After Sanding
After sanding, resin may lose some of its shine. To restore its clarity, you can use a resin polish or compound and gently buff the surface in circular motions. This process will help remove any sanding marks and bring back the resin’s glossy appearance. Remember to clean and dry the surface before applying any polishing products.
What Is the Best Way to Clean Resin
To keep your resin artwork looking its best, regular cleaning is essential. Start by gently dusting the piece using a soft, lint-free cloth or brush. For more stubborn stains or residue, use a mild soap and warm water solution. Avoid harsh chemicals or abrasive materials that can damage the resin’s finish.
How Do You Polish Resin at Home
Polishing resin at home is a fun and rewarding process. Begin by sanding the resin surface with progressively finer grits of sandpaper to remove imperfections. Next, apply a resin polish or compound, and using a soft cloth or buffing pad, gently buff the surface in circular motions. Finally, rinse with water and admire your beautifully polished resin art.
Can You Polish Art Resin
Absolutely! Art resin can benefit greatly from polishing to achieve a flawless, professional finish. Whether you’re a hobbyist or a professional artist, taking the time to polish your art resin can elevate the overall appearance and make your piece truly eye-catching.
Is Gel Polish Resin
While both gel polish and resin are used for artistic applications, they differ in composition and purpose. Gel polish is a type of nail polish cured under a UV or LED lamp, specifically designed for manicures. Resin, on the other hand, is a versatile material used for various creative endeavors, including resin art. So, while they serve different purposes, both can create stunning results in their respective domains.
Can You Use Wax to Polish Resin
Using wax to polish resin is not recommended. Wax may cause an unwanted buildup and potentially affect the resin’s clarity. Instead, stick to resin-specific polishing products and techniques for the best results. These products are specifically formulated to enhance the luster and gloss of resin artworks.
Can You Use Peek Polish on Resin
Peek Polish is a popular polishing product known for its versatility. While it can be effective in some applications, it’s not ideal for polishing resin. Resin art requires specialized polishing compounds or resinspecific products that are designed to work specifically with the resin’s unique properties. These products are more likely to provide optimal results for resin polishing.
Can I Use Rubbing Alcohol on Resin
Yes, rubbing alcohol can be safely used on resin for cleaning purposes. It’s effective in removing resin residue, fingerprints, or stickiness. However, it’s important to check the compatibility of rubbing alcohol with any colors or pigments in your resin art, as it may affect certain dyes or pigments. Always test a small area first to ensure no adverse reactions occur.
Can You Polish Resin With Toothpaste
While toothpaste is known for removing stains from our pearly whites, it’s not recommended for polishing resin. Toothpaste contains abrasive particles that can damage the surface of the resin, leaving scratches or a hazy appearance. Stick to resin-specific polish and compounds formulated for art projects to achieve the best finish.
We hope this FAQ-style guide on how to polish resin art has answered all your burning questions and given you the knowledge and confidence to achieve stunning, glossy results. Happy polishing!
Note: The information provided in this article is for general guidance purposes only and should not be considered professional advice. Always follow the manufacturer’s instructions and conduct appropriate research before attempting any resin polishing techniques.