Are you struggling to merge layers in Adobe Animate? Whether you’re a beginner or a seasoned user, understanding the process of merging layers can be incredibly useful for creating stunning animations. In this blog post, we’ll walk you through the steps to merge layers in Adobe Animate, enabling you to streamline your workflow and enhance your animation projects.
With the help of this guide, you’ll learn how to merge layers in Adobe Animate, regardless of whether you’re working on After Effects or animated projects. We’ll also cover important concepts such as frame and layers, the difference between layer animate CC, selecting multiple layers, and more. So, let’s dive into the exciting world of Adobe Animate and discover how to merge layers like a pro!
So, let’s get started and unlock the power of merging layers in Adobe Animate!
How to Merge Layers in Adobe Animate
Layers in Adobe Animate are like the different ingredients that make up a delicious digital animation cake. But sometimes, you may find yourself in a sticky situation where you want to merge those layers together to create a single layered masterpiece. Fear not, brave animator! In this guide, we’ll navigate the world of merging layers in Adobe Animate like a pro pastry chef. So put on your apron, grab your mouse, and let’s get cooking!
Simplify Your Animation Recipe with Layer Merging
Merge Layers to Streamline your Workflow
When your Adobe Animate project starts to resemble a layer lasagna, it’s time to simplify things. Merging layers allows you to reduce the clutter and declutter your workspace. With fewer layers to juggle, you can work more efficiently and focus on perfecting your animation skills without the fear of things getting lost in the mix.
Step 1: Select Layers to Merge
To begin the merging magic, start by selecting the layers you want to bring together. Hold down the Shift key and click on each layer you wish to merge. It’s like gathering all your favorite toppings before you make that perfect pizza!
Step 2: The Right-Click Righteousness
Once you’ve selected your layers, right-click on any of the selected layers. A magical menu will appear (not really magical, but it sounds cooler that way). From the menu, choose the “Merge Layers” option. Voila! Your selected layers are now combined into one delicious layer.
Add a Dash of Layer Sorting
If you are a neat freak like me, you might want to sort your layers alphabetically or in a specific order. To do this, simply right-click on your layer and select “Sort Layers by Name.” Now your layers will be neatly organized, just like those perfectly arranged spice jars on your kitchen shelf.
Blend Mode Blunders – Watch Out!
Merge layers is a powerful tool, but it’s not without its quirks. If your animation relies heavily on different blend modes, merging layers might not be the best idea. The blend modes can interact differently when merged together, resulting in unexpected flavors in your final output. So be cautious and taste-test your animation before serving it to your audience.
Merging Text Layers – A Special Recipe
Merging text layers is a tad trickier. Text turns into editable shapes when merged, so make sure you double-check your text content before merging. You don’t want “Hello World” to become “H3ll0 W0r1d,” especially if you’re aiming for a more sophisticated audience.
Undo the Magic with Layer Separation
Oops, did you blend the wrong layers? No worries! Adobe Animate has the magic undo button to save you from any mishaps. Simply press the good old Ctrl + Z (Command + Z for our Mac friends) to separate those merged layers into their original, unspoiled state.
Merging layers in Adobe Animate is like mixing together the perfect blend of colors and textures to create your animation masterpiece. It simplifies your workflow, declutters your workspace, and adds that extra pinch of organization to your projects. So go forth, brave animator, and let the merging magic begin! But remember, while merging layers can create animation symphonies, be mindful of the blend modes and text layers to avoid any unappetizing surprises. Happy merging!

FAQ: How to Merge Layers in Adobe Animate
Welcome to our FAQ guide on merging layers in Adobe Animate! If you’re looking to combine layers in your animation project, you’ve come to the right place. In this comprehensive FAQ-style subsection, we’ll answer some of the most common questions about merging layers in Adobe Animate, provide helpful tips, and give you a better understanding of how to make the most of this powerful animation software.
How do I merge two layers in After Effects
Unfortunately, Adobe Animate and After Effects are different software programs. If you’re looking for guidance on merging layers in Adobe Animate, you’re in the right place. But if you’re using After Effects, we recommend checking out Adobe’s official documentation or online forums for instructions specific to that software.
How do I merge layers in Adobe Animate
To merge layers in Adobe Animate, follow these simple steps:
- In the timeline panel, select the layers you want to merge by holding down the Ctrl (Windows) or Command (Mac) key and clicking on the layers.
- Right-click on one of the selected layers and choose “Merge Layers” from the context menu.
- Adobe Animate will then merge the selected layers into a single layer, preserving their content.
How do I enable multiple frames to edit in Adobe Animate
To enable multiple frames for editing in Adobe Animate, you need to switch to the “Edit Multiple Frames” mode. Here’s how you can do it:
- Go to the timeline panel.
- Click on the square icon at the top-left corner of the timeline panel or press F6 on your keyboard.
- Once you’re in the “Edit Multiple Frames” mode, you can select and edit multiple frames simultaneously, making it easier to apply changes across several frames in your animation.
What is the difference between layer animate CC and Adobe Animate
Good question! Actually, Adobe Animate CC and Adobe Animate refer to the same software. The name “Animate CC” was used by Adobe for a few years, but they have since dropped the “CC” and now simply refer to the software as Adobe Animate. So, there is no difference between the two – it’s just a matter of a name change.
What is a frame and layers in animation
Frames and layers are fundamental concepts in animation. Here’s a quick explanation of each:
-
Frames: In animation, frames are individual images or drawings that, when played in sequence, create the illusion of movement. Each frame represents a single point in time, and when we combine multiple frames, we bring our animation to life.
-
Layers: Layers, on the other hand, are like transparent sheets stacked on top of each other. Each layer contains different elements of the animation, such as characters, backgrounds, or special effects. By organizing our animation into layers, we can control their visibility, order, and make edits more efficiently.
How do I select all layers in an animation
Selecting all layers in an animation can be done easily by following these steps:
- Go to the timeline panel.
- Hold down the Shift key on your keyboard.
- Click on the topmost and bottommost layers in the timeline panel to select all the layers in between.
Can I merge layers in After Effects
In After Effects, merging layers isn’t a direct feature. Instead, you can use the pre-compose function to group multiple layers into a single composition. This allows you to apply effects, transformations, or animations to the entire composition as one unit. Check the official Adobe documentation for more details on pre-composing layers in After Effects.
What are unity animation layers
Oops! It seems you’ve mixed up the software. Unity and Adobe Animate are different tools. Unity Animation Layers are a feature specific to Unity, a popular game development platform. These layers allow you to control the blending and priority of multiple animations in your Unity game. For more information on Unity Animation Layers, visit Unity’s official documentation.
How do you combine animations in PowerPoint
While this guide focuses on Adobe Animate, we can offer a quick tip for combining animations in PowerPoint:
- Open PowerPoint and go to the slide where you want to merge animations.
- Select the first animated element and go to the “Animations” tab.
- Click on the “Add Animation” button and choose the desired animation effect.
- Repeat this process for all the animations you want to combine.
- In the “Animations” tab, click on the “Animation Pane” button.
- In the animation pane, select all the animations you want to merge by holding down the Ctrl key and clicking on each animation.
- Right-click on the selected animations and choose “Group” or “Merge” from the context menu.
- PowerPoint will then merge the selected animations into a single animation, allowing them to play together seamlessly.
How do I put multiple animations in Unity
To put multiple animations in Unity, you can follow these general steps:
- Import your animated assets (e.g., character model, animations) into Unity.
- In the Unity Editor, create an Animator Controller asset.
- Open the Animator Controller window and create motion animation clips for each of your animations.
- Drag and drop the animation clips onto your character or object within the Animator Controller to create a state machine.
- Set up transitions between the animation clips within the state machine to control the flow of your animations.
- Customize the Animator Controller parameters and conditions to trigger specific animations based on different game events or player input.
- Attach the Animator Controller to your character or object in the scene.
Please note that these are oversimplified steps, and the actual process may vary depending on the complexity of your animations and game setup. Unity has extensive documentation and tutorials available to help you dive deeper into animation in Unity.
Why do we add layers to animation
Layers are essential in animation because they provide organization and flexibility in the creation process. Here are a few reasons why adding layers to animation is beneficial:
-
Organization: Layers help keep your animation project tidy and manageable by separating different elements such as characters, backgrounds, and effects. This allows for easier editing and reordering without affecting other parts of the animation.
-
Flexibility: By working with layers, you can easily modify individual elements at any point in the animation process. Layers also allow you to adjust the visibility, opacity, and blending of specific elements, giving you more control over the final result.
-
Efficiency: Working with layers in animation software like Adobe Animate enables you to make changes to specific parts of the animation without redoing the entire sequence. This makes the animation process more efficient and less time-consuming.
How do you merge an animation layer in Photoshop
While merging layers in Adobe Photoshop is a useful feature, Adobe Animate is specifically designed for animation. If you’re looking for guidance on merging layers in Photoshop, we recommend checking out Adobe’s official Photoshop documentation or online forums for detailed instructions on how to merge layers in that software.
How do I select multiple layers in Adobe Animate
To select multiple layers in Adobe Animate, follow these steps:
- Go to the timeline panel.
- Hold down the Ctrl (Windows) or Command (Mac) key on your keyboard.
- Click on the layers you want to select. They will highlight as you click on each one.
- Release the Ctrl or Command key after selecting all the desired layers.
How do layers work
Layers are a crucial part of the Adobe Animate workflow. They allow you to separate and organize different elements of your animation, making it easier to edit and manage your project. Each layer can contain different components such as characters, backgrounds, or special effects. By stacking layers on top of each other, you can control their visibility, order, and apply effects or transformations to specific elements independently.
How do you combine animations
Combining animations involves merging multiple animated elements to create a seamless and cohesive animation. In Adobe Animate, you can combine animations by following these steps:
- Create or import the individual animations you want to combine as separate symbols or movie clips.
- Arrange the animations on the timeline in the desired order and position.
- Apply any necessary transformations, effects, or timing adjustments to each animation.
- Finally, preview and export your combined animation to share or use in your project.
With Adobe Animate’s powerful timeline and layer-based approach, you have the flexibility to combine animations and unleash your creative vision.
How do layers work in Adobe Animate
In Adobe Animate, layers are an essential building block for organizing and managing your animation project. Here’s a breakdown of how layers work in Adobe Animate:
-
Layering Structure: Layers are arranged hierarchically, with the topmost layer being the one in front. This stacking order influences the visibility of elements in the animation.
-
Layer Properties: Each layer can have different properties, such as opacity, blending modes, and locking to protect content from accidental modifications.
-
Editing Efficiency: Layers allow you to modify specific elements without affecting others. For example, you can animate a character on one layer while keeping the background static on a separate layer.
-
Animation Control: Layers offer granular control over timing and keyframes, making it easier to animate different elements independently.
By utilizing layers effectively, you can streamline your workflow, create complex animations, and achieve the desired visual impact.
How do I move layers in Adobe Animate
Moving layers in Adobe Animate is a breeze! Follow these steps:
- Open the timeline panel in Adobe Animate.
- Click and drag the layer you want to move to a new position in the stacking order. You can see a preview of the layer’s position as you drag it.
- Release the mouse button to drop the layer into its new position.
Adobe Animate will automatically update the layer’s position, and you can now see the changes reflected in your animation.
How many layers can be active at once
The number of active layers you can have in Adobe Animate depends on your computer’s processing power and the complexity of your animation project. Adobe Animate does not have a fixed limit on the number of layers you can have. However, keep in mind that working with too many active layers simultaneously may affect performance, especially on older or less powerful systems. It’s always a good idea to optimize and streamline your animation by organizing elements into fewer layers whenever possible.
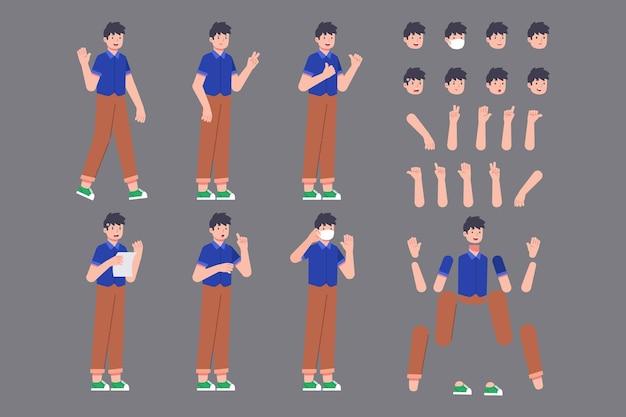
What are animation layers
In Adobe Animate, animation layers refer to the individual layers that contain animated elements in your animation project. Each animation layer represents a distinct part of your animation, such as a character’s body, limbs, or background effects. By separating your animation into layers, you gain precise control over each element, allowing you to animate them independently and create complex, visually stunning animations.
We hope this FAQ-style guide has provided you with valuable insights into merging layers in Adobe Animate. Remember, layers are your animation superpower, allowing you to organize, modify, and combine elements seamlessly. So, go ahead and give it a try! Experiment with merging layers, and let your creativity soar in the animated world of Adobe Animate.
Stay tuned for more exciting and informative content on animation, software tips, and industry trends. Happy animating!
Disclaimer: This blog post is for informational purposes only and is not affiliated with or endorsed by Adobe or Unity.