In the world of hair removal, waxing continues to be a popular choice for many people. Not only does it provide longer-lasting results compared to shaving, but it also helps to make the hair grow back softer and finer over time. However, frequent salon visits for waxing can quickly add up in cost. That’s where DIY waxing comes in handy!
If you’ve ever wondered how to make your own wax strips at home, you’re in the right place. In this blog post, we’ll walk you through the steps to create your very own DIY wax strips using common household materials. Whether you’re a beginner or an experienced waxer, this guide will help you achieve salon-quality results in the comfort of your own home.
So, grab your supplies and get ready to say goodbye to those pesky hairs as we dive into the wonderful world of DIY wax strips!
How to Make Your Own DIY Wax Strips
So, you’re tired of spending a fortune at the salon every time you need to get rid of unwanted hair? We hear you! But fear not, my friend, for we have the perfect solution for you – DIY wax strips! Yes, you heard that right. With a little bit of effort and a whole lot of courage, you can make your own wax strips right at home. Get ready to save some bucks and unleash your inner hair removal guru!
Gather Your Supplies
Before you embark on this adventurous journey of DIY waxing, you’ll need to gather your supplies. Don’t worry; they’re probably already lying around your house somewhere. Here’s what you’ll need:
1. Waxing Waxcellent Wax
First things first, you’ll need wax. Not just any wax, mind you, but waxing waxcellent wax. Okay, we made that term up, but the point is you need some good-quality wax designed specifically for hair removal. You can find it at your local beauty supply store or online. Make sure it’s safe for home use and suitable for your skin type.
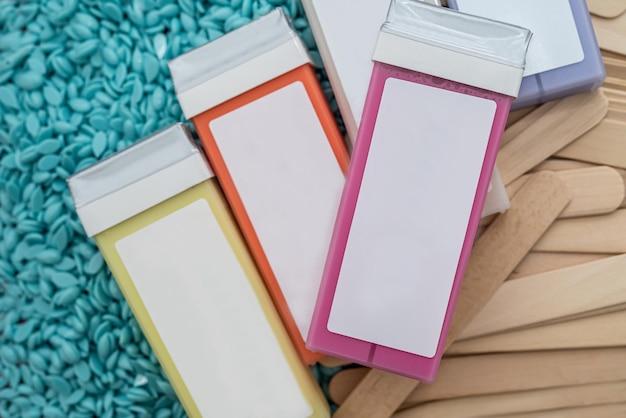
2. Wax Strips (DIY Edition)
Now, the star of the show – the wax strips! Instead of buying pre-made strips, we’re going to make our own. You’ll need some fabric or cloth cut into small rectangular pieces. Old T-shirts or cotton fabric work great for this. Just make sure they’re 100% clean and dry.
3. Spatula (No, Not the Kitchen Kind)
No, we’re not making pancakes; we’re making wax strips! You’ll need a spatula – but not the one you use in the kitchen. Look for a wooden or plastic spatula specifically made for waxing purposes. Trust us; it’s going to make your life so much easier.
The Waxing Magic
Now that you have your supplies ready, it’s time to dive into the fascinating world of DIY waxing magic! Follow these steps, and you’ll be on your way to silky smooth skin in no time:
Step 1: Wax On, Wax Off
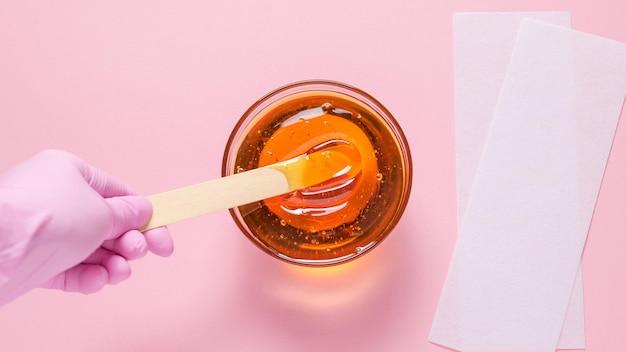
Start by heating up your wax. Follow the instructions on the packaging, because no one wants to witness wax explosions in the microwave. Once the wax has reached the perfect temperature, apply a thin layer to the area you want to wax using the spatula. Remember, a thin layer is key – we’re not plastering walls here!
Step 2: Sticking It to the Hair
Next, grab your DIY wax strip and place it right on top of the wax. Press it down gently, ensuring it adheres to the wax. Leave a little bit of the strip hanging off as a tab for easy removal later. Think of it as a tiny flag declaring freedom from hair!
Step 3: The Pull Game
Now comes the moment of truth – it’s time to rip that hair out! Hold your skin taut with one hand and use the other hand to swiftly pull the strip against the direction of hair growth. Feel that hair being plucked out from its roots? Ah, sweet victory! If you’re new to waxing, brace yourself for a combo of sensation and liberation you’ve never felt before.
Step 4: Repeat and Triumph
Continue the process, applying wax and sticking on your homemade wax strips. Remember to change to a fresh strip for each new application. Repeat until you’ve conquered all the hairy areas you desire to be hair-free. You’ll feel like a DIY waxing champion, and rightly so!
Parting Words
Congratulations, my fellow DIY hair removal enthusiast! You’ve successfully learned the art of making your own DIY wax strips and tamed the unruly beast that is unwanted hair. Just remember, practice makes perfect, so don’t be discouraged if your first attempt isn’t flawless. With time, you’ll become a true waxing maestro. So go forth, wax away, and revel in the joy of smooth, hair-free skin – all without breaking the bank!
FAQ: How To Make Your Own DIY Wax Strips
How do Beginners Wax for the First Time
Waxing may seem intimidating, but with a few helpful tips, even beginners can achieve smooth and hair-free skin. Here’s a step-by-step guide to waxing for beginners:
-
Prepare your skin: Cleanse and exfoliate the area you wish to wax to remove any dirt, oil, or dead skin cells. This will ensure better wax adhesion and reduce the risk of ingrown hairs.
-
Choose the right wax: Opt for a gentle wax suitable for beginners, like a sugar wax or soft strip wax. These are less likely to cause skin irritation.
-
Check the temperature: Warm the wax according to the product instructions, making sure it’s not too hot to avoid burns.
-
Apply the wax: Using a spatula or applicator, spread a thin, even layer of wax in the direction of hair growth. Place a strip of cloth or wax strip over the wax and press it firmly.
-
Remove the strip: Hold the skin taut with one hand and quickly pull off the wax strip in the opposite direction of hair growth. Make sure to pull close to the skin for better hair removal.
-
Soothe the skin: Apply a soothing lotion or aloe vera gel to calm the skin and reduce any redness or inflammation.
-
Maintain regular waxing: For best results, wax every four to six weeks to ensure that hair growth becomes finer and more sparse over time.
What can I use as DIY Wax Strips at Home
If you don’t have access to store-bought wax strips, don’t worry! You can make your own DIY wax strips using simple household items. Here are a few alternatives you can try:
-
Fabric or muslin strips: Cut clean fabric, like an old cotton t-shirt or muslin cloth, into strips of the desired size. These can be washed and reused multiple times.
-
Parchment paper: Cut parchment paper into strips and use them as an alternative to wax strips. They provide a smooth surface for easy wax removal.
-
Cardboard strips: Cut thin strips from a clean, sturdy cardboard box. Make sure to round off any sharp edges and use them as an economical substitute for wax strips.
Remember, regardless of the material used, ensure that it’s clean, free from any chemicals, and suitable for waxing.
What are the Disadvantages of Waxing
While waxing has numerous benefits, it’s essential to be aware of the potential drawbacks. Here are a few disadvantages of waxing:
-
Pain: Let’s be honest, waxing can be uncomfortable, especially for those with low pain tolerance. However, the pain lessens with each session as hair becomes finer.
-
Skin Irritation: Some people may experience redness, irritation, or even small bumps after waxing. This is usually temporary and subsides within a few hours or days.
-
Ingrown Hairs: Waxing can sometimes lead to ingrown hairs, where hair curls and grows back into the skin. Exfoliating regularly can help prevent this issue.
-
Skin Sensitivity: Individuals with sensitive skin may experience more significant irritation, so patch testing is crucial before applying wax to larger areas.
Remember, the advantages of waxing often outweigh the disadvantages, and with proper preparation and aftercare, you can minimize any potential negative effects.
What is the Best Material for DIY Wax Strips
The material used for your DIY wax strips is essential for effective hair removal. Here are a few recommended options:
-
Muslin cloth: Muslin, a finely woven cotton fabric, is a popular choice for home waxing. It’s soft, pliable, and easily adheres to the wax, making hair removal efficient and less painful.
-
Cotton fabric: Clean, lightweight cotton fabric, like an old t-shirt or bedsheet, can be a reliable alternative to muslin cloth. Cut it into strips of the desired size for DIY waxing.
-
Parchment paper: If you prefer a non-fabric option, parchment paper works well. It’s smooth, flexible, and offers excellent wax adhesion.
Choose a material that suits your preference and availability. Remember to cut the strips into manageable sizes for better control during wax application and removal.
Is Hot Wax better than DIY Wax Strips
Hot wax and DIY wax strips both have their advantages and disadvantages. It ultimately depends on individual preferences and specific needs. Here’s a breakdown of each to help you decide:
Hot Wax:
- Offers better hair removal for coarse or stubborn hair.
- Ideal for sensitive areas like the bikini area and face.
- Appropriate for all skin types, especially sensitive or delicate skin.
- Requires a wax warmer or stove to melt the wax to the right consistency.
- Provides longer-lasting results compared to wax strips.
DIY Wax Strips:
- Convenient and easy to use, suitable for beginners.
- Quick hair removal process, perfect for larger areas like legs or arms.
- Minimal setup required, no need for heating or melting the wax.
- Generally less messy compared to hot wax.
- Affordable and readily available.
- May not be as effective for removing stubborn or short hair as hot wax.
Consider your hair type, the area you wish to wax, and your personal comfort level to determine which option is best for you.
How do you Wax Without Strips
If you find yourself without wax strips, don’t worry! You can still achieve smooth results with these alternative waxing methods:
-
Hard Wax: Also known as stripless wax, hard wax is melted and applied in a thick layer directly to the skin. It then hardens and can be pulled off without the need for strips.
-
Sugar Waxing: A paste made from sugar, lemon juice, and water is applied to the skin, allowed to harden, and then removed by flicking it off with your fingers. This technique is sometimes called sugaring.
Both methods require a different technique but can be equally effective in removing unwanted hair. Choose the method that suits your preference and the materials you have available.
Are Cloth Wax Strips Reusable
Absolutely! Cloth wax strips can be reused multiple times, making them an eco-friendly option. After using cloth wax strips, wash them with gentle soap and warm water, let them air dry, and they’ll be ready to use again. Remember to discard the strips if they become worn-out or lose their effectiveness.
Can I use Normal Paper for Waxing
Using normal paper, like printer paper or notebook paper, is not recommended for waxing. Normal paper is not designed to withstand the waxing process and may tear or stick to the wax, causing a mess and ineffective hair removal. It’s best to stick with proper wax strips or alternative materials like fabric or parchment paper for reliable results.
Can I use Denim as DIY Wax Strips
Denim, although a sturdy fabric, is generally not the best option for DIY wax strips. Due to its rough texture, it may not adhere well to the wax, making hair removal less effective and possibly more painful. It’s better to choose softer fabrics like muslin or cotton fabric for DIY wax strips for optimal results.
Can I Sugar Wax Myself
Yes! Sugaring, the process of hair removal using a sugar paste, can be done yourself at home. It’s a natural and gentle alternative to traditional waxing. The sugar paste can be easily made with sugar, lemon juice, and water, and then applied and removed in the same manner as regular wax. Just remember to follow the proper technique and maintain cleanliness to achieve the best results.
What Fabric can I use for Waxing
When it comes to fabric for waxing, it’s essential to choose one that is clean, lightweight, and doesn’t have any chemical coatings. Fabrics like muslin cloth, cotton fabric, or even clean, old t-shirts make excellent options for waxing. They are soft, pliable, and easily adhere to the wax, ensuring efficient and effective hair removal.
What is Hard Wax
Hard wax, also known as stripless wax, is a type of wax that doesn’t require cloth or paper strips for hair removal. Unlike traditional waxes, hard wax hardens as it cools and can be peeled off directly from the skin without the need for additional materials. It’s convenient for small, sensitive areas like the face and bikini area and is a popular choice for those with sensitive or delicate skin.
How long should my hair be for sugaring
For sugaring, or sugar waxing, your hair should ideally be around 1/4 to 1/2 inch long. This length allows the sugar paste to adhere to the hair effectively, resulting in better hair removal. If your hair is too short, the sugar paste may not grip the hair properly, while hair that is too long can make the process more painful.
What Ingredients are in Strip Wax
Strip wax typically contains a combination of natural or synthetic resins, such as rosin or modified hydrocarbon resin, which provide the stickiness required for effective hair removal. It may also contain ingredients like beeswax or mineral oil to improve flexibility and smooth application. Some strip waxes may include additional soothing ingredients like chamomile or aloe vera for a more comfortable experience.
Can I use Sugar Wax without Strips
Yes! One of the main advantages of sugar wax is that it can be used without strips. The sugar paste itself acts as both the wax and the strip. After applying the sugar paste to the skin, you can flick it off with your fingers, removing the hair in the process. This makes sugar waxing a convenient and cost-effective option for hair removal.
Can I Wax with Duct Tape
While it might be tempting to use duct tape in a pinch, it’s not recommended for waxing. Duct tape is not designed for hair removal and can be harsh on the skin, leading to irritation or damage. It’s best to stick with proper wax strips or alternative materials specifically designed for waxing to ensure safe and effective hair removal.
What can I use as Waxing Paper
Parchment paper is an excellent alternative to traditional waxing paper. Its smooth surface allows the wax to adhere efficiently while providing easy removal. Avoid using regular paper, as it’s not designed to withstand the waxing process and may tear or stick to the wax, creating a messy and ineffective hair removal experience.
Is Lemon Juice Necessary for Sugar Wax
Yes, lemon juice plays a crucial role in sugar waxing. Lemon juice acts as a natural preservative and helps prevent the sugar paste from crystallizing. It also provides a slight acidity that enhances the effectiveness of the sugar wax in removing unwanted hair. Additionally, lemon juice has mild antibacterial properties, making it a beneficial ingredient for maintaining hygiene during the sugar waxing process.
Note: This blog post is for informational purposes only and should not be considered a substitute for professional advice. Always consult a dermatologist or beauty expert for personalized guidance.