Introduction
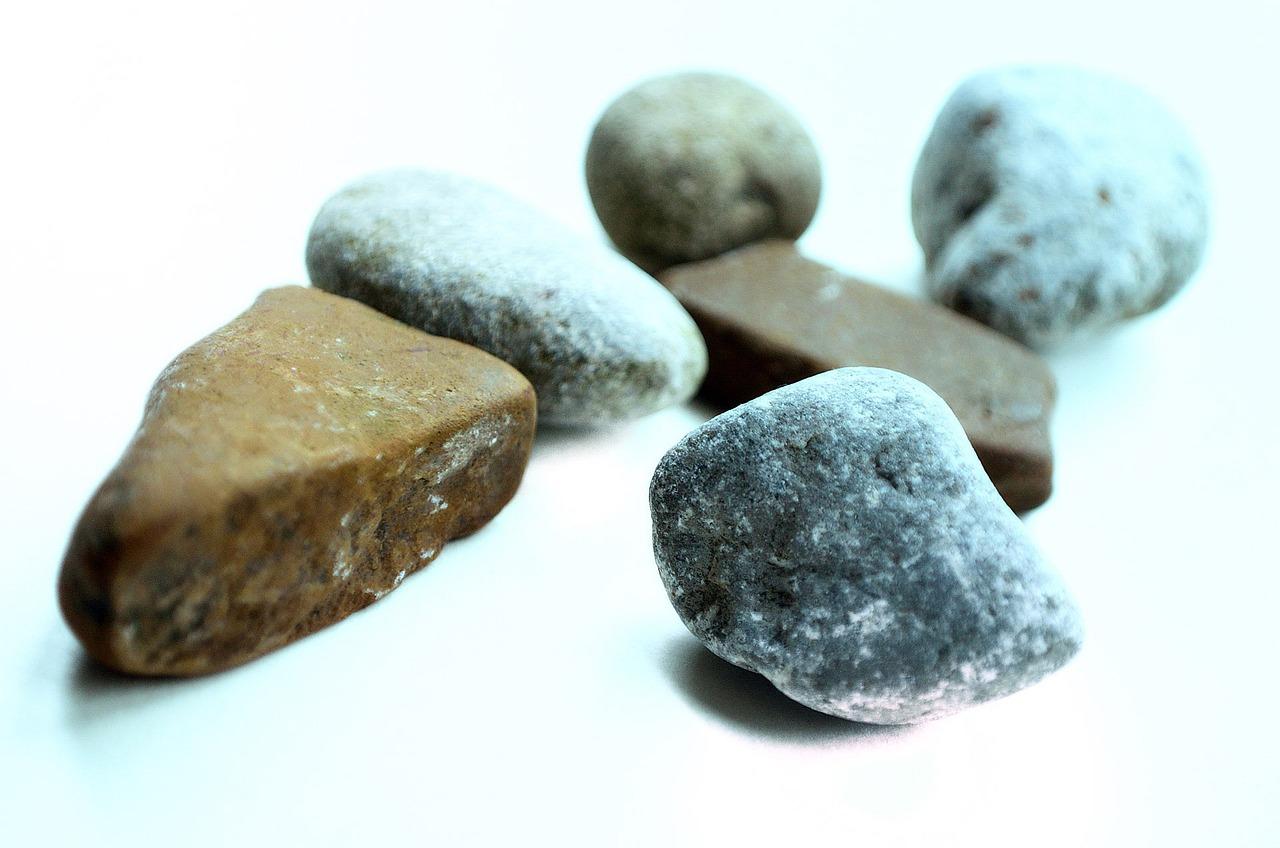
Welcome to our comprehensive guide on how to make rocks shiny using mineral oil! Whether you’re a rock enthusiast, a DIY lover, or simply looking to add some luster to your collection, this blog post has got you covered. We’ll explore various techniques, tips, and tricks to achieve that stunning sheen on your rocks, all without the need for expensive equipment or professional services. So, if you’ve ever wondered how to make your rocks look wet or shiny, keep reading to discover the secrets!
In this guide, we’ll answer burning questions such as: Can I use mineral oil to polish rocks? How do you shine rocks without a tumbler? What household items can you use to polish rocks? Plus, we’ll debunk common misconceptions and delve into alternative solutions for those looking to steer clear of mineral oil. By the time you finish reading, you’ll be equipped with all the knowledge and techniques to transform your dull rocks into captivating pieces of nature’s artwork. So, let’s dive in and make your rocks shine like never before!
How to Make Rocks Shine with Mineral Oil
There’s something mesmerizing about a shiny rock. It’s like nature’s bling, catching the light and commanding attention. If you’ve ever picked up a dull rock and wondered how to give it that jaw-dropping shine, you’ve come to the right place. In this guide, we’ll delve into the realm of rock polishing and reveal the secret ingredient that can bring out the luster in your mineral treasures: mineral oil.
The Magic Elixir: Mineral Oil
Before we dive into the how-to’s, let’s take a moment to appreciate the wonder that is mineral oil. Derived from refined petroleum, mineral oil is a versatile substance with a range of applications. It is non-toxic, odorless, and affordable, making it a popular choice for everything from baby oil to beauty products. And of course, it’s your ticket to transforming ordinary rocks into glossy showstoppers.
Step 1: Gather Your Supplies
To embark on this rock polishing adventure, you’ll need a few essential tools and materials:
Materials:
- Dull rocks
- Mineral oil
- Soft cloth or rag
Tools:
- Bucket or basin
- Gloves (optional)
- Toothbrush (reserved for rock polishing, not dental hygiene!)
Step 2: Prepare for the Shine-fest
- Find a well-ventilated area or, even better, head outdoors. This way, you can fully immerse yourself in the rock-transforming magic while enjoying some fresh air.
- Put on your gloves if you prefer to keep your hands free of mineral oil. Plus, they give you that cool, mad-scientist vibe.
- Fill your bucket or basin with warm water. It’s time to get things rockin’!
Step 3: The Rock Buffing Ritual
- Submerge your dull rocks in the warm water. Let them take a little bath, soaking up that H2O goodness and preparing for their shiny makeover.
- Once the rocks are thoroughly soaked, remove them from the water and dry them off with a soft cloth or rag. We don’t want any water droplets messing with our mineral oil magic!
- Now, it’s time for the main event: the mineral oil application. Place your rocks on a clean, dry surface, and using a fresh cloth, gently rub mineral oil onto each rock. Coat them evenly but don’t go overboard; a little oil goes a long way.
- Give your rocks a chance to soak up the oil for a few minutes. It’s like a luxurious spa treatment, except for rocks. They deserve a little pampering too, right?
- After the oil has had its time to work its magic, use a toothbrush (dedicated solely to rock polishing, remember!) to gently scrub the surface of each rock. This will help remove any residual dirt or grime and reveal the glistening beauty beneath.
- Rinse off the rocks with warm water to remove any excess mineral oil or debris, and pat them dry with a fresh cloth.
- Voila! Your rocks have undergone a breathtaking transformation. Prepare to be dazzled as their true colors and shine come to life!
Final Notes on Rock Shining and Mineral Oil:
- If your rocks don’t initially reach peak shininess with one round of mineral oil treatment, don’t fret! Repeat the process until you achieve the desired results. Remember, all good things take time.
- Some rocks may be more reluctant to shine than others, depending on their composition. Don’t be discouraged if you encounter a stubborn stone or two along the way. Persistence is key!
- After completing the rock polishing process, be sure to clean your tools thoroughly. Your toothbrush deserves a good scrubbing after all its hard work.
So there you have it, the rock polishing secret weapon: mineral oil. With a little patience and a lot of mineral oil, you can turn even the dullest rocks into dazzling gems. Get ready to impress your friends with your newfound rock-shining skills and become the talk of the mineral enthusiast community. Happy polishing!
FAQ: How to Make Rocks Shiny with Mineral Oil
Are you tired of staring at dull, lifeless rocks in your rock collection? Do you want to give your landscape rocks a stunning wet look? Look no further! In this FAQ-style guide, we will answer all your burning questions about how to make rocks shiny using mineral oil. So grab your favorite rocks and let’s get started!
Can I Use Vegetable Oil to Polish Rocks
While vegetable oil may work to some extent, it is not the ideal choice for polishing rocks. Vegetable oil tends to go rancid over time and can leave a sticky residue on your rocks. To ensure the best results and a long-lasting shine, we recommend using mineral oil specifically designed for rock polishing.
How Do You Make Landscape Rocks Look Wet
To achieve that coveted wet look on your landscape rocks, follow these simple steps:
- Clean your rocks: Start by giving your rocks a good wash to remove any dirt or debris.
- Dry them thoroughly: Make sure your rocks are completely dry before proceeding.
- Apply mineral oil: Using a clean cloth or brush, generously apply mineral oil to the surface of the rocks. Allow the oil to seep in and enhance the natural colors and patterns.
- Let it soak: Leave the rocks undisturbed for a few hours or even overnight to allow the mineral oil to work its magic.
- Remove excess oil: Wipe off any excess oil with a dry cloth, and voila! Your landscape rocks will glisten with a stunning wet appearance.
How Do You Make Mineral Oil
You don’t need to be a chemist to make mineral oil. It is readily available in stores and online. Simply purchase a bottle of mineral oil from your local hardware store or order it online. Make sure to choose a food-grade mineral oil that is safe for use on rocks. Easy peasy!
How Do You Shine River Rocks
River rocks are a popular choice for rock polishing due to their smooth surfaces and unique shapes. To make river rocks shine, follow these steps:
- Clean your river rocks: Give the rocks a thorough cleaning to remove any dirt or grime.
- Dry them completely: Ensure the rocks are completely dry before proceeding.
- Apply mineral oil: Using a cloth or brush, apply a generous amount of mineral oil to the rocks. Make sure to cover all surfaces.
- Let them sit: Allow the rocks to sit undisturbed for several hours or overnight to allow the mineral oil to penetrate and enhance their natural beauty.
- Wipe off excess oil: After the oil has had time to work its magic, gently wipe off any excess oil with a dry cloth. Admire the shiny, rejuvenated river rocks!
How Do You Shine Rocks by Hand
Don’t have access to a rock tumbler? No problem! You can still shine rocks by hand with a little elbow grease. Follow these steps:
- Clean the rocks: Start by cleaning your rocks to remove any dirt or debris.
- Choose your abrasive: Select a polishing compound or abrasive powder suitable for the type of rock you are working with. Popular choices include aluminum oxide or cerium oxide.
- Wet the rock: Moisten the rock with water to create a slurry with the abrasive.
- Start polishing: Rub the abrasive onto the surface of the rock using a cloth or your hands. Apply pressure in circular or back-and-forth motions.
- Rinse and repeat: Periodically rinse the rock and check for desired shine. Continue the process until you achieve the desired level of shine.
- Apply mineral oil: Once you are satisfied with the shine, apply a thin coat of mineral oil to the rock to enhance its luster and protect the surface.
How Do I Make My Stone Shiny
If you want to make your stone shiny, whether it’s a gemstone or a polished decorative stone, follow these steps:
- Clean the stone: Give the stone a good cleaning to remove any dirt or dust.
- Choose the right method: Depending on the type of stone, you can use techniques such as hand polishing, rock tumbling, or using a polishing machine.
- Begin the process: Whether by hand or using a machine, follow the appropriate method to polish the stone. This may involve using abrasives, polishing compounds, or diamond pastes.
- Rinse and dry: After polishing, rinse the stone thoroughly with water and dry it completely.
- Apply a finishing touch: To further enhance the shine, apply a thin coat of mineral oil to the stone and buff it gently with a clean cloth.
How Do You Brighten Up River Rocks
If your river rocks are looking a bit dull and you want to brighten them up, here’s what you can do:
- Clean the rocks: Start by giving the rocks a good cleaning to remove any dirt or grime.
- Dry them thoroughly: Make sure the rocks are completely dry before proceeding.
- Apply a sealer: Consider using a rock sealant or enhancer specifically designed to brighten stone surfaces. This will add luster and vibrancy to your river rocks.
- Follow the instructions: Read and follow the instructions on the sealer packaging carefully. Apply the sealer to the rocks, ensuring even coverage.
- Let it dry: Allow the sealer to dry and cure according to the instructions. Once dry, your river rocks will shine with renewed brilliance.
Can You Varnish Rocks
While you can varnish rocks, it may not be the best option for achieving a natural and long-lasting shine. Varnish can alter the appearance of the rocks, making them look artificial or glossy. If you prefer a more authentic and lustrous finish, we recommend opting for mineral oil instead.
How Do You Make Homemade Rock Polish
If you’re feeling adventurous and want to make your own rock polish, here’s a simple recipe:
- Gather the ingredients: You will need equal parts of water, baking soda, and mild liquid dish soap.
- Mix the ingredients: Combine the water, baking soda, and dish soap in a bowl and stir well to form a paste.
- Apply to the rock: Using a cloth or brush, apply the homemade polish to the surface of the rock.
- Polish away: Gently rub the polish into the rock using circular motions. Continue until you achieve the desired shine.
- Rinse and wipe: Rinse the rock with water to remove any residual polish and wipe it dry with a clean cloth.
Keep in mind that homemade rock polish may not produce the same results as commercial products, but it’s a fun and cost-effective alternative.
What Kind of Oil Do You Use on Rocks
When it comes to oiling rocks, mineral oil is the way to go. Mineral oil is safe, non-toxic, and specifically designed for rock polishing. It enhances the natural beauty of the rocks, offering a long-lasting shine without leaving any sticky residue. So, say goodbye to vegetable oil and embrace the wonders of mineral oil!
How Do You Make Spray Rocks Shiny
If you prefer a hassle-free option for making rocks shiny, a rock polishing spray can be your best friend. Follow these steps for shiny rocks in a jiffy:
- Clean the rocks: Start by cleaning the rocks to remove any dirt or debris.
- Shake the spray bottle: Give the rock polishing spray bottle a good shake to ensure the contents are well-mixed.
- Spray the rocks: Holding the bottle a few inches away from the rocks, spray an even coat of the rock polishing spray onto the surfaces.
- Let it dry: Allow the spray to dry for the recommended time specified on the product packaging.
- Admire the shine: Once dry, behold the beautiful shine on your rocks. No fuss, no mess!
Can You Use Mineral Oil to Polish Rocks
Absolutely! Mineral oil is one of the best options for polishing rocks. Its non-toxic and non-reactive properties make it safe to use on a variety of rocks without causing any damage. So go ahead and grab that bottle of mineral oil to transform your dull rocks into dazzling gems!
How Do You Shine Rocks Without a Tumbler
If you don’t have access to a rock tumbler, don’t despair! You can still achieve shiny rocks with a few simple tools and techniques. Here’s how:
- Choose the right rocks: Select rocks that have a relatively smooth surface, as rough rocks will be more challenging to polish without a tumbler.
- Gather your materials: You will need sandpaper or emery cloth in various grits, polishing compound or powder, and a soft cloth.
- Start with coarse grit: Begin by sanding the rocks with coarse-grit sandpaper or emery cloth. This helps to remove any rough edges or imperfections.
- Progress to finer grits: Gradually work your way through finer grits of sandpaper, smoothing the surface of the rocks with each pass. This will gradually bring out the shine.
- Apply polishing compound: Once you’ve achieved a smooth surface, apply a small amount of polishing compound or powder to the rocks. Rub it in using a soft cloth, applying gentle pressure.
- Buff to a shine: With a clean cloth, buff the rocks vigorously to bring out a brilliant shine. Admire your handiwork!
Is Olive Oil a Mineral Oil
No, olive oil is not considered a mineral oil. It is a natural oil derived from olives and is commonly used in cooking and skincare. While olive oil can be used to add temporary shine to rocks, it is not as effective or long-lasting as mineral oil. Mineral oil is specifically formulated for rock polishing and offers superior results.
How Do You Make Polished Rocks Shiny
If you already have polished rocks but want to enhance their shine, mineral oil is your secret weapon. Follow these steps:
- Clean the polished rocks: Remove any dust or residues from the polished rocks using a soft cloth.
- Apply mineral oil: Using a clean cloth or brush, apply a thin coat of mineral oil to the surface of the rocks.
- Let it soak: Allow the mineral oil to penetrate the rocks and enhance their luster. Leave them undisturbed for a few hours or overnight.
- Wipe off excess oil: Gently wipe off any excess oil with a dry cloth, revealing the newly intensified shine of your polished rocks.
How Do You Make Rocks Look Wet Permanently
While it is challenging to make rocks look wet permanently, you can enhance their appearance for an extended period with a simple trick. After applying mineral oil to your rocks and letting them dry, consider giving them a clear coat of acrylic sealant. The sealant will protect the rocks and give them a glossy, wet look that lasts longer. However, keep in mind that rocks that are exposed to the elements, such as rain or direct sunlight, may require periodic reapplication.
What is a Good Substitute for Mineral Oil
If you don’t have mineral oil on hand, or if you prefer a natural alternative, you can use coconut oil as a substitute. Coconut oil works similarly to mineral oil and can provide a temporary shine to your rocks. However, keep in mind that coconut oil may solidify at lower temperatures, so choose an appropriate time to apply it to your rocks.
Is Baby Oil Mineral Oil
Yes, baby oil is a type of mineral oil. It is a common and readily available option for rock polishing. However, be aware that some baby oils may contain added fragrances or other additives that may not be suitable for use on rocks. Opt for unscented, pure mineral oil or mineral oil specifically designed for rock polishing to ensure the best results.
What Household Items Can You Use to Polish Rocks
If you’re looking for household items to polish rocks, here are a few options you can try:
- Toothpaste: The mild abrasives in toothpaste can help polish rocks. Apply a small amount to the rock’s surface and rub it in using circular motions. Rinse and wipe dry.
- Baking soda: Create a paste using baking soda and water. Rub it onto the rock’s surface using a cloth or your hands. Rinse and dry.
- White vinegar: Soak the rocks in white vinegar overnight to help dissolve debris and stains. Rinse thoroughly and dry.
- Window cleaner: Spray window cleaner onto the rock’s surface and scrub gently with a brush. Rinse and dry.
Remember, these household items may not provide the same level of shine as specialized rock polishing products but can serve as a temporary solution in a pinch.
Now that you have all the knowledge to make rocks shine like never before, it’s time to unleash your inner rock guru and create a stunning collection that will leave everyone in awe! Happy rock polishing!
I hope you found this article informative and entertaining! If you have any more questions, feel free to leave them in the comments or rock on over to our next blog post.