Moving sand art, also known as sand pictures or sandscapes, is a captivating form of art that allows you to create mesmerizing patterns and designs with the natural beauty of sand. If you’re an arts and crafts enthusiast looking for a unique and kinetic project, this blog post is for you!
In this comprehensive guide, we’ll explore the fascinating world of moving sand art, answering questions like how to make your own sand sculptures permanent, how to color your own sand, and how to seal the top of sand art. We’ll even delve into the secrets behind creating the enchanting moving sand and discuss the different types of sand that are ideal for sand art.
So, grab your creative spirit, a handful of sand, and let’s dive into the wonderful realm of moving sand art!
How to Create Mesmerizing Moving Sand Art
Sand art has been captivating people for centuries with its intricate designs and soothing motion. If you’ve ever wondered how to create your own mesmerizing moving sand art, you’re in for a treat! In this guide, we’ll walk you through the process step by step, so grab your sand and let’s get started!
Gather Your Materials
Before you embark on your sand art adventure, it’s important to gather all the necessary materials. Here’s a list of what you’ll need:
- Sand: Opt for fine-grained sand, ideally in different colors to add some visual flair to your creation. You can find colored sand at craft stores or even make your own by dyeing regular sand.
- Bottles: Choose clear, empty bottles or containers with a narrow neck that will allow you to control the sand flow more easily.
- Funnel: To pour the sand into the bottles without making an aesthetically disastrous mess.
- Stick or Utensil: You’ll need something thin and pointy, like a skewer or a chopstick, to create patterns and designs in the sand.
- Sealant: To secure the lid of your bottle and prevent any accidental sand spills.
Now that you have everything you need, it’s time to unleash your creativity!
Let the Sand Flow!
- Step 1: Prepare your workspace. Find a clean, flat surface where you can work comfortably and freely. You don’t want any unexpected bumps or spills to ruin your masterpiece.
- Step 2: Start with a base layer. Using your funnel, carefully pour a layer of sand into the bottom of your bottle. This will serve as the foundation for your artwork. Feel free to experiment with different colors to create a striking contrast.
- Step 3: Create stunning patterns. Now comes the fun part! Use your stick or utensil to gently create patterns and designs in the sand. You can make swirls, waves, or even draw intricate shapes. Let your imagination run wild!
- Step 4: Layer it up. Once you’re satisfied with your design, add another layer of sand to the bottle, covering your beautifully crafted patterns. Repeat steps 3 and 4 until your bottle is nearly full, alternating colors and creating different designs with each layer.
- Step 5: Seal the deal. Once you’re done layering the sand, carefully seal the bottle with the cap or lid. This will ensure that your creation stays intact and allows you to enjoy the mesmerizing movement without making a mess.
Voilà! You’ve just created your very own moving sand art. Now sit back, relax, and watch as the sand gracefully dances and shifts within its glassy confines. It’s a truly enchanting sight that is sure to mesmerize anyone who lays eyes on it.
Tips and Tricks for Sand Art Success
- If you want to add an extra touch of magic to your moving sand art, try adding some glitter to the sand. The shimmering specks will elevate your creation to a whole new level of sparkle and charm.
- Experiment with different bottle shapes and sizes to create unique visual effects. Tall and narrow bottles will produce more controlled movements, while wider ones will allow for more extravagant swirls and patterns.
- Don’t limit yourself to just sand! You can incorporate other materials like small seashells, colored beads, or even tiny figurines to add a personal touch and enhance the overall aesthetics of your artwork.
Now that you know the secret behind creating captivating moving sand art, it’s time to unleash your inner artist. So grab your sand, get creative, and let the sands of time flow in your favor!
FAQ: How To Make Moving Sand Art
How do you make sand sculptures permanent
If you desire to make your sand sculptures stand the test of time, there are a few steps you can take. First, ensure that the sand you are using for your sculpture is damp. This will help the sand stick together better. Once you have finished creating your masterpiece, apply a mixture of white glue and water to the surface of the sculpture. This mixture will act as a protective sealant, preventing the sand from crumbling and preserving your work of art for longer.
Can you color your own sand
Absolutely! Inject some color into your sand art by coloring your own sand. Start by pouring some regular sand into a Ziploc bag. Then, add a few drops of food coloring of your choice to the bag. Seal the bag and shake it vigorously to distribute the color evenly. Open the bag and let the colored sand air dry for a few hours. Once dry, your sand will be ready to take your sand art to the next level!
How do you seal the top of sand art
Sealing the top of your sand art is essential to keep it intact and mesmerizing. To seal the top, you can use a simple technique. First, make sure the sand is fully dry. Then, carefully pour a thin layer of white school glue onto the surface of the sand. Use a brush to spread the glue evenly and create a protective seal over your masterpiece. Allow the glue to dry completely before displaying or moving the sand art.
How do you adjust the air in your sand picture Pitkin Stearns
Ah, the mystical air bubbles in a sand picture! If you wish to adjust the air in your sand picture from the renowned Pitkin Stearns collection, follow these steps. First, locate the air hole on the sand picture’s frame. Using either a straw or a small hand pump, gently blow air into the hole to create more bubbles or use the straw to extract air to reduce the number of bubbles. Be patient and experiment until you achieve the desired effect. It’s like playing a harmonica for your sand art!
How do you make sand sand art
Sand sand art? Sounds like a sandy inception! To create your own sand art, you’ll need a flat surface, some sand, and various coloring materials. Begin by choosing an interesting design or pattern to create on your flat surface. Then, carefully pour different colors of sand onto the surface, allowing them to layer and blend naturally. You can use your fingers or a utensil to shape and manipulate the sand, giving life to your unique creation. Let your imagination run wild and have fun creating your own sandy masterpiece!
Can sand be bleached
While you might be tempted to give your sand art a sun-kissed look, unfortunately, sand cannot be effectively bleached. Sand is mainly composed of tiny rock and mineral particles, and the bleaching process is more suitable for organic materials. So, instead of bleaching your sand, focus on exploring various colors and textures to make your sand art pop with creativity!
How do you make moving sand
Ah, the enchanting movement of sand! To make your sand come alive, you’ll need to create a shifting medium. Mix equal parts of sand and cornstarch in a bowl. Add some water gradually while stirring until the mixture reaches a thick, dough-like consistency. You can also add a few drops of food coloring to give your moving sand a vibrant touch. And voila! You now have your very own magical sand that flows and dances at your command!
How are moving sand pictures made
The creation of moving sand pictures is like a well-kept secret from the sand gods themselves! These captivating artworks are achieved through a combination of carefully layered sand and concealed air chambers. Talented sand artists meticulously pour a special blend of colored sand between two panes of glass, ensuring that strategically placed air gaps allow the sand to flow and create mesmerizing patterns. These pictures are a true feast for the eyes and a testament to the magic of sand!
What is magic sand
Magic sand, also known as hydrophobic sand or kinetic sand, is a fascinating substance. It is regular sand that has been coated with a hydrophobic (water-repelling) compound, such as silicone or wax. This coating makes the individual sand particles repel water, allowing them to remain dry even when submerged. This unique property gives magic sand a mesmerizing tactile sensation and makes it perfect for creating sculptures or for sensory play.
How do you fill sand art
Filling sand art is an art form in itself! To fill your sand art, start by carefully selecting a container with a sealable top. Then, layer different colors of sand into the container, creating beautiful patterns as you go. You can use funnels or carefully pour the sand with a steady hand. Take your time and experiment with different colors and techniques to achieve the desired outcome. Once filled, seal the container to preserve your sand art and enjoy the mesmerizing display!
What is moving sand
Moving sand is like a tiny symphony in motion, a ballet of grains dancing like nobody’s watching. It refers to sand that flows, shifts, and creates mesmerizing patterns due to the forces of gravity and air pressure. Whether manipulated by the artist’s hand or housed within a specially designed frame, moving sand has a mesmerizing quality that captivates and relaxes the mind. It’s like having a beach in a box, with the power to transport your thoughts to tranquil seaside moments!
How do you keep sand art in place
Preventing your sand art from morphing into a sandy mess isn’t a breeze, but with a few simple tricks, you can keep it in place. Start by selecting a sturdy frame or container that will securely hold the sand. Consider applying a layer of clear glue or adhesive to the bottom of your container to anchor the sand and prevent excessive movement. Additionally, ensure your sand art is displayed on a stable surface, away from potential hazards like curious pets or mischievous gusts of wind. A solid foundation ensures your sandy creation stays intact!
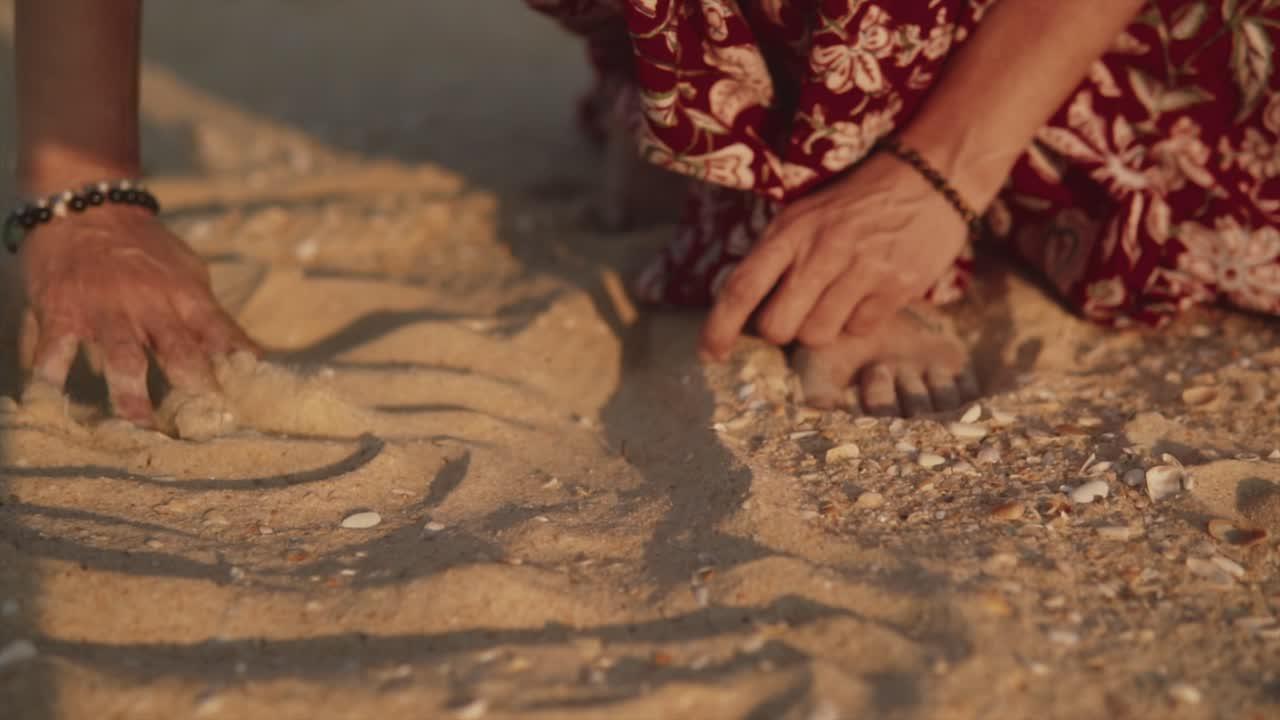
How do you make ocean sand art
Ah, ocean sand art, the art that resonates with the soothing rhythm of the tides! To make your own ocean-inspired sand art, start by gathering sand from your favorite beach or purchase some fine-grained sand. Next, carefully pour the sand into a container, creating layers that resemble the ebb and flow of ocean waves. Add a few seashells, tiny starfish, or even bits of sea glass to enhance the coastal vibe. Let your imagination ride the wave, and enjoy the tranquil beauty of your ocean-themed sand art!
What is the secret ingredient in kinetic sand
Ah, the secret ingredient that brings kinetic sand to life! While it may not be as secretive as an ancient treasure map, the key component in kinetic sand is none other than good ol’ silicone oil. This slick substance provides kinetic sand with its signature properties of smooth texture and exceptional moldability. It’s like having a sandcastle in your hands that never crumbles, allowing you to shape and sculpt to your heart’s desire. So go ahead, dive into the fascinating world of kinetic sand and let your creativity flow!
What kind of sand is used for sand art
The choice of sand for sand art is as diverse as the colors of the rainbow. However, the type of sand often used for sand art is known as “silica sand.” Silica sand is sedimentary in nature and consists of finely crushed quartz particles. Its grainy texture and ability to hold its shape make it a popular choice among sand artists. So, if you’re looking to build towering sandcastles or create intricate designs, silica sand is your trusty companion on your artistic sandy journey!
What can you craft with sand
The possibilities are as endless as the grains of sand! Sand can inspire your creativity to soar to new heights. Here are a few fun sand craft ideas to get you started:
Sand Bottles:
Fill different-shaped glass bottles or jars with layers of vibrant colored sand. The result? Eye-catching decorative pieces that add a touch of charm to any room.
Sand Candles:
Create your own beachy ambiance by making sand candles. Melt wax, mix in some sand, and pour the mixture into shells or other creative molds. Light the candle, sit back, and relax to the warm glow and gentle aroma.
Sand Jewelry:
Fashion your own unique sand jewelry by combining colorful sand with jewelry resin. Pour the mixture into various molds, such as rings or pendants, for personalized accessories that capture the essence of the beach.
Sand Paintings:
Unleash your inner artist by using sand instead of paint to create textured paintings. Apply glue to a canvas or paper, sprinkle sand onto the glue, and watch as your masterpiece comes to life in a tactile, sandy way.
What is the liquid in moving sand art
Ah, the enigmatic liquid that brings motion to sand art! The liquid used in moving sand art is a closely guarded secret, like the recipe for a secret sauce. However, it is commonly a combination of water and a small amount of alcohol. The precise mixture is carefully calibrated to create the perfect viscosity, allowing the sand to flow gracefully as if guided by an invisible hand. The gentle dance of sand in this mysterious liquid is what makes moving sand art so captivating and mesmerizing!
How long do sand pictures last
Sand pictures, like grains slipping through an hourglass, have a finite lifespan. The longevity of a sand picture depends on various factors, such as the quality and type of sand used, the sealant applied, and how often the picture is handled. On average, well-preserved sand pictures can last for several months to a few years, creating a temporary sanctuary of shifting patterns. So, savor the transient beauty of sand art while it lasts, for like a summer breeze, it will eventually fade away.
How do you make sand dough
Creating sand dough is like bringing a beach party to your fingertips! To make your own sand dough, you’ll need the following ingredients:
- 2 cups of sand (finely ground)
- 1 cup of flour
- ½ cup of salt
- ¾ to 1 cup of water (gradually added)
In a large mixing bowl, combine the sand, flour, and salt. Slowly add the water while mixing until the ingredients form a moldable dough-like consistency. Knead the dough with your hands until it becomes smooth and pliable. Now you have a sandy masterpiece worthy of any beach-themed sculpture or sensory playtime fun!
What is sand art called
Sand art, the captivating realm where creativity meets nature, takes many forms. One popular form of sand art is known as “sand animation” or “sand painting.” Skilled artists use sand to create intricate and mesmerizing artworks while manipulating the sand on a flat surface or using a lightbox to enhance the visual impact. The captivating process of sand animation captures the imagination and creates stunning visuals that leave spectators in awe. So, let your creativity flow, and embark on your own mesmerizing journey into the world of sand art!
What type of sand is used for sand art
When it comes to sand art, the type of sand chosen can greatly influence the outcome of your masterpiece. “Play sand” or “craft sand” is commonly used for sand art due to its fine texture and easy moldability. This type of sand is typically free of impurities and designed to be safe for children to play with. Additionally, avoiding sand with large particles ensures smoother layers and more precise details in your sand art. So, embark on your artistic journey armed with the perfect sand for your sandy creations!