Are you looking for a creative way to share your favorite photos with friends and family? DIY photo cards are the perfect solution! Whether it’s for birthdays, holidays, or just because, these personalized cards add a special touch to any occasion. In this blog post, we’ll guide you through the process of making your own DIY photo cards, from choosing the right paper to printing and crafting.
We’ll also answer some commonly asked questions, such as the legality of selling photocards, the best paper weight for postcards, and the materials used for photo cards. So, grab your photos, gather your crafting supplies, and let’s dive into the exciting world of DIY photo cards!
So, let’s get started and create some beautiful and memorable DIY photo cards that will leave a lasting impression on your loved ones.
How to Create Your Own DIY Photo Card
So you want to express your creativity and give someone a personalized card that will bring a smile to their face? Well, you’re in luck! In this guide, we’ll show you how to make your very own DIY photo card that is sure to impress. Get ready for a fun crafting adventure that will leave you feeling like the next Picasso of greeting cards!
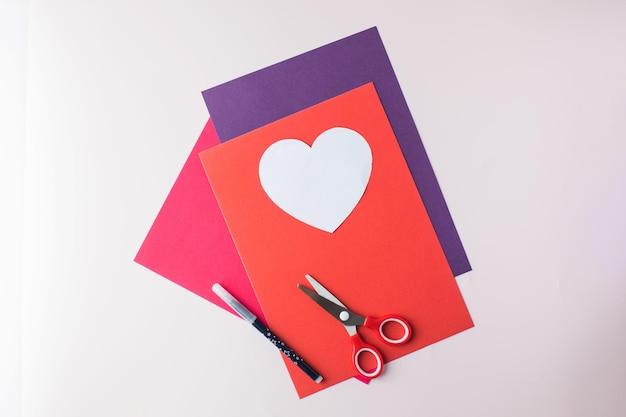
Gather the Materials
First things first, let’s gather all the materials you’ll need for this project. Don’t worry, none of them will break the bank. Here’s what you’ll need:
- Cardstock or thick paper: This will serve as the base of your card. Opt for a color that complements your photo.
- Scissors: A trusty pair of scissors will be essential for cutting shapes and trimming your photo.
- Glue or double-sided tape: You’ll need something to attach your photo to the cardstock.
- Markers or colored pencils: These will come in handy for adding some extra pizzazz to your card.
- Photos: The star of the show! Choose a photo that captures a special moment or memory.
Prepare Your Workspace
Before diving headfirst into your creative venture, take a moment to set up your workspace. Clear a clutter-free area and gather all your materials. Get into the crafting zone by putting on some music or lighting a scented candle. A wonderfully organized and inviting space will make all the difference in your crafting experience.
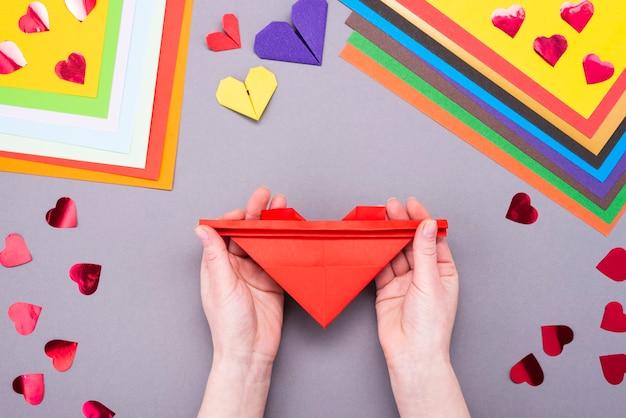
Choose Your Card Design
Now comes the exciting part—choosing the design for your card. Will you go for a classic rectangular shape or get fancy with a heart or star? It’s all up to you! If you’re feeling super adventurous, why not try a pop-up card design? Your loved one will be astonished by your artistic prowess!
Cut and Fold your Card
Once you’ve selected your card design, it’s time to get cutting and folding. Carefully measure and cut your cardstock into the desired shape. If you’re creating a pop-up card, make sure to follow a template or tutorial to ensure it turns out just right. Fold your card in half neatly, maintaining a clean and crisp edge. Voila, you’re one step closer to card-making greatness!
Add Your Personal Touch
Now it’s time to show off your creativity! Take your chosen photo and trim it to fit nicely on the front of your card. If you want to add some flair, consider cutting out a shape around the main subject of your photo. This will make it stand out and create a visually appealing effect. Think outside the box and experiment with different shapes and angles.
Attach the Photo
With your photo perfectly trimmed and ready to go, it’s time to attach it to the cardstock. Use glue or double-sided tape to secure the photo in place. Make sure it’s centered and secure, ensuring your masterpiece remains intact even if it encounters a bumpy postal journey.
Let the Creativity Flow
Now that your photo is in place, it’s time to unleash your inner artist. Grab those markers or colored pencils and let your imagination take flight. Add captions, doodles, or heartfelt messages to make the card truly personalized. Write a heartfelt message inside, letting the recipient know just how special they are to you.
The Finishing Touches
Before you send off your DIY photo card, take a moment to admire your handiwork. Check for any loose ends or smudges, making sure your card looks as perfect as can be. If desired, add some shimmer with glitter or a touch of elegance with embossing powder.
Now, sign your name proudly and seal it with a kiss. Your DIY photo card is complete and ready to bring joy to someone’s day. So go ahead, surprise your loved ones with a heartfelt message and a personalized touch that they’ll cherish forever!
What are you waiting for? Grab your crafting supplies, unleash your creativity, and get ready to make memories that go beyond pixelated screens. Happy card-making, my creative friends!
Note: This DIY tutorial is provided for personal use only, and any resemblance to previous crafting failures is purely coincidental. Always approach scissors with caution and keep them away from mischievous pets or siblings.
FAQ: How To Make DIY Photo Cards
Is selling photo cards illegal
No need to panic! Selling photo cards is not illegal. In fact, it can be quite a profitable venture. As long as you are using your own photos or images that you have obtained the rights to use, you’re good to go. Just make sure to respect copyright laws and only use photos you have permission to print.
What weight paper is best for postcards
When it comes to postcards, you’ll want to use a sturdy paper that can withstand the journey through the mail. Opt for a paper weight between 250-300gsm (grams per square meter) for a durable postcard that won’t get damaged too easily. This way, your masterpiece will arrive intact, ready to bring joy to the recipient.
What kind of paper do you use for postcards
Great question! For postcards, it’s best to use a high-quality cardstock. Look for a smooth finish that allows your photo to shine. A matte or semi-glossy cardstock will work wonders. Avoid using regular printer paper as it may not be thick enough to withstand the mail system.
How do I make a birthday card in Photoshop
Creating a birthday card in Photoshop can be a blast! Start by opening a new document in the desired card size, such as 5×7 inches. Then unleash your creativity by adding images, text, and fun design elements. Experiment with different fonts and colors to personalize the card. Voila! You’ve just worked some Photoshop magic to create a unique birthday card.
How do I print a photo on a card
Printing a photo on a card is easier than you might think. First, design your card on your computer using image editing software or a template. Then, load your printer with cardstock suitable for photo printing. Make sure to adjust the printer settings according to the type of cardstock you’re using. Finally, hit print and watch your photo come to life on the card!
What paper is used for photo printing
When it comes to photo printing, you’ll want to use a high-quality photo paper that brings your images to life. Look for a heavyweight paper with a glossy or satin finish for vibrant colors and sharp details. These papers are specifically designed to showcase the best of your photos, helping you create stunning keepsakes.
What is the size of Lomo cards
Lomo cards are all about that unique look and feel! They typically come in a square format, with dimensions of around 2.5×2.5 inches. This compact size allows you to carry your Lomo magic everywhere, capturing moments in a fun and artistic way.
How can I write a birthday card
Writing a birthday card is your chance to show off your inner wordsmith. Start by thinking about the recipient and what makes them special. Let your words be heartfelt, funny, or nostalgic. Add personal touches and memories that create a genuine connection. Remember, it’s the thought that counts, so let your personality shine through!
What paper is used for Lomo cards
To achieve that distinctive Lomo vibe, you’ll want to use a special type of paper called Lomo paper. This paper has a slightly rough texture and offers a retro aesthetic that perfectly complements the unique Lomo style. It’s a favorite among Lomo enthusiasts who want to give their photos an authentic touch.
How do I make a photo card
Making a photo card is a creative adventure waiting to happen! Start by selecting your favorite photo. Next, choose a suitable cardstock or photo paper and cut it to your desired size. Decorate the card with your photo, adding personal messages or design elements. Let your imagination run wild, and soon you’ll have a one-of-a-kind photo card to brighten someone’s day.
What size is a photo card
Photo cards come in various sizes to suit different needs and occasions. The most common photo card size is 5×7 inches, providing ample space for your photo and message. However, you can also opt for smaller sizes, such as 4×6 inches or even larger sizes for a more impactful visual statement. The choice is yours!
How do you make a card on the computer and print it
Creating and printing a card on your computer allows for endless possibilities. Start by using software or online platforms that provide card templates. Customize the layout, colors, and images to your heart’s content. Once you’re satisfied with the design, simply print it onto cardstock using your printer. Get ready to impress everyone with your professional-looking DIY card!
Does Samsung have BTS photocards
Just like K-pop’s catchy tunes, BTS photocards have gained immense popularity. While Samsung collaborates with BTS for exciting ventures, such as limited edition phone designs, it does not produce BTS photocards as standalone products. However, you can still find these coveted collectibles from official BTS merchandise sources and dedicated fans.
How do I turn my photos into Polaroids
Love the charming nostalgia of Polaroid photos? Transforming your digital photos into Polaroid-style prints is a breeze. Utilize online tools or smartphone apps designed for this purpose. Choose the desired photo, select the Polaroid effect, and voila! You’ll have those iconic white borders and vintage vibes in no time.
How do I create a photocard in Word
With the power of Microsoft Word, you can craft eye-catching photocards. Start by opening a new document and customizing the page size to your desired card dimensions. Use the shapes, text, and image insertion tools to design your card. Don’t forget to leverage Word’s formatting options to make your photocard visually stunning. Once satisfied, save your creation and print it on high-quality cardstock.
What material is used for photo cards
Photo cards flourish on premium materials that enhance the visual impact. Cardstock is the go-to material for photo cards, providing the necessary thickness and durability to ensure the card stands the test of time and arrives intact. Look for cardstock with a smooth finish to showcase your photos in all their glory.
What are Lomo cards
Lomo cards are a delightful fusion of photography and creativity. Originating from Lomography, a movement that celebrates spontaneous and artistic photography, Lomo cards capture the essence of this unique style. They feature vibrant and often unconventional photos, evoking a playful and quirky aesthetic. If you’re a photography enthusiast looking to add a dash of whimsy, Lomo cards are the way to go!
Which cardstock is best for postcards
When it comes to postcards, the right cardstock can make all the difference. Opt for a heavyweight cardstock with a glossy or matte finish to ensure your postcards look and feel professional. The ideal weight ranges from 250-300gsm, providing the durability required for a smooth journey through the postal system. Your recipients will be impressed by the quality and craftsmanship of your postcards.
Can you print Polaroids at Walgreens
Absolutely! Walgreens provides a convenient and reliable solution for printing your digital photos in various formats, including Polaroids. By using their online or in-store services, you can transform your cherished memories into tangible Polaroid prints. Embrace those classic square frames and enjoy the instant gratification of holding your Polaroids in your hands.
How do you make photo cards online
Creating photo cards online is a breeze, even if you’re not a tech wizard. Numerous websites offer user-friendly tools and templates to help you realize your vision. Simply select a preferred design, upload your photos, add personal messages, and customize colors and fonts. It’s like having your own virtual card-making studio, ensuring your photo cards shine with style and sentiment.
How do I get my free photocard from BTS
As of 2023, BTS continues to delight fans with enthralling performances and heartwarming gestures. To get your hands on a free photocard from BTS, keep an eye out for special promotions or giveaways on their official website, social media channels, or fan events. Stay connected with the BTS fandom, and who knows, a surprise photocard might just come your way!
Is cardstock OK for postcards
Absolutely! Cardstock is the perfect choice for postcards. Its sturdiness and weight make it resilient enough to withstand the postal journey. Whether you’re designing postcards for personal use or planning on sending them out en masse, cardstock ensures your postcards arrive in pristine condition. So go ahead, unleash your creativity, and let cardstock take your postcards to the next level!