Soaker hoses are a convenient and efficient way to water your garden or plants. They deliver water directly to the roots, minimizing waste and ensuring optimal hydration for your plants. While you can easily purchase a soaker hose from the store, making your own using PVC pipe can be a cost-effective and customizable alternative.
In this blog post, we will guide you through the process of creating your own soaker hose from PVC pipe. We will also address common questions and concerns related to soaker hoses, such as the advantages of flat versus round hoses, whether you should mulch over your soaker hose, and the water distribution capabilities of various hose widths.
Whether you’re a seasoned gardener looking for an environmentally friendly watering solution or a beginner wanting to explore DIY projects, this step-by-step guide will help you create a functional soaker hose that suits your specific needs. So let’s get started and learn how to make a soaker hose from PVC pipe!
How to Turn PVC Pipe into a Fantastic Soaker Hose
If you’re a gardener who loves keeping your plants hydrated, then you’re probably familiar with the joys and wonders of a soaker hose. But why spend money on a store-bought one when you can easily make your own using a humble PVC pipe? Get ready to unleash your inner irrigation master and learn how to transform your PVC pipe into an awesome soaker hose!
What You’ll Need:
- PVC Pipe: Grab a ¾ inch PVC pipe from your local hardware store. Make sure it’s long enough to cover the desired area of your garden.
- Drill and Bits: A drill is your new best friend. Don’t forget to equip it with a ⅛ inch bit and a ¼ inch bit.
- Soaker Hose Fittings: You’ll need a female garden hose end and a male garden hose end to connect your DIY soaker hose to the water source.
- Hose Clamps: Secure the fittings to the PVC pipe with a couple of hose clamps.
- Hose Cap: Get a hose cap to seal off one end of the PVC pipe.
Step 1: Preparation is Key
Before you dive into the world of soaker hose excellence, gather all your materials. Organize them in a neat and convenient location, preferably near your watering area. Trust us; it saves you from running around like a headless chicken later on!
Step 2: Drill, Baby, Drill!
Using the ⅛ inch drill bit, create evenly spaced holes along the length of the PVC pipe. Aim for around 2 to 3 holes per foot, depending on the level of watering extravaganza you desire. Don’t be too generous; you want the water to soak in, not drown your poor plants!
Step 3: The Power of Threads
Screw the female garden hose end onto one open end of the PVC pipe. Make sure it’s nice and snug; you don’t want any water leakage ruining your gardening dreams. Give it a little twist to make it feel extra secure!
Step 4: Seal the Deal
Now, it’s time to seal off the other end of your PVC pipe masterpiece. Pop that trusty hose cap onto the remaining open end, and tighten it up. We wouldn’t want any water escaping in the wrong direction, would we?
Step 5: Embrace the Clampdown
To attach the male garden hose end to the PVC pipe, use a hose clamp to secure it tightly. This ensures a watertight connection that will make your plants applaud with delight. Trust us; they’ll be thanking you for this masterpiece!
Step 6: Give It a Test Run
Before you unleash the full force of this PVC soaker hose goodness onto your precious plants, connect your homemade masterpiece to a water source. Turn on the tap and check for any leaks. Don’t stress; even the best gardeners make a splash now and then!
Step 7: Time to Get Soaking!
Now, position your DIY soaker hose exactly where you want it in your garden. Watch as the water seeps out gracefully and nourishes your beloved plants. They’ll be dancing and singing your praises, guaranteed!
With your newly minted PVC soaker hose, watering your garden will become a breeze. No longer will you need to stand with a hose for hours on end, feeling like a Dancing with the Plants contestant. So grab that PVC pipe, unleash your creativity, and let the watering frenzy begin!
Now, go forth, fellow gardeners, and conquer the watering world with your PVC pipe and a touch of DIY genius. Your plants will thank you, and your neighbors will envy your green thumb skills!
FAQ: How To Make A Soaker Hose From PVC Pipe
Is a flat or round soaker hose better
When it comes to choosing between a flat or round soaker hose, both have their advantages. If you’re looking for higher water volume and a wide coverage area, a round soaker hose is more suitable. On the other hand, if you prefer a lower water volume and more precise watering, a flat soaker hose would be the better option. Ultimately, it depends on your specific gardening needs and preferences.
Should mulching be done over a soaker hose
Yes, it is highly recommended to mulch over a soaker hose. Mulching helps to conserve moisture in the soil, prevent weed growth, and protect the soaker hose from sunlight and potential damage. By adding a layer of mulch, you can improve the effectiveness and efficiency of your soaker hose irrigation system.
How wide of an area will a soaker hose water
The width of the area that a soaker hose can water depends on various factors such as the hose’s permeability, water pressure, and soil condition. Generally, a soaker hose can irrigate an area up to 1-2 feet on either side of the hose. However, it’s important to note that you must account for the water penetration depth and adjust the placement of the hose accordingly to ensure adequate coverage.
Can a soaker hose be too long
Yes, a soaker hose can be too long, leading to inadequate water distribution and pressure issues. It’s recommended to keep the length of a soaker hose under 100 feet for optimal performance. If a longer length is required, it’s advisable to split the hose into multiple shorter sections and use connectors to maintain consistent water flow.
Will a soaker hose work without any pressure
No, a soaker hose requires some water pressure to function properly. Without any pressure, the water won’t be able to seep out evenly along the length of the hose. Therefore, it’s essential to ensure that your water source provides sufficient pressure for the soaker hose to effectively deliver water to your plants.
What are the drawbacks of drip irrigation
Drip irrigation has several disadvantages that you should consider. First, it can be more expensive to install compared to traditional sprinkler systems. Additionally, drip irrigation systems are more prone to clogging, especially if the water source contains debris or sediment. Furthermore, maintaining and repairing drip irrigation systems can be more complex than other watering methods.
Can I connect two soaker hoses together
Yes, you can easily connect two soaker hoses together to extend the coverage area. By using a hose connector or a simple coupling, you can attach the hoses end-to-end. This allows for a seamless extension of the irrigation system, ensuring that your plants receive water evenly across a larger section of your garden.
How can I create a drip irrigation system using a plastic bottle
Creating a makeshift drip irrigation system with a plastic bottle is a fun DIY project. Start by drilling small holes near the bottom of the bottle. Fill the bottle with water, screw the cap back on, and then bury the bottle next to the plant you want to water. The water will slowly seep out through the holes, providing a drip irrigation effect. It’s a simple and eco-friendly solution for smaller plants or pots.
Is it possible to poke holes into a soaker hose
It is not advisable to poke holes in a soaker hose, as it can disrupt the even water distribution along its length. Soaker hoses are specifically designed with permeable material that allows water to seep out naturally. If you need to customize the hose’s pattern, it’s better to use a hose connector or cut the hose to desired lengths and attach fittings.
How much water does a soaker hose use per hour
The water usage of a soaker hose varies depending on factors such as water pressure and hose length. On average, a soaker hose uses around 1-2 gallons of water per foot per hour. Therefore, it’s important to consider the length of the hose and the duration of watering to prevent over or under-watering your plants.
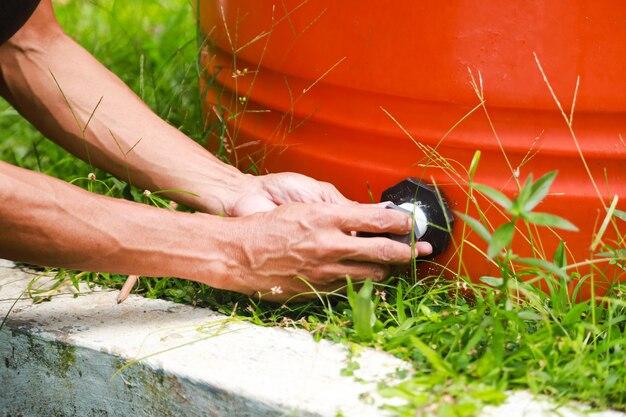
Do I need a backflow preventer for my soaker hose
While not mandatory, it’s recommended to install a backflow preventer for your soaker hose to prevent any potential contamination of your water supply. A backflow preventer helps to avoid back-siphoning, which can happen if there is a sudden drop in water pressure. This simple device ensures the safety and cleanliness of your water source.
What is the purpose of the blue disc in a soaker hose
The blue disc, often found inside a soaker hose, serves as a pressure regulator. It helps to maintain a consistent and optimal water pressure throughout the hose, ensuring even water distribution. This feature is particularly useful when connecting multiple soaker hoses together or when there are variations in the water pressure from the source.
Should I bury my soaker hose underground
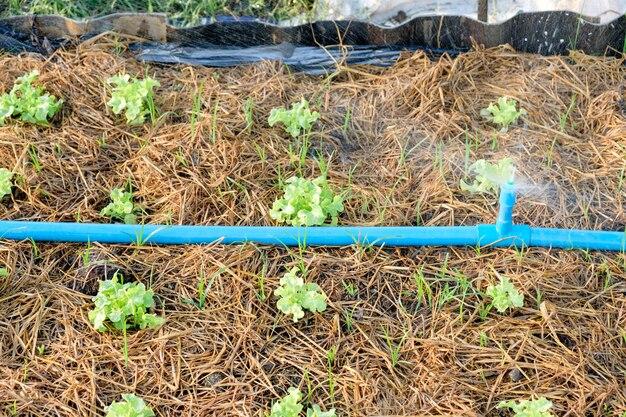
Burying a soaker hose underground is not necessary. In fact, it’s more efficient to lay the hose on top of the soil or mulch. This allows for better water absorption and minimizes the risk of clogs due to soil particles. However, you can lightly cover the hose with a thin layer of soil or mulch to protect it from direct sunlight and potential damage.
How can I make a soaker hose using an old garden hose
Repurposing an old garden hose into a soaker hose is a fantastic way to reduce waste. Start by drilling small holes evenly along the length of the hose. Space the holes approximately 6-12 inches apart, depending on your desired watering pattern. Once you’ve created the holes, connect the hose to the water source, and enjoy the benefits of a DIY soaker hose.
What is the difference between a soaker hose and a drip hose
While both soaker hoses and drip hoses are effective for irrigating plants, there are some key differences. A soaker hose is made of a porous material, allowing water to seep out along its entire length. It’s best for watering areas like flower beds or vegetable gardens. In contrast, a drip hose features emitters spaced at specific intervals, delivering water directly to the base of individual plants. Drip hoses are more suitable for potted plants or specific landscape features.
Can soaker hoses be left out in the winter
It is recommended to remove soaker hoses from your garden and store them indoors during the winter months. Freezing temperatures can cause the water trapped inside the hose to expand, leading to potential damage. To prolong their lifespan, disconnect the soaker hoses from the water source, drain any remaining water, and store them in a dry and protected area until spring.
What is the best diameter for a soaker hose
The best diameter for a soaker hose depends on the specific watering needs of your garden. Generally, soaker hoses come in various diameters, ranging from ½ inch to 1 inch. Thicker hoses with a larger diameter are suitable for covering larger areas, while thinner hoses offer better flexibility and precision for smaller spaces. Consider the size of your garden and the distance you need to water when selecting the appropriate diameter for your soaker hose.
Do soaker hoses really work
Absolutely! Soaker hoses are a highly effective and water-efficient method of irrigating plants. Their porous material allows water to seep slowly and evenly into the soil, directly hydrating plant roots. This targeted watering minimizes water wastage through evaporation or runoff. By using a soaker hose, you can achieve healthier plants and save both water and time in your gardening endeavors.
How long should I leave my soaker hoses on
The duration for leaving soaker hoses on depends on various factors such as weather conditions, soil type, and plant water requirements. As a general guideline, it’s recommended to water with your soaker hose for about 30 minutes to an hour per session, 2-3 times a week. However, it’s crucial to monitor the soil moisture levels and adjust the watering schedule accordingly to avoid over or under-watering your plants. Remember, consistency is key!