Are you looking to add a touch of casual elegance to your summer wardrobe? Look no further than the timeless charm of a DIY straw hat. Perfect for sunny days, beach outings, or even dressing up as your favorite anime character, a straw hat is a versatile accessory that never goes out of style.
In this comprehensive guide, we will take you through the process of making your very own straw hat from scratch. We’ll cover everything from the materials you’ll need to the step-by-step instructions for shaping and stiffening your hat. Whether you’re a beginner or a seasoned crafter, this blog post is here to help you create a hat that suits your style and stands the test of time.
So, grab your crafting supplies and let’s dive into the art of straw hat making!
How to Craft Your Own Stylish Straw Hat
When it comes to DIY fashion, there’s nothing quite as satisfying as creating your own accessories. And what better accessory for the summer than a trendy straw hat? With a little creativity and a touch of humor, you can whip up your very own stylish headgear that will have people turning heads and wondering, “Where did she get that fabulous hat?”
Materials You’ll Need
Before we dive into the nitty-gritty of hat making, let’s gather all the materials you’ll need to bring your vision to life. Here’s a handy list:
1. A Spool of Raffia
Raffia, the star of our DIY show here, is a versatile material that’s essential for a straw hat. It’s lightweight, durable, and perfect for creating that classic summer vibe.
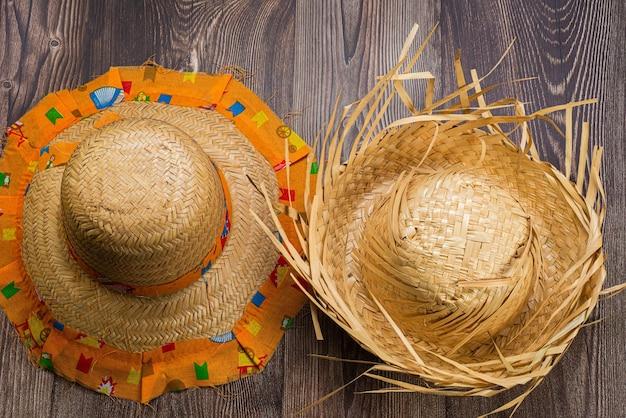
2. A Wide-Brimmed Hat
To get started, you’ll need a plain wide-brimmed hat as your base. Look for one that doesn’t have any embellishments or decorations. Remember, we’re going for a clean canvas here!
3. Glue Gun
Ah, the trusty glue gun! A staple in every DIY enthusiast’s toolbox. This little hero will come in handy when it’s time to attach the raffia to your hat. Just be careful not to get too trigger-happy with the glue, unless you want a hat that sticks to everything but your head!
Let’s Get Crafty
Now that we have all our materials ready, it’s time to channel our inner hat designer and get crafty! Follow these simple steps to create your DIY straw hat masterpiece:
Step 1: Prep Your Hat
Before we start working with the raffia, let’s give our hat a little TLC. Remove any tags or labels, and make sure the surface is clean and smooth. You wouldn’t want any hidden surprises popping up while you’re strutting your stuff at the beach!
Step 2: Secure the Raffia
Grab your glue gun and carefully attach one end of the raffia to the inner brim of your hat. Start winding the raffia around the brim, overlapping as you go to ensure a solid coverage. If you want to switch up the design, you can experiment with different patterns or weave in colorful ribbons for that extra pizzazz!
Step 3: Embrace Imperfections
Remember, the beauty of DIY lies in embracing imperfections. Don’t stress if your raffia isn’t perfectly aligned or if there are some gaps along the way. Those little quirks give your hat character and show off your unique craftsmanship.
Step 4: Trim and Tuck
Once you’ve covered the entire brim with raffia, it’s time to trim any excess material. Be cautious not to clip anything you didn’t mean to! After trimming, use a small dot of hot glue to neatly tuck the loose end of the raffia into the inner brim. Voila! Your hat is taking shape.
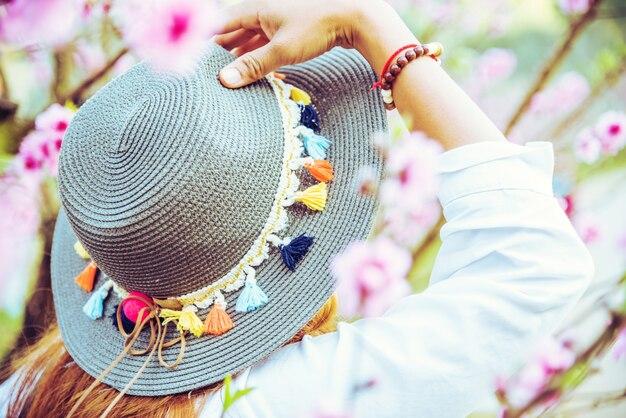
Step 5: Personalize Your Creation
Let your creativity run wild! Add some decorative elements like artificial flowers, seashells, or even a whimsical hatband. This is your chance to make your DIY straw hat truly one-of-a-kind and a reflection of your personal style.
Ready to Turn Heads
Now that your DIY straw hat is complete, it’s time to rock it with confidence! Head out to the beach, a picnic, or even just your backyard, and let your fabulous creation shine. Don’t be surprised when people start asking where they can get a hat as fabulous as yours. Just remember to respond with a knowing smile and say, “Oh, this old thing? I made it myself!”
Remember, DIY projects should be fun and exciting, so feel free to put your own spin on this tutorial. With a touch of creativity and a sprinkle of humor, your DIY straw hat will be the envy of everyone around. So go ahead, unleash your inner designer, and get ready to turn heads wherever you go!
DIY Straw Hat FAQs
How do you dress up as Luffy
To dress up as Luffy, the iconic pirate from the beloved anime series One Piece, you’ll need a few key elements. Start with a red sleeveless shirt and pair it with blue shorts. Find a straw hat with a wide brim, similar to Luffy’s signature headpiece. Complete the look with a long, flowing, and floppy red sash to tie around your waist. And don’t forget to wear sandals to emulate Luffy’s carefree and adventurous spirit!
Can a straw cowboy hat get wet
While it’s best to avoid getting your straw cowboy hat wet, accidents do happen. If your hat does get wet, make sure to handle it delicately. Gently reshape the hat while it’s damp and let it air dry naturally. Avoid exposing your straw cowboy hat to direct sunlight or heat sources as it may cause the straw fibers to shrink and warp. Remember, prevention is key, so try your best to keep your straw hat dry!
What is the Japanese term for a straw hat
The Japanese term for a straw hat is “kasa”. These traditional hats have been used in Japan for centuries as a practical and stylish way to shield oneself from the sun. The lightweight and breathable design of a straw hat make it a popular choice for outdoor activities during the hot and humid Japanese summers.
How do you stiffen a straw cowboy hat
If your straw cowboy hat has lost its shape or needs a bit more structure, you can stiffen it using a few simple techniques. One method is to spray a light mist of water on the hat and then apply a hat stiffener or starch spray to help retain its shape. You can also place a damp cloth or towel inside the hat and let it dry in the desired shape. Just be sure not to overdo it with the stiffening process, as too much moisture or starch can damage the delicate straw fibers.
What makes a high-quality straw hat
When looking for a high-quality straw hat, there are a few key factors to consider. First, the material should be made from natural straw fibers such as Panama, toyo, or raffia. These materials are known for their durability and breathability. Additionally, a well-made straw hat will have tight, even weaving without any loose ends or visible gaps. Lastly, check for a sturdy and well-finished brim that holds its shape and provides adequate sun protection. Investing in a high-quality straw hat ensures both style and functionality.
How do you prevent a straw hat from cracking
To keep your straw hat from cracking, it’s essential to handle it with care and take preventive measures. Avoid placing your hat in high-temperature areas or exposing it to direct sunlight for extended periods of time. Store your straw hat in a cool, dry place, preferably inside a hat box or covered with a cloth, to protect it from excess moisture or dust. Regularly cleaning and reshaping your hat will also help maintain its integrity and prevent cracking. Remember, a little TLC goes a long way in preserving the life of your straw hat!
Why do Ronin wear straw hats
In Japan, the image of a Ronin, a wandering samurai without a master, is often associated with the iconic straw hat. Ronin wore straw hats both for practical and symbolic reasons. The wide brim provided protection from the sun and rain during their travels, while the hat’s shapeless design allowed them to go unnoticed and blend in with the common folk. The straw hat became a symbol of the Ronin’s free-spirited and unattached lifestyle, showcasing their resilience and adaptability in a changing world.
Can you use Scotchgard on straw hats
Unfortunately, Scotchgard is not recommended for use on straw hats. Straw hats are delicate and porous, and the chemicals in Scotchgard can cause discoloration or damage to the natural fibers. If you want to protect your straw hat from water or stains, there are specialized hat protectant sprays available that are specifically designed for use with straw hats. These sprays offer a gentle and safe solution to keep your hat looking its best.
How long does it take to make a straw hat
The time required to make a straw hat can vary depending on the complexity of the design, materials used, and the skill level of the hat maker. On average, it can take several hours to a few days to complete a straw hat. The process involves weaving, shaping, and finishing the hat by hand, ensuring every detail is carefully crafted. Each hat is a unique work of art, and the time invested in its creation contributes to its beauty and quality.
Can Luffy be Joyboy
Ah, the never-ending theories and speculation surrounding the One Piece universe! While it’s an intriguing idea that Luffy could be Joyboy, a legendary figure from the past, it’s important to remember that Joyboy’s true identity and role in the story have not been revealed yet. As fans, we can continue to theorize and analyze the clues Oda-sensei provides, but for now, let’s enjoy the adventure and unravel the mysteries of the One Piece world together!
How do you make a homemade straw hat
Making a homemade straw hat can be a fun and rewarding DIY project. Start by finding a sturdy base for your hat, such as a wide-brimmed hat you no longer use or a hat block. Then, gather your desired straw material, whether it’s raffia, toyo, or other natural fibers. Carefully weave the straw around the base, securing it with small stitches or glue. Trim the excess straw and shape the brim to your liking. Add decorative elements like ribbons, feathers, or beads to personalize your homemade straw hat. Remember, the beauty of a homemade hat lies in its imperfections and the love put into its creation!
How do you shape a hat
To shape a hat, especially a straw hat, follow these simple steps:
- Determine the desired shape for your hat’s brim, whether it’s flat, slightly turned up, or curled.
- Sprinkle a small amount of water on the hat’s brim to moisten it slightly. Be careful not to soak it.
- Gently mold the brim into the desired shape, using your hands or a shaping tool like a hat block or wooden spoon. Don’t apply too much pressure to avoid damaging the straw fibers.
- Let the hat air dry naturally in the shaped position. Avoid using a hairdryer or other heat sources as they may cause the hat to shrink or warp.
- Once dry, your hat should hold its new shape. If needed, make minor adjustments or reshape after the hat has completely dried.
How do you fix a wet straw hat
Fixing a wet straw hat requires patience and gentle handling. Follow these steps:
- Assess the condition of the hat. If the hat is severely misshapen or damaged, it may be difficult to fully restore it.
- Gently reshape the hat while it’s still wet. Use your hands to mold the brim and crown into the desired shape.
- Place the hat on a clean, dry towel or cloth to absorb excess moisture. Allow it to air dry in a cool, shaded area away from direct sunlight or heat sources.
- Check the hat periodically and make any necessary adjustments during the drying process to ensure it dries in the desired shape.
- Once the hat is completely dry, gently brush off any remaining debris or dust and reshape it if needed. Your hat should be ready to wear again!
What style is Luffy’s hat
Luffy’s hat, also known as a “straw hat” or “straw boater,” falls under the category of a classic boater hat. Boater hats are characterized by their flat, stiff brim and crown with a ribbon or band around the base. Luffy’s hat has a wider brim and a shorter crown than traditional boater hats, giving it a unique and recognizable look. It’s the perfect accessory to complement his adventurous and carefree personality!
Can Panama hats get wet
Panama hats, despite their name, are not meant to be worn in the rain or submerged in water. While they are known for their lightweight and breathable qualities, the straw fibers used in Panama hats can become misshapen or damaged when wet. If your Panama hat does get wet, gently reshape it while damp and let it air dry naturally. Avoid exposing it to direct sunlight or heat sources, as this can cause the straw fibers to shrink and distort.
Can you get a straw hat wet
Ideally, you should try to avoid getting your straw hat wet, as moisture can damage the delicate straw fibers and cause the hat to lose its shape. However, accidents happen, and if your straw hat does get wet, follow these tips to minimize damage:
- Handle the wet hat with care to avoid further misshaping.
- Gently reshape the hat while damp, using your hands or a shaping tool.
- Place the hat on a dry towel or cloth to absorb excess moisture, then allow it to air dry naturally in a cool, shaded area.
- Avoid exposing the hat to direct sunlight or heat sources during the drying process.
Remember, prevention is key, so try your best to keep your straw hat dry to maintain its longevity and appearance.
Can you use spray starch on a straw hat
Using spray starch on a straw hat is generally not recommended. Straw hats are made from delicate natural fibers, and the chemicals in spray starch can cause discoloration, stiffness, or even damage to the straw. If you want to add some extra stiffness to your straw hat, there are specific hat stiffeners available that are formulated to be safe for use on straw hats. These products provide a gentle hold without compromising the integrity of the hat’s material.
Can I waterproof a straw hat
Straw hats are not inherently waterproof due to the porous nature of the straw fibers. However, there are specialized hat protectant sprays available that can provide some level of water resistance. These sprays create a thin barrier on the straw, helping to repel light rain or moisture. Keep in mind that these sprays are not foolproof and may not withstand heavy downpours or prolonged exposure to water. It’s always best to err on the side of caution and avoid exposing your straw hat to excessive moisture whenever possible.
What if Luffy’s hat is the One Piece
Ah, the thrilling question that has fans theorizing and pondering! While it’s an exciting concept to imagine Luffy’s hat as the fabled One Piece treasure, it’s important to remember that the true nature and location of the One Piece have yet to be revealed in the One Piece storyline. Oda-sensei has proficiently crafted a complex and captivating narrative, keeping us all eagerly awaiting the final revelation. So, let’s keep watching, reading, and speculating together as the mysteries of the One Piece universe slowly unfold!
How do you make straw
The process of making straw involves harvesting and processing certain types of crops or plants. To make straw for crafts or weaving purposes, such as for a straw hat, follow these steps:
- Harvest the plant or crop when the stems are mature but still green and flexible.
- Bundle the harvested stems together, tightly securing them at one end.
- Hang the bundles in a dry, well-ventilated area, away from direct sunlight. This allows the stems to dry naturally while maintaining their color and strength.
- After the stems have thoroughly dried, remove the outer layer by rubbing the stems gently between your hands or using a brush. This process will separate the straw fibers from the inner core.
- Fluff and separate the individual straw fibers to create a pile of usable straw for your crafting or weaving purposes.
Remember, the process of making straw varies depending on the desired outcome and the specific plant or crop used. Always consider safety precautions and choose suitable materials for your project.
How is a straw hat made
Making a straw hat involves a labor-intensive process that requires skilled craftsmanship. Here is a simplified breakdown of how straw hats are made:
- Select the desired type of straw, such as Panama, toyo, or raffia, known for their flexibility and durability.
- Hand-weave the straw strands into a crown and brim using traditional hat-making techniques. This involves intricate weaving and shaping to create the desired shape and structure of the hat.
- Secure the woven straw with stitches or glue, ensuring a secure and long-lasting construction.
- Trim any excess straw and smooth the edges for a neat and polished appearance.
- To add finishing touches, incorporate decorative elements like ribbons, bands, or other accessories, depending on the hat’s style and design.
- Clean and inspect the finished hat, ensuring its quality and proper shape.
- Package the hat carefully to protect it during transportation and storage.
Each step requires expertise, attention to detail, and a profound understanding of the art of hat-making. A true testament to craftsmanship and creativity!
How do you clean and reshape a straw hat
To clean and reshape a straw hat, follow these steps:
- Remove any excess dust or debris from the hat by lightly brushing it with a soft-bristled brush or a lint-free cloth. Be gentle to avoid damaging the delicate straw fibers.
- If your hat has stains or spots, mix a small amount of mild soap or shampoo with lukewarm water. Using a soft cloth or sponge, gently dab and clean the affected areas. Avoid soaking the hat, as excessive moisture can weaken the straw.
- Rinse the cloth or sponge with clean water and gently wipe away any soapy residue.
- Gently reshape the hat using your hands or a shaping tool, taking care not to apply too much pressure and damage the straw fibers.
- Place the hat on a clean towel or cloth to absorb excess moisture and allow it to air dry naturally in a cool, shaded area.
- Once dry, lightly brush or fluff the hat to restore its shape and texture. Make any necessary adjustments to the hat’s brim or crown to achieve the desired look.
Regular cleaning and reshaping will help maintain the beauty and longevity of your straw hat, ensuring you can enjoy it for many summers to come!