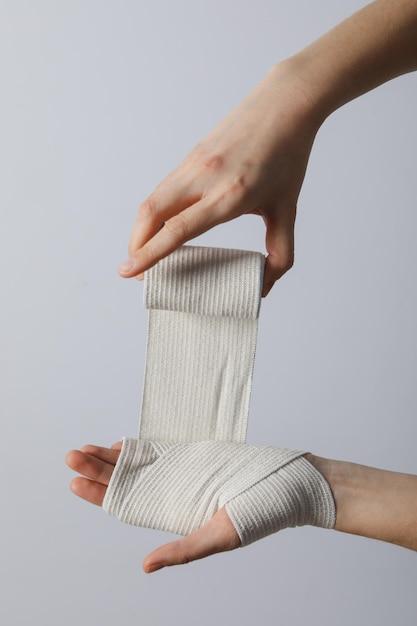
Hey there! Sometimes accidents happen, and we find ourselves in need of some first aid. One essential item that can come in handy is an Ace bandage. However, what do you do if you don’t have one on hand? Don’t worry, because in this blog post, I’ll guide you through the process of making your very own DIY Ace bandage.
In this comprehensive guide, we’ll cover everything from the materials you can use to how to wrap various body parts, and even how to keep it from sliding down. I’ll also answer some frequently asked questions, like what to do if a bandage gets stuck to a wound or if you don’t have an Ace bandage available.
So, if you’re ready to be prepared for any unforeseen situations, let’s dig in and learn how to make a DIY Ace bandage!
How to Create Your Own Ace Bandage for Those Unexpected Twists and Turns (DIY Style!)
So, you’ve managed to sprain your ankle while attempting an interesting dance move. Ouch! But hey, no worries! Instead of rushing to the store to grab an Ace bandage, how about we have some fun and make one ourselves? Get ready to channel your inner DIY master as we walk you through How to Make Your Very Own Ace Bandage. Trust us, your sprained ankle will thank you!
Gather Your Supplies like a Crafty Pro
First things first, let’s gather our supplies before we get down to the nitty-gritty. You’ll need:
1. Elastic Fabric (A.K.A. The Star of the Show)
Congratulations, you’re about to become the proud creator of a DIY Ace Bandage! For this, you’ll need elastic fabric. Go ahead and raid your sewing kit or head to your nearest fabric store. Look for a fabric that’s at least 2 inches wide and long enough to comfortably wrap around the injured area with a little extra to spare.
2. Scissors (Snip, Snip!)
Make sure you have a trusty pair of scissors on hand. We’re cutting fabric here, folks!
3. Velcro Strips (Say Hello to Sticky Friends)
To make your bandage easily adjustable, grab some Velcro strips. You can find them at any craft store or online. Just like peanut butter and jelly, Velcro and your DIY Ace Bandage are going to become the best of friends.
4. Safety Pins (To the Rescue!)
In the world of bandages, safety pins are the unsung heroes. These little guys will come to your rescue when it’s time to secure the ends of your DIY creation. Plus, they add a touch of charm!
Feeling artsy? Great! Now let’s dive into the creation process.
The Crafty Process Unveiled
Step 1: Measure, Cut, and Shape
Using your scissors, measure and cut the elastic fabric to match the length you desire. Just remember, we want it long enough to wrap around your sprained ankle or any other injured area snugly but not too tight—no need to cut off circulation!
Step 2: The Velcro Magic
On one end of your newly cut fabric, attach one side of the Velcro strip using a needle and thread. We’d like our bandage to be adjustable and secure, don’t we?
Step 3: Secure with Style
Lay your fabric flat and attach the other side of the Velcro strip to the opposite end. This ensures your bandage stays secure while giving you the flexibility to tighten or loosen as needed. Beauty and functionality in one package—woo-hoo!
Step 4: Adjust, Wrap, and Repeat
Now, it’s time to put your craftsmanship to work. Carefully wrap the bandage around the injured area, making sure it’s snug but not constricting. Use those trusty safety pins to securely fasten the ends. And voila! You’ve crafted your very own Ace bandage like a total pro.
Embrace the DIY Magic!
Who says crafting is just for scrapbooking? With your newfound DIY skills, you’ve become a pro at making your own Ace bandage. Say goodbye to store-bought bandages and hello to personalized, funky ones! Show off your creative side, wow your friends with your crafting prowess, and most importantly, take care of that sprained ankle in style.
Remember, always consult a healthcare professional for any serious injuries, but for those minor ones that simply need some tender love and care, your DIY Ace bandage has got you covered—literally! So go ahead, rock that self-made bandage and conquer the world, one sprained ankle at a time. Happy crafting, my fellow DIY warriors!
Disclaimer: This article should not be taken as medical advice. Please consult a healthcare professional for proper diagnosis and treatment of any injuries.
FAQ: How To Make A DIY Ace Bandage
In this FAQ-style subsection, we will address some common questions about creating your own DIY Ace bandage. Whether you’re in a pinch and need a quick solution or prefer the satisfaction of crafting your own, we’ve got you covered with practical advice, alternative options, and helpful tips to ensure your DIY bandage does the job.
How do you wrap an ace lower leg
Wrapping an Ace bandage around a lower leg injury requires a careful approach to provide adequate support and compression. Here are the steps to wrap an ace lower leg effectively:
- Start by positioning the end of the bandage below the injured area.
- Wrap the bandage around the leg, overlapping the previous layer by half its width.
- Ensure the wrap is snug, but not too tight, to maintain circulation.
- Continue wrapping until the bandage covers the entire injured area, leaving the toes exposed.
- Secure the end of the bandage with clips or tape.
Can paper towel be used as gauze
While paper towels may resemble gauze, they are not a suitable replacement. Paper towels are designed for absorbency, making them less effective at providing the necessary cushioning and protection for wounds. It’s best to use proper medical gauze or sterile dressing for optimal wound care.
Should I wrap a swollen foot
Wrapping a swollen foot can provide support and alleviate discomfort. However, it is essential to practice caution and consult a medical professional, as wrapping too tightly may hinder blood circulation. If swelling persists or worsens, seek medical advice for proper evaluation and guidance.
Can I use a shirt as a bandage
In a DIY emergency, a shirt can serve as a makeshift bandage until help arrives. Simply tear or cut the fabric into strips and use them to wrap and secure the injury. Keep in mind that shirts are not designed to provide the same level of compression and support as a proper Ace bandage.
How do you drain fluid from your legs
Draining fluid from your legs is a delicate process best handled by a healthcare professional. If you experience excess fluid retention in your legs, it’s crucial to consult a doctor who can determine the underlying cause and recommend appropriate treatment.
How are Ace bandages made
Ace bandages are typically made from a combination of elastic fibers, such as polyester or cotton, and a blend of latex or rubber. The elastic properties allow the bandage to stretch and conform to the body, providing support and compression to injured areas.
What to do if the bandage is stuck to a wound
If an Ace bandage becomes stuck to a wound, it’s important to handle the situation gently to avoid further injury. Here’s what you can do:
- Moisten the affected area with warm water to help loosen the bandage.
- Slowly and carefully peel back the bandage, trying to minimize discomfort.
- If the bandage continues to adhere to the wound, seek medical assistance for proper removal.
What to use if you don’t have an Ace bandage
If you find yourself without an Ace bandage, improvisation is key. You can use a scarf, a long sock, or even strips of fabric as alternatives. Just make sure the material provides enough support and can be secured adequately.
How do I keep my Ace bandage from sliding down
To prevent your Ace bandage from constantly sliding down, try these helpful tips:
- Start the wrap at a wider point of the injured area and gradually work your way downwards. This technique creates a tighter grip and helps keep the bandage in place.
- Use clips or tape to secure the end of the bandage firmly.
- Avoid excessive tightness, as it can restrict blood flow and cause discomfort.
- If the bandage continues to slide, adjust and rewrap with slightly more tension.
How do you get rid of swollen ankles fast
To alleviate swelling in your ankles, consider these effective techniques:
- Elevate your legs above heart level for around 15-20 minutes a few times a day.
- Apply a cold compress or ice pack wrapped in a towel to the swollen area for 10-15 minutes at a time.
- Avoid prolonged periods of sitting or standing; try to incorporate regular movement and exercise into your routine.
- Monitor your salt intake and stay hydrated to maintain proper fluid balance in the body.
- Consider wearing compression socks or stockings, which help promote healthy blood circulation.
How do you wrap a swollen ankle
Carefully wrapping a swollen ankle can provide stability and reduce swelling. Here’s a step-by-step guide to wrap a swollen ankle effectively:
- Start by placing a protective layer, such as a foam or felt pad, over the swollen area.
- Secure the pad with medical tape to prevent it from shifting.
- Begin wrapping the Ace bandage from the ball of the foot, moving toward the calf.
- Wrap the bandage in a figure-eight pattern, ensuring a snug fit without cutting off circulation.
- Continue wrapping until the bandage reaches just below the calf muscle.
- Secure the end of the bandage with clips or tape.
How do you make a homemade bandage
Crafting your own bandage is not as complicated as it may sound. Follow these steps to create a simple homemade bandage:
- Start with a clean fabric, such as a clean cotton cloth or an old t-shirt.
- Cut the fabric into an appropriate size and shape for your wound.
- Cleanse and disinfect the wound thoroughly before applying the homemade bandage.
- Secure the fabric over the wound using medical tape or by tying it snugly.
Can I use cotton balls instead of gauze
Cotton balls, though soft, are not designed to provide the same level of absorbency and protection as gauze. They have a higher risk of leaving fibers behind, which may interfere with the wound healing process. It’s best to opt for proper medical gauze for reliable wound care.
Is it OK to wear an Ace bandage to bed
While wearing an Ace bandage to bed may seem tempting for extra support, it’s generally not recommended. Sleeping with the bandage on can cause discomfort and restrict blood flow. Instead, allow your body to rest and recover naturally during sleep, removing the bandage temporarily if needed.
What material is used for making bandages
Bandages are typically made from a variety of materials, including woven or knitted cotton, polyester, or a combination of both. Certain bandages may also incorporate adhesive components or elastic fibers for enhanced support and flexibility.
How much does an ace wrap cost
The cost of an Ace wrap can vary depending on factors such as brand, length, and specific features. On average, a standard Ace bandage typically ranges between $5 and $15. However, prices may vary, so it’s advisable to check with local retailers or online shops to find the best option that suits your budget.
Does wrapping a swollen hand help
Wrapping a swollen hand can provide support and minimize further swelling. Here’s a simple technique to wrap a swollen hand:
- Begin by placing a foam or felt pad over the swollen area to protect it.
- Start wrapping your hand at the wrist, using the Ace bandage in a figure-eight motion.
- Wrap around the thumb and then continue around the hand, overlapping the previous wrap by half its width.
- Extend the wrap up towards the fingers without wrapping them tightly.
- Secure the end of the bandage using clips or tape.
How do I compress my ankle
Compressing your ankle can help reduce swelling and provide stability. Follow these steps to compress your ankle effectively:
- Place a thin foam or felt pad over the swollen area as a protective layer.
- Start wrapping the Ace bandage at the ball of your foot, moving towards the calf.
- Make two or three crisscross wraps around the ankle for added support and stability.
- Continue wrapping upwards, overlapping the previous wrap by half its width.
- Secure the end of the bandage with clips or tape, ensuring a snug fit without compromising circulation.
How do I wrap my lower legs for swelling
Wrapping your lower legs to address swelling requires attention to detail. Here’s a guide to help you wrap your lower legs effectively:
- Begin wrapping the Ace bandage just above the ankle, using a figure-eight pattern.
- Continue wrapping the bandage upwards towards the calf, overlapping the previous layer by half its width.
- Ensure the wrap is snug but not overly tight to avoid impairing circulation.
- Once you reach the desired height, secure the end of the bandage with clips or tape.
- Make sure the bandage provides adequate support and compression to alleviate swelling.
How do you make a compression wrap
Crafting a compression wrap can be done with a few simple steps. Here’s how to make one:
- Start with an elastic fabric or material that provides suitable compression, such as a stretchable bandage or tube-shaped sleeve.
- Measure the length needed to wrap around the desired area.
- Cut the fabric accordingly, ensuring it’s wide enough to provide even compression without excessive tightness.
- Begin wrapping the fabric around the area, making sure it’s snug but not constricting.
- Secure the end of the wrap to keep it in place.
Conclusion
We hope this DIY Ace bandage FAQ-style subsection has provided you with valuable insights and solutions for your bandaging needs. Remember to exercise caution and consult healthcare professionals for personalized advice and proper care. With a little creativity and resourcefulness, you can create a practical DIY bandage and empower yourself with the knowledge to handle minor injuries confidently. Stay safe and healthy!