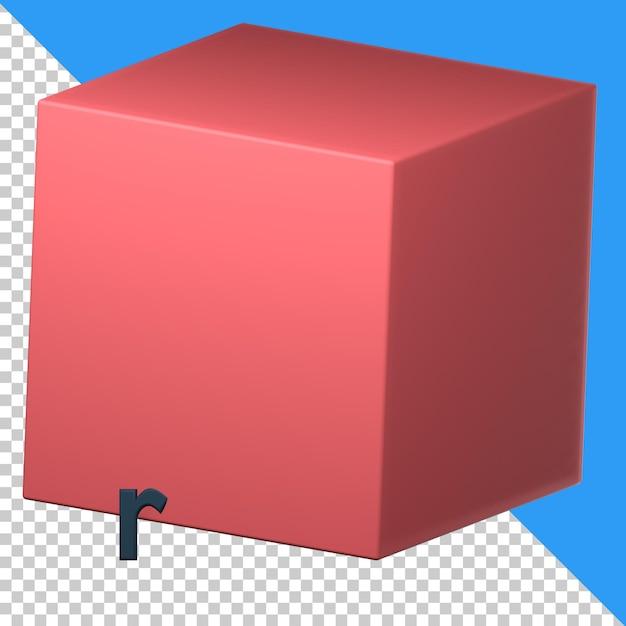
Are you a beginner in SolidWorks and looking to create a cube? You’ve come to the right place! In this guide, we’ll walk you through the process of making a perfect cube using SolidWorks, a popular 3D CAD software. Whether you’re a student, a professional designer, or simply someone interested in learning 3D modeling, this tutorial will give you the knowledge and confidence to create a cube with ease.
But wait, why do you need to make a cube in SolidWorks? Well, a cube is often the starting point for many more complex 3D models. Understanding how to create a cube lays the foundation for building more intricate shapes and structures. Plus, it’s a great way to familiarize yourself with the tools and features of SolidWorks.
So, let’s dive in and discover how to make a cube in SolidWorks. By the end of this tutorial, you’ll have a solid grasp of the process, as well as some additional tips and tricks to enhance your modeling skills. Let’s get started!

How to Create a Cube in Solidworks
Solidworks is a powerful CAD software that allows you to create 3D models with ease. If you’re just starting out and wondering how to make a cube in Solidworks, you’ve come to the right place. In this guide, we’ll walk you through the steps to create a perfect cube using Solidworks. So grab your virtual toolbox and let’s get started!
Step 1: Open a New Part
To begin, open Solidworks and create a new part by selecting “New” from the file menu. Give it a catchy name like “Super Awesome Cube” and click on the “OK” button. Now you’re ready to dive into the magical world of cube creation!
Step 2: Choose the Cube Tool
Next, navigate to the toolbar and look for the cube tool. It usually looks like a square with equal sides. Click on it, and voila! You’re ready to unleash your cube-creating genius.
Step 3: Sketch and Define the Cube
Now is the time to let your inner artist shine. Use the cursor to sketch a square shape on the screen. Make sure all the sides are equal in length to create that perfectly symmetrical cube. It’s like drawing with a virtual pen, only cooler.
Step 4: Extrude the Sketch
Once you’re satisfied with your square sketch, it’s time to bring it to the third dimension. Select the “Extrude” tool from the toolbar and enter the desired cube height in the input box. Imagine you’re giving your cube a growth spurt – but don’t go too crazy, or it might get a big head!
Step 5: Apply Some Finishing Touches
Now that you have your basic cube structure, it’s time to add some pizzazz. Use the various tools and features in Solidworks to customize your cube. You can round the edges, add fillets, or even cut out holes to make it look like Swiss cheese (if that’s your thing).
Step 6: Save and Share Your Masterpiece
Congratulations, you’ve successfully created a cube in Solidworks! Before you call it a day, don’t forget to save your masterpiece. Click on the trusty old “Save” button and choose a location on your computer to store your file. And hey, why not show off your creation to the world? Share it on social media and bask in the glory of your cube-making skills!
Creating a cube in Solidworks may seem like a daunting task at first, but with the right tools and a touch of creativity, you’ll be designing three-dimensional wonders in no time. So go forth, my friend, and let your imagination run wild. Whether you’re designing buildings, gadgets, or just experimenting with shapes, Solidworks has got your back. Happy cube-making!
FAQ: How to Make a Cube in SolidWorks
How to Find a Cube
Finding a cube is easier than you think! Just open your eyes and look around. Cubes are everywhere, from dice and sugar cubes to storage boxes and Rubik’s cubes. They’re known for their equal sides and right angles, making them a perfect choice for various projects, including 3D modeling in SolidWorks.
How to Make a Big Box in Minecraft
Ah, the iconic Minecraft! Building a big box in this pixelated world is a breeze. Simply gather enough materials like wood, stone, or even diamond blocks if you’re feeling fancy. Then, let your creativity run wild as you stack the blocks to form a massive cube. Don’t forget to leave ample space inside for all your loot and Minecraft adventures!
How to Make a 3D Circle in SolidWorks
While circles are typically associated with 2D shapes, you can create a 3D version using SolidWorks. The key is to utilize the revolve feature. Sketch a circle on a plane, select the revolve tool, and choose the axis around which you want your circle to rotate. Click, and voila! You now have a beautifully rounded 3D circle in SolidWorks.
What is Loft in SolidWorks
Lofting in SolidWorks is like magic for 3D modeling enthusiasts. It allows you to create complex shapes by sweeping or blending between multiple profiles. With a few clicks, you can transform basic sketches into intricate designs, giving your creations a whole new level of sophistication. So, wave your digital wand and let the lofting begin!
How to Make a Rib in SolidWorks
No, we’re not talking about a culinary delight or something to tickle your funny bone. In SolidWorks, ribs are structural protrusions that add strength and support to your designs. Think of them as the backbone of your 3D models. Use the rib feature to create these sturdy elements and give your creations the stability they need to stand tall.
What is the Cuboid Formula
Ah, the mysterious formula behind the cuboid! Brace yourself, math lovers. The formula for finding the volume of a cuboid is simply length x width x height. It’s as straightforward as it gets. Plug in the measurements, crunch the numbers, and you’ll have the volume of your cuboid faster than you can say “Eureka!”
How to Do the Hollow Command in Minecraft
In Minecraft, the hollow command is a nifty trick to create hollow structures. Let’s say you want to build a hollow cube. First, construct a solid cube using your desired blocks. Then, execute the hollow command, specifying the dimensions and the type of block you want to remain. Minecraft will do the rest and magically hollow out your creation, turning it into an impressive architectural masterpiece.
What is a Hollow Cube
A hollow cube is like a regular cube’s sophisticated cousin. If a solid cube is a block of cheese, then a hollow cube is a fancy cheese grater. It’s still a cube, with equal sides and right angles, but with an empty space inside. This architectural marvel is often used in designs where weight reduction or space utilization is crucial. So, go ahead, embrace the elegance of the hollow cube!
How to Make a Hollow Body Solid in SolidWorks
Creating a hollow body solid in SolidWorks is a walk in the park. Start by sketching the desired shape, then use the extrude command to give it depth. Next, utilize the shell feature to hollow out the body, specifying the wall’s thickness. Finally, sit back and admire your hollow body solid, ready to be integrated into your amazing 3D design.
How to Make a Cone in SolidWorks
Prepare to conquer both geometry and SolidWorks with the awe-inspiring creation of a cone. Begin by sketching a circle, then use the revolve feature, choosing the axis around which your circle will rotate. Adjust the angle, define the height, and watch as your 2D circle transforms into a magnificent 3D cone. You’re now the master of both circles and cones!
How to Define a 3D Sketch in SolidWorks
Are you ready to give your designs an extra dimension? Defining a 3D sketch in SolidWorks is your gateway to a world of endless possibilities. Simply select the desired plane, invoke the sketch command, and let your imagination soar. With 3D sketching, you can create complex curves, lines, and shapes that add depth and sophistication to your designs. It’s like painting with virtual reality!
How to Create a Figure in SolidWorks
SolidWorks allows you to transform your wildest ideas into tangible figures. Start by sketching the outlines of your figure, adding dimensions and constraints along the way. Then, use the variety of tools and features at your disposal, such as extruding, cutting, and filleting, to bring your figure to life. Whether it’s a simple cube or an intricate sculpture, SolidWorks has got you covered.
How to Make a 3D Shape in SolidWorks
Ready to unleash your inner Picasso on the digital canvas of SolidWorks? To create a 3D shape in SolidWorks, begin with a sketch, either on a plane or in 3D. Then, utilize the features and tools within SolidWorks, such as extruding, revolving, or lofting, to give your sketch depth and form. Add some color and texture, and watch as your 3D shape springs to life, ready to dazzle viewers with its dimensional allure.
What is a Hollow Cuboid
Imagine a cuboid with empty inner space, like a box without a bottom or a deconstructed block. That’s a hollow cuboid for you! It maintains the cuboid’s distinctive features, such as equal sides and right angles, while embracing the power of negative space. Hollow cuboids provide versatility and lightness, making them ideal for various applications in architecture and design. Embrace the charm of the hollow cuboid and let your creativity flourish!
How to Create a Simple Part in SolidWorks
Complexity can be overwhelming, so sometimes we just need simplicity. To create a simple part in SolidWorks, start by sketching the basic outline or profile. Then, use features like extruding, cutting, and filleting to add depth and refine the part. Keep it clean, elegant, and functional. Sometimes, the beauty lies in simplicity, and that’s what creating a simple part in SolidWorks is all about. Less is more, they say!
How is a Rubik’s Cube Held Together
Ah, the Rubik’s Cube, the quintessential brain-teaser. But have you ever wondered how this marvel of puzzle engineering is held together? Fear not, for we have the answer! It’s a clever combination of friction, interlocking pieces, and a central core mechanism that allows the different layers to rotate independently. So, next time you try to solve that Rubik’s Cube, appreciate the intricate craftsmanship that keeps it intact.
What is the Equation of a Cube
If you’re looking to unravel the mathematical beauty of a cube, its equation is quite simple. The volume of a cube is given by the formula side length³, where the side length represents the measurement of each edge. So, for example, if the side length of your cube is 5 units, the equation would be 5³ or 5 x 5 x 5, resulting in a volume of 125 cubic units.
How to Find the Volume of a Hollow Cube
Extracting the volume of a hollow cube is like exploring the depths of a cavernous mystery. To uncover this mathematical enigma, start by calculating the volume of the outer cube using the formula length x width x height. Next, determine the volume of the inner cube. Subtract the inner cube’s volume from the outer cube’s volume, and there you have it—the volume of your hollow cube. Prepare to venture into the mathematical abyss!
How to View 3D in SolidWorks
Looking for a thrilling 3D experience within the realms of SolidWorks? Fear not, for the power to view your creations in all their three-dimensional glory lies within your grasp. Simply select the desired model or assembly, go to the View tab, and click on the Shaded with Edges option. Watch as your 2D designs transcend into the magical realm of 3D, leaving you mesmerized and ready to immerse yourself in a world of depth and dimension.
How to Calculate the Volume of a Cube
Trying to measure the vastness contained within a cube? Fear not, for the calculation of its volume is a piece of cake. All you need is the length of one side, and you’re good to go. Multiply the length of the side by itself twice (length x length x length), and presto! You have successfully unlocked the secret to calculating the volume of a cube. It’s like solving a math puzzle without even breaking a sweat!
How to Make a Cube in SolidWorks
Creating a cube in SolidWorks is as foundational as building blocks. To begin, select the sketch command and choose a plane to work on. Draw a square by utilizing the rectangle tool, ensuring all sides are equal. Then, use the extrude feature to give your square depth, specifying the desired length for all sides. And just like that, you’ve constructed a glorious cube in SolidWorks. Marvel at your creation and let it inspire your next awe-inspiring project