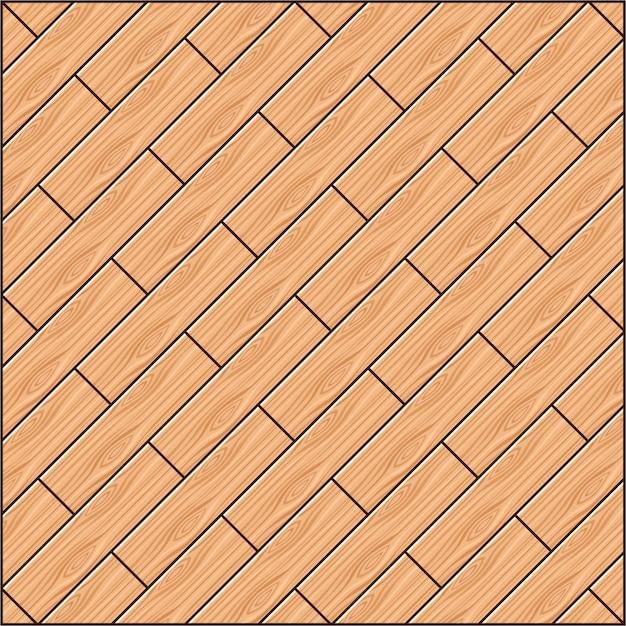
If you’re looking to add a unique and stylish touch to your next tile project, laying the tiles on a 45-degree angle can create a visually stunning effect. Whether you’re tiling a floor, wall, or even a slanted ceiling, this technique can bring a dynamic and modern look to any space. In this blog post, we will explore the ins and outs of tiling on a 45-degree angle, from the initial measurements and tile cuts to the finishing touches. By the end, you’ll have the knowledge and confidence to tackle this design challenge and create a beautifully tiled space that stands out from the crowd.
Before we dive into the details, let’s address a few common questions. Can all tiles be mitred to achieve a 45-degree angle? Should tile be laid diagonally or straight? And is diagonal tile outdated? We’ll explore these topics and more to provide you with a comprehensive understanding of the possibilities and considerations when it comes to tiling on a 45-degree angle. So whether you’re a seasoned DIY enthusiast or a homeowner looking to undertake a new project, let’s get started and master the art of laying tile on a 45-degree angle in 2023.
How to Lay Tile on a 45 Degree Angle
So you’ve got your new batch of shiny tiles and you’re ready to transform your space into something straight out of a design magazine. But hold on a sec, why settle for the simple straight-lined layout when you can jazz things up with a 45-degree angle? It’s like wearing a bow tie instead of a regular one—it adds a touch of sophistication and flair to your flooring game. Fear not, my friend, for I’m here to guide you through the magical world of tiling at a 45-degree angle. So grab your tools, put on your imaginary hard hat, and let’s get started!
The Right Tools for the Right Angle
Before we dive into the nitty-gritty of tiling at a 45-degree angle, let’s make sure we have all the necessary tools at our disposal. You’ll need the classics, like a trusty tape measure, a pencil for marking, a notched trowel for adhesive application, and a tile cutter or wet saw for those precise cuts. Oh, and let’s not forget a healthy dose of patience and a playlist of your favorite tunes to keep you in the groove.
Prepping the Battlefield
Just like any DIY project, the key to success lies in proper preparation. Start by prepping your floor—make sure it’s clean, level, and free from any debris. Trust me, you don’t want any surprise pebbles peeking through your meticulously laid tiles. Next, give your tiles a good cleaning to remove any dust or dirt that might hinder their adhesion. Now here’s where the fun begins.
Finding Your Starting Point
You want your tiled masterpiece to be symmetrical and balanced, right? Of course, you do! So, it’s crucial to find the perfect starting point for your 45-degree angle extravaganza. Start by drawing a centerline that intersects the middle of your room—measure twice, cut once, as they say. Now, use your trusty 45-degree angle tool (or resort to some fancy math if you’re feeling mathematical) to establish the angle that will guide your tile placement journey.
Lay, Adhere, Repeat
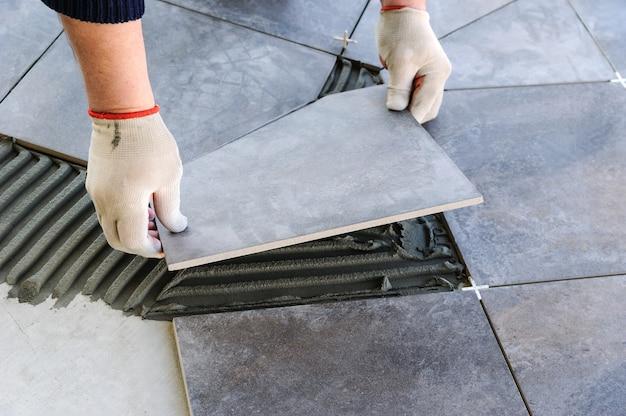
With your starting point and angle established, it’s time to put your master plan into action. Begin by applying adhesive to a small area of the floor, using your notched trowel to create those satisfying ridges. Don’t get too excited now; you don’t want the adhesive to dry before you can lay your tiles. Speaking of tiles, carefully place them one by one along the angle you’ve set, pressing gently to ensure they bond securely with the adhesive.
The Cutting Edge of Tile Mastery
Now, let’s address the elephant in the room—those tricky little areas where your tiles need some extra TLC (that’s tender loving cuts, by the way). Here’s where your tile cutter or wet saw becomes your trusty sidekick. Measure twice, cut once (yes, it applies here too), and make sure those cuts are as precise as a surgeon’s scalpel. And don’t forget to wear your imaginary superhero cape—it adds a touch of drama to the whole process.
Grout, Wipe, and Marvel
Congratulations, my friend! You’ve reached the final stretch of your 45-degree angle tile adventure. After allowing the adhesive to set (consult your adhesive package for recommended drying time), it’s time to grout those gaps and bring your masterpiece to life. Apply the grout using a float, making sure to press it firmly into the crevices. Once it sets for a bit, wipe away the excess grout with a damp sponge. Step back, take a deep breath, and marvel at your creation—it’s a work of art, my friend!
So there you have it, your comprehensive guide to laying tile on a 45-degree angle. Remember, it’s not just about functionality; it’s about adding a touch of pizzazz to your space. With a little patience, a few calculations, and a sprinkle of creativity, you’ll be the proud owner of a floor that will make your guests go all googly-eyed with envy. Now go forth, my tiling warrior, and conquer your flooring dreams!
FAQ: How To Lay Tile On a 45-Degree Angle
How do you tile at a 45-degree angle
Tiling at a 45-degree angle adds a touch of sophistication and visual interest to any space. To achieve this look, follow these steps:
-
Start by determining the center point of the room. Measure the length and width, divide by two, and mark the center with a chalk line.
-
Lay out the tiles without adhesive, starting from the center and working towards the walls. Adjust the layout until you achieve a visually pleasing pattern.
-
Once you’re satisfied with the layout, begin spreading tile adhesive on the floor using a trowel. Work in small sections to prevent the adhesive from drying out.
-
Place the first tile at the center point and press it firmly into the adhesive at a 45-degree angle. Use a tile spacer to maintain even spacing between tiles.
-
Continue placing tiles, following the pattern you established earlier and working outwards from the center. Cut tiles as needed to fit along the edges.
-
Allow the adhesive to dry completely before grouting the tiles. Follow the manufacturer’s instructions for mixing and applying the grout.
-
Once the grout has dried, clean the tiles with a damp sponge to remove any excess grout. Polish the tiles with a dry cloth for a finished look.
Can all tiles be mitred
Mitering tiles involves cutting them at an angle to create a clean, seamless joint. While most tiles can be mitered, it’s important to consider the type and thickness of the tile.
Porcelain and ceramic tiles are generally suitable for mitering, as they are durable and have a consistent thickness. However, natural stone tiles, such as marble or slate, can be more challenging to miter due to their irregularities and brittleness.
Before attempting to miter tiles, it’s recommended to practice on a few spare tiles to ensure you achieve clean, precise cuts. If you’re uncertain about mitering a specific type of tile, consult with a professional for guidance.
Can you tile a sloped ceiling
Yes, you can tile a sloped ceiling to create a unique and visually stunning look. However, tiling a sloped ceiling can be more challenging than tiling a flat surface. Here are a few key considerations:
-
Make sure the ceiling is structurally sound and capable of supporting the weight of the tiles.
-
Use lightweight tiles to minimize the stress and strain on the ceiling.
-
Plan the layout carefully to ensure the tiles flow seamlessly with the slope of the ceiling.
-
Cut the tiles accordingly to fit the slope and maintain a cohesive pattern.
-
Use an adhesive specifically designed for overhead applications to ensure the tiles adhere securely.
Tiling a sloped ceiling may require advanced tiling skills and experience. If you’re unsure about tackling this project yourself, it’s best to consult a professional for assistance.
What is the most popular trending tile look in 2023
The world of tile design is constantly evolving, and in 2023, the most popular trending tile look is the “organic modern” style. This style combines natural elements with modern aesthetics, creating a harmonious balance of warmth and elegance. Key features of the organic modern tile look include:
-
Earthy tones: Neutral colors like warm beiges, soft grays, and muted greens are commonly used to create a nature-inspired ambiance.
-
Textured surfaces: Tiles with textured finishes, such as matte or honed, add depth and character to the space.
-
Geometric shapes: While organic in nature, the organic modern style often incorporates geometric patterns to add a contemporary touch.
-
Large-format tiles: Oversized tiles continue to be favored, as they create a seamless look with fewer grout lines, enhancing the overall aesthetic.
The organic modern tile look lends itself well to various spaces, from kitchens and bathrooms to living areas and entryways. Embrace this trend to bring a touch of natural sophistication into your home.
Can you lay tiles on an angle
Absolutely! Laying tiles on an angle is a creative way to add visual interest and flair to your space. Whether you choose a 45-degree angle or a different angle, tiling on an angle can create a dynamic and unique look.
By deviating from the traditional straight grid pattern, angled tiles can inject a sense of movement and energy into the room. Just remember to plan your layout carefully and make precise cuts to ensure a seamless and professional result.
Should tile be laid diagonally or straight
The decision to lay tile diagonally or straight ultimately depends on your personal taste and the overall design aesthetic you want to achieve. Here are a few considerations to help you make an informed decision:
-
Diagonal layout: Diagonal tile layout can make a room appear larger and more spacious. It adds visual interest, breaks up the monotony of a straight grid pattern, and can create a sense of flow. This layout works well in both small and large spaces.
-
Straight layout: A straight, grid-like tile layout is timeless and works well in traditional or minimalist designs. It creates a clean, streamlined look and can be easier to install, especially for beginners.
Consider your space, the style you’re aiming for, and your personal preference when deciding whether to lay tile diagonally or straight.
How do I determine where to start laying the tile
Determining where to start laying tile is crucial for a successful installation. To find the best starting point, consider the following steps:
-
Measure and mark the center of the room’s longest wall. This will serve as your starting reference point.
-
Dry-fit tiles from the center point along the wall in both directions to see how they align with the room’s boundaries. Adjust accordingly until you achieve a visually balanced look.
-
Once you’re satisfied with the layout, snap a chalk line along the center of the room’s longest wall. This line will guide the placement of the first row of tiles.
-
Begin laying tiles along the chalk line, working outward from the center point. Use tile spacers to maintain consistent spacing.
-
Continue tiling one row at a time, following the established reference line and using tile spacers to ensure even spacing between tiles.
By starting from the center point and working outward, you ensure a symmetrical and aesthetically pleasing tile installation.
Do diagonal tiles make a room look bigger
Yes, diagonal tiles have the ability to create an illusion of a larger space. By breaking up the straight lines and creating angles, diagonal tiles can visually expand a room. The oblique lines draw the eye outward, tricking the brain into perceiving a larger area.
This effect is particularly noticeable in small or narrow spaces like hallways or small bathrooms. So, if you’re looking to maximize the perceived size of a room, opting for diagonal tiles can be a smart choice.
Is it more expensive to lay tiles on a diagonal
Laying tiles on a diagonal does require more precise cuts and additional planning compared to a straight installation. While this might imply greater costs, it is not necessarily more expensive overall.
The cost difference, if any, would primarily lie in the increased time and labor required for cutting and layout preparation. However, the material costs themselves remain the same, regardless of whether the tiles are laid diagonally or straight.
Considering the visual impact and perceived value of a diagonal tile layout, any potentially higher labor costs are often outweighed by the aesthetic appeal it brings to the space. So, don’t let cost deter you from considering a diagonal tile installation.
How do you measure angles for tile cuts
To measure angles for tile cuts accurately, you’ll need an adjustable protractor and a pencil. Follow these steps:
-
Place the protractor on the tile’s edge, aligning the base of the protractor with the tile’s surface.
-
Adjust the protractor so that the zero-degree line corresponds with the edge of the tile.
-
Slide the protractor along the edge until the desired angle aligns with the edge.
-
Use the pencil to mark the cutting line along the protractor’s edge.
-
Cut the tile along the marked line using a wet saw or tile cutter.
Remember to double-check your measurements and make test cuts on scrap tiles to ensure accuracy before making the final cuts on your installation tiles.
Can you tile a sloped roof
Tiling a sloped roof is not a typical practice. Sloped roofs generally require shingles or other specialized roofing materials to ensure proper drainage and waterproofing. Tiles, especially heavy ceramic or stone tiles, may not provide sufficient protection against moisture and potential leaks on sloped surfaces.
If you’re looking to enhance the aesthetic appeal of a sloped roof, consult a professional roofer or a tile expert. They can guide you on alternative methods or materials that are specifically designed for sloped roof applications.
Do you start in the middle when tiling
Starting in the middle of the room is a common practice when tiling. This technique helps achieve a balanced and symmetrical layout. However, the starting point may vary depending on the specific project and design preferences.
Beginning at the center allows you to work outward in both directions, ensuring equal cuts along the edges of the room. It also helps in maintaining a cohesive pattern.
That being said, sometimes it may be more practical to start at one end or corner of a room, particularly if you have unique architectural features or fixtures that you want to align with.
Consider the layout and features of your space, and use your judgment to determine if starting in the middle or at a specific point makes the most sense for your tiling project.
What is the most popular tile pattern
In 2023, the herringbone tile pattern takes the lead as the most popular choice for both classic and contemporary designs. This pattern adds a touch of elegance and visual appeal to any space. Here’s how you can achieve the herringbone tile pattern:
-
Start by laying a row of rectangular tiles perpendicular to the wall. The tiles should be at a 45-degree angle to the floor.
-
Begin the next row by placing tiles at a 90-degree angle to the first row, creating a “V” shape with the tiles.
-
Continue alternating the tiles’ direction in subsequent rows, mimicking the “V” shape.
-
Cut tiles as needed to fit along the edges of the space.
The herringbone pattern works well with various tile sizes and materials, allowing you to customize the overall look. It’s a timeless and versatile option for floors, backsplashes, and accent walls.
Why do my tiles crack when I cut them
Tiles can crack during cutting for a few reasons, including:
-
Insufficient moisture: Failure to wet the tile and the saw blade adequately can cause excessive friction, resulting in cracks. Always ensure the tile and blade are properly wet before cutting.
-
Incorrect blade selection: Different types of tiles require specific blades. Using the wrong blade can lead to excessive heat build-up and cracking. Consult the manufacturer’s recommendations and use a blade suitable for the tile material.
-
Incorrect blade depth: Setting the saw blade too deep or shallow can lead to uneven cuts and increase the risk of cracks. Adjust the blade depth to match the thickness of the tile.
-
Applying excessive force: Forcing the tile through the saw too quickly or exerting too much pressure can cause stress fractures. Allow the saw to do the cutting and use light, even pressure when feeding the tile through.
To minimize the risk of tile cracking, practice cutting on spare tiles, follow the manufacturer’s guidelines, and work with patience and precision.
What direction should tiles be laid
When deciding on the direction to lay tiles, consider the shape and size of the space, as well as the overall design goals. Here are a few common options:
-
Lengthwise: Laying tiles lengthwise can visually elongate a room or hallway, making it appear more spacious. This direction works well in narrow spaces.
-
Widthwise: Tiles laid widthwise can create a sense of expansion in larger rooms. They can add a feeling of width and balance to the space.
-
Diagonally: As mentioned earlier, diagonal tile installation can make a space look larger and more open. It adds a dynamic element to the design and is suitable for both small and large areas.
The choice ultimately depends on the room’s proportions, your personal preference, and the effect you want to achieve.
How do you tile a slanted wall
Tiling a slanted wall requires careful planning and execution to ensure a successful installation. Here’s a step-by-step guide:
-
Begin by measuring and marking the centerline of the wall. This will serve as your reference point.
-
Dry-fit the tiles to determine the best layout and pattern, accounting for the angle of the wall.
-
Start tiling from the centerline and work outward in both directions. Apply the adhesive to the wall using a notched trowel, ensuring even coverage.
-
Angle the tiles accordingly to match the slope of the wall. Use tile spacers to maintain consistent spacing and a level line.
-
Cut tiles as needed to fit along the edges and ensure a clean finish.
-
Once the adhesive has dried, apply grout to the tiles, following the manufacturer’s instructions. Clean any grout residue from the tiles with a damp sponge.
Tiling a slanted wall may require advanced tiling skills and equipment, so it’s advisable to seek professional assistance if you’re unsure about taking on this project.
Are diagonal tiles outdated
No, diagonal tiles are not outdated. In fact, they continue to be a popular choice among homeowners and interior designers who value the unique visual impact of diagonal layouts.
Diagonal tiles can add a distinctive touch to any space, creating movement and energy. They can make a room appear larger and more spacious, making them particularly well-suited for smaller areas.
The key to keeping diagonal tiles fresh and up-to-date is to pair them with modern patterns, colors, and finishes. By embracing contemporary design elements, you can ensure that your diagonal tile installation remains stylish and on-trend.
How much extra tile do I need for a diagonal
To account for the additional tile needed when laying tiles on a diagonal, a common rule of thumb is to add 10% to 15% to the total square footage of the area to be tiled.
This extra tile accounts for the cuts required to fit the angled edges, as well as any potential breakage or mistakes during the installation process.
By having a sufficient amount of extra tile, you can complete the project without delays or having to search for matching tiles in case replacements are needed.
Make sure to consult with your tile supplier or