Are you looking to enhance your outdoor space with a beautiful paver patio or a charming stone walkway? If your property has a slope, you might be wondering if it’s even possible to install edging pavers on uneven ground. Well, we’re here to tell you that it is! In this comprehensive guide, we’ll walk you through the steps of installing edging pavers on a slope, ensuring a level and sturdy foundation for your outdoor project.
Before we dive into the nitty-gritty details, let’s address some common concerns. You might be wondering how much slope is too much for a patio or whether you should even slope your paver patio at all. Additionally, you may be curious about the importance of having sand under your pavers or how to deal with water drainage. We’ll answer all of these questions and more, equipping you with the knowledge you need to tackle your project with confidence.
By the end of this blog post, you’ll have a clear understanding of how to level ground for pavers on a slope, how to build a stone walkway on uneven terrain, and how to maintain a level surface for your pavers. So, grab your tools and let’s get started on transforming your outdoor space into a stunning haven!
Now let’s move on to the specifics of installing edging pavers on a slope.
How to Conquer the Slope: Installing Edging Pavers Like a Pro
Tackling Hillside Challenges
When it comes to landscaping on a slope, just imagine yourself as a fearless mountaineer, ready to conquer that uphill battle. Installing edging pavers on a slope may seem daunting, but fear not, we’ve got the expert tips to make it a smooth ride. Buckle up and let’s get started!
Gear Up: Tools and Materials
Before we embark on this epic adventure, let’s make sure we have all the necessary gear. Here’s what you’ll need to become the slope-conquering hero:
-
Edging Pavers: These will be the sturdy soldiers that form the backbone of your landscape design. Choose pavers that can withstand the challenges of the slope, such as stonework or concrete slabs.
-
Gravel: This will be your trusty sidekick, providing stability and preventing erosion. Opt for coarse gravel, around ¾ inch in size, to ensure proper drainage.
-
Landscape Fabric: Don’t forget your armor! Landscape fabric will protect your pavers from unwanted weed invaders, ensuring your landscape stays neat and tidy.
-
Shovel: Your faithful companion for digging trenches and shaping the terrain. Make sure it’s sharp and ready for action.
-
Rubber Mallet: The secret weapon to lock those pavers in place with a gentle, yet firm, tap. Plus, it adds a touch of percussion to your landscaping symphony.
-
Level: You can’t conquer the slope if you’re not on the level. Use a good ol’ level to keep things straight and balanced.
Unleash Your Strategy: Step-by-Step Guide
Now that you’re geared up for success, it’s time to unleash your landscaping prowess. Follow these steps to install edging pavers on a slope like a seasoned pro:
Mark Your Territory: Planning and Preparation
Before you start wielding your shovel, take a moment to survey the battlefield. Plan the layout of your pavers, marking the edges and corners. It’s time to show that slope who’s boss!
-
Choose the Right Path: Determine the path for your pavers, considering both functionality and aesthetics. Map out where the pavers will go, creating a clear vision for your landscape masterpiece.
-
Dig Trenches: Start digging trenches along the marked path, making sure they are deep enough to accommodate the paver height. Aim for a trench depth of approximately 6-8 inches to ensure stability.
-
Even the Ground: As you dig, adjust the soil to create a level foundation for your pavers. Smooth out any bumps or humps, maintaining a harmonious slope flow. Remember, a gentle slope is your key to success.
Lay the Groundwork: Installing Pavers with Finesse
With the trenching complete, it’s time to roll out the red carpet for your pavers. Follow these steps to ensure a secure installation:
-
Install Landscape Fabric: Lay landscape fabric along the trench to prevent weed growth. This will save you from future battles against stubborn green invaders and keep your landscape looking sharp.
-
Add a Layer of Gravel: Pour a generous amount of gravel into the trench, creating a stable base for your pavers. Smooth it out and make sure it’s level with the top of the trench.
-
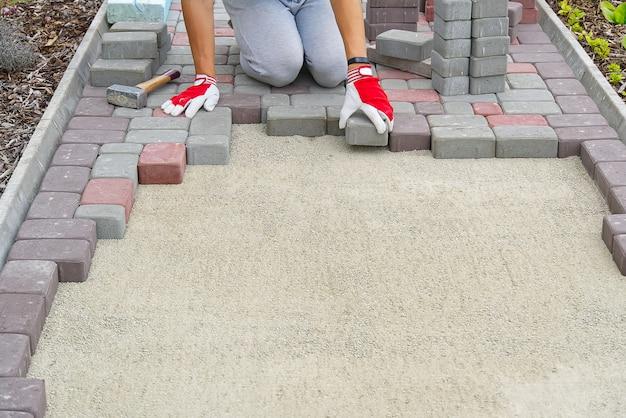
Place the Pavers: It’s showtime! Gently place your pavers on the gravel, making sure they snugly fit together. Use your trusty rubber mallet to tap them into place, ensuring a solid connection.
-
Check for Levelness: Regularly check the levelness of your pavers as you progress. A quick tap here and there with the rubber mallet should bring everything back in line.
Defeat Weeds: Securing the Slope for Good
Now that your pavers are snugly in place, it’s time to fortify your position against those pesky weeds. Follow these steps to safeguard your slope-conquering victory:
-
Add Gravel and Fabric: Pour another layer of gravel over the pavers, filling any gaps between them. Don’t forget to add another layer of landscape fabric on top of the gravel, acting as a shield against weed invasions.
-
Tuck in the Edges: With finesse, tuck the fabric edges neatly under the pavers. This will provide extra protection against weed growth and maintain a polished appearance.
-
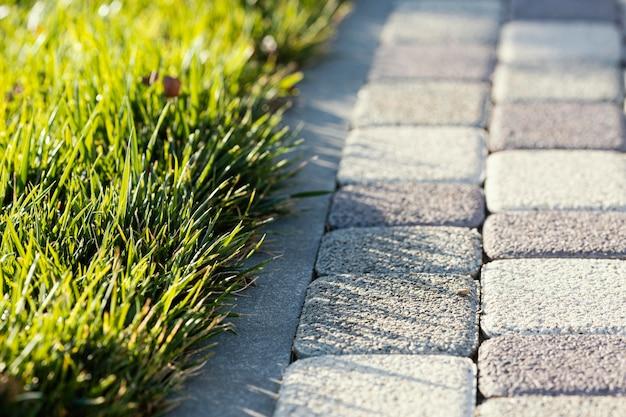
Finishing Touches: To give your landscape that professional edge, carefully sweep off any excess gravel from the paver surfaces. Stand back, admire your work, and let out a victorious whoop! You did it!
Conquering the Slope With Style and Precision
Congratulations, brave landscaper! You’ve conquered the mighty slope and transformed it into a stunning masterpiece. With the right tools, preparation, and a touch of finesse, installing edging pavers on a slope becomes an adventure worth undertaking. Now, sit back, relax, and revel in your well-deserved victory!
Happy landscaping in 2023!
FAQ: How To Install Edging Pavers On A Slope
Welcome to our comprehensive FAQ guide on installing edging pavers on a slope! If you’re looking to add some charm and functionality to your outdoor space, edging pavers can be a fantastic option. However, dealing with slopes can present unique challenges. Don’t worry, though! We’ve got you covered. In this FAQ-style guide, we’ll answer some common questions about leveling, sloping, and installing pavers on uneven ground. So, grab a cup of coffee, put on your DIY hat, and let’s dive in!
How do you level ground for pavers on a slope
Leveling ground for pavers on a slope requires some elbow grease, but fear not! Start by removing any vegetation and clearing the area. Then, use a shovel or rake to distribute soil and level it as much as possible. For steeper slopes, you may need to install retaining walls to create terraces. Ensure each level is compacted properly before moving on to the next. Remember, a flat and solid foundation is crucial for a successful paver installation!
How much slope is too much for a patio
When it comes to slopes for patios, it’s all about finding the right balance. As a general rule, slopes of 1 inch for every 4 feet are considered acceptable. However, slopes steeper than this can make it challenging to install and maintain pavers evenly. Keep in mind that extreme slopes may require additional engineering and professional expertise to avoid potential issues like drainage problems or shifting of the pavers over time.
Should I slope my paver patio
Sloping your paver patio is highly recommended. Proper slope ensures efficient water drainage, preventing pooling and potential damage. Not only does it keep your patio looking good, but it also helps maintain its structural integrity. So, embrace the slope and let it work its magic!
Can you lay pavers on uneven ground
Absolutely! Pavers are quite versatile and can be laid on uneven ground. However, to achieve a stable and long-lasting installation, it’s essential to properly level and prepare the ground before laying the pavers. Take the time to ensure a flat and compacted surface, and consider using additional materials like compacted sand or gravel to even out any dips or gaps.
What should the slope be on a patio
Aim for a slope of 1 inch for every 4 feet when it comes to your patio. This gradual slope allows for efficient water runoff without being too steep for paver installation or creating an awkward walking experience. Remember, you want a patio that looks good and functions even better!
Do I need sand under pavers
Sand under pavers acts as a leveling agent and helps with water drainage, so it’s highly recommended. After properly leveling the ground, adding a layer of compacted sand provides a stable base for the pavers and helps prevent them from shifting over time. It also aids in achieving proper interlocking and promotes uniformity in your paver patio. So, grab that sand and get ready to lay the foundation for an amazing outdoor space!
How do you build a stone walkway on a slope
Building a stone walkway on a slope requires some strategic planning. Start by mapping out your desired path and mark it with stakes and string. Then, excavate the area and create a stable base by leveling the ground and adding a layer of compacted sand. Next, lay your stone pavers, making sure they sit firmly and evenly. Inclined slopes may require some additional measures like creating steps or securing the edges with concrete or other edging materials. Remember, safety first!
Does water drain through pavers
Yes, water drains through pavers! One of the fantastic benefits of using pavers is their permeability. The gaps between them allow water to seep through, preventing water accumulation and potential damage. However, ensure that the base underneath the pavers is adequately prepared and sloped for proper water drainage.
How do you make a walking path on a slope
Creating a walking path on a slope can add character and functionality to your outdoor space. Start by marking out the path and clearing any vegetation. Prepare the ground by leveling and compacting it, ensuring a stable foundation. Consider using materials like gravel or stepping stones to create a safer walking surface, especially on steeper slopes. Don’t forget to add handrails or other safety features if necessary. Happy strolling!
How do you level pavers after installation
If you notice any unevenness or sinking of pavers after installation, fear not! It’s relatively easy to level them. Start by removing the affected pavers. Add or remove sand or gravel as needed to achieve the desired level, and then reposition the pavers. Use a rubber mallet or a tamper to ensure they are firmly set and level with their neighbors. Repeat this process until you’ve achieved the perfect balance. Voila! Your pavers will be back in top-notch shape in no time!
How do you install concrete edging on a slope
Installing concrete edging on a slope requires some additional care, but it’s entirely doable. Start by preparing the ground and leveling it as much as possible. Then, lay out your concrete edging in your desired pattern, utilizing stakes and string to maintain a straight line. Ensure the edging is securely in place, either by burying it partially or using concrete adhesive. Backfill any gaps with soil or gravel to provide additional stability. You’re on your way to creating defined, eye-catching edges that will make your pavers pop!
How do you level ground for pavers without digging
If you want to level the ground for pavers without digging, you can use adjustable paver support systems like pedestals. These systems allow you to raise or lower the pavers to achieve the desired level without having to excavate the area. Simply place the pedestals on the ground, adjust their height, and lay the pavers on top. It’s like magic!
How do you level ground by hand for pavers
Leveling the ground for pavers by hand requires some good old-fashioned elbow grease. Start by removing any vegetation and debris from the area. Use a shovel, rake, or tamper to distribute and level the soil, focusing on low spots and slopes. Take your time and be patient. A flat and even surface will reward you with a beautiful paver installation!
How do you edge a slope
Edging a slope can be a bit more challenging than edging a flat surface, but it’s not impossible! Consider using flexible plastic or metal edging materials that can conform to the shape of the slope. Begin at the lowest point, securing the edging to the ground with stakes or other anchoring methods. Gradually work your way up, making adjustments as needed to maintain a consistent and visually appealing edge. Embrace the challenge, and your edging will stand tall even on the most rollicking slopes!
Can you put a paver walkway on a slope
Absolutely! A paver walkway on a slope can add an elegant touch to your landscape. Follow the same principles as installing pavers on a slope, ensuring proper leveling and compacting of the ground. Consider using additional measures like steps or retaining walls for steep slopes to ensure stability and safety. With a bit of creativity and planning, your paver walkway will navigate that slope like a pro!
Can you put pavers on an incline
Yes, you can put pavers on an incline! Pavers are quite versatile and can adapt to various inclines with the right preparation. Focus on properly leveling and compacting the ground to create a stable foundation. Consider using additional materials like sand or gravel to ensure evenness and stability. With a little TLC, your pavers will shine on that incline like they own it!
What do you put under pavers level
To achieve a level and stable paver installation, start with a properly prepared base. Clear the area of vegetation and debris, then level and compact the ground as much as possible. Add a layer of compacted sand or gravel to provide a uniform and solid base for the pavers. This layer will help distribute weight evenly and prevent shifting over time. So, give your pavers a solid foundation, and they’ll reward you with beauty and durability!
Congratulations, you’ve made it to the end of our comprehensive FAQ guide on installing edging pavers on a slope! We hope this journey has provided you with valuable insights and confidence to tackle your paver project. Remember to take your time, plan carefully, and embrace the challenge that slopes bring. With a combination of hard work, a bit of humor, and a touch of creativity, you’ll have a stunning paver installation that defies gravity and captivates all who step foot on it. Happy paving, and may your slopes always be in your favor!